This is Part 4 of an 8 part series in getting Azure IoT Edge setup with the Raspberry Pi.
You can read the other parts here…
Part 1 – Setting up Raspbian Buster
Part 2 – Creating an IoT Hub and Edge Device
Part 3 – Creating an Azure DevOps Organisation, Project, Settings, etc
Part 5 – Setting up the Azure IoT Edge Build Pi
Part 6 – Creating an Azure Container Registry
Part 7 – Download the Azure DevOps Project Source Code
Contents
In this post we’ll run through getting Raspbian Buster set up on two Raspberry Pi’s ready to get Azure IoT Edge up and running.
What we’ll be doing
1 – Connect to the IoT Edge Device Pi
2 – Install Docker
3 – Install LibSSL
4 – Install the IoT Edge Runtime
5 – Edit IoT Edge Config
6 – Restart IoT Edge and Check Status
What we’ll be doing
In the previous post, we created an Azure DevOps Organisation and a Project. We then created a Personal Access Token or PAT for our IoT Edge Build Pi to connect to. Finally we created a new Build Agent Profile in our organisation for the IoT Edge Build Pi to refer to.
1: Connect to the IoT Edge Device Pi
For this section you’ll need PuTTY. You can grab a copy here…
Next, launch PuTTY and enter “iotedgedevice” in the “Host Name (or IP address)” box.
Next, enter a friendly name for the connection such as “IoT Edge Device” in the “Saved Sessions” Box. This way you’ll be able to return to your session at a later date.
Finally, hit the “Open” button to begin connecting to the IoT Edge Device Pi.
PuTTY will likely prompt you with a “PuTTY Security Alert” asking you to accept a certificate. Hit the “Yes” button to accept the certificate and connect to the Pi.
Enter “pi” as the username at the “login as:” prompt and hit enter.
Enter “raspberry” (all in lower case) at the “pi@iotedgedevice’s password:” prompt and hit enter to finish connecting to the IoT Edge Device Pi.

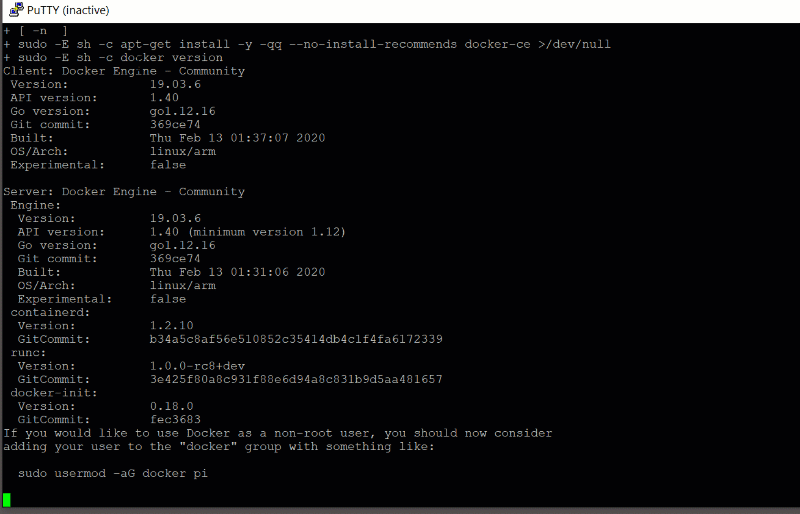
2: Installing Docker
Now we need to install Docker. Azure IoT Edge Deploys Docker Images known as Modules. Each Module runs individual functionality for our Edge Device, such as a Temperature or Telemetry.
Enter the following command in the PuTTY terminal;
curl -sSL get.docker.com | sh && sudo usermod pi -aG docker && sudo reboot

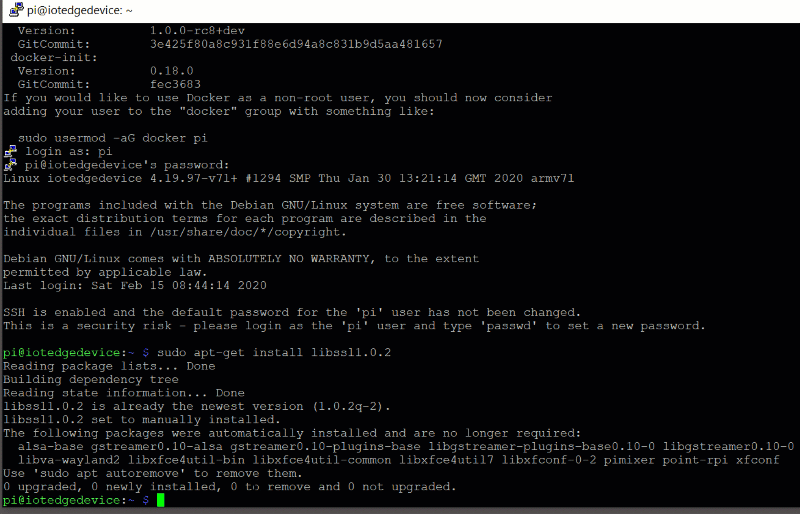
3: Install LibSSL
Your Pi will have restarted after the last command, so go ahead and reconnect using the same method as about…
IoT Edge relies on the LibSSL library to communicate between Azure and the IoT Edge Runtime on the IoT Edge Device… LibSSL is OpenSSL’s implementation of SSL and TLS. So let’s get that installed…
Run the following command to install LibSSL;
sudo apt-get install libssl1.0.2
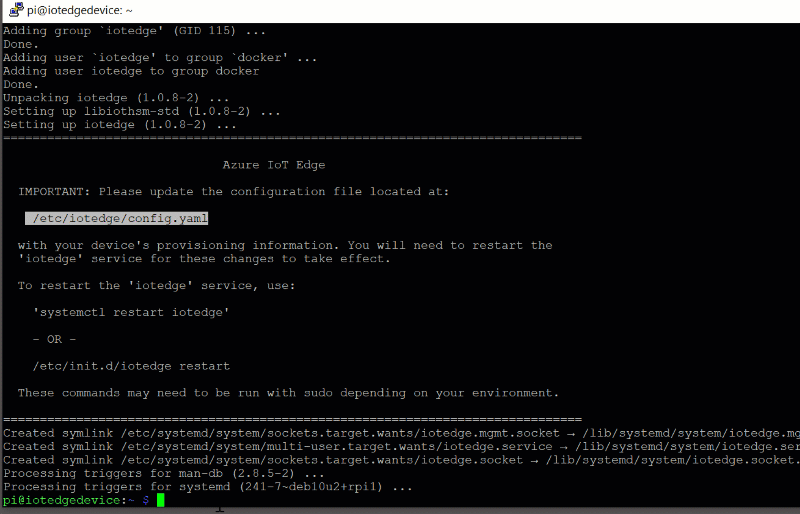
4: Install the IoT Edge Runtime
Next up we get on to installing the IoT Edge Runtime.
The IoT Edge Runtime essentially coordinates between the IoT Edge instance within IoT hub in Azure and the Edge Device. Keeping track of running modules on the device as well as keeping the Edge Device Modules up to date.
Run the following command to install the IoT Edge Runtime;
curl https://packages.microsoft.com/config/debian/stretch/multiarch/prod.list > ./microsoft-prod.list && \
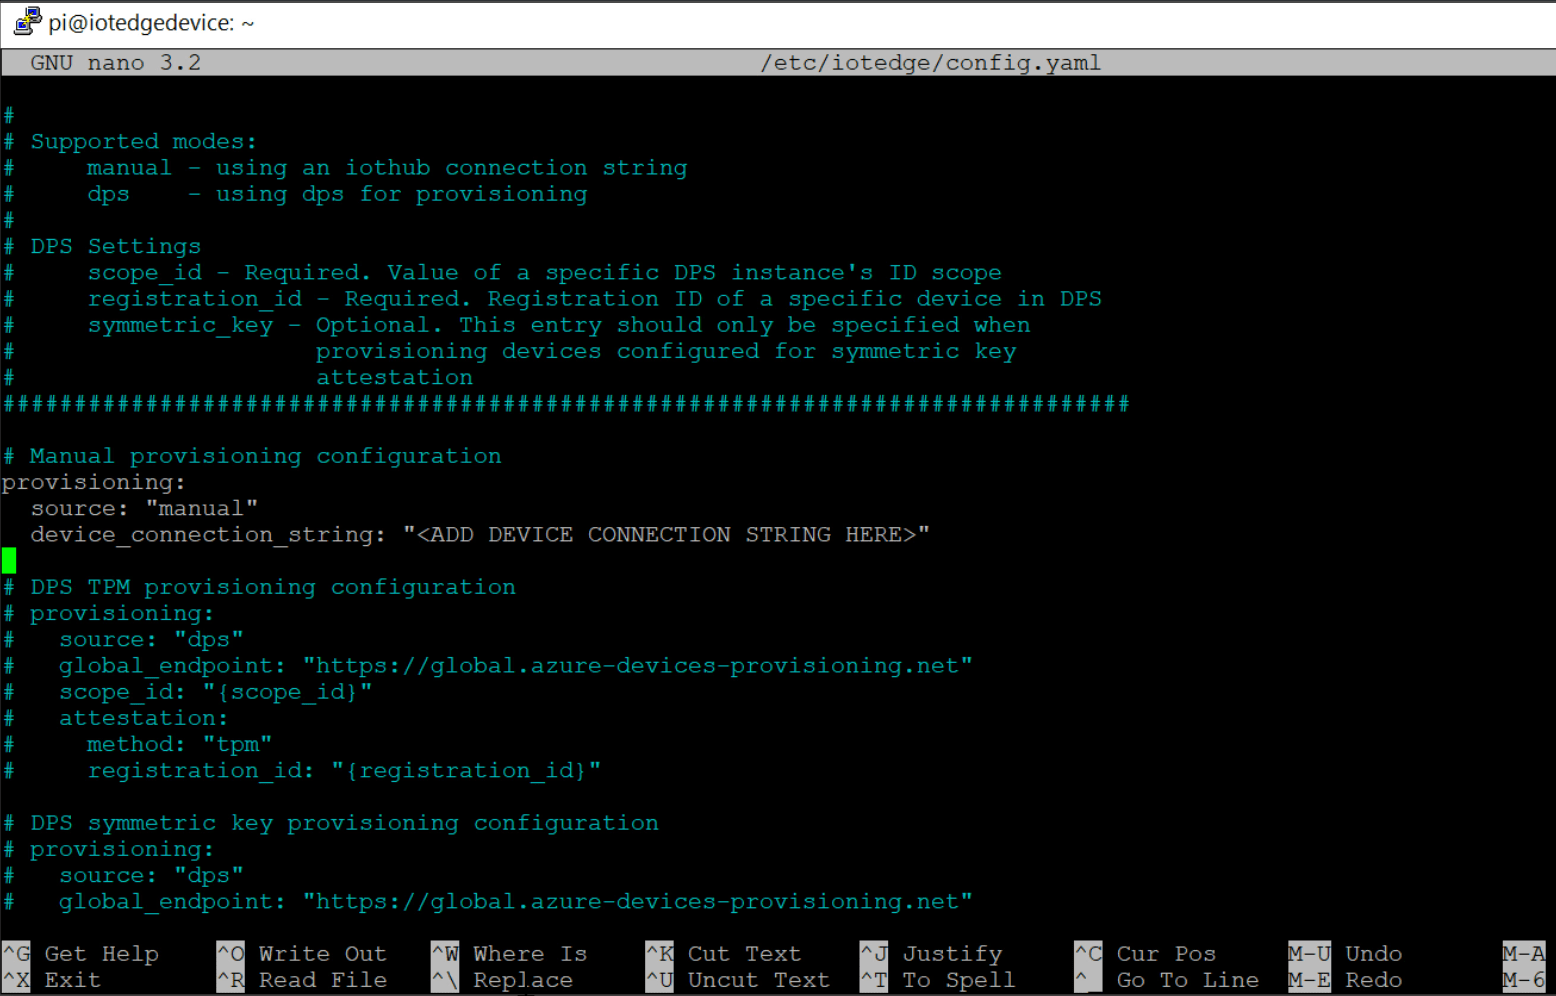
5: Edit the Config to connect to IoT Hub
Now we need to edit the IoT Edge Config File to connect it up to our IoT hub.
Enter the following command to open the config.yaml file in nano;
sudo nano /etc/iotedge/config.yaml
Scroll down to the section titled “Manual provisioning configuration“. You’ll see the “device_connection_string” setting. This is where we’ll paste the connection string for the IoT Edge device we created in part 2 of this blog post series.
Return to your browser and the IoT hub you created earlier. Go to your list of IoT Edge devices and click on the “iotedgedevice” device you created earlier.
Click the copy button next to the “Primary Connection String” setting, to copy the primary connection string.
Return to PUTtY and the config.yaml file in nano.
Replace the “<ADD DEVICE CONNECTION STRING HERE>” wording with the connection string from your IoT Hub Edge Device.
Restart IoT Edge and Check Status
With the Config edited, all that remains is to restart the IoT Edge Service and check if everything is running.
Run the following command to restart the IoT Edge Service;
systemctl restart iotedge
Now check that the Docker side of things is running correctly by listing the running containers with the following command;
docker ps -a
Finally, we can check if the service is communicating to the IoT hub. Return to the Azure Portal, back to your IoT Hub and onward to the IoT Edge Devices. Click on your IoT Edge Device and you should see a list of modules shown below your device.
You should start to see the IoT Edge Modules being reported as “Yes” in the “Reported By Device” column.

To be continued…
In this post we got our IoT Edge Device Pi setup and connected to the IoT Edge service in our IoT Hub.
In the next post we’ll get the IoT Edge Build Pi setup so that we can build modules for an ARM32 client.
Setting up the IoT Edge Build Pi >