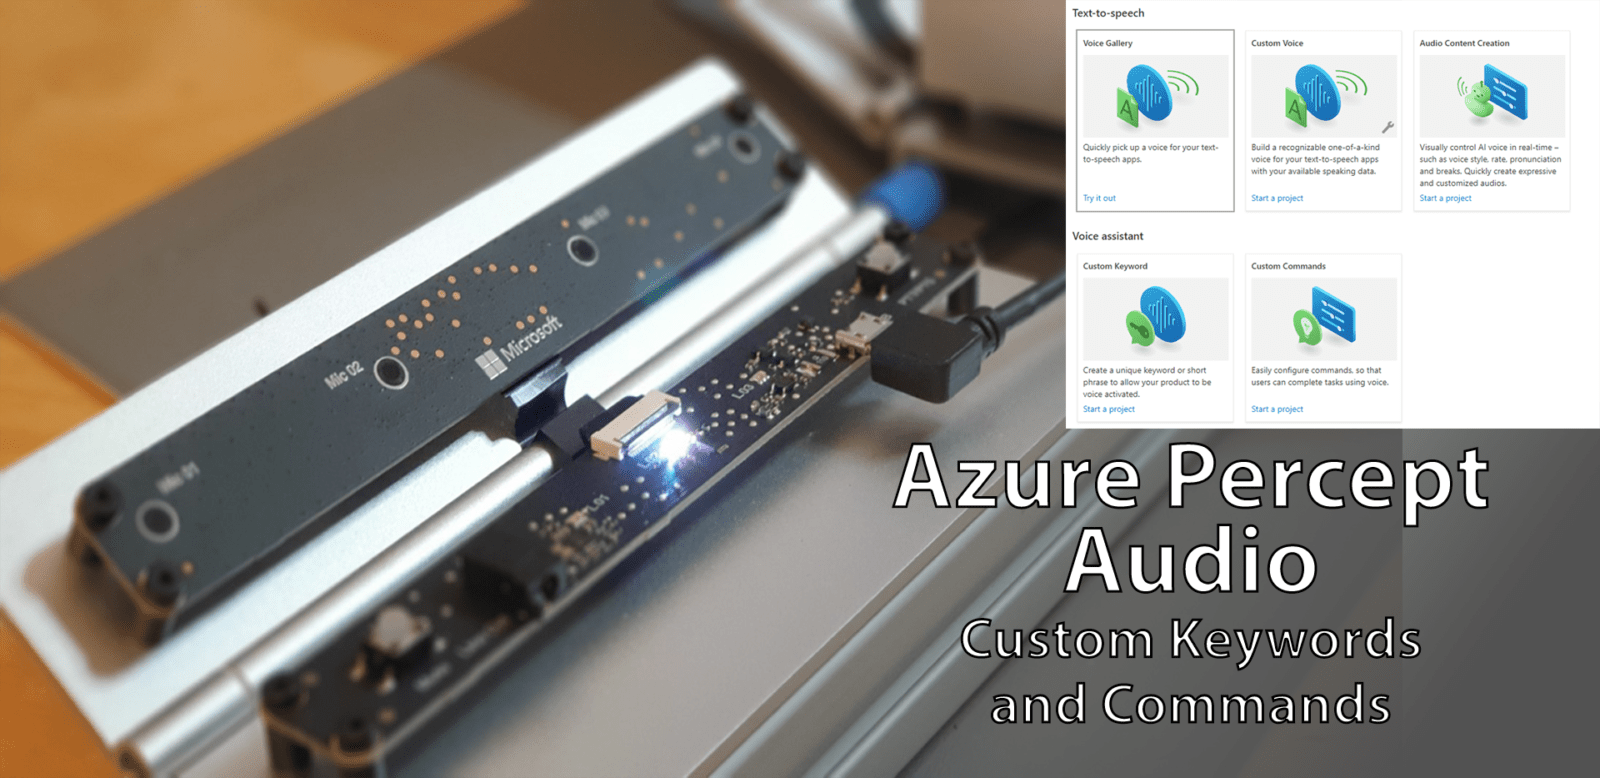
In the previous post we got started with the Azure Percept Audio System on a Module (SoM).
We deployed a Sample Hospitality application and saw how we could issue commands to the Percept, the Percept would respond, and the Sample Application would simulate the effects of the commands on screen.

In this post we’ll take the sample further by training our own Custom keyword and creating a Custom Command.
Custom Keywords
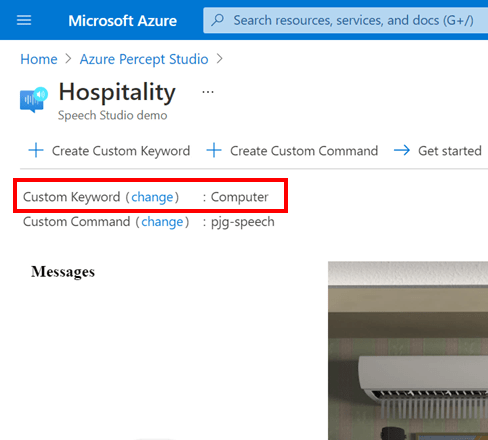
For the Azure Percept Audio, a Keyword is the word that the Percept “listens” for in order to begin listening for commands. Sometimes referred to as a “Wake-Word”, this word defaults to “Computer” in the Hospitality Sample.
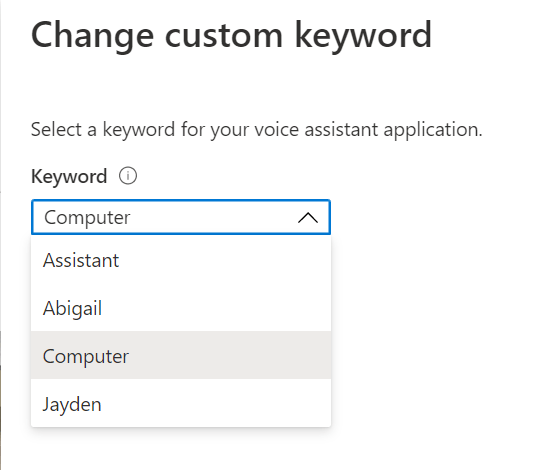
We have access to some pre-trained keywords deployed along with the sample, allowing us to choose from;
- Assistant
- Abigail
- Computer
- Jayden
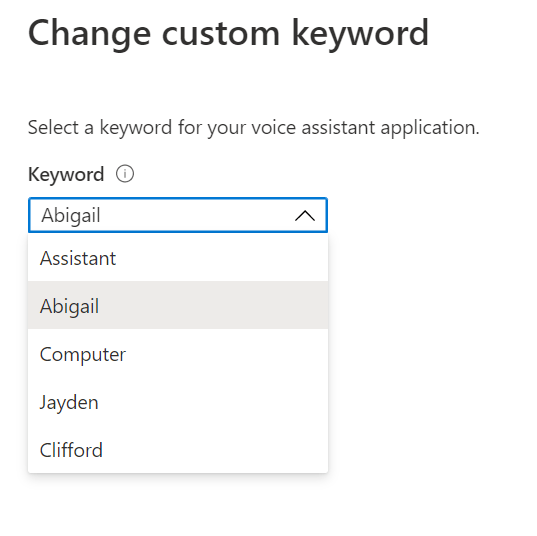
Which we can set by pressing the “change” link next to the “Custom Keyword” item below the toolbar area;
Hitting the Custom Keyword Change Link shows us the “Change custom keyword” flyout with the various options available to choose from.
Selecting another custom keyword and pressing the “Save” button at the bottom of the dialog will update the Percept, and we can then wake the device with the new Keyword.
Training our own Custom Keywords
We can however train our own custom keyword directly from the Sample Application, allowing us to use a word of our own choosing;

Pressing the “Create Custom Keyword” button in the toolbar at the top of the page allows us to configure and train our own custom keyword;
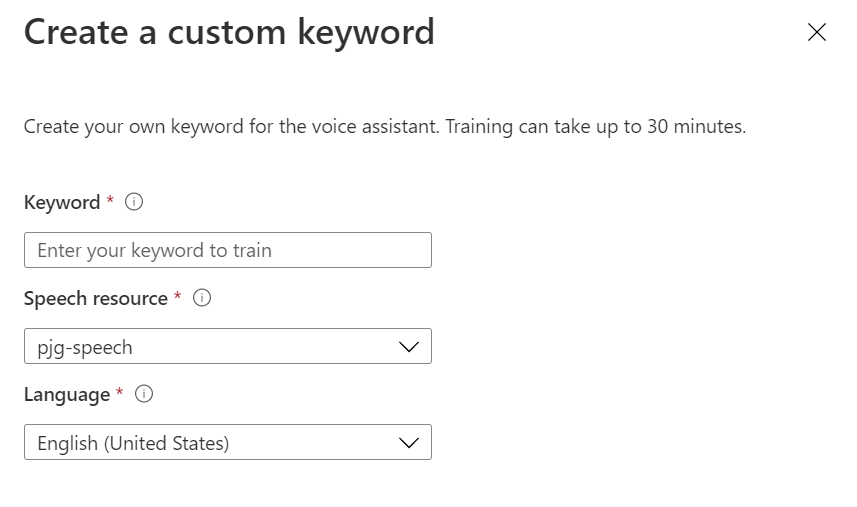
Here we can enter the keyword of our choosing, select an Azure Speech Resource and a Language, and pressing save will begin the training process.
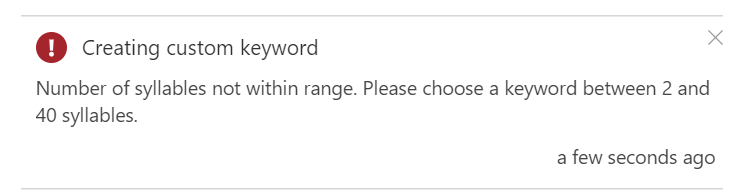
Bear in mind however, that the keyword must have between 2 and 40 syllables to be accepted;
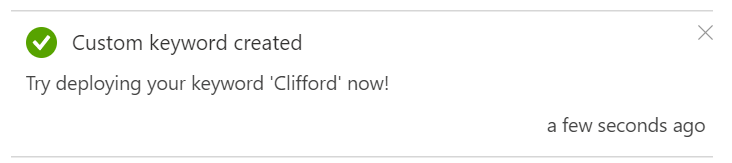
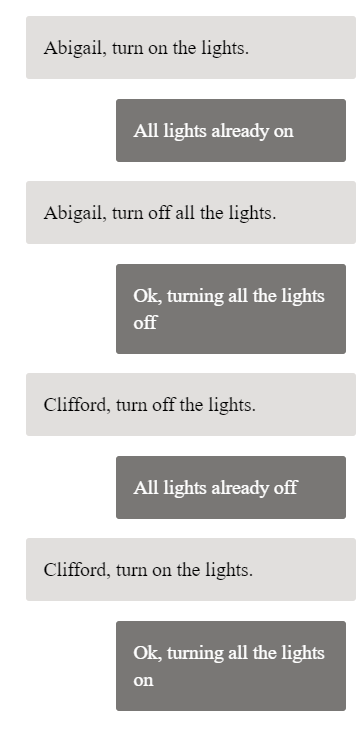
Once the training is complete, a process which took my chosen keyword of Clifford only a few moments, we’re then able to hit the “Change” button next to the Custom Keyword and select our new Keyword from the list;
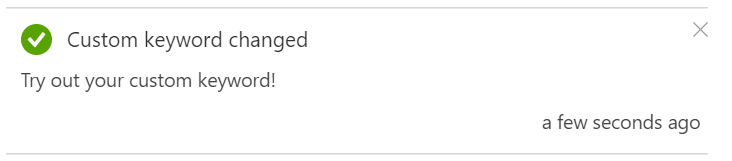
With our new Keyword selected and deployed to the Percept, we are then able to wake the Percept with our new Custom Keyword;
Custom Commands
As well as training our own Custom Keywords, we’re also able to create Custom Commands.
Azure Percept Audio Commands are a natural language based commanding mechanism, allowing us to control the Percept using plain language commands.
The sample Hospitality application comes with a set of pre-trained commands;
- Turn on/off the lights
- Turn on/off the TV.
- Turn on/off the AC.
- Open/close the blinds.
- Set temperature to X degrees. (X is the desired temperature, e.g. 75.)
These commands are all part of a Speech project specific to this Sample.
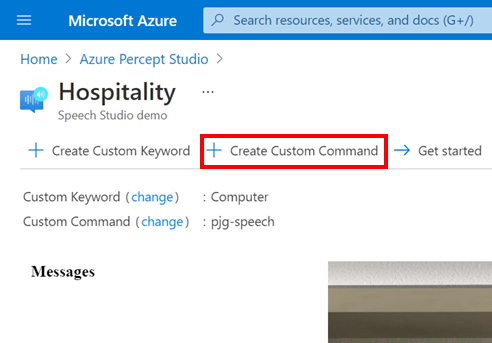
We can create our own Custom Commands by clicking the “+ Create Custom Command” Button in the toolbar;
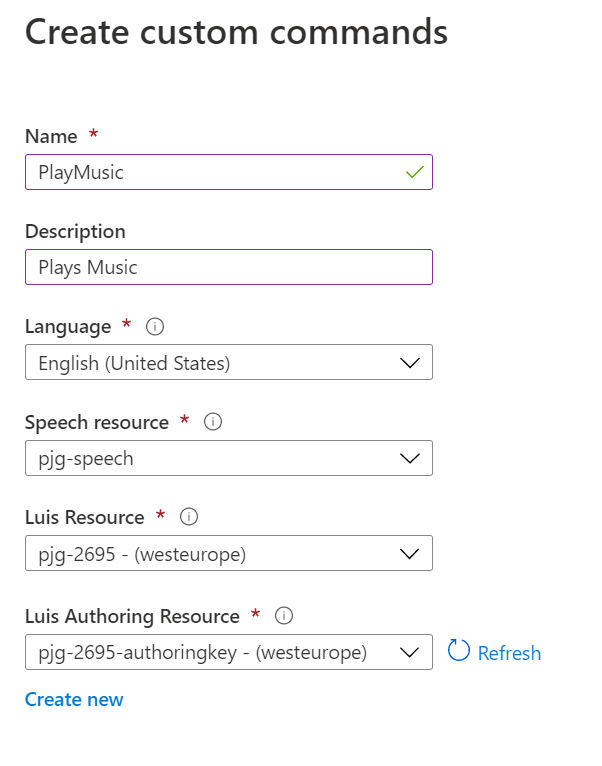
This will show the “Create custom commands” flyout, where we can enter a Name and a Description for our new command.
In our case we’ll create a custom command that turns a music playing device on and off.
We can then choose the Language, Speech Resource, Luis Resource and Luis Authoring Resource, which I left at their defaults for this sample;
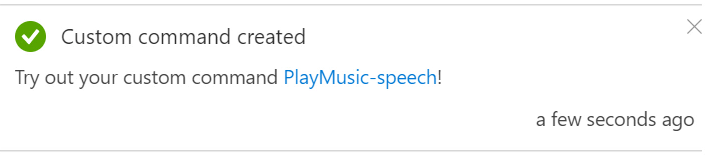
Once we’re happy, we can hit the blue “Create” button at the bottom of the flyout, and the new Custom Command will be created;
Azure Speech Studio
Azure Speech Studio is an Azure tool that allows us to create and configure a set of Commands and Responses based on Natural Language Processing.
Azure Speech is a service which brings together a set of Speech and Language based services from Azure under one hood.
Azure Speech supports;
- Speech-to-text
- Text-to-speech
- Speech Translation
- Voice Assistants
- Speaker Recognition
This service allows to to create a Command based on a plain language sentence. The Speech Service can then interpret the spoken command and return a response.
The response can also be converted to speech also and spoken back to the user.
Using Azure Speech Studio with the Percept Audio
When we created a new custom command earlier, it doesn’t add a command to the existing speech project from the sample. It instead creates a new empty Speech Project for us to work with.
As such, we can’t simply start using our new Command, we first need to configure the command using Speech Studio.
We can navigate to speech studio by going to speech.microsoft.com
After we sign in, we’re presented with the welcome popup;
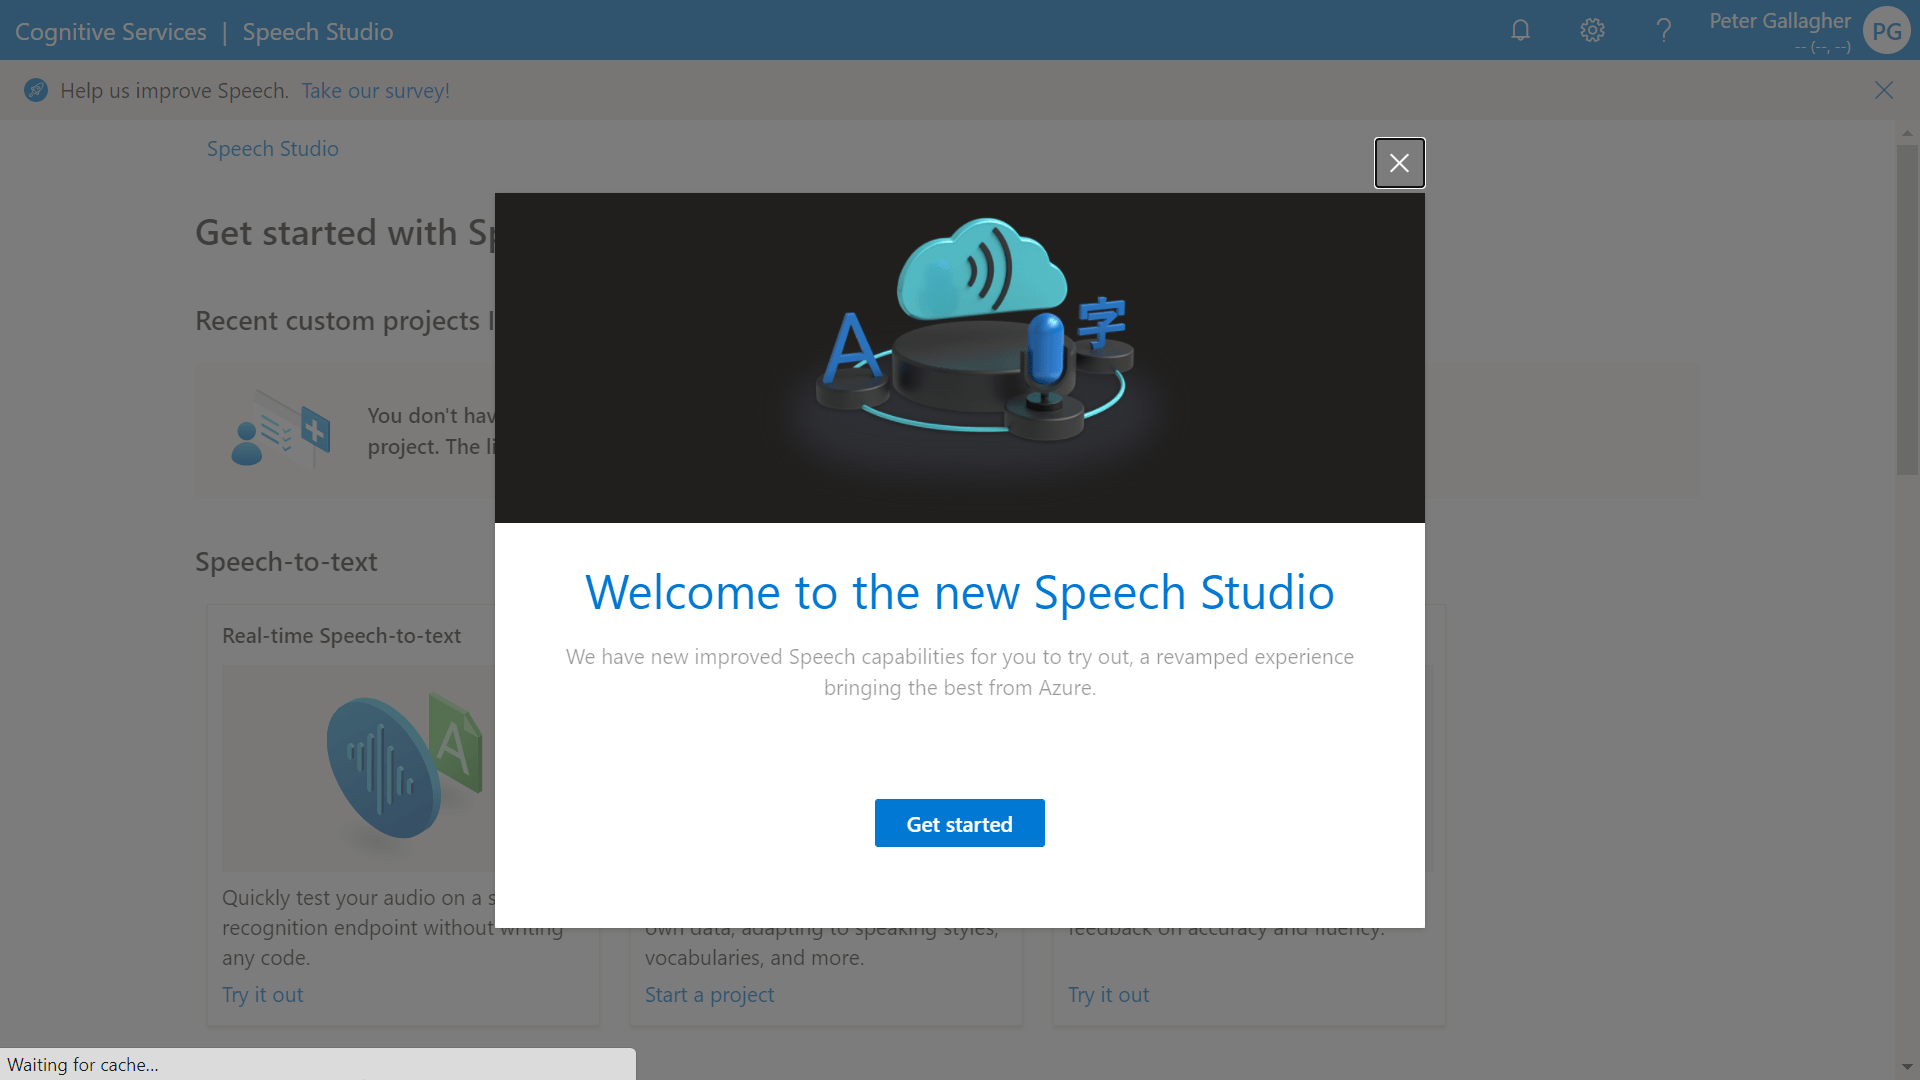
Closing the popup, we’re shown a selection of options available to create various project types,
Beginning with “Speech-to-text” which includes Real-Time Speech-to-text, Custom Speech, Pronunciation Assessment;
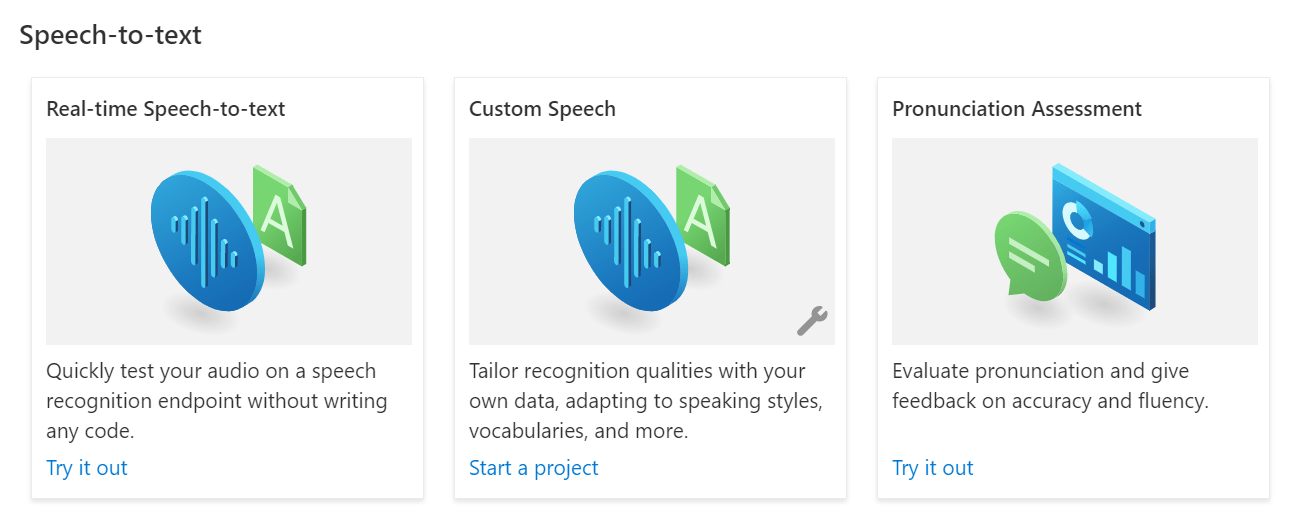
We then have “Text-to-speech” which has Voice Gallery, Custom Voice, Audio Content Creation;
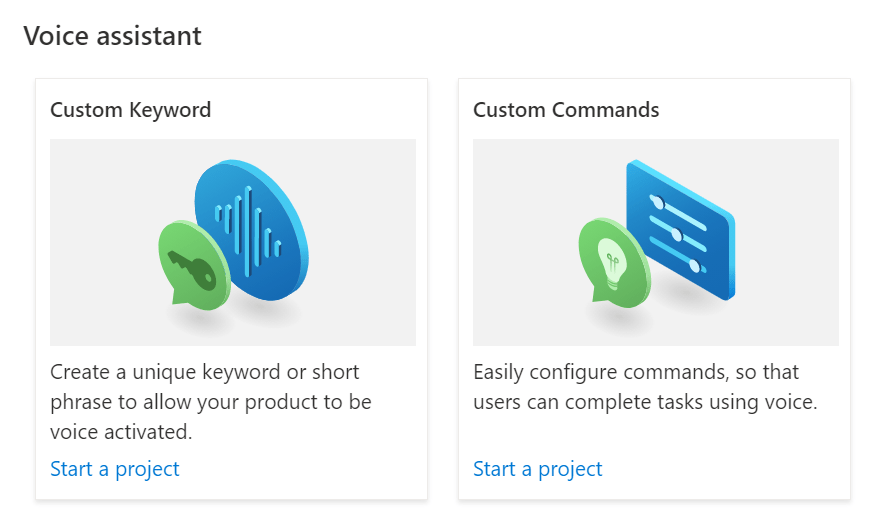
Finally, we have the “Voice Assistant” options of Custom Keyword and Custom Commands;
At the top of the page should be listed our existing Speech Projects. However, there appears to be an issue with Speech Studio at the time of writing, which means our projects aren’t listed sadly. However, your mileage may vary of course, so I thought it best to include this section so it makes sense later!

Accessing Speech Projects via Azure Percept Studio
Another way to access the Custom Speech Projects associated with our Percept is to use Azure Percept Studio.
Navigating to portal.azure.com/#blade/AzureEdgeDevices/Main/overview will take us to the Percept Studio overview page.
From there we can click the “Speech” item under “AI Projects” in the menu on the left, before clicking the “Commands” tab to show all of the Custom Commands we’ve created.

You should see at least two Speech Projects listed there. In my case, the first is the project associated with Sample we spun up in the previous post, the second is the new Custom Command we just created above.
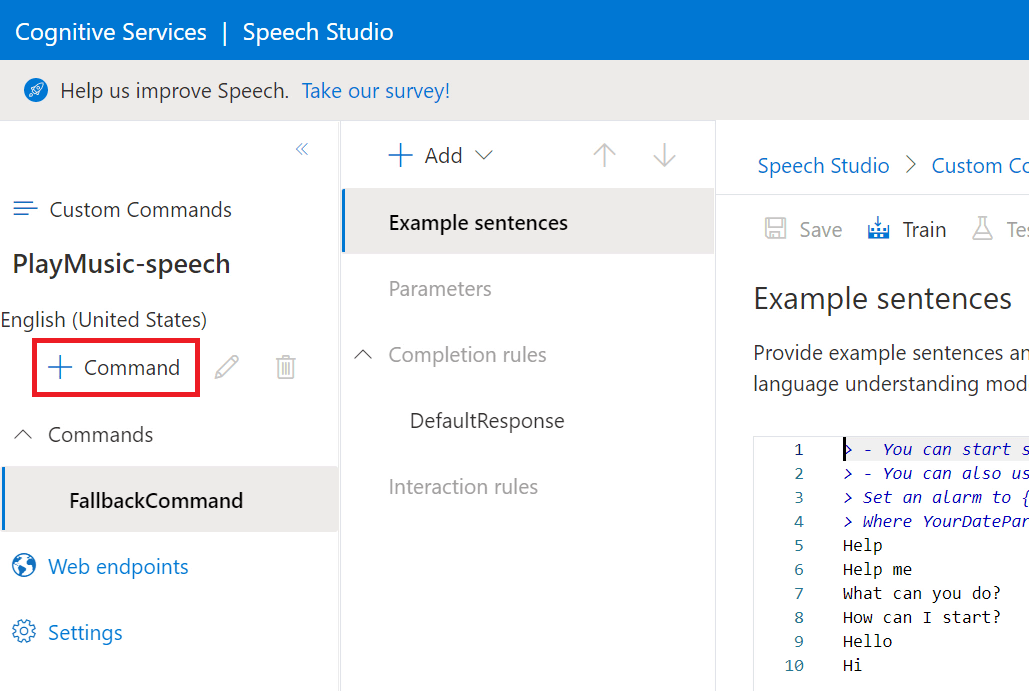
Clicking on the Custom Command Speech Project we want to work with, in our case the “PlayMusic-speech” project, takes us to Speech Studio;

Speech Studio is split up into three primary areas.
On the left is the primary Project navigation area, with the list of Commands, Web Endpoints and Project Settings.
In the centre pane, we have a contextual area, primarily this is where we can select to configure the Example Sentences for our commands, create or edit Parameters, configure Completion Rules and create and configure Interaction Rules.
On the far right is where we Enter our Custom Command Sentences and Parameters etc.
Creating a new Custom Command
We can now create a Custom Command for our Percept to action by hitting the “+ Command” button;
This will show the “New command” dialog;
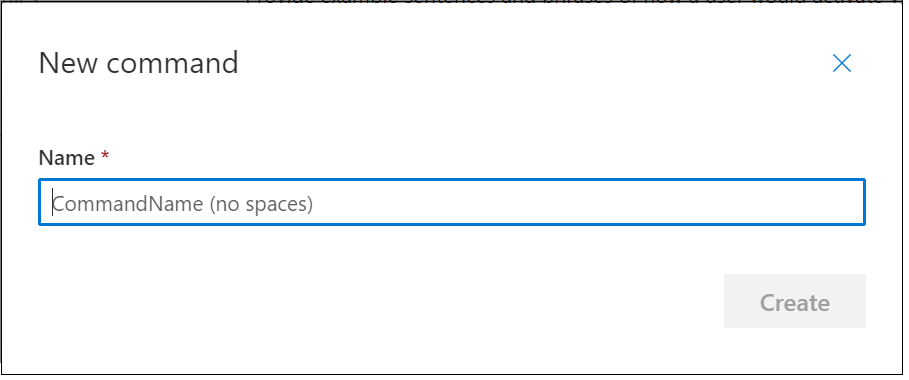
We can enter a name for our command here.. This isn’t the word(s) we’ll be using to invoke the command, but simply a name for the command. As the dialog says, this shouldn’t contain any spaces.
I’ve chosen “TurnOnMusic” as the Command Name here, with a view to allowing this command to simply turn music on to begin with.
We’ll expand upon this functionality later with parameters.
Once we’ve hit the “Create” button, we’re shown the “Example Sentences” pane on the righthand side of the screen;
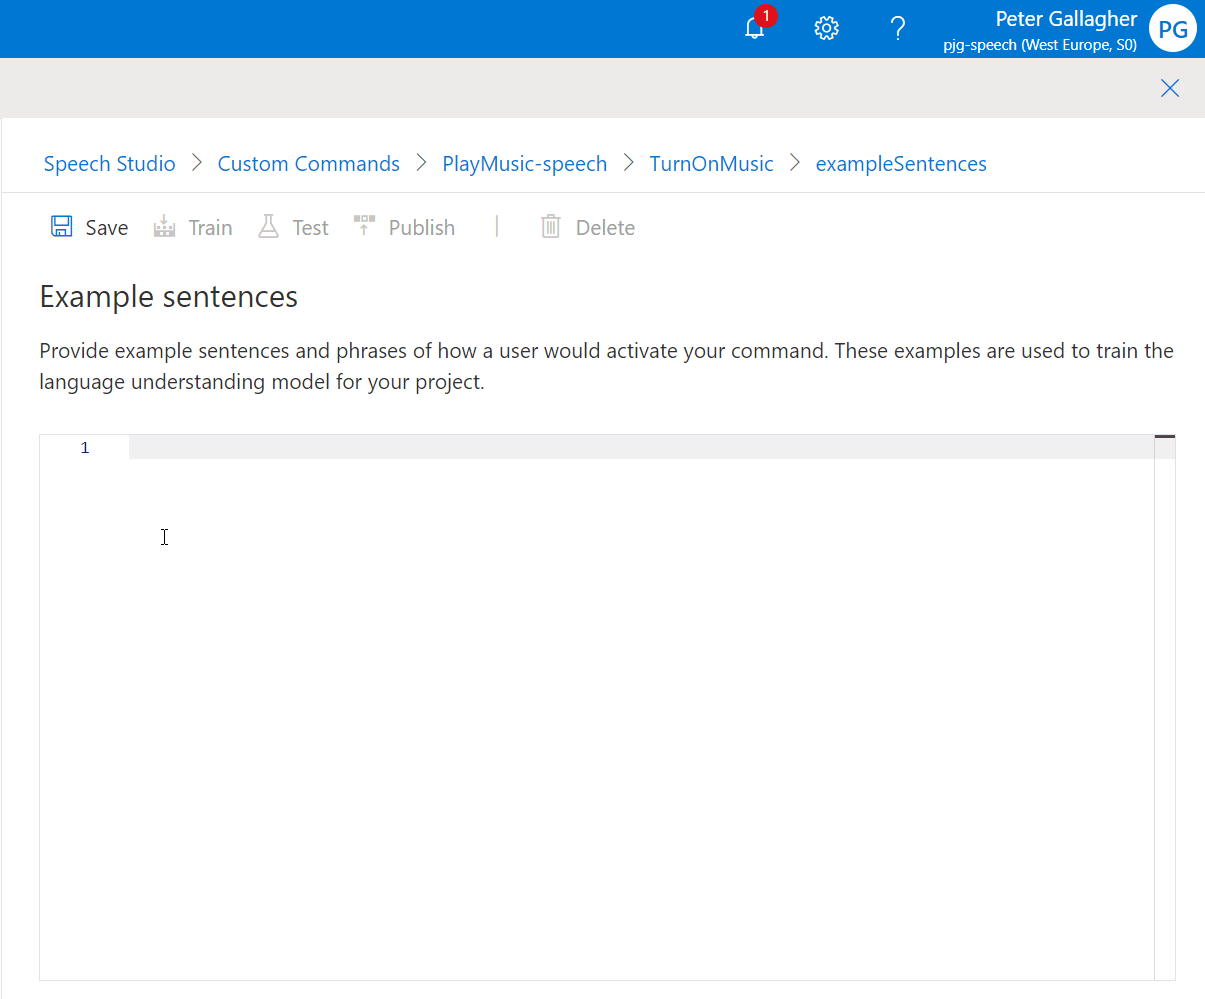
We can now enter the sentences we expect this particular command to react to. Each sentence should be on its own line.
We’ll go with the following sentences, all of which are aimed at Playing some Music;
- Turn on the music
- Turn music on
- Turn on music
- Turn the music on
- Turn the stereo on
- Turn on the stereo
- Play some music
- Play me some music
- Play music
- Play the music

Adding a “Done” Response
We can now add a response for when our command completes. Without this, if we try to execute the command in the test environment, we won’t get any confirmation that the command was successful.
If we click in the “Done” item in the centre pane we’ll be shown the “Completion rules” section;
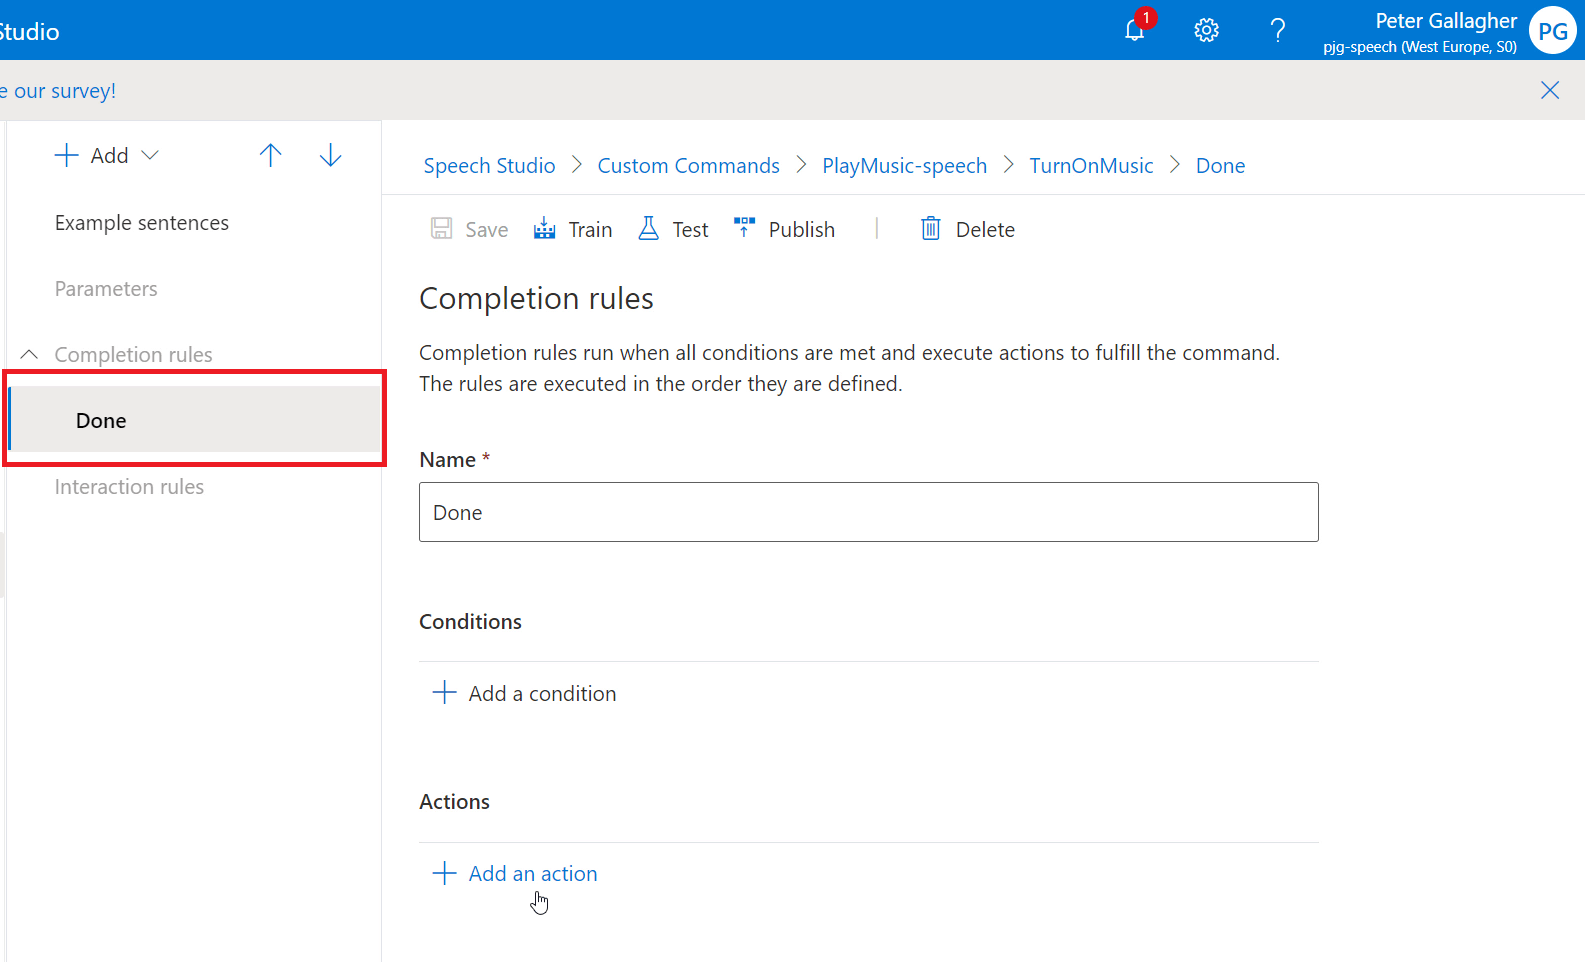
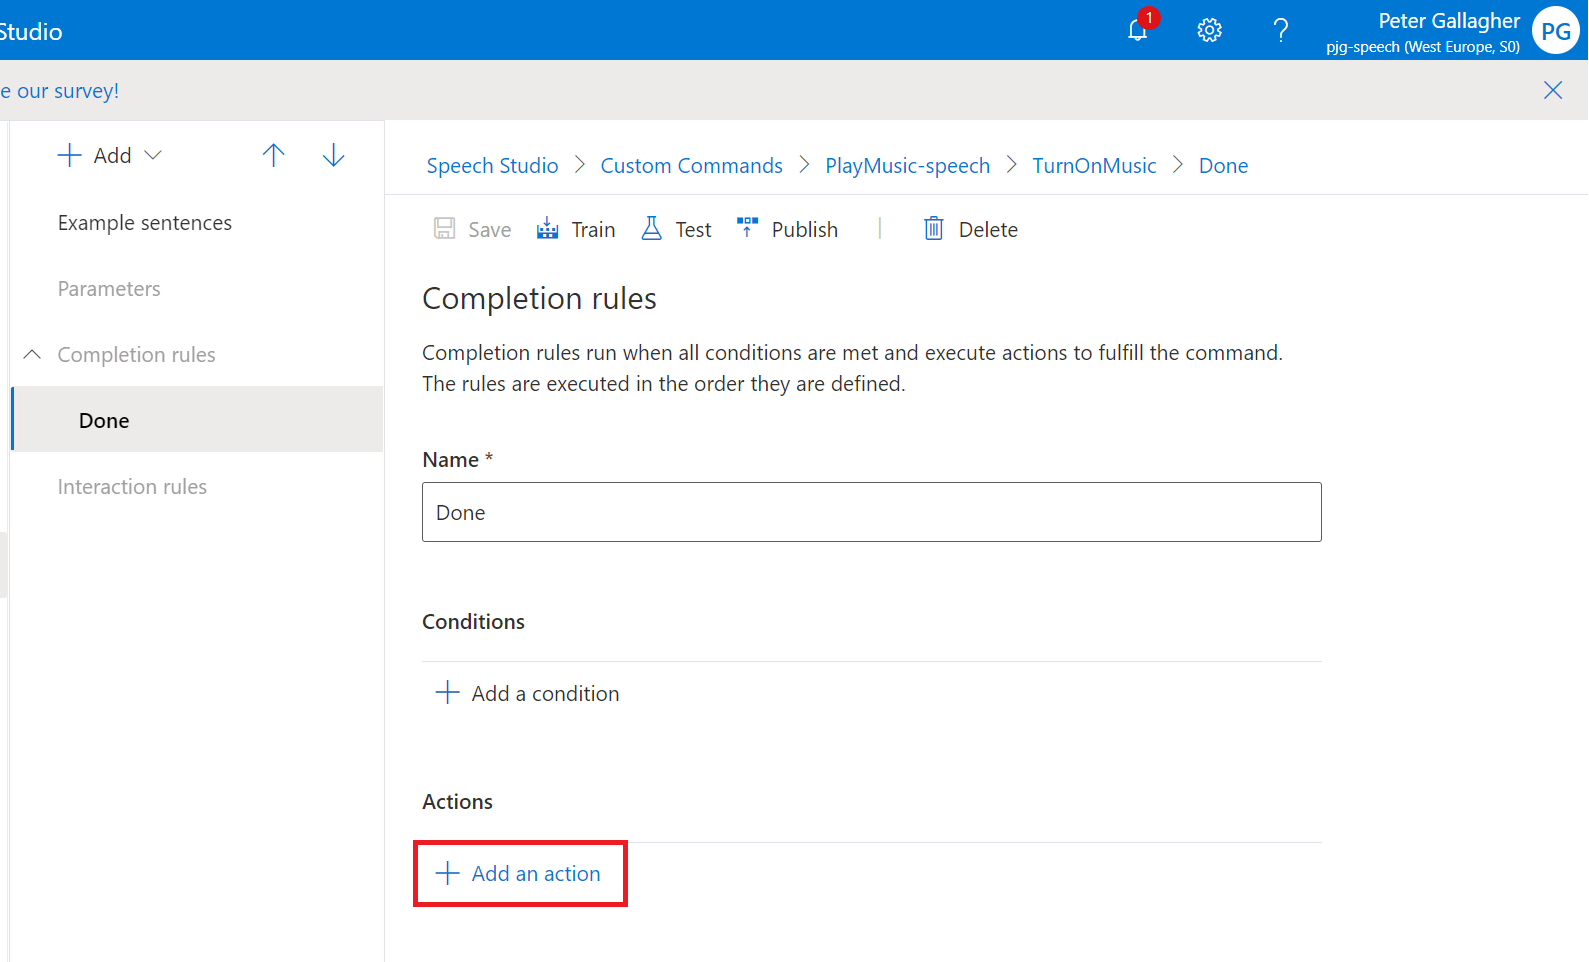
We can now add the Action we want to carry out when the Command is executed, by clicking the “+ Add an action” button;
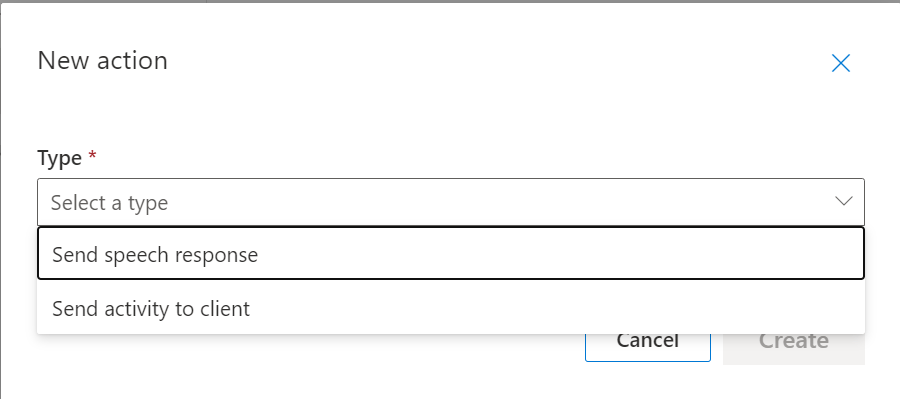
We’ll be prompted to select the Type of Action we’d like to carry out. We have two options to choose between for actions.
- “Send speech response” will return a spoken word response back to the user who issued the command.
- “Send activity to client” will send an activity payload to a client application via the SDK so that the client can action the command in some way. We saw this in action in the Sample Application when we actioned commands.
We’ll choose “Send speech response” here as we’re only developing a test project at the moment;
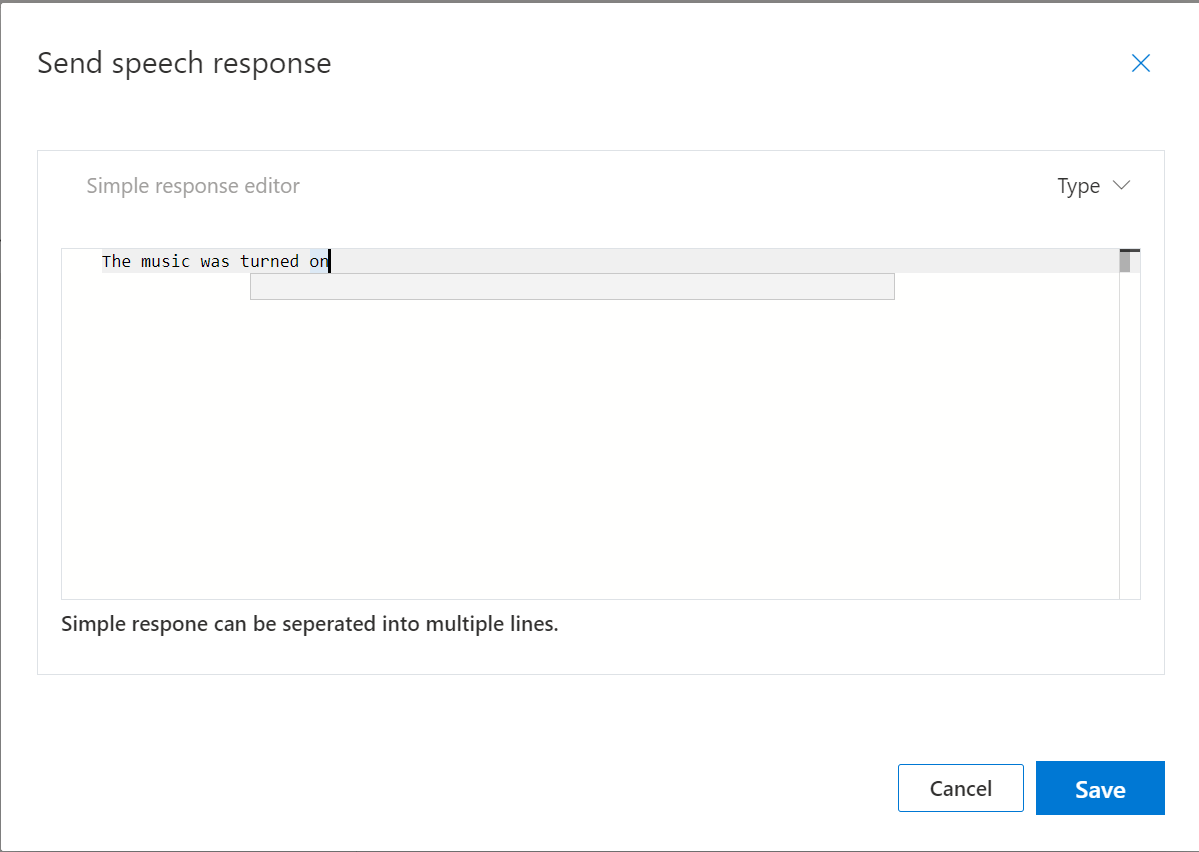
Selecting “Send speech response” and hitting the “Create” button will pop up the “Send speech response” editor window.
We have a choice of three different response types at this stage.
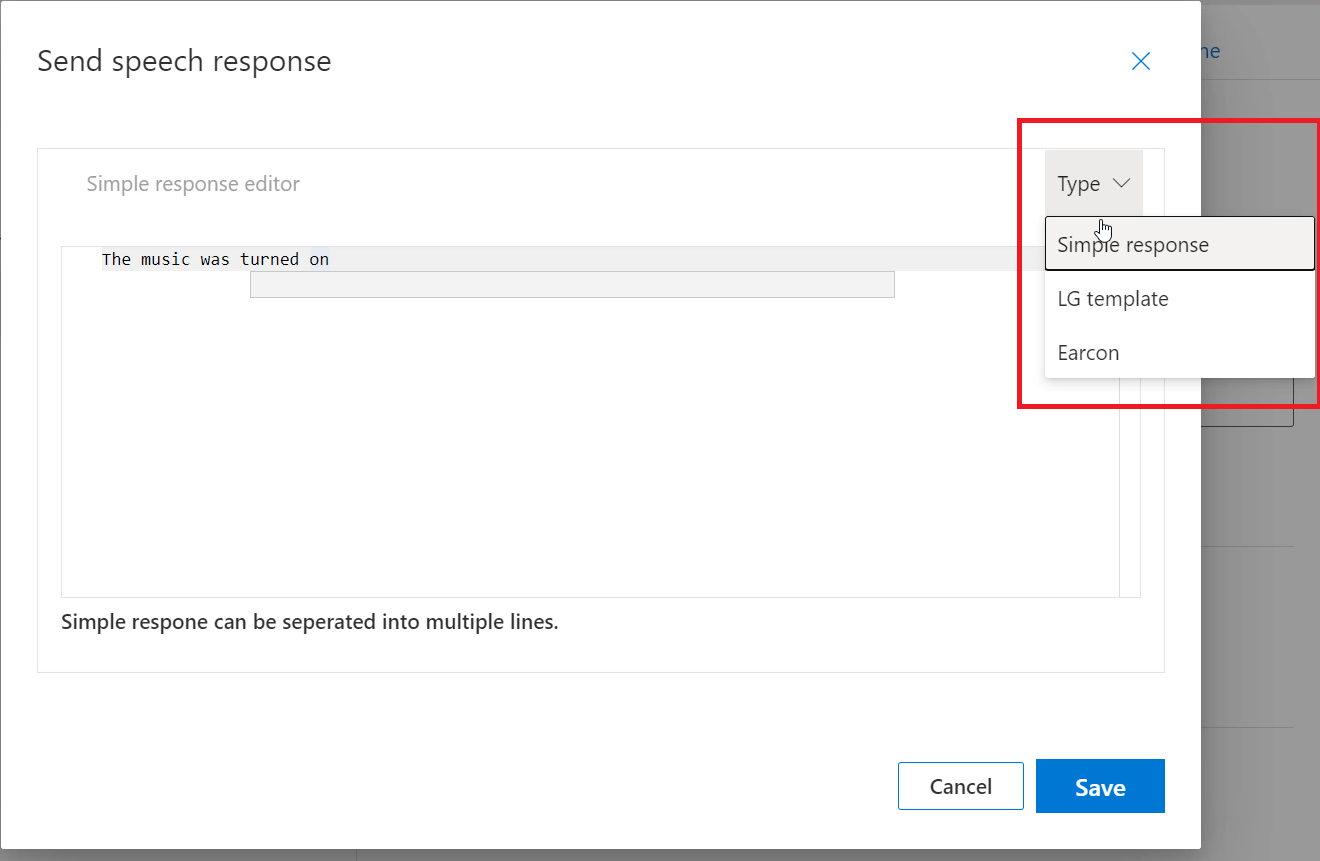
- “Simple Response” will respond in plain speech the response we enter in the editor.
- “LG Template” refers to Language Generation Templates which are based on those used in the Bot Framework, and allows us to introduce variance into the responses, meaning we don’t always hear the same response time after time.
- “Earcon” allows us to respond with a brief sound in response to the command. This sound can either reflect a Success or a Failure.
We’ll leave our response at the default of “Simple Response” and have the command respond with “The music was turned on”;
Pressing the “Save” button will return us to the Completion Rules page.
If we navigate back to the Example Sentences page, we can get ready to test our Custom Command.
Testing the Custom Command
Now that we have the basics of a Custom Command, we can go ahead and test it using the in built test functionality within Speech Studio.
If we first save our Example Sentences;

We can now prepare our Command for Testing by hitting the “Train” button.

With the Custom Command now Trained, we can now hit the Test Button;

Our new Command will then be published for testing which takes a few moments;

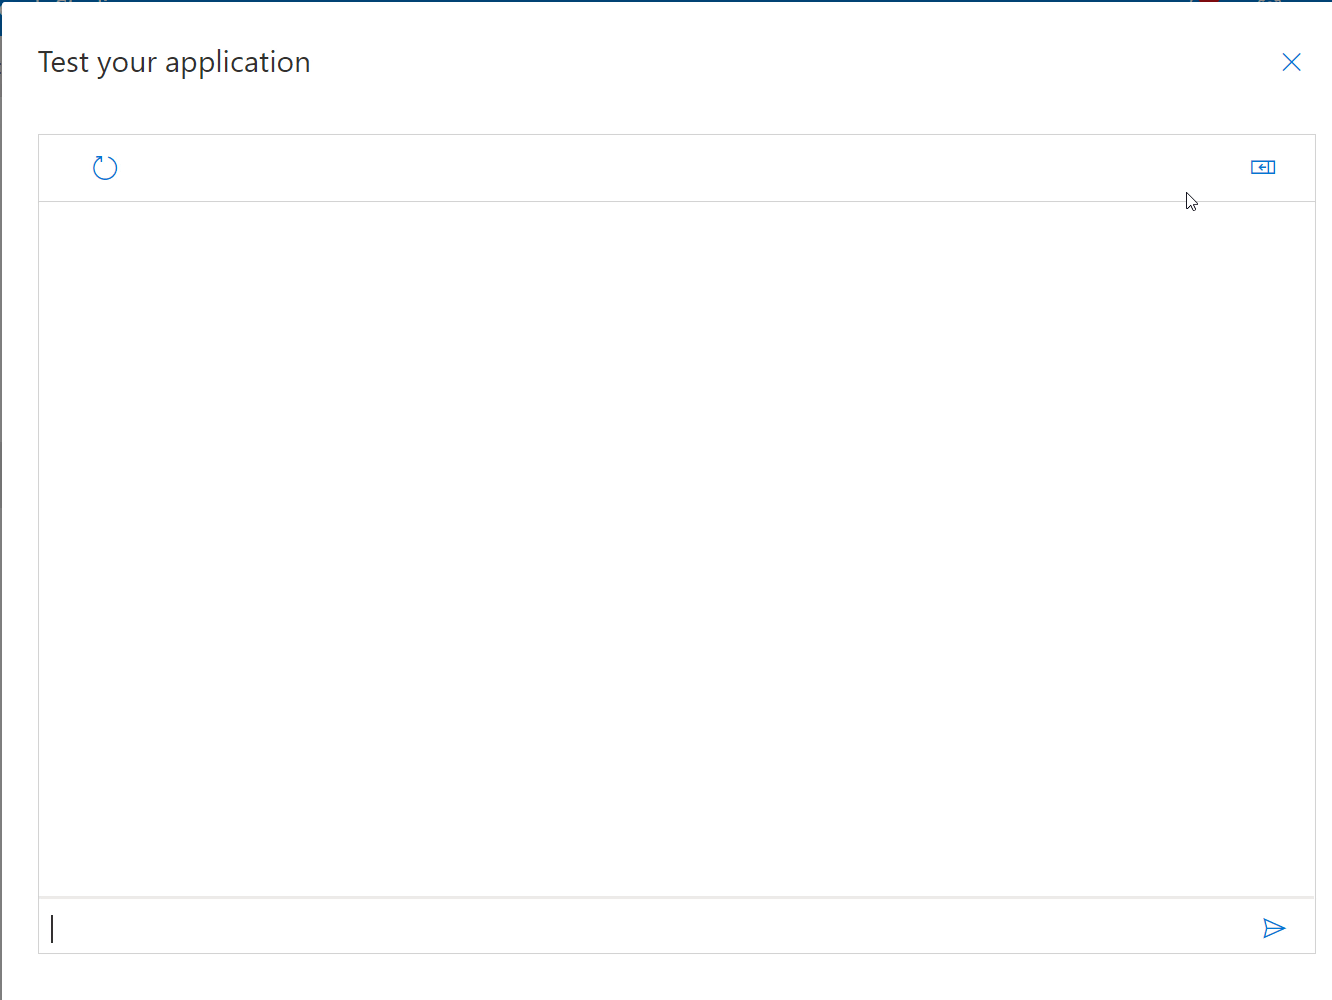
Once the Publish process is complete, we’ll then be taken to the testing environment;
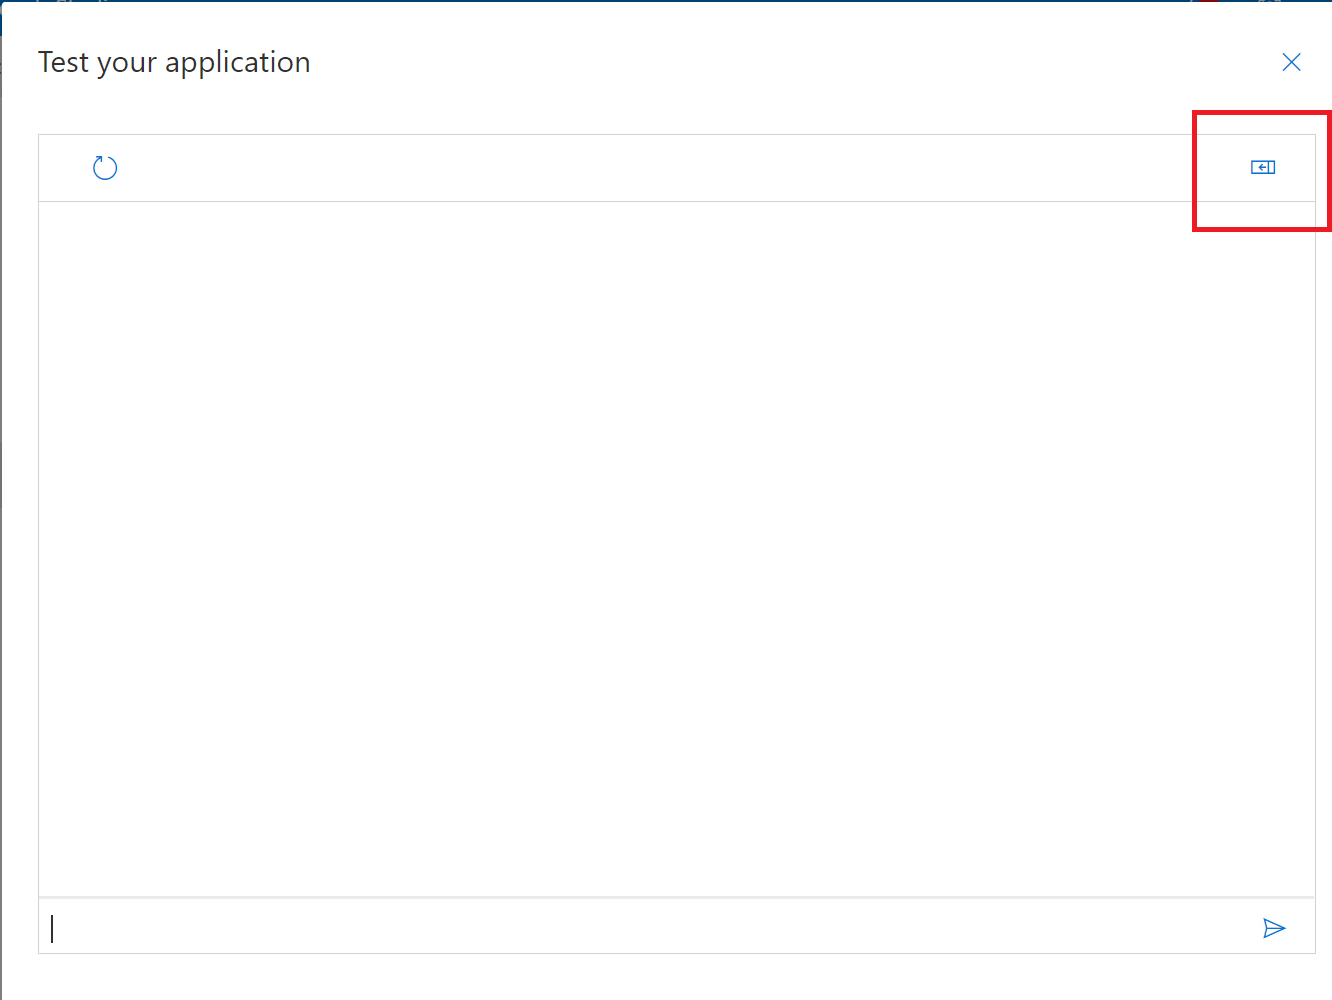
We can expand the details about our interactions (or turns) with our appllication by clicking the expander in the top right of the screen;
The Details area will show us information about the commands we’re issuing, any parameters that are expected and the Rules Executed from our “Done” Completion Rules.
We’re now ready to try out our new command… If we type “Turn on music” in the entry box at the bottom of screen;
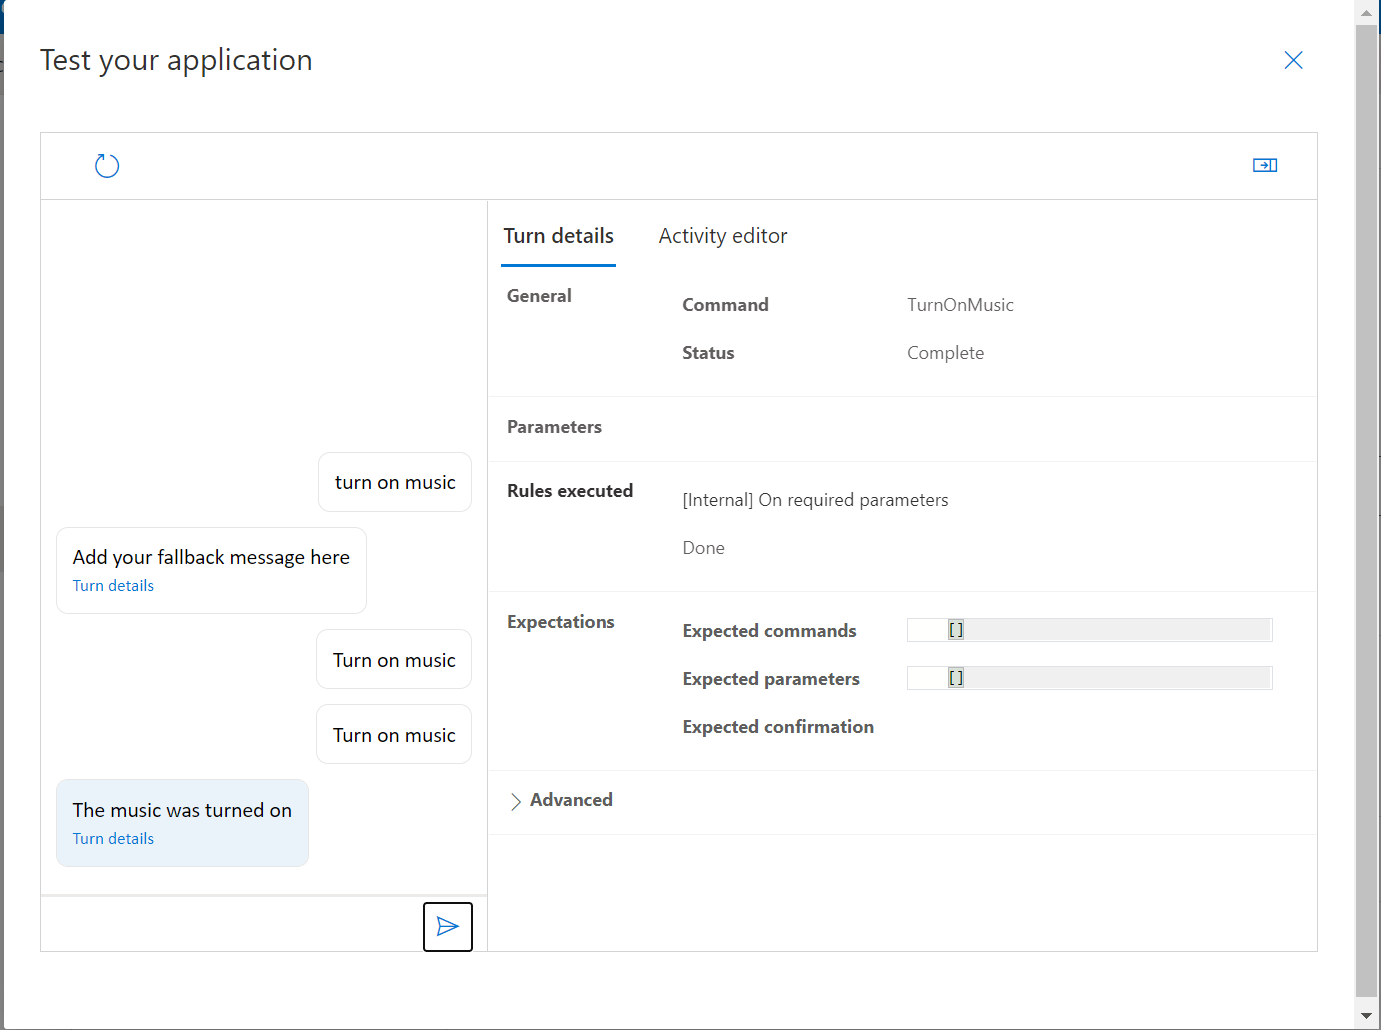
We can see that we successfully executed the command, and we received the response we were expecting, both in text and spoken word!
Our command currently only turns music on however… What if we want to turn it back off?
We could of course add a whole new command that turns the music off… However, we can actually add parameters to our existing command.
Adding Parameters
Parameters are a method to add flexibility to commands, allowing commands to accept a variable portion which affects the action that’s carried out in response.
We’ll add the ability to turn the music both on and off.
We can achieve this by adding a parameter to our command which represents the state we’d like to set. We’ll also need to modify our Example Sentences along with the Completion Response.
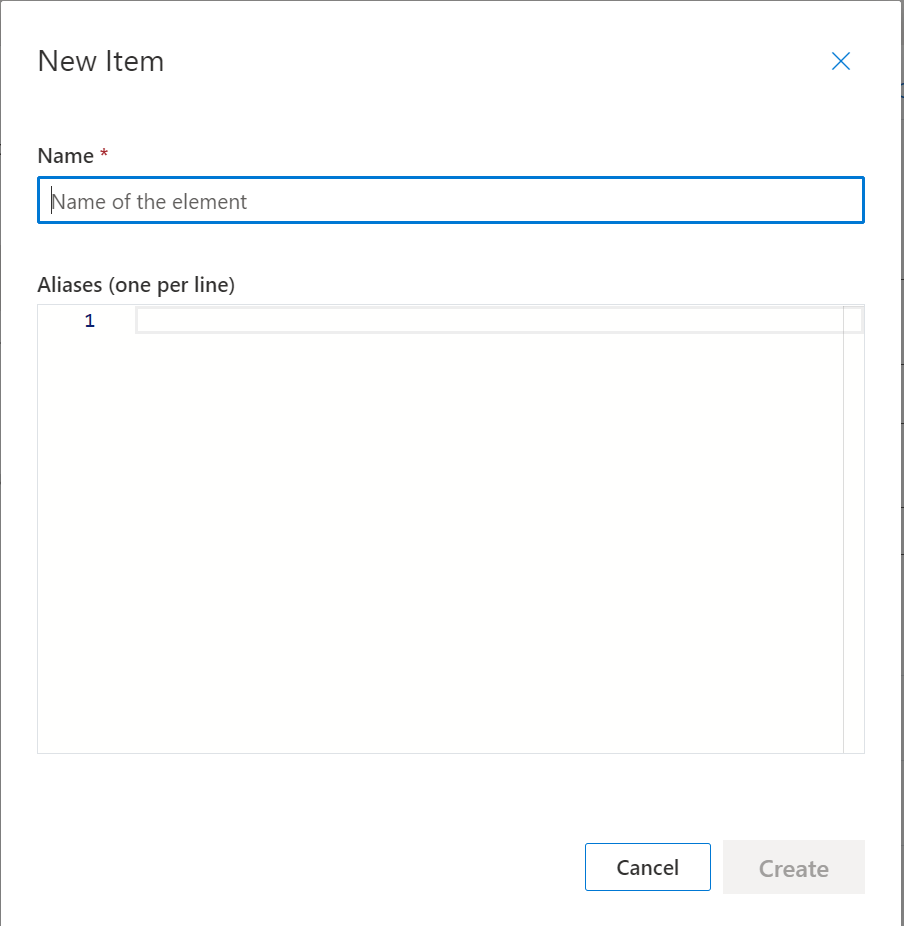
If we click the “+ Add” button at the top of the right hand panel, we can select the “Parameter” option.

We’ll then be prompted for a name for our Parameter;

We’ll choose “OnOff” and press the “Create” button.
We’ll then be shown the Parameters pane on the right of the screen. As we need to know whether to turn the music on or off, we can set that this Parameter is “Required”;

We’ll then be prompted to add a response if the user doesn’t supply the Parameter.
As with the Completion response, we can either elect to use a Simple Response or an LG Template. There’s no option here for an EarCon as we need to ask the user a specific question of course.
We can have the Command respond with “Would you like to turn the music on or off?” and press the “Update” button;

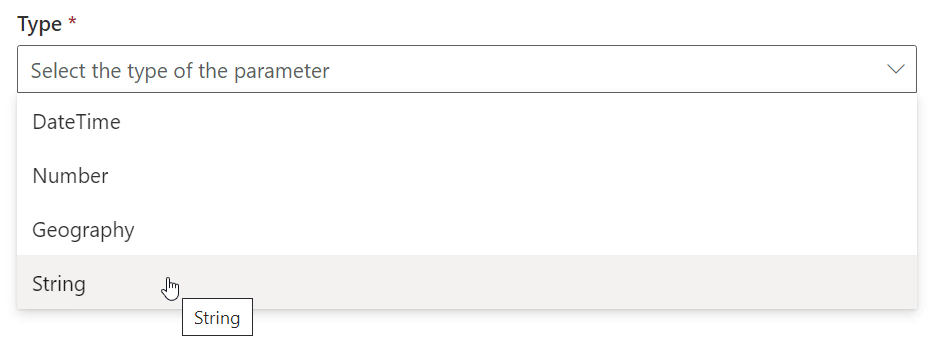
We can now select a “Type” for our parameter… We can choose between;
- DateTime
- Number
- Geography
- String
Our response will be either “On” or “Off”, so we’ll opt for “String” here;
We can leave the “Default Value” empty here, as we’ve specified that this parameter is required.
Next, as we’ve chosen a Type of “String“, we can choose the “Configuration” for this parameter. The Configuration sets whether the parameter can accept any response or one from a predefined list of responses.
The options here are;
- “None“
- “Accept Full Input” – Simply accept whatever the user says, for instance a postal address
- “Accept predefined input values from internal catalog” – Constrain the parameter value that the user gives to a pre-defined list of allowed values.
We’ll choose “Accept predefined input values from internal catalog” here are we only want to accept “On” or “Off”;

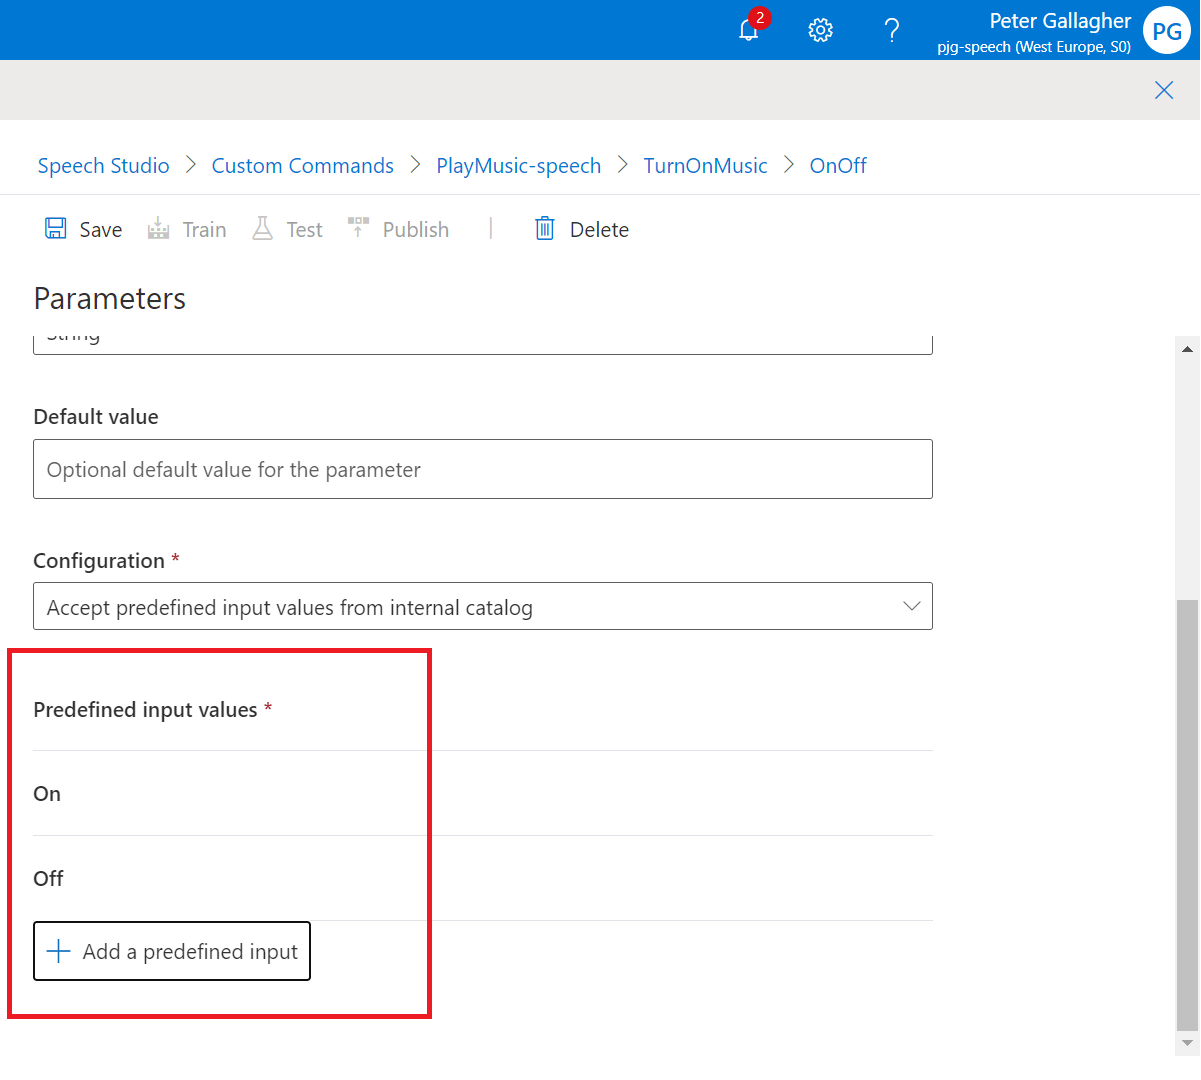
As we’ve selected “Accept predefined input values from internal catalog” as the Configuration, we can now define the values we expect to receive for our “OnOff” parameter by hitting the “+ Add a predefined input” button at the bottom of the Parameters pane;

We can add a Predefined Value with a “Name” of “On” and another with a “Name” of “Off”, we won’t need any Aliases for our options in this case;
We should now have two Predefined Input Values set for both “On” and “Off”
Rename Command
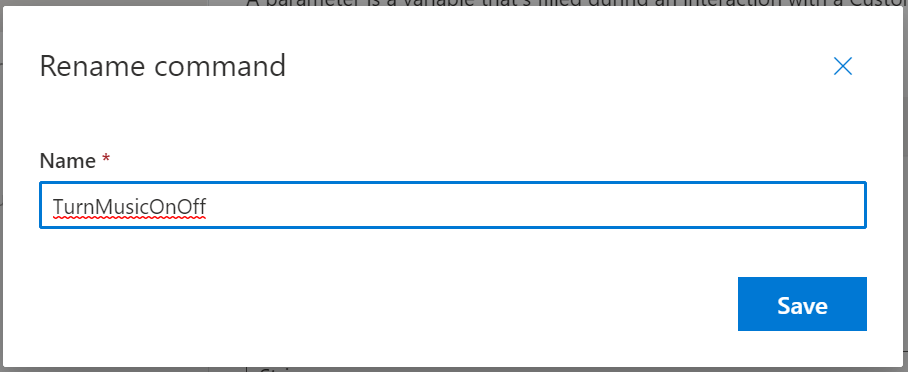
The next thing we need to do is rename our command. Currently it’s set to “TurnOnMusic”, however we can now use this command to turn the music both on and off.
Hitting the Pencil Icon next to the “+ Command” button will allow us to rename our command to something which now reflects its operation;

We can then give our Command a name of “TurnMusicOnOff”;
Update Command to use Parameters
We now need to update our Example Sentences to make use of our new Parameter.
We can assign where in a sentence the command should expect a parameter to be used by adding the parameter name in curly brackets at the given location in the sentence.
A nice feature here is that, as soon as we enter a curly brace, we’re given our available parameters are options, so we don’t have to remember exactly which one we need.
With that in mind, we can update our Example Sentence list to;
- Turn {OnOff} the music
- Turn music {OnOff}
- Turn {OnOff} music
- Turn the music {OnOff}
- Turn the stereo {OnOff}
- Turn {OnOff} the stereo

We also need to update the Done response to match the parameter that the user requests.
If we click back into the “Done” section, we can click the Pencil Icon next to the Completion Rule Action we created to edit it;
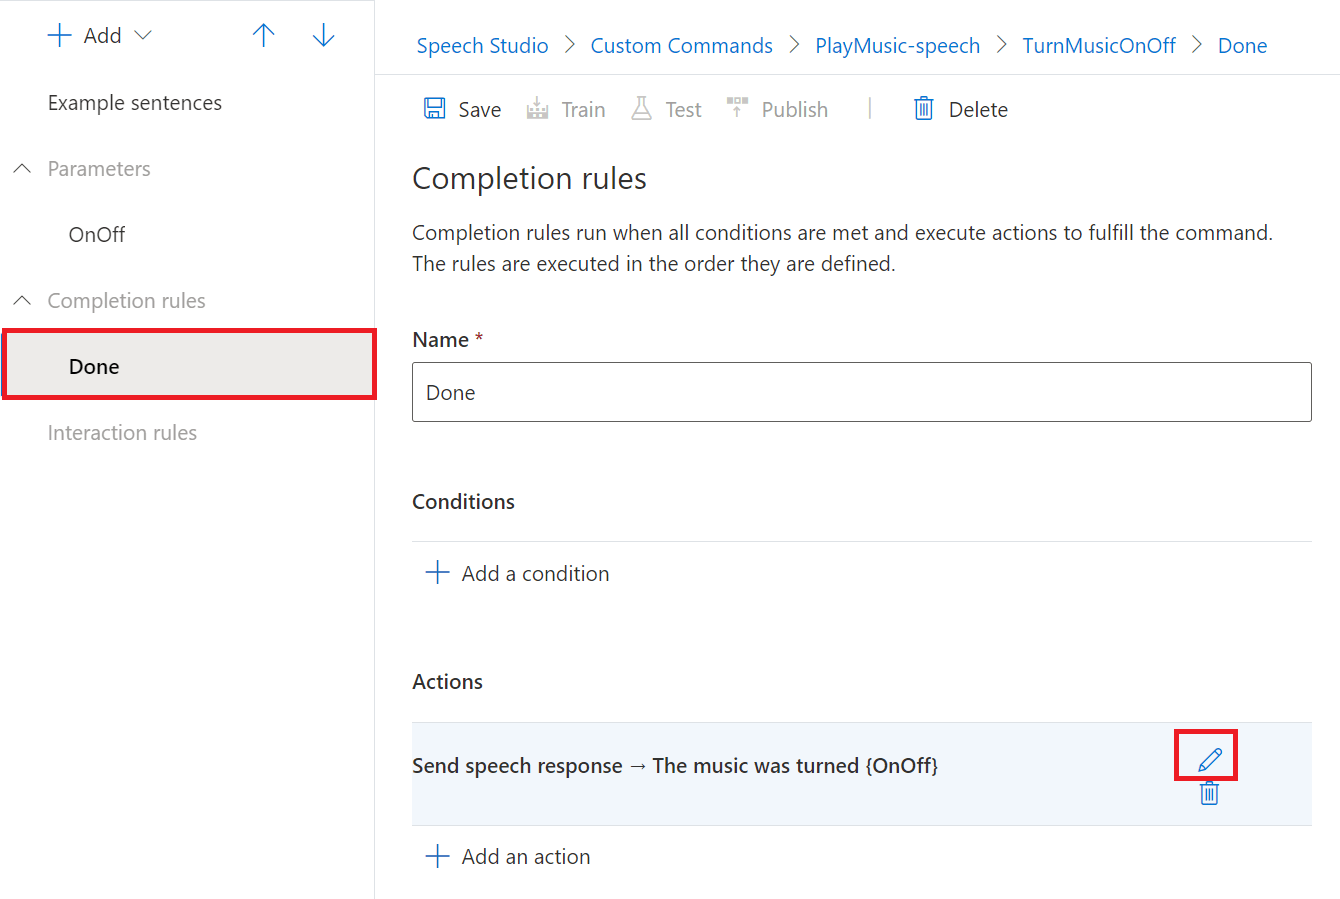
As with the example sentences, we can insert the name of our parameter between curly braces where we want it’s value to be repeated back to the user.
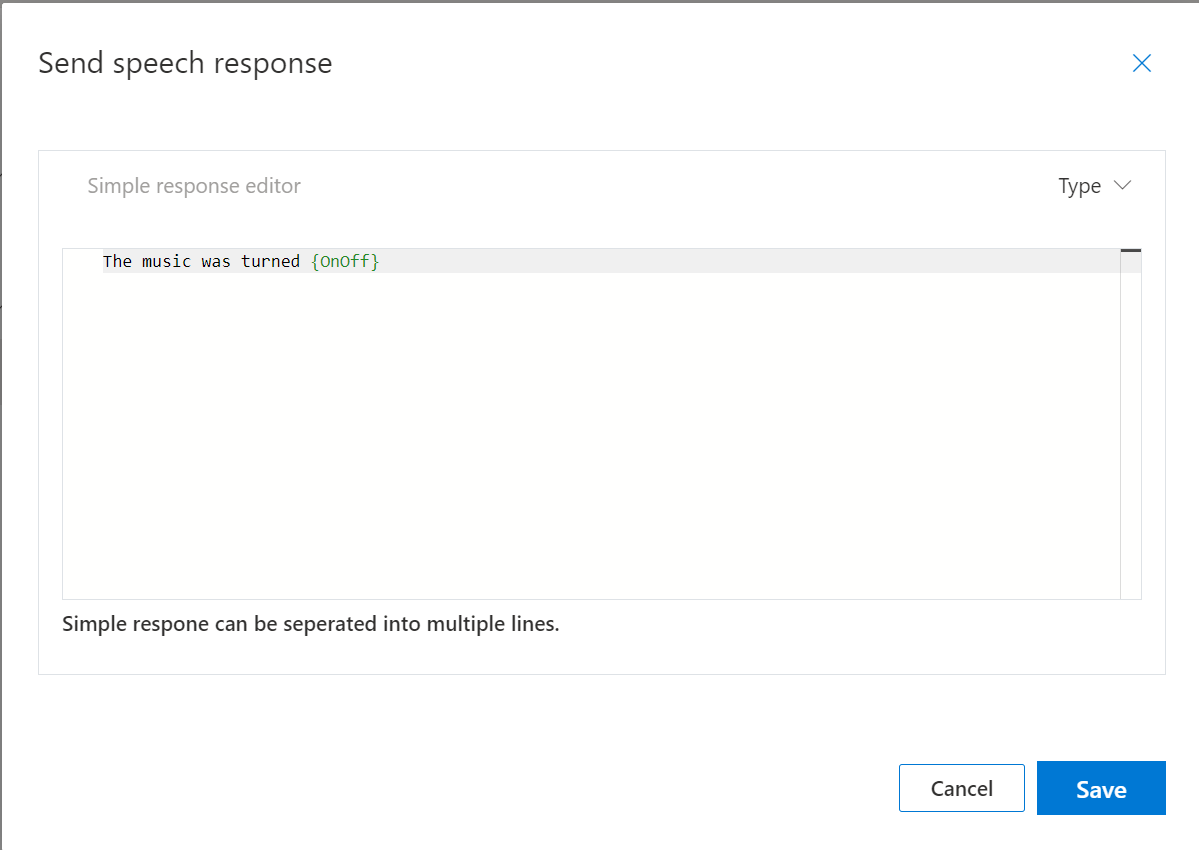
We’ll set the Speech Response to “The music was turned {OnOff}”;
Hitting the blue Save button will update the Completion Response.
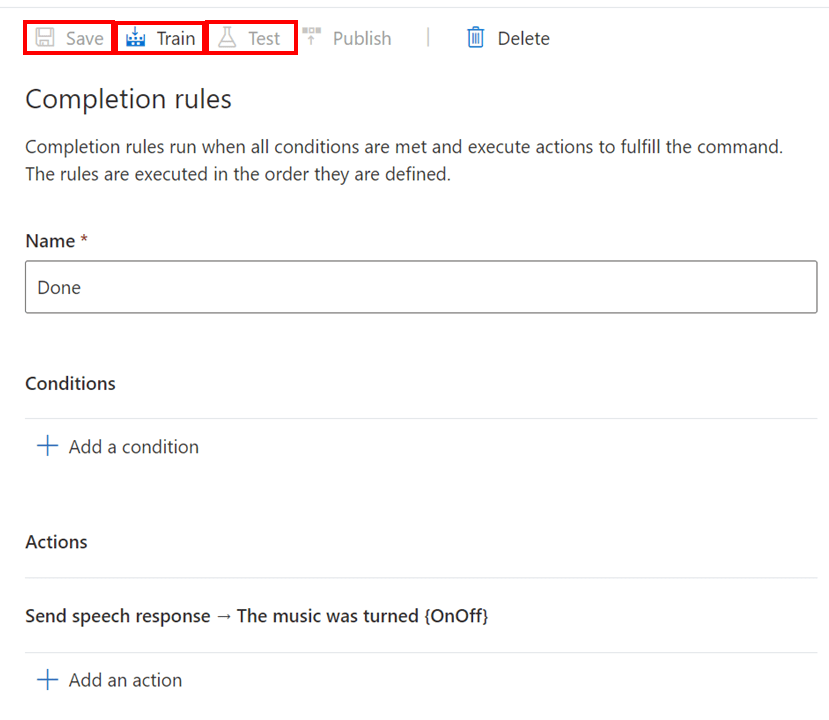
Test the updated Command
We’re now ready for testing again, we can hit the “Save” button, followed by the “Train” button and finally the Test button;
We’ll then be returned to the testing environment where we can see our new parameters in action;

Publishing the Command to the Percept
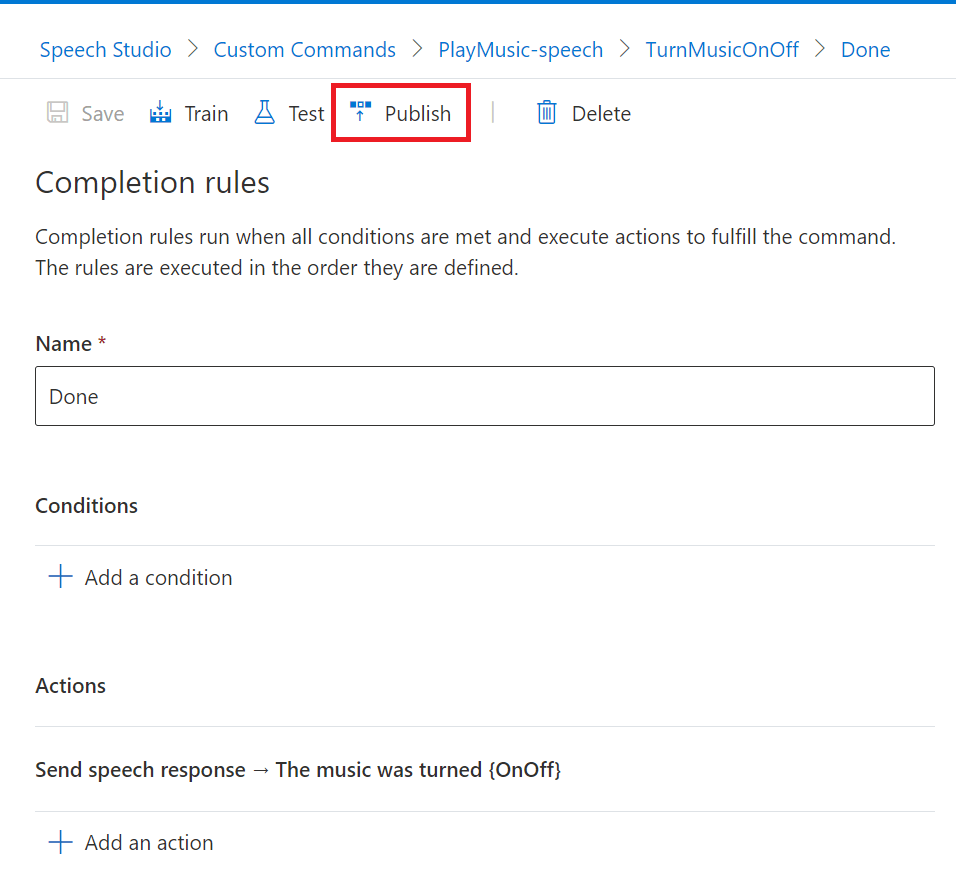
Now that we’ve tested the updated command, we’re ready to publish it to our percept so we can give it a go on the device itself.
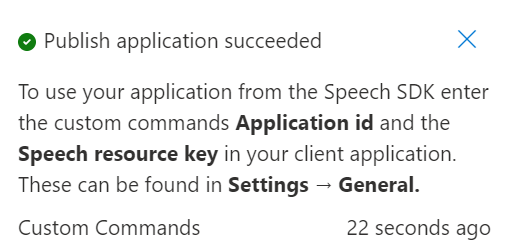
If we close the testing environment, we can hit the Publish button to begin publish process;
Speech Studio will then begin the process of Publishing the command to the Speech Project.

We’ll be notified when the Publish operation has completed successfully. As you can see, this process doesn’t take too long, with our example here only taking 22 seconds;
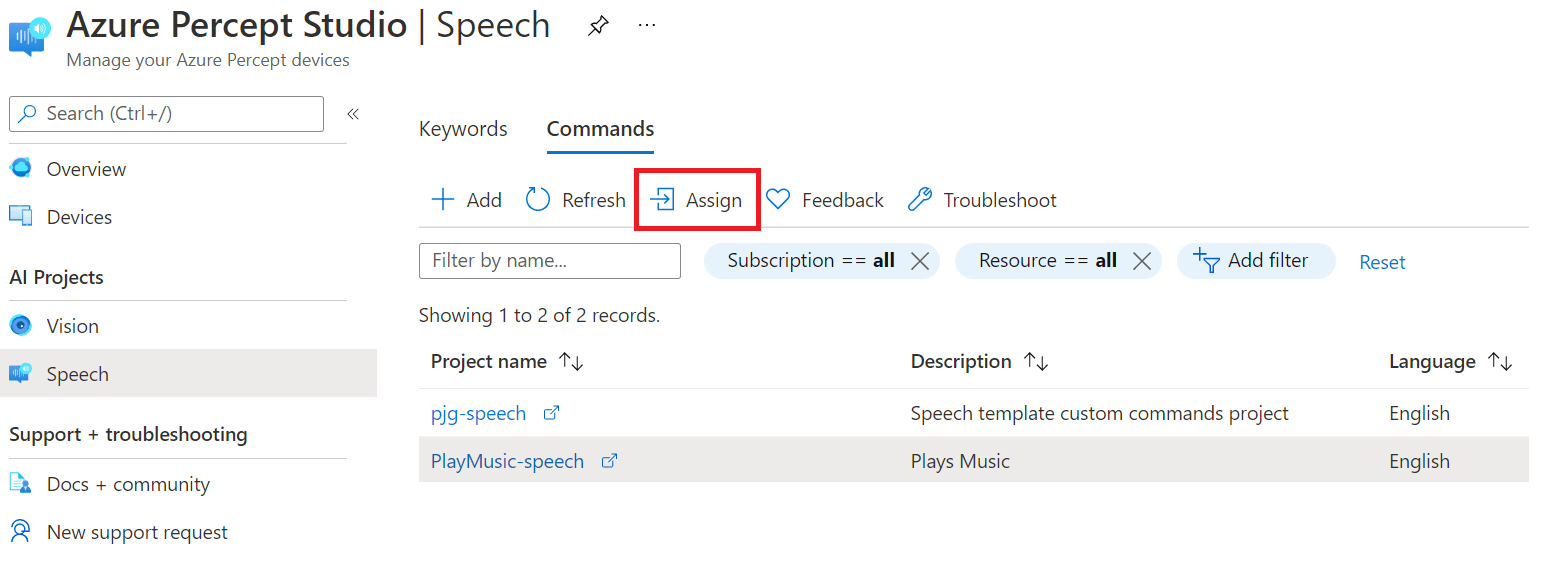
Next we need to Assign our new command to our Percept.
If we return to Azure Percept Studio at portal.azure.com/#blade/AzureEdgeDevices/Main/overview
We can then navigate to Speech using the menu item on the left and select the Commands Tab.
If select the row of our new Command, in our case the “PlayMusic-speech” row, we can then hit the “Assign” button;
We’ll then be shown the “Deploy to device” dialog, where we can select the IoT Hub and Percept device we want to deploy our new command to;
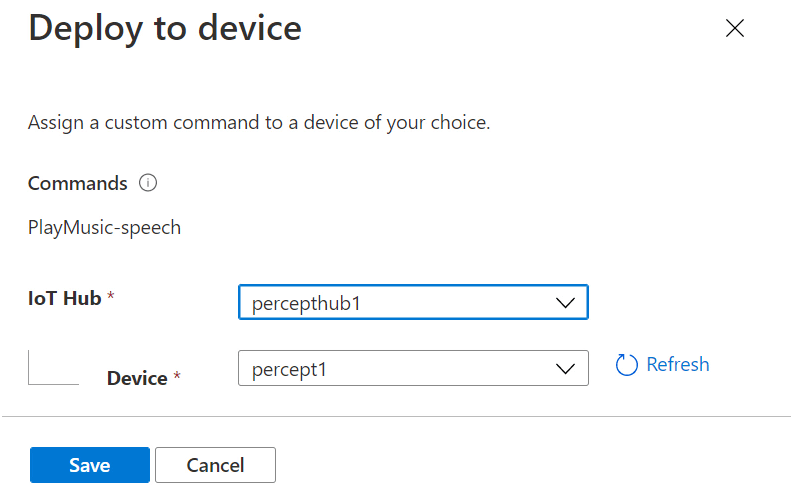
Hitting the “Save” button begins the process of deploying the new Command to the Percept;

The New Command in Action
As part of a special IoTeaLive show, I create a Video of my experiences working with the Azure Percept Audio Module, which you can find on YouTube here.
This is the section where I tested the new Custom Command;