What we did last time
In this series of posts we’re running through how to get Octopus Deploy setup, along with the required Azure Services, in order to deploy an ASP.NET Blazor app to Dev, Staging and Production environments.
In the previous post we set up our first Environment and began configuring out Deployment Location.
What we’re doing this time
In this post we’ll continue setting up our deployment location by linking our Azure Subscription to our Octopus Deploy instance and creating some Deployment Targets.
Contents
Part 1 – Environments and Deployment Targets
Part 2 – Linking Azure
Part 3 – Create Azure Web Apps + Staging and Production Deployment Targets
Part 4 – Create and Package a Blazor WebAssembly App
Part 5 – Octopus Deploy Projects, Variables and Processes
Part 6 – Create a Release
Part 7 – Send a Notification to Microsoft Teams
Prerequisites
Once again, for this tutorial you’ll need the following;
- An Azure Subscription
- Either a Cloud Hosted Octopus Deploy Environment or…
- … If you’re self hosting Octopus Deploy, a local SQL Server instance.
- The .NET 5 SDK
- Visual Studio Code
- For Teams Notifications – A Teams Environment with Admin access
Octopus Deploy Accounts
We’re currently part way through creating our Deployment Target;

Next up we need to set up the Azure account to which we’re going to deploy our Web App.
Octopus Deploy allows us to create accounts for a variety of platforms and login types including Azure, AWS, SSH Key Pairs and more.
We currently don’t have an account setup, so we can hit the “+” button to the right of the development account. We’ll then be shown the Accounts Page;
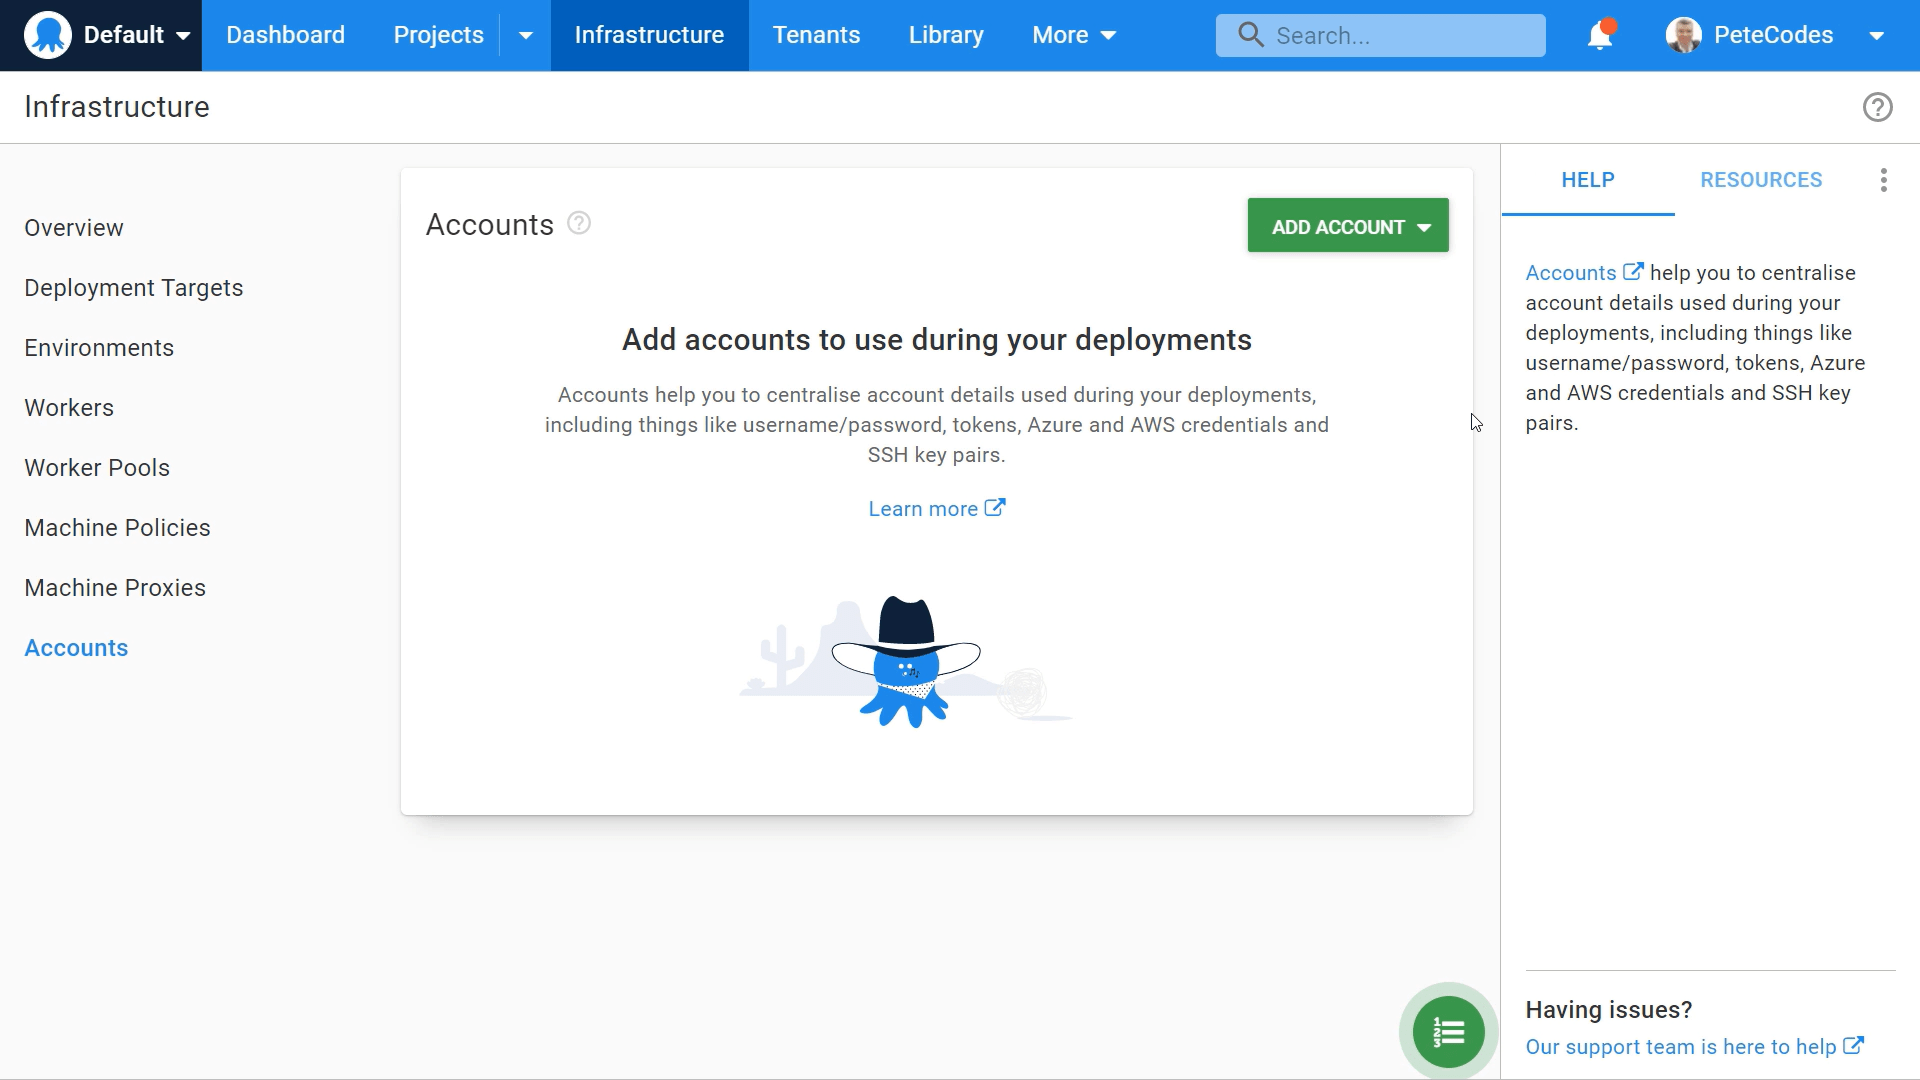
If we already have some accounts set up, then this page will give us a list of them. We don’t have any accounts yet so we can click the “Add Account” button in the top right corner of the page;
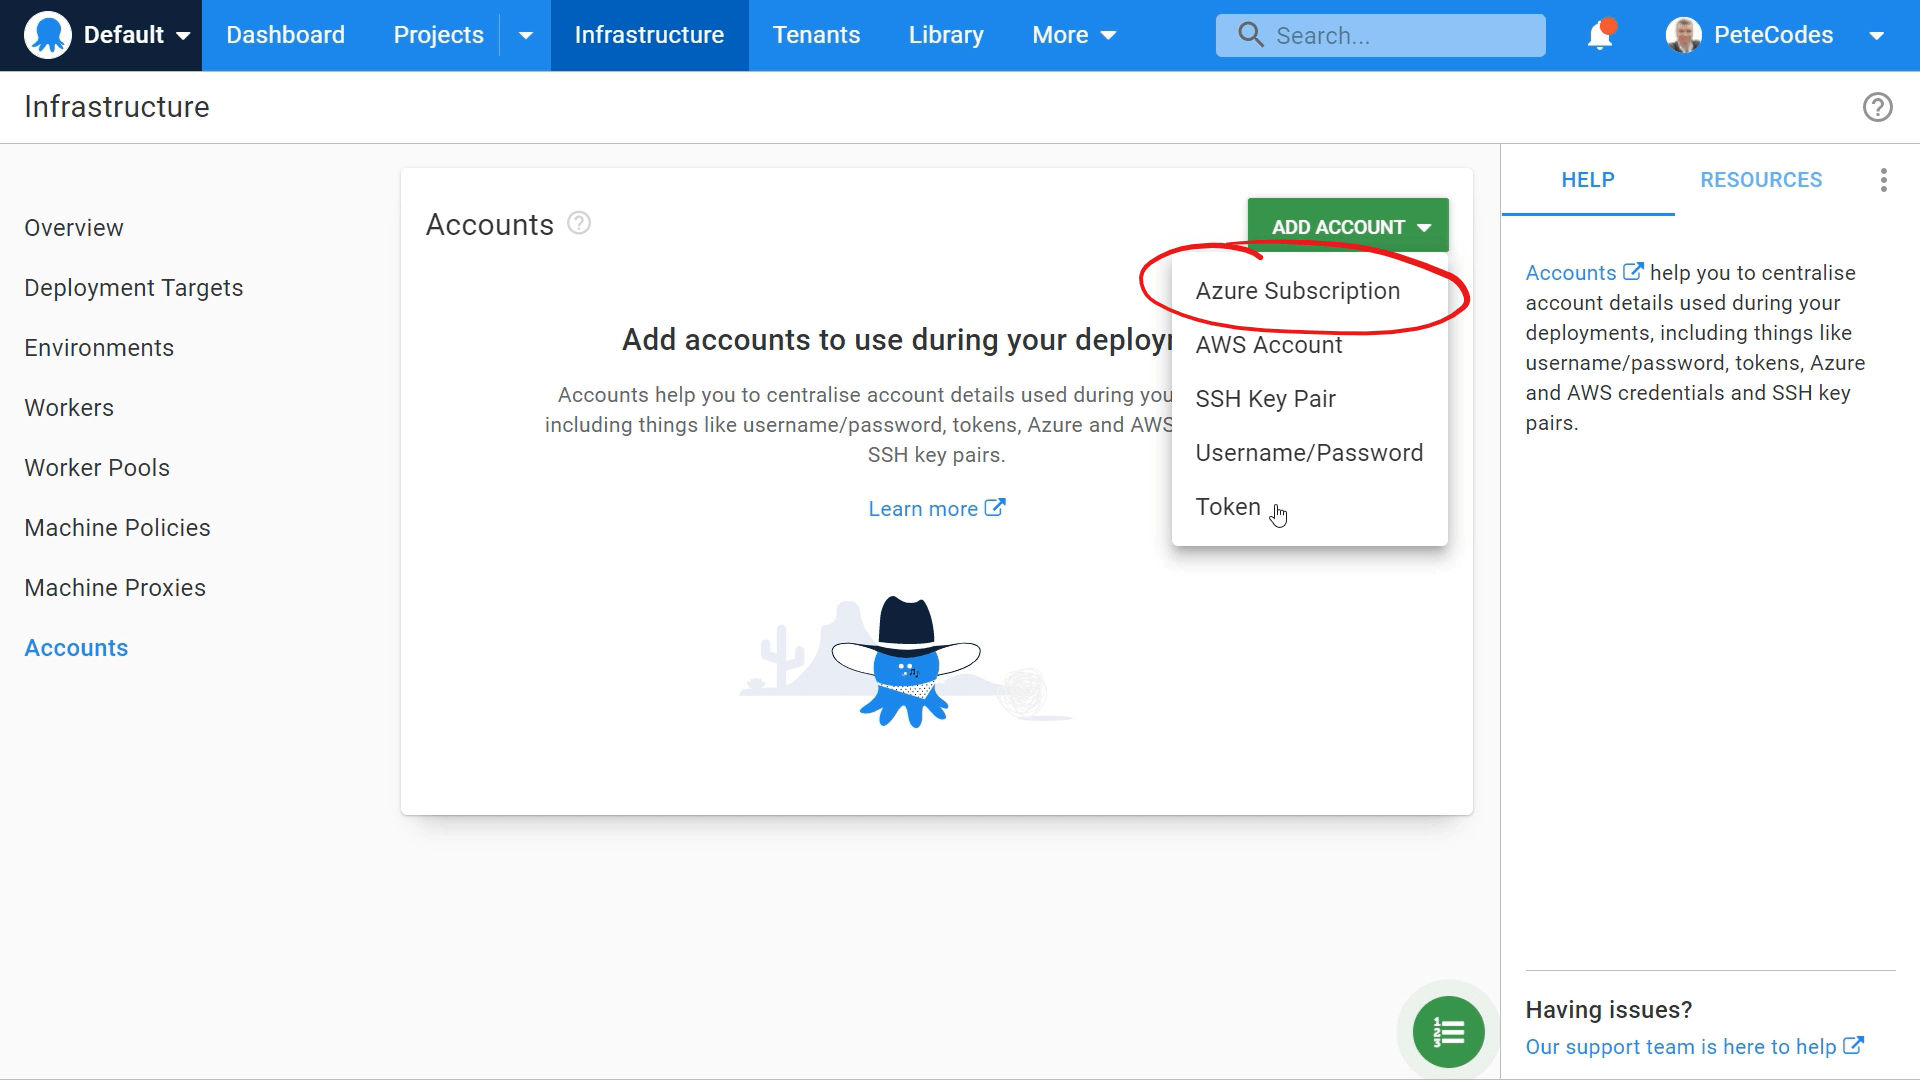
We can then choose the Azure Subscription item from the list of options. This will take us to the Create Account page for our new Azure Account;
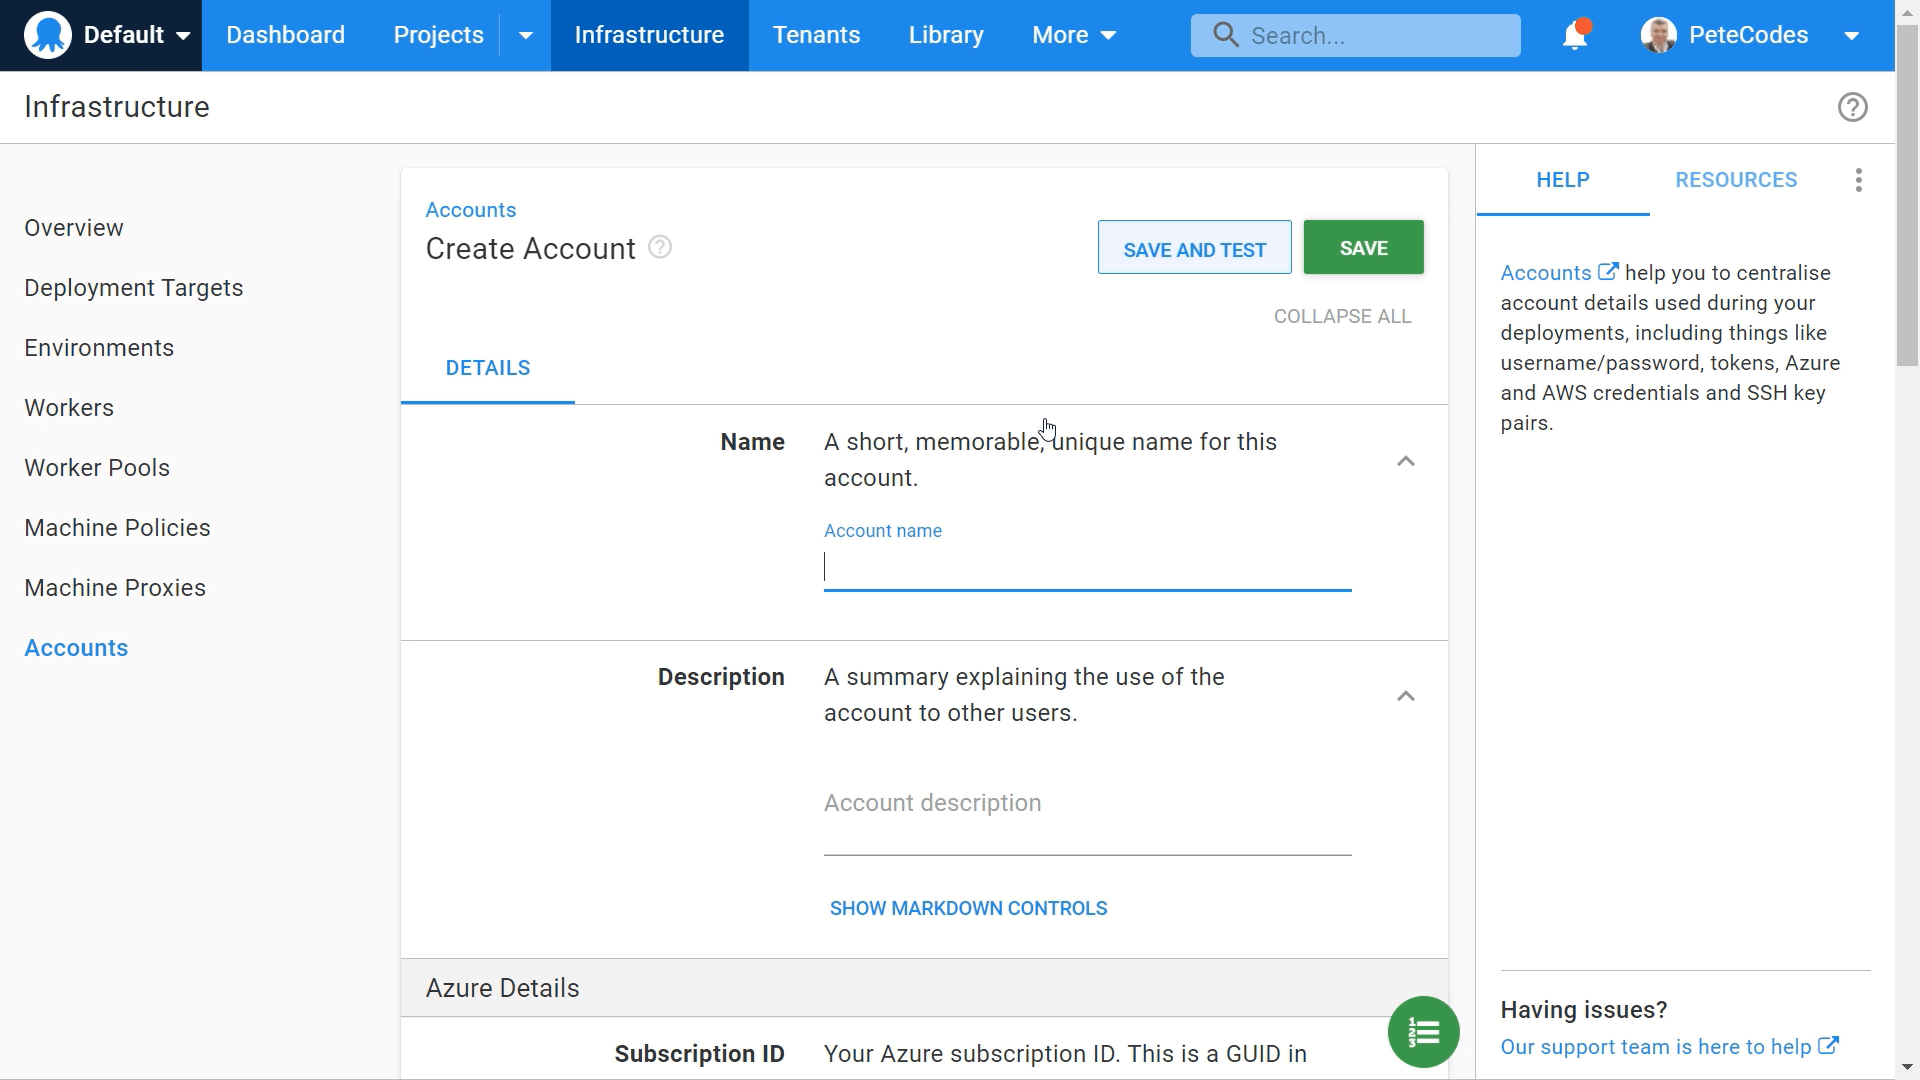
We can then give our Account a meaningful name. We’ll choose “Azure Sponsorship” here as that’s the name of my Azure Account.
We can also give our Subscription a Description in case the name doesn’t contain enough information to fully identify the Account. We’ll choose “Azure Sponsorship Account”;

Azure Subscription ID
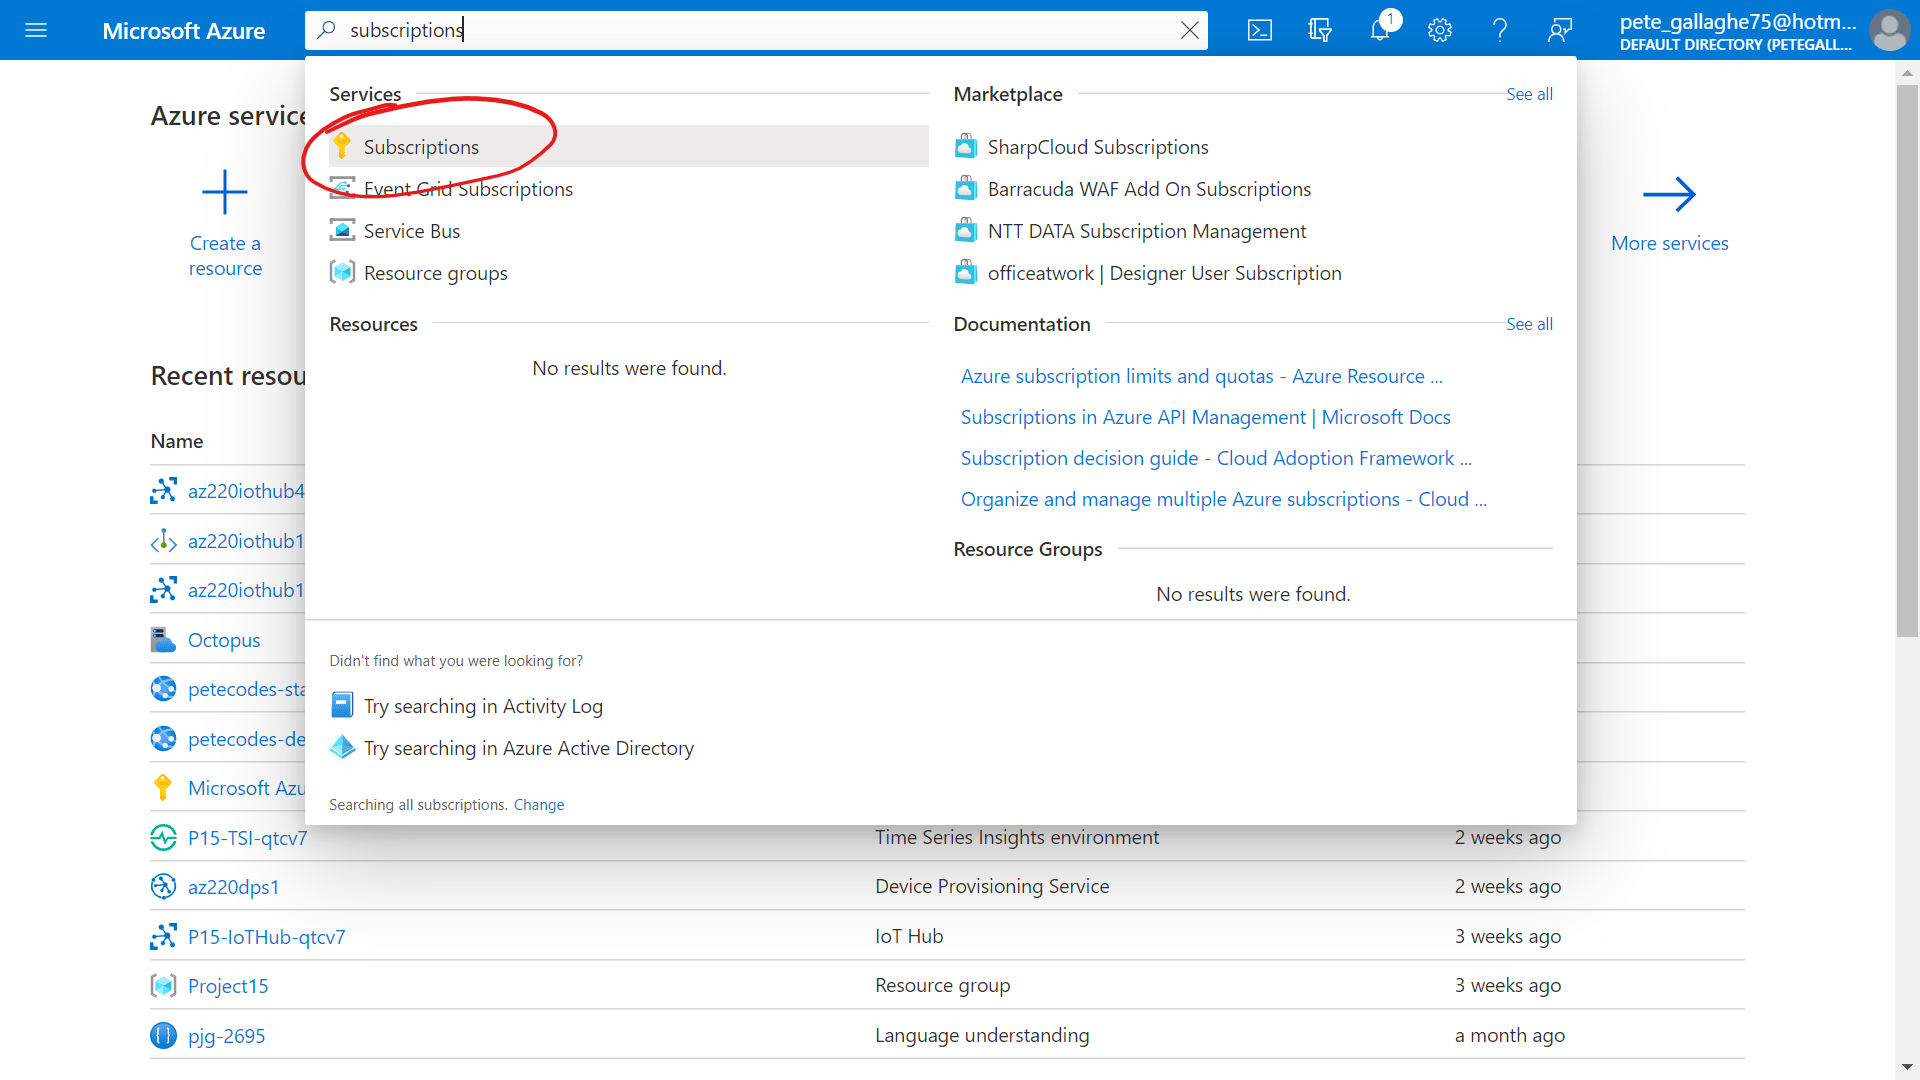
Next up we need a Subscription ID from our Azure Account. If we log in to the Azure Portal. We can search at the top for “Subscriptions” and select the “Azure Subscriptions” option from the list of results;
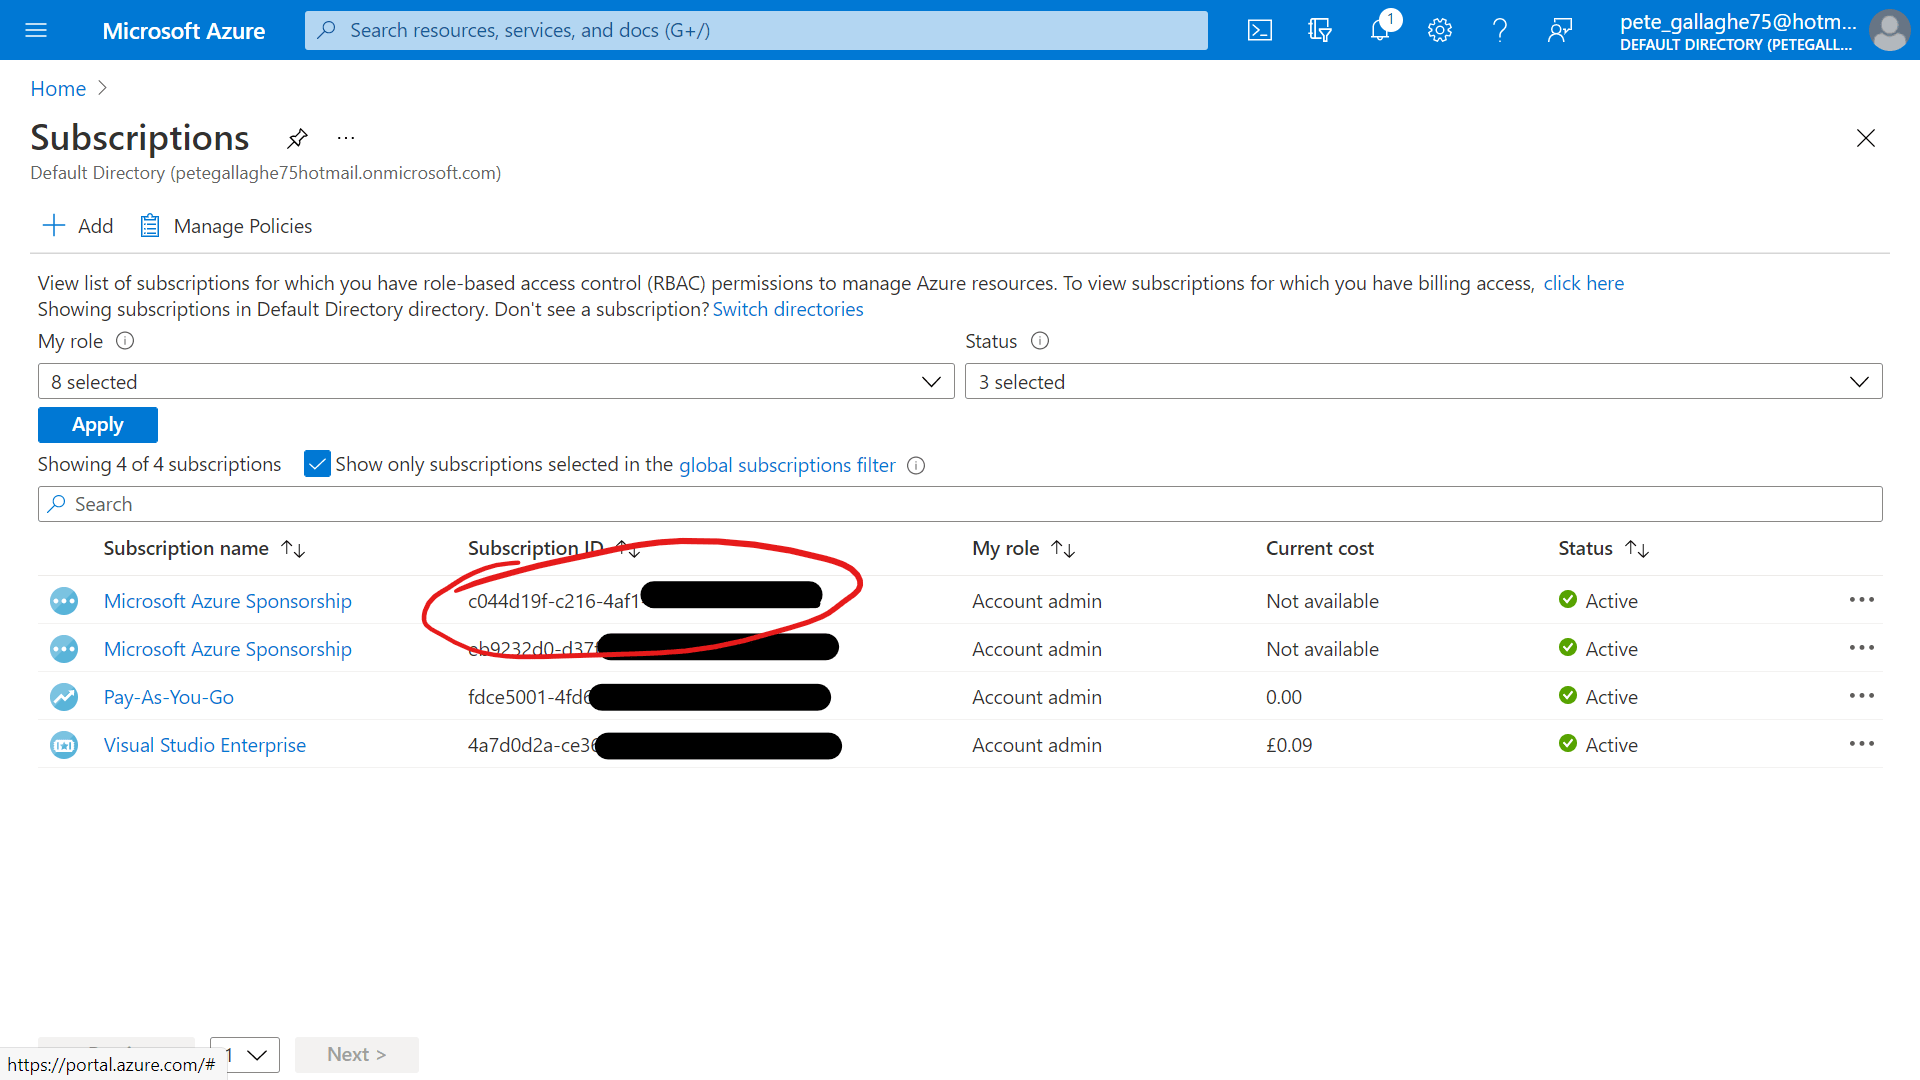
We’ll then be shown a list of our existing Azure Subscriptions, we can then copy the value from the “Subscription ID” column for the Azure Account we’d like to add;
We can then return to the Octopus Deploy Account Setup page and paste that in;
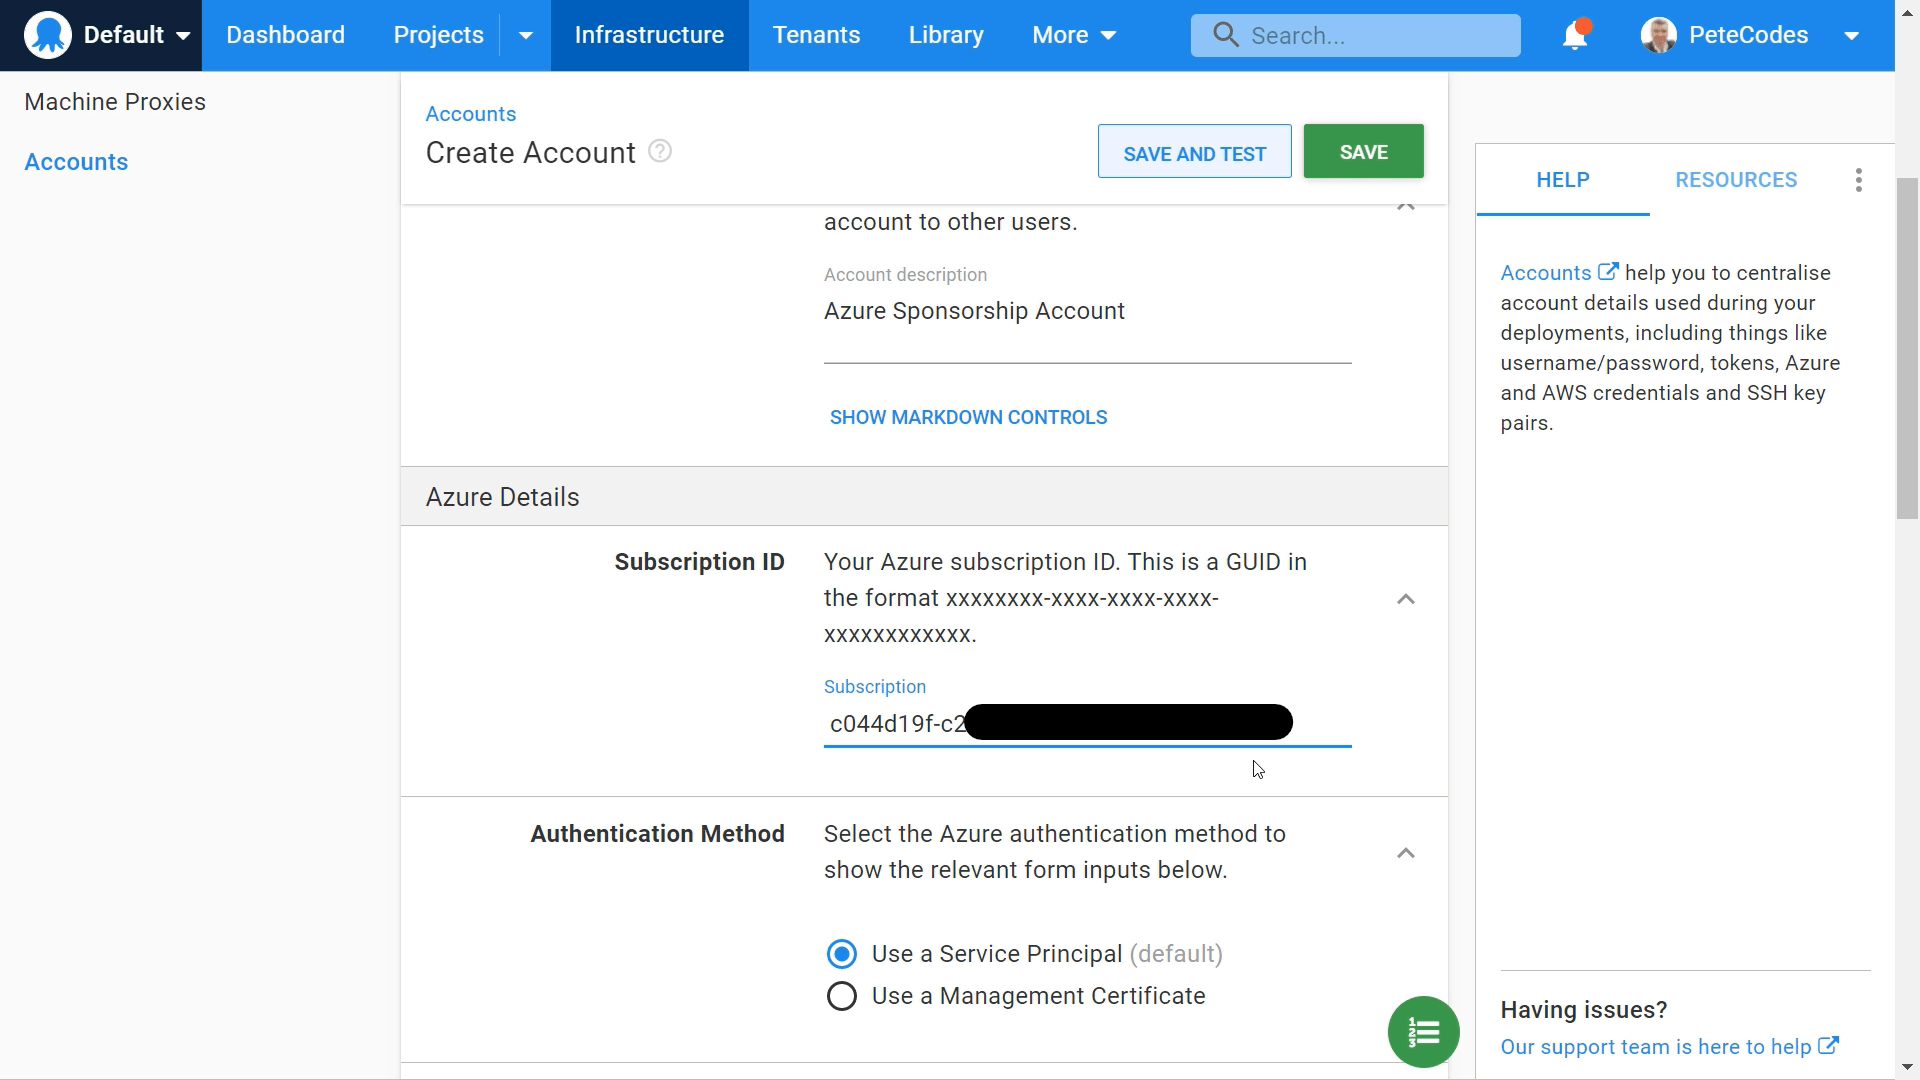
We can leave the “Authentication Method” at the default of “Use a Service Principal”.
Azure Tenant ID
The next field we need to fill in is our Tenant ID.
Once again, we can grab this from the Azure Portal, so returning there, we can search for “Active Directory” in the search bar and select the “Azure Active Directory” option from the list of results;

We’ll then be taken to the Azure Active Directory page, where we can click the copy button next to our Tenant ID;

We can then return to the Octopus Deploy Account Setup and paste that in;
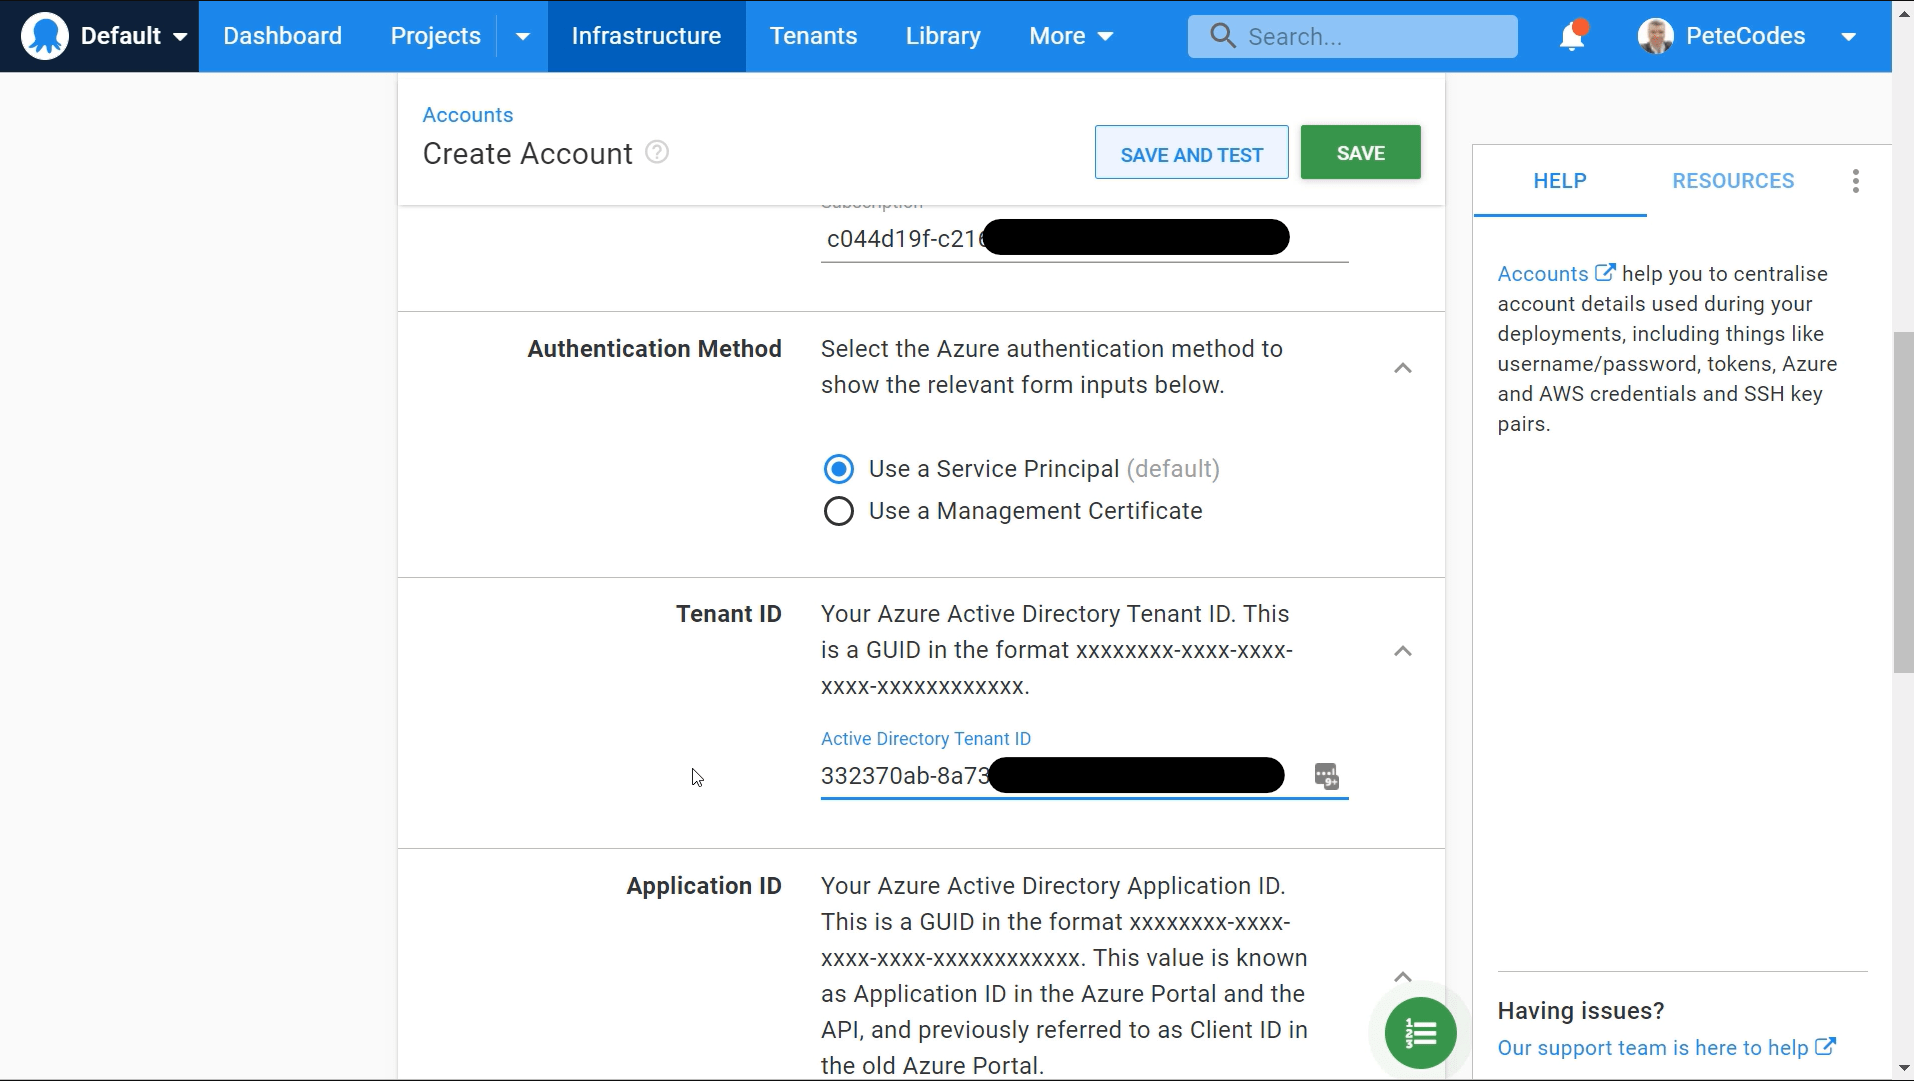
Azure Application Registration
The next bit of information we need is the Azure Application ID. This gives our Octopus Application access to the portal to perform operations.
If we return to the portal and to the Azure Active Directory page, we can create a new Application Registration by hitting the “+ Add” button at the top left of the Overview Pane, and hitting the “App registration” item;

We’ll be taken to the “Register an Application” page;
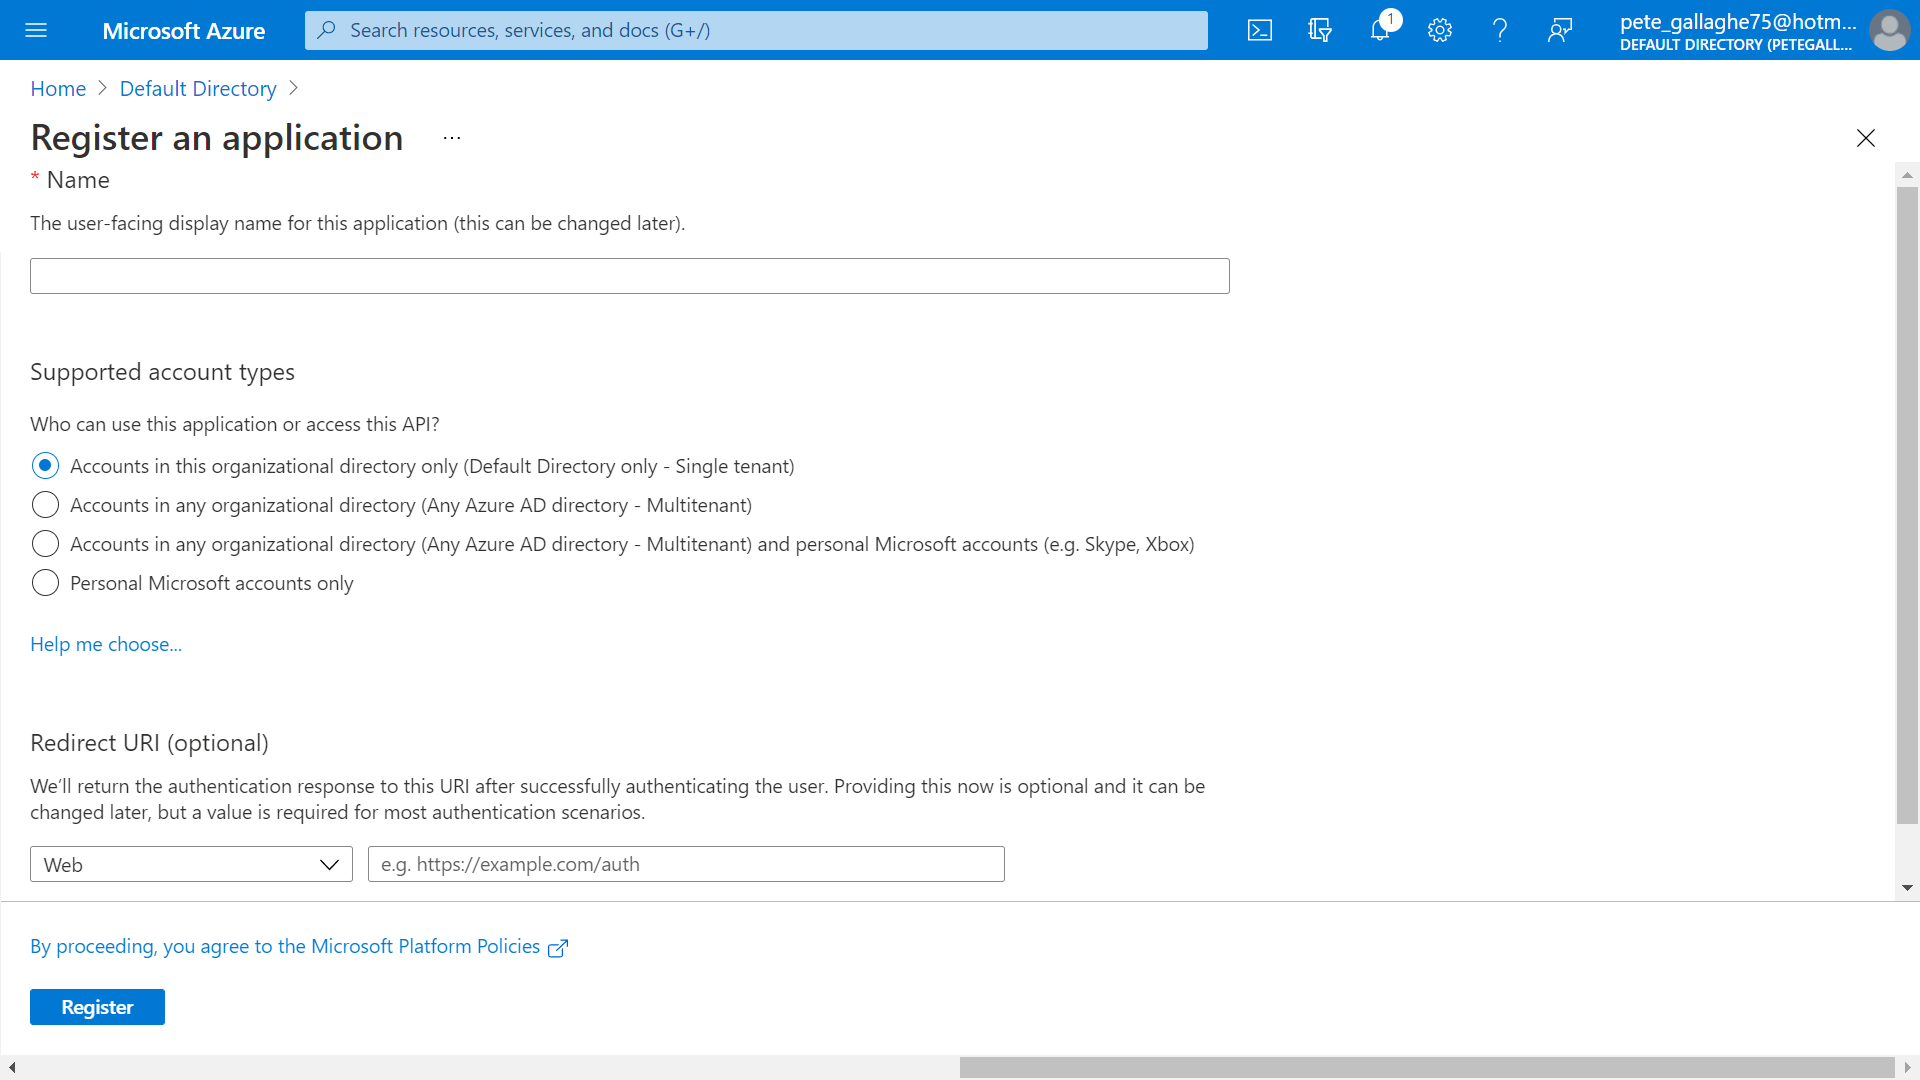
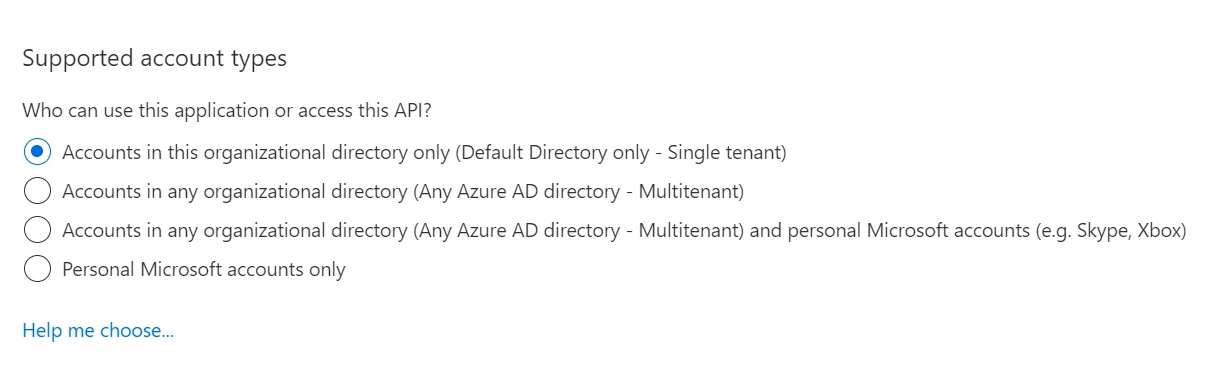
Here we can enter a name for our Application. We’ll choose “OctopusDeploy” here. Next, we can leave the “Supported account types” at “Accounts in this organizational directory only (Default Directory Only – Single Tenant)”;
For the redirect URI, this is going to be the location of your Octopus Deploy instance. For a self hosted instance, this will be a “localhost” address followed by a port.
For the Cloud Hosted option, this will be the address you chose when you created it.
In both cases, you can grab the URI from the address bar of your octopus instance. Just remove any trailing information and either stop at the port number for self-hosted, or at “octopus.app” for the cloud hosted option.
For our example, we’re using a self-hosted option, and the local instance address is “http:localhost:8090”;

We can now hit the save button at the bottom left of the page to register our new application.
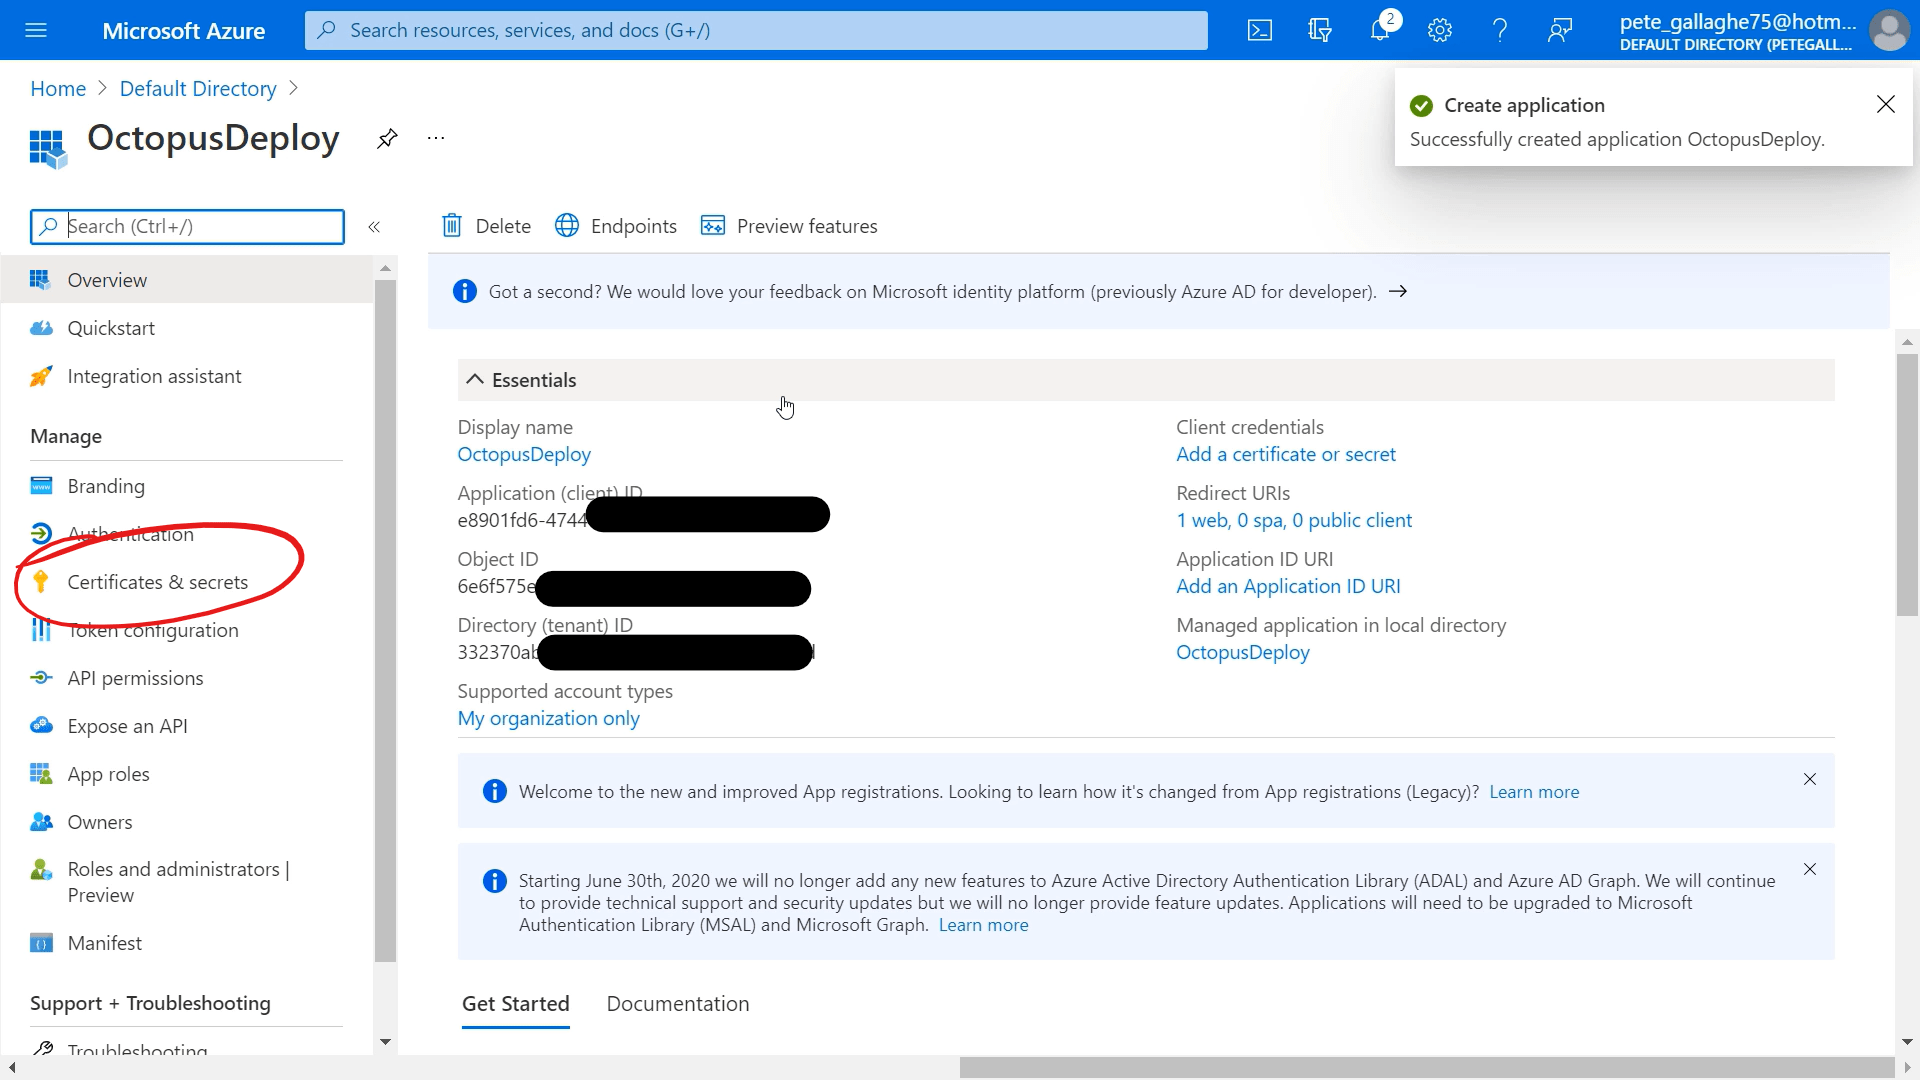
We’ll then be shown the Overview page for our Application;
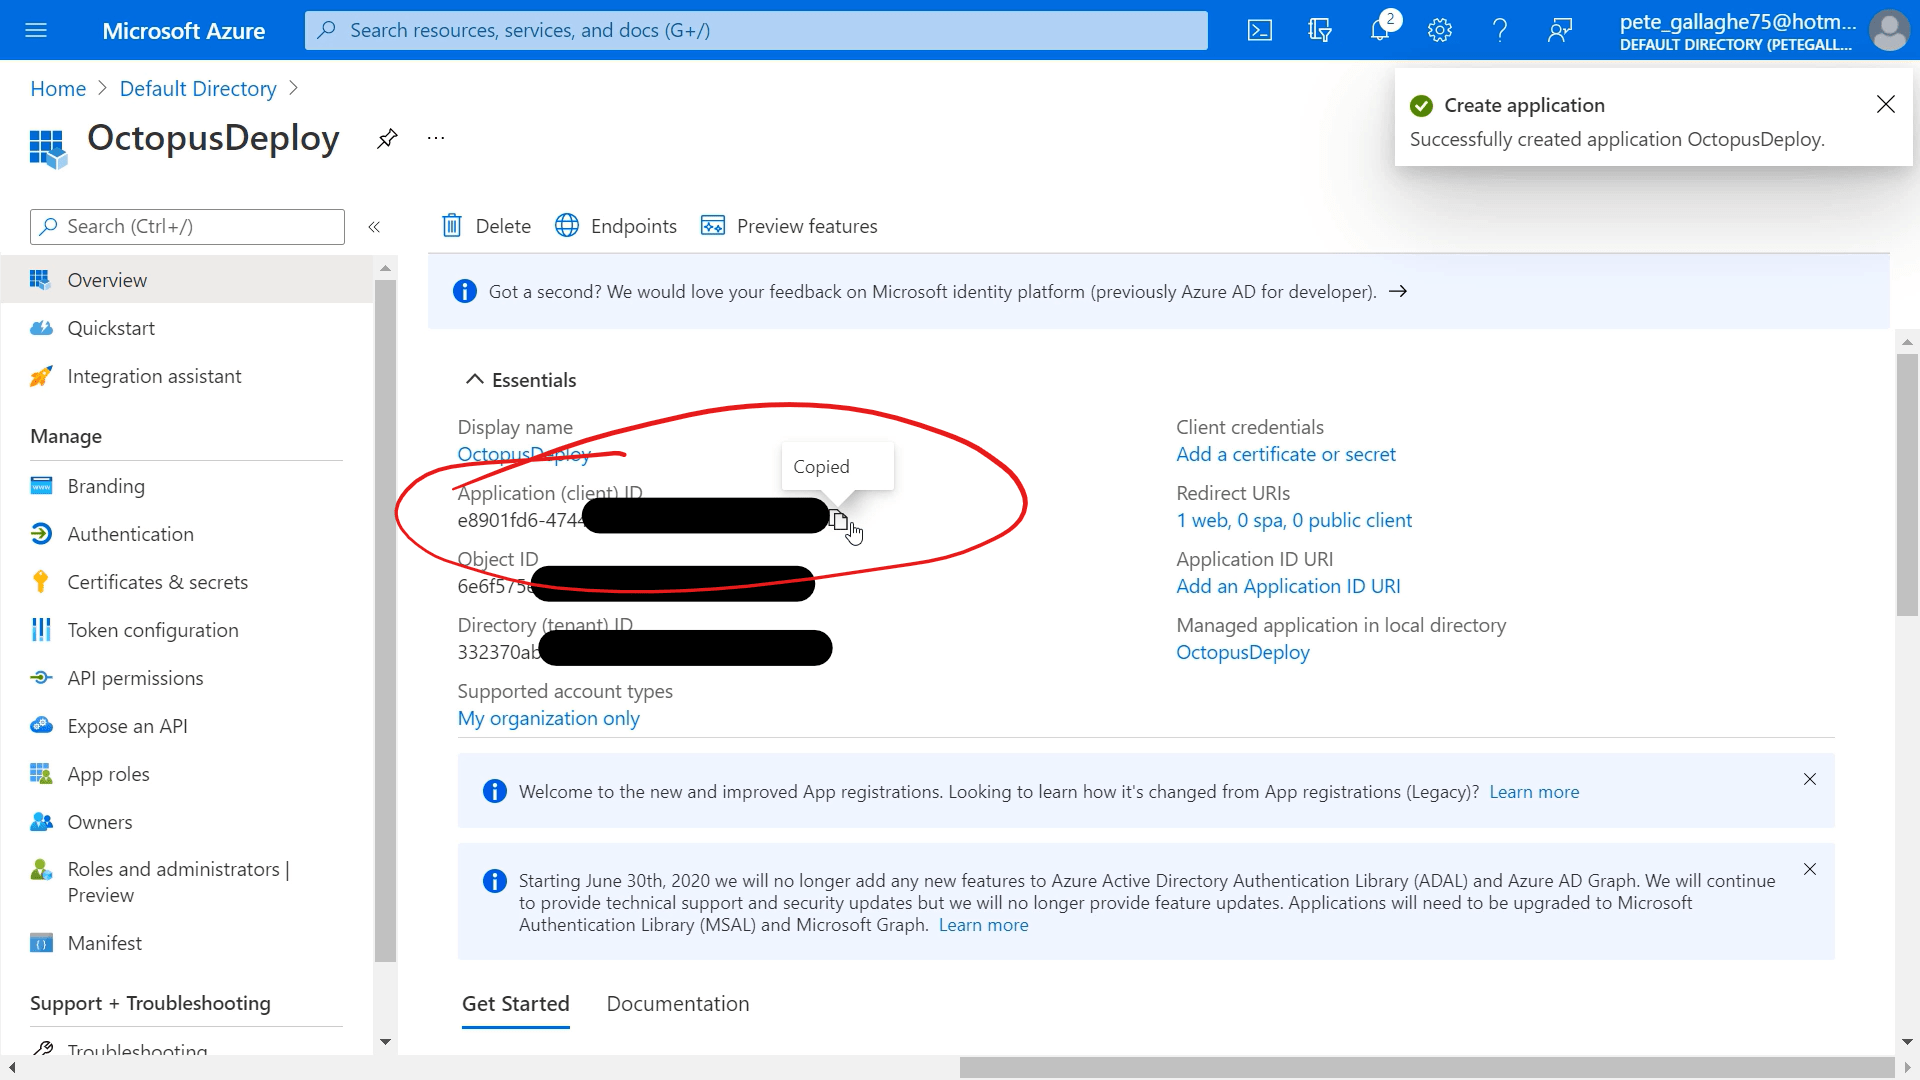
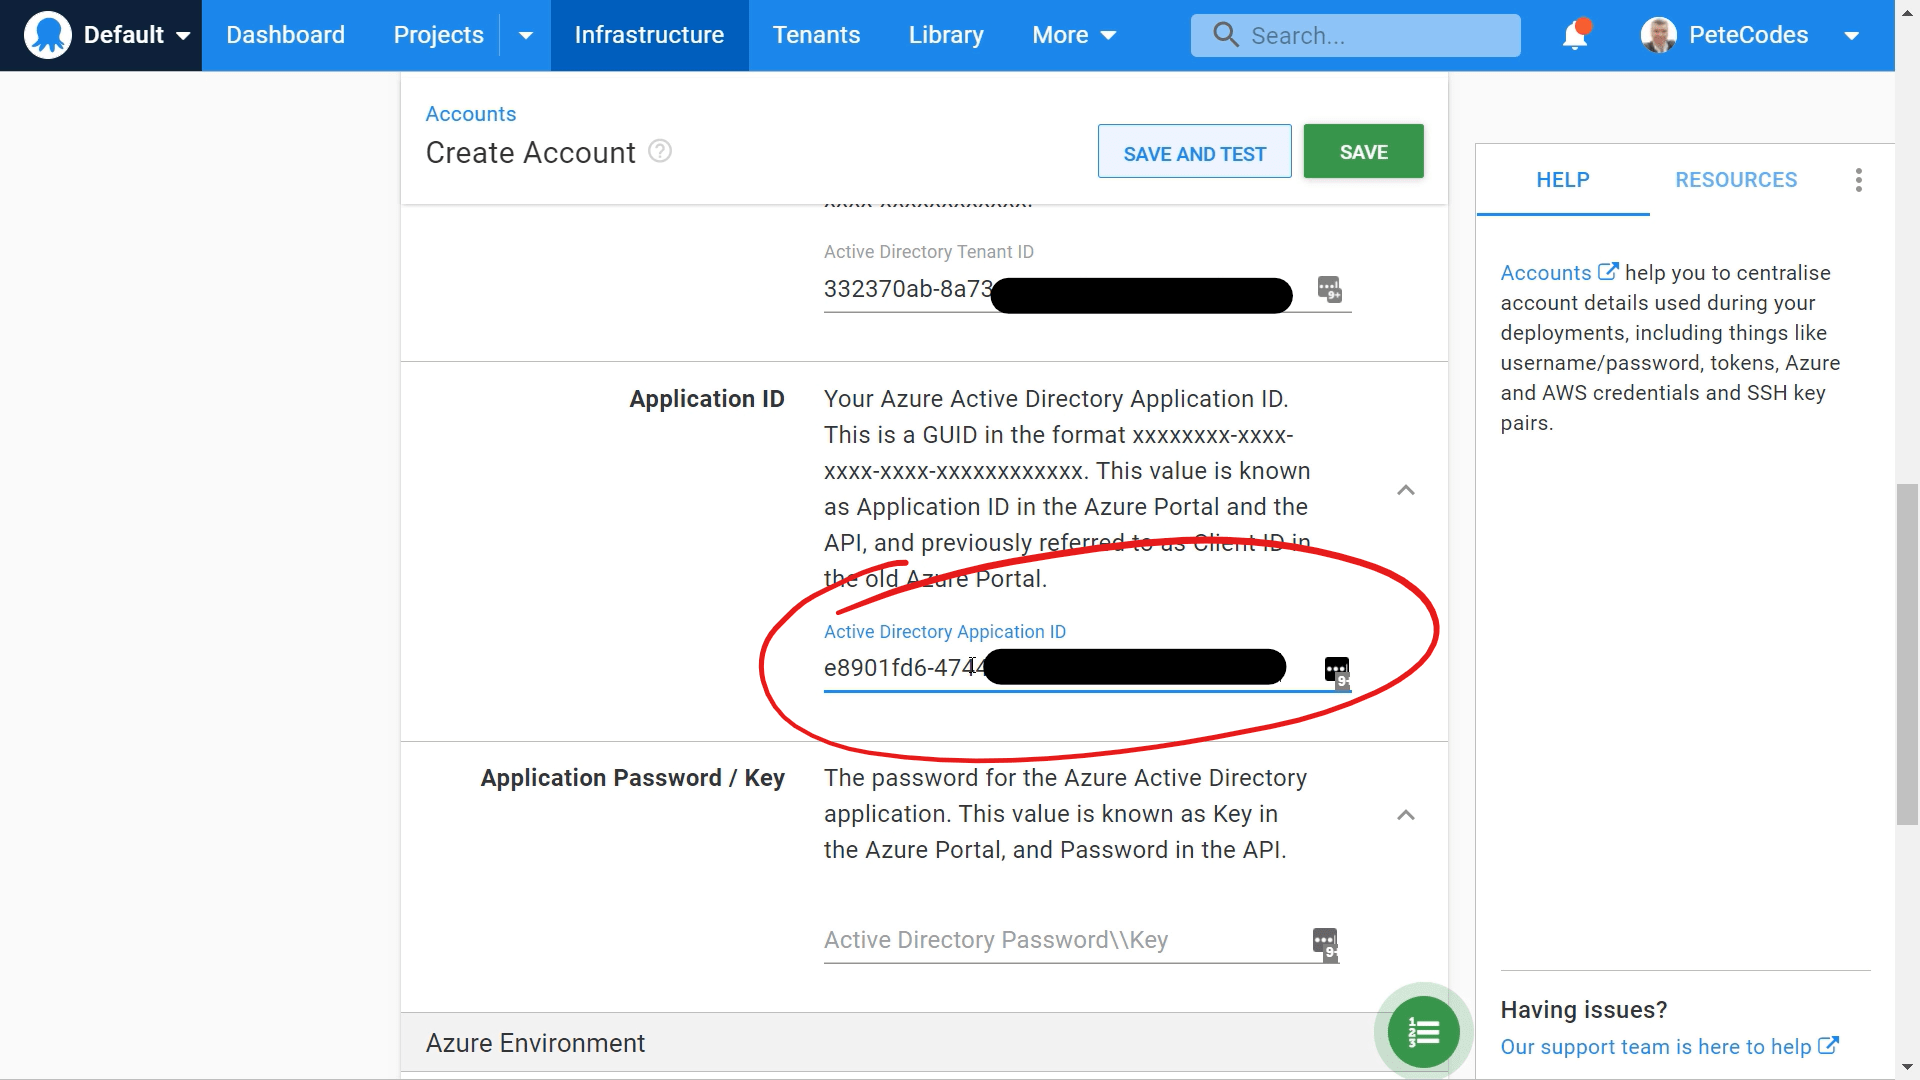
Hit the copy button next to the “Application (client) ID” value. We can then return to the Octopus Deploy Setup page and paste it in;
Azure Application Password / Key
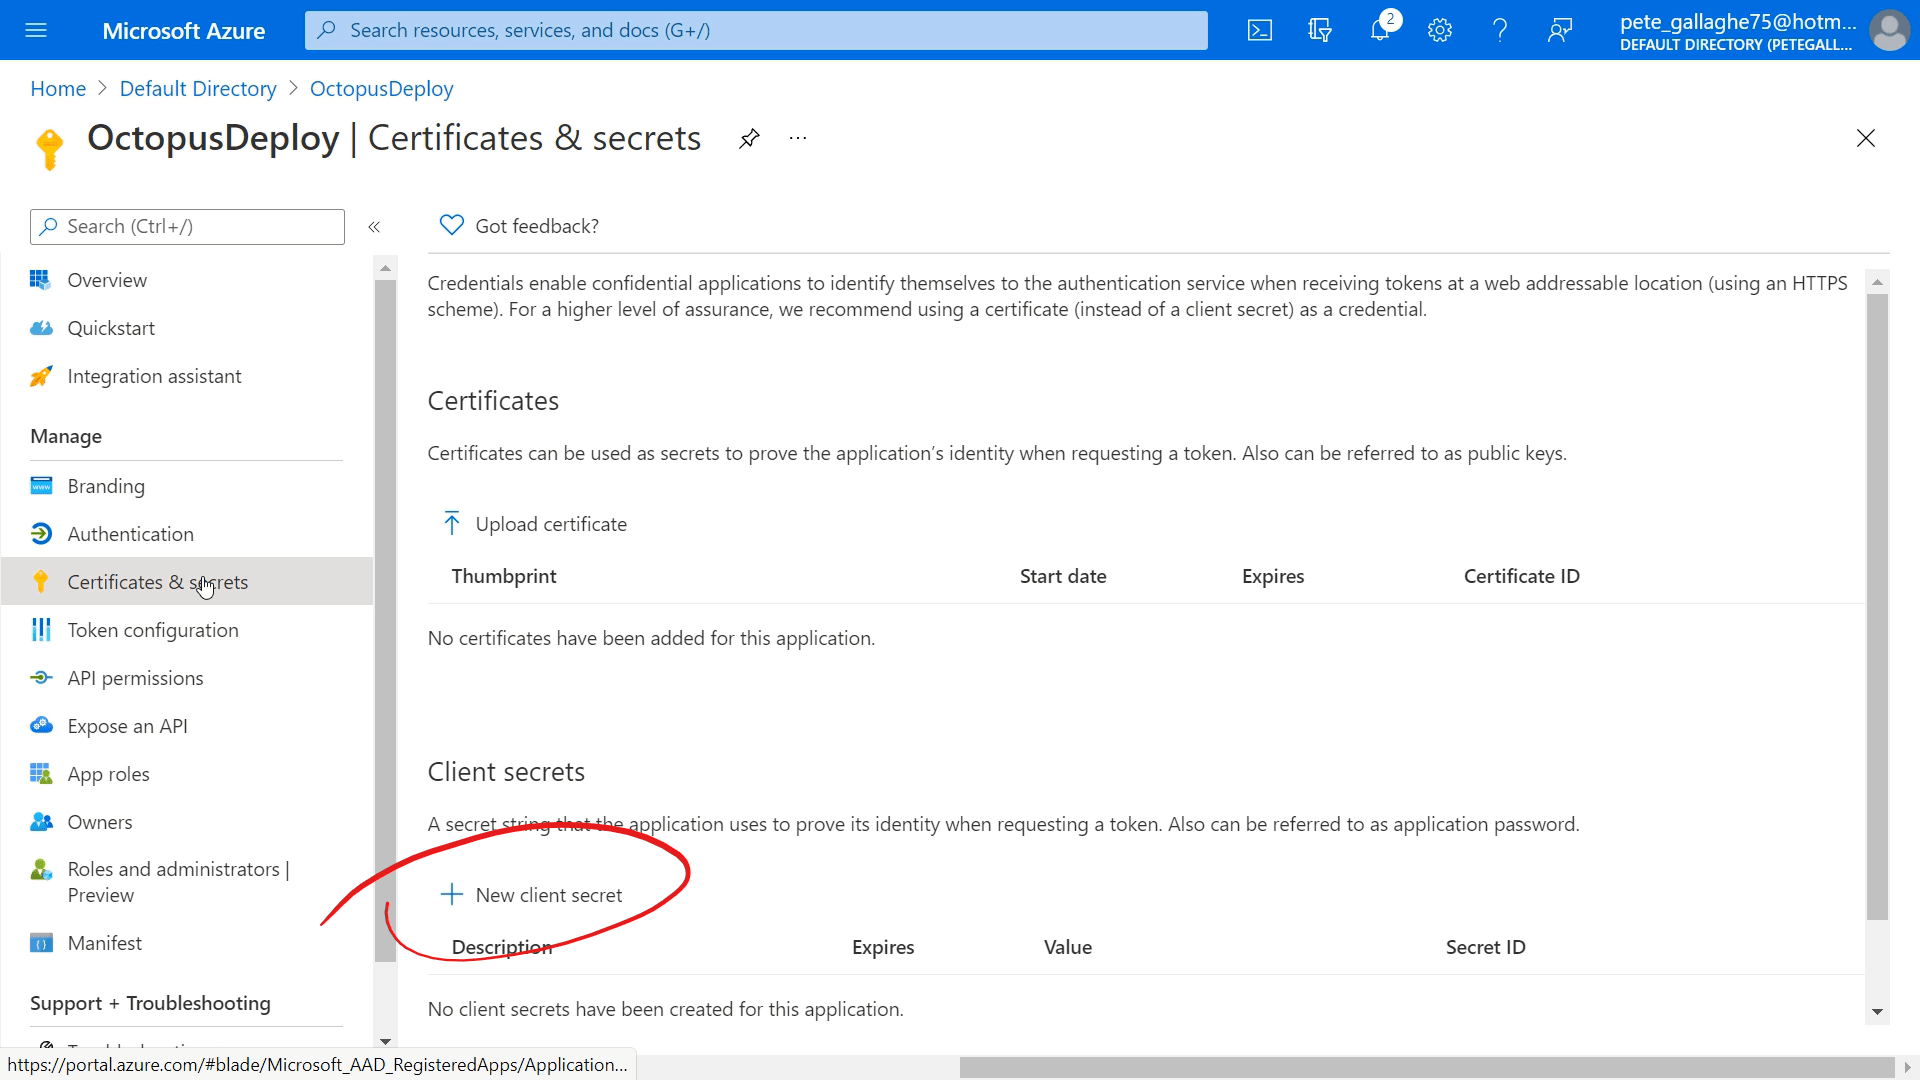
Next we need an Application Password or key… If we return to the Portal and to the Application Overview page, we can click the “Certificates and Secrets” menu item on the left;
We’ll then be taken to the “Certificates and Secrets” page. We can now create a new “Client Secret” by hitting the “+ New client secret” button towards the bottom of the page;
We’ll be shown the “Add a client secret” pane, where we can enter a description for this secret;
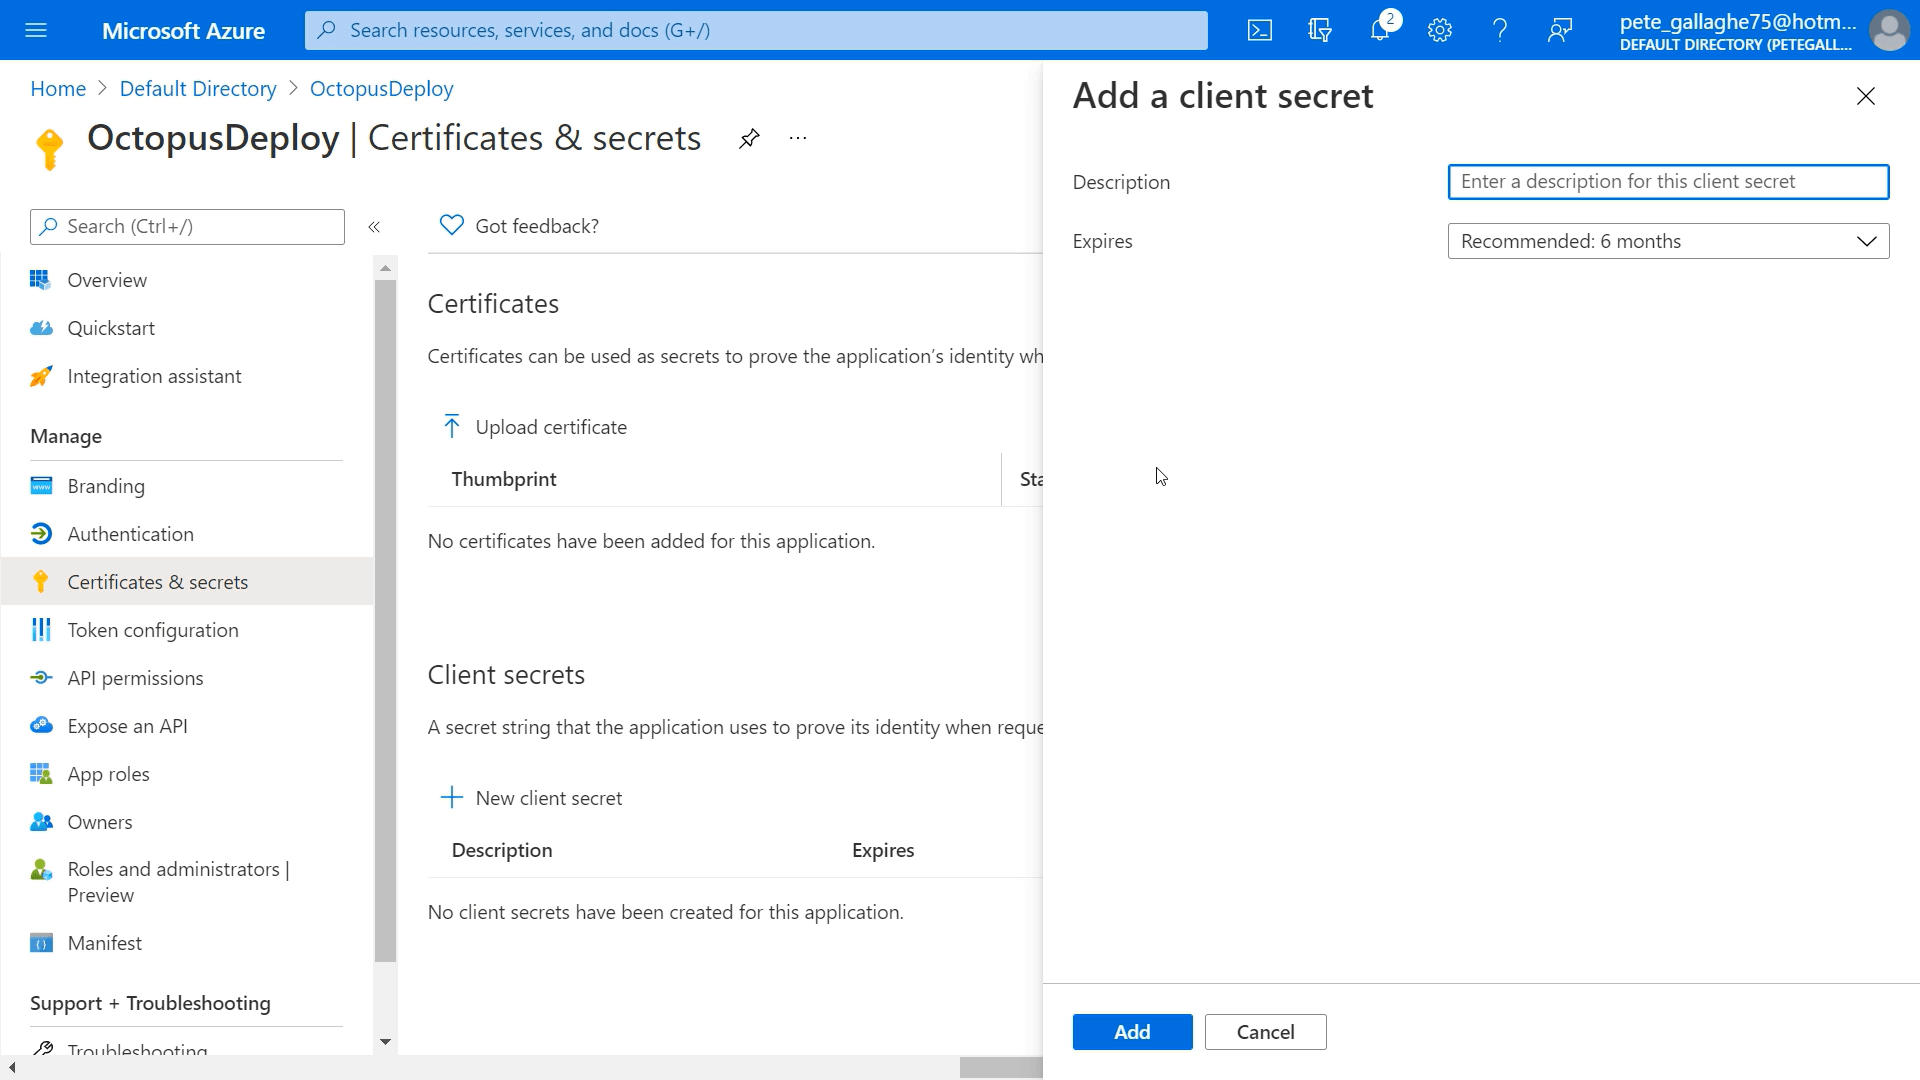
We’ll chose “Octopus”, and we can leave the “Expires” at “Recommended: 6 months”. Finally, we can press the “Add” button at the bottom of the “Add a client secret” pane.
Our client secret will then be created. We can copy the “Value” item by hitting the Copy button to the right of the Value;
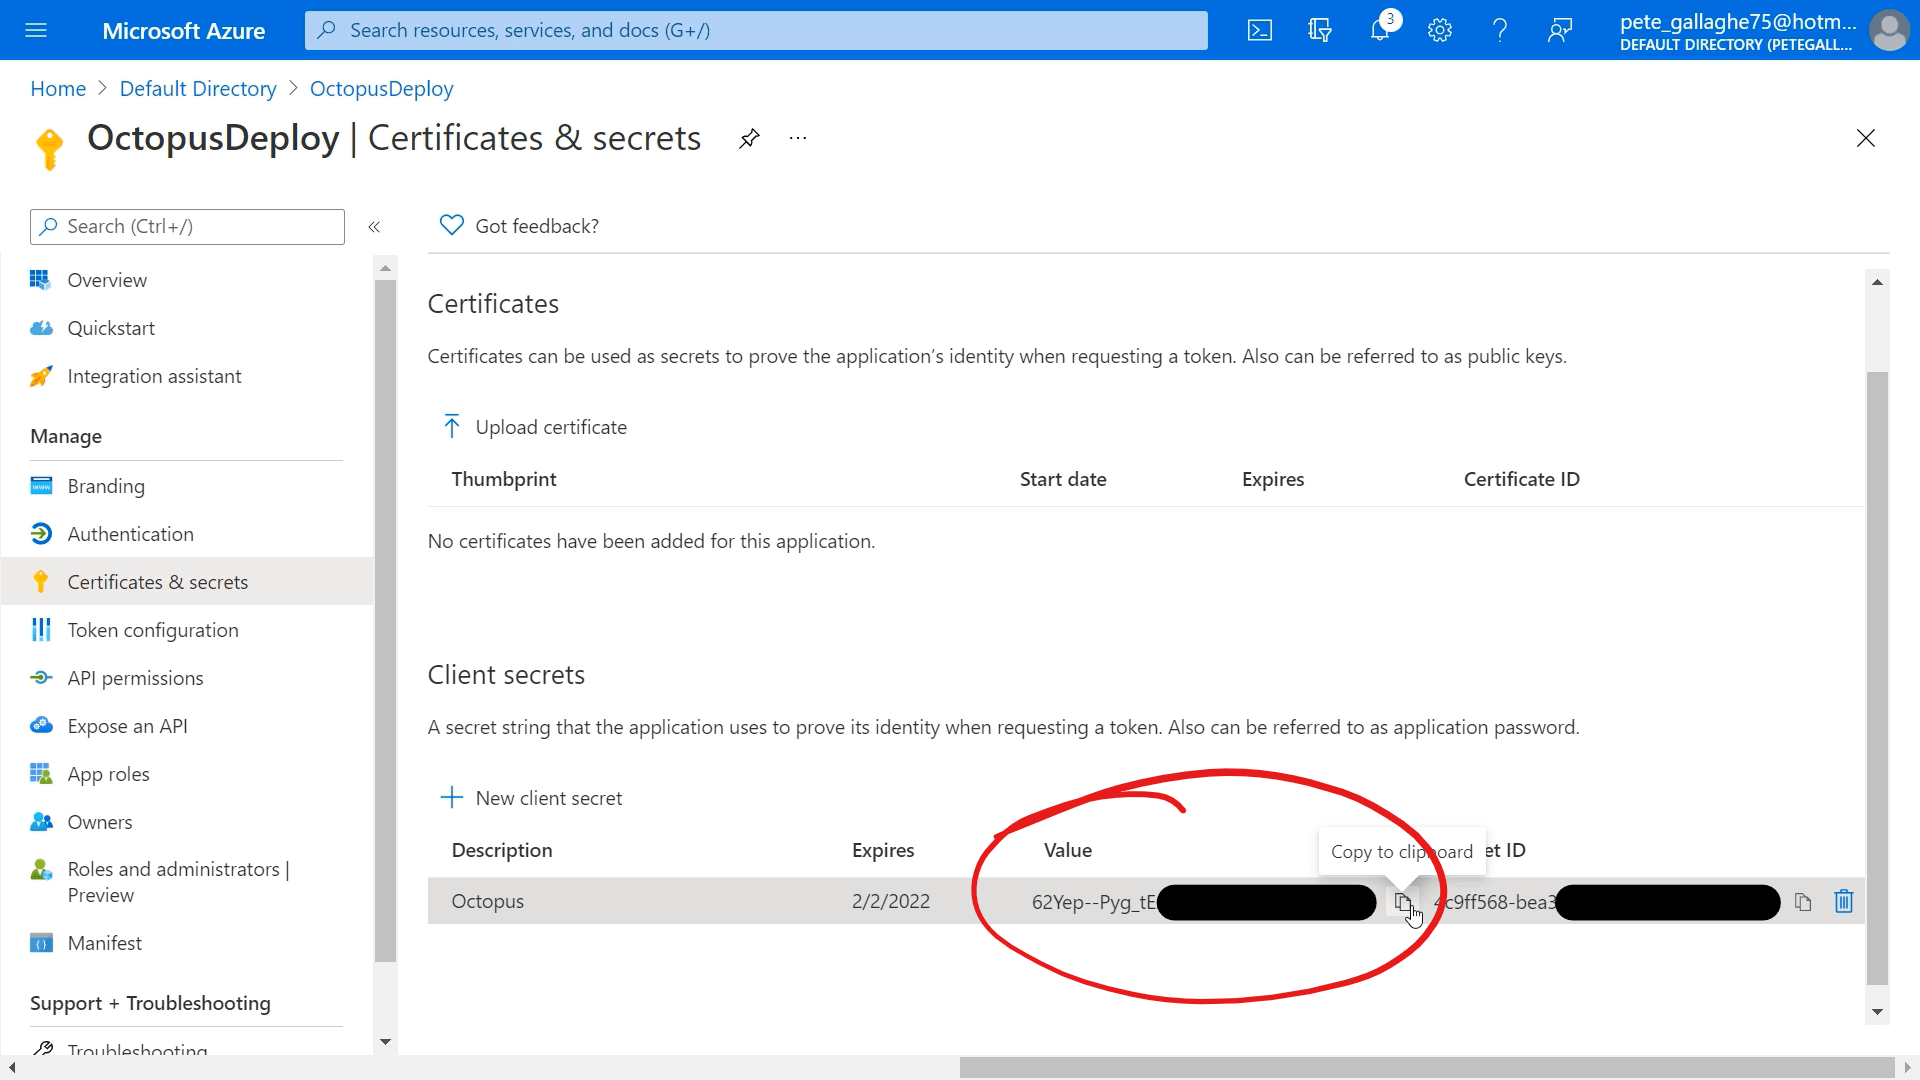
We can then return to Octopus Deploy Setup page again and paste our secret in;
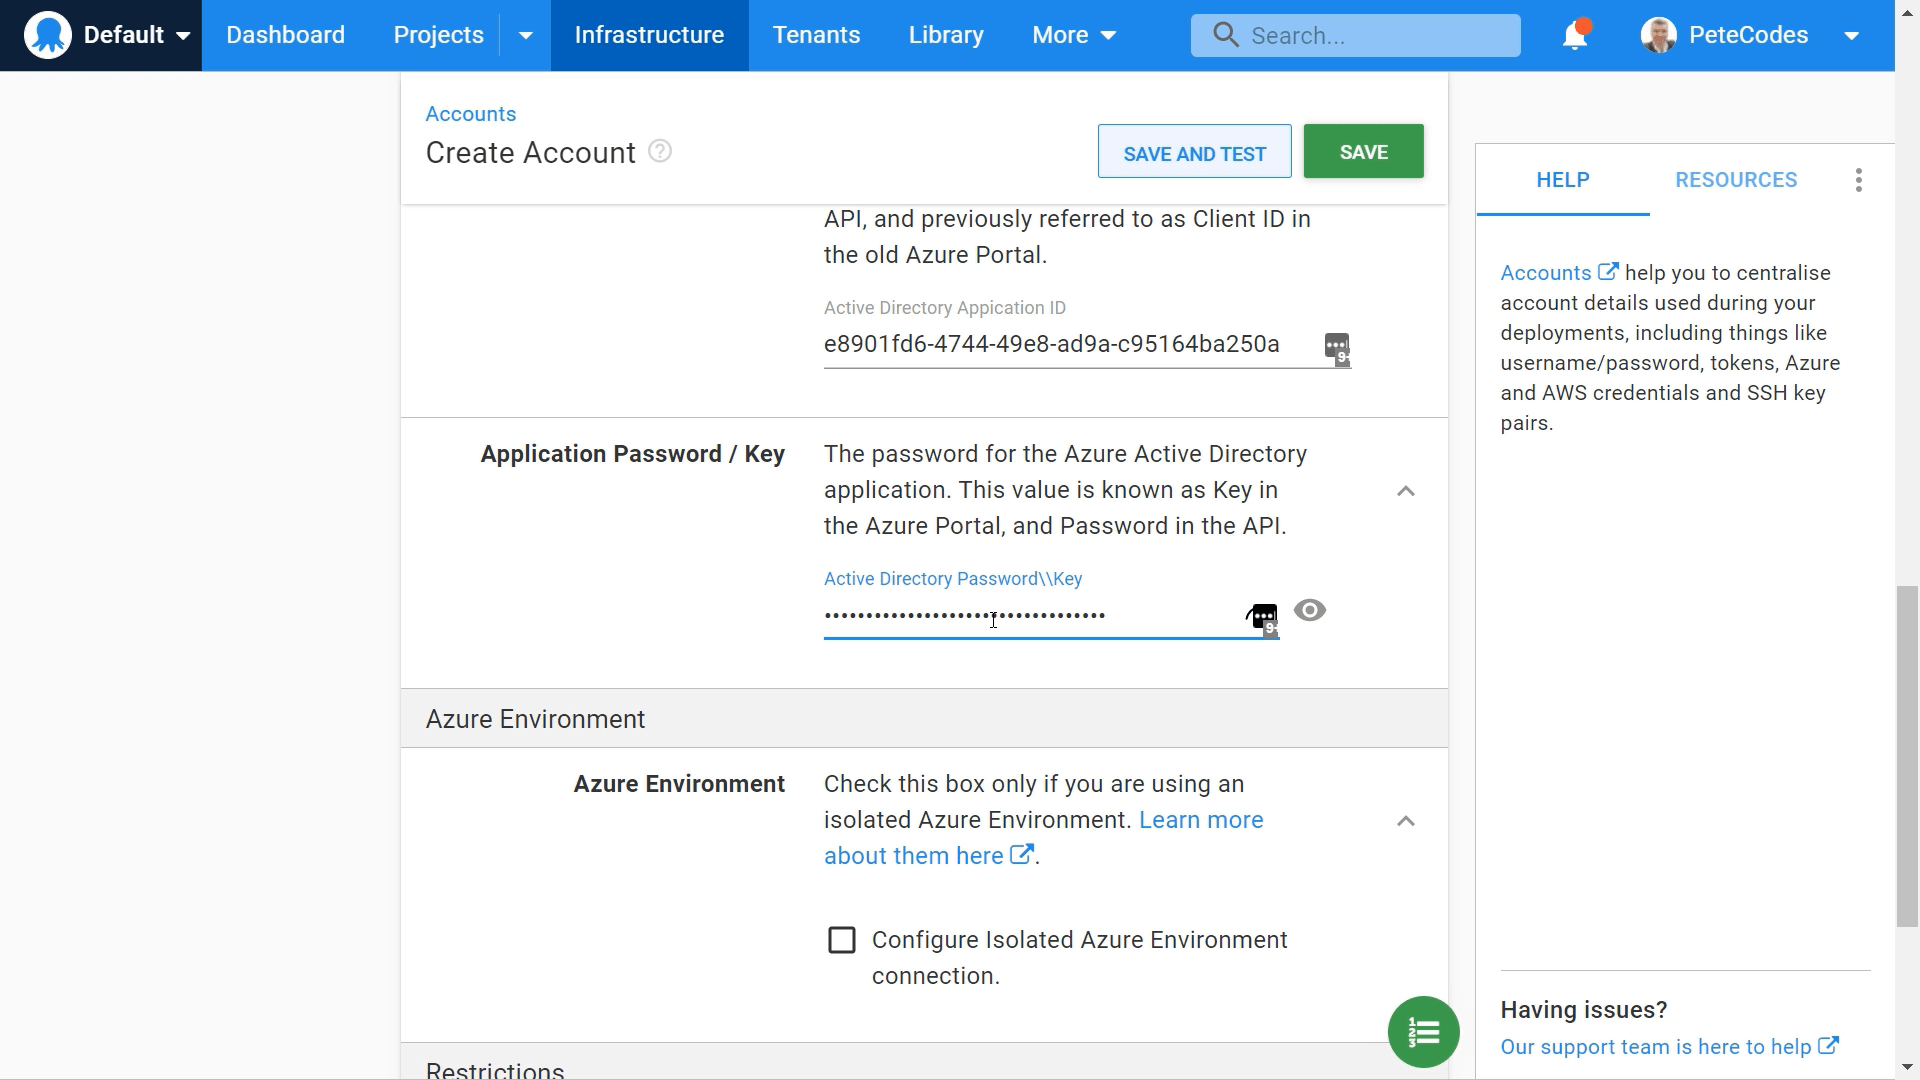
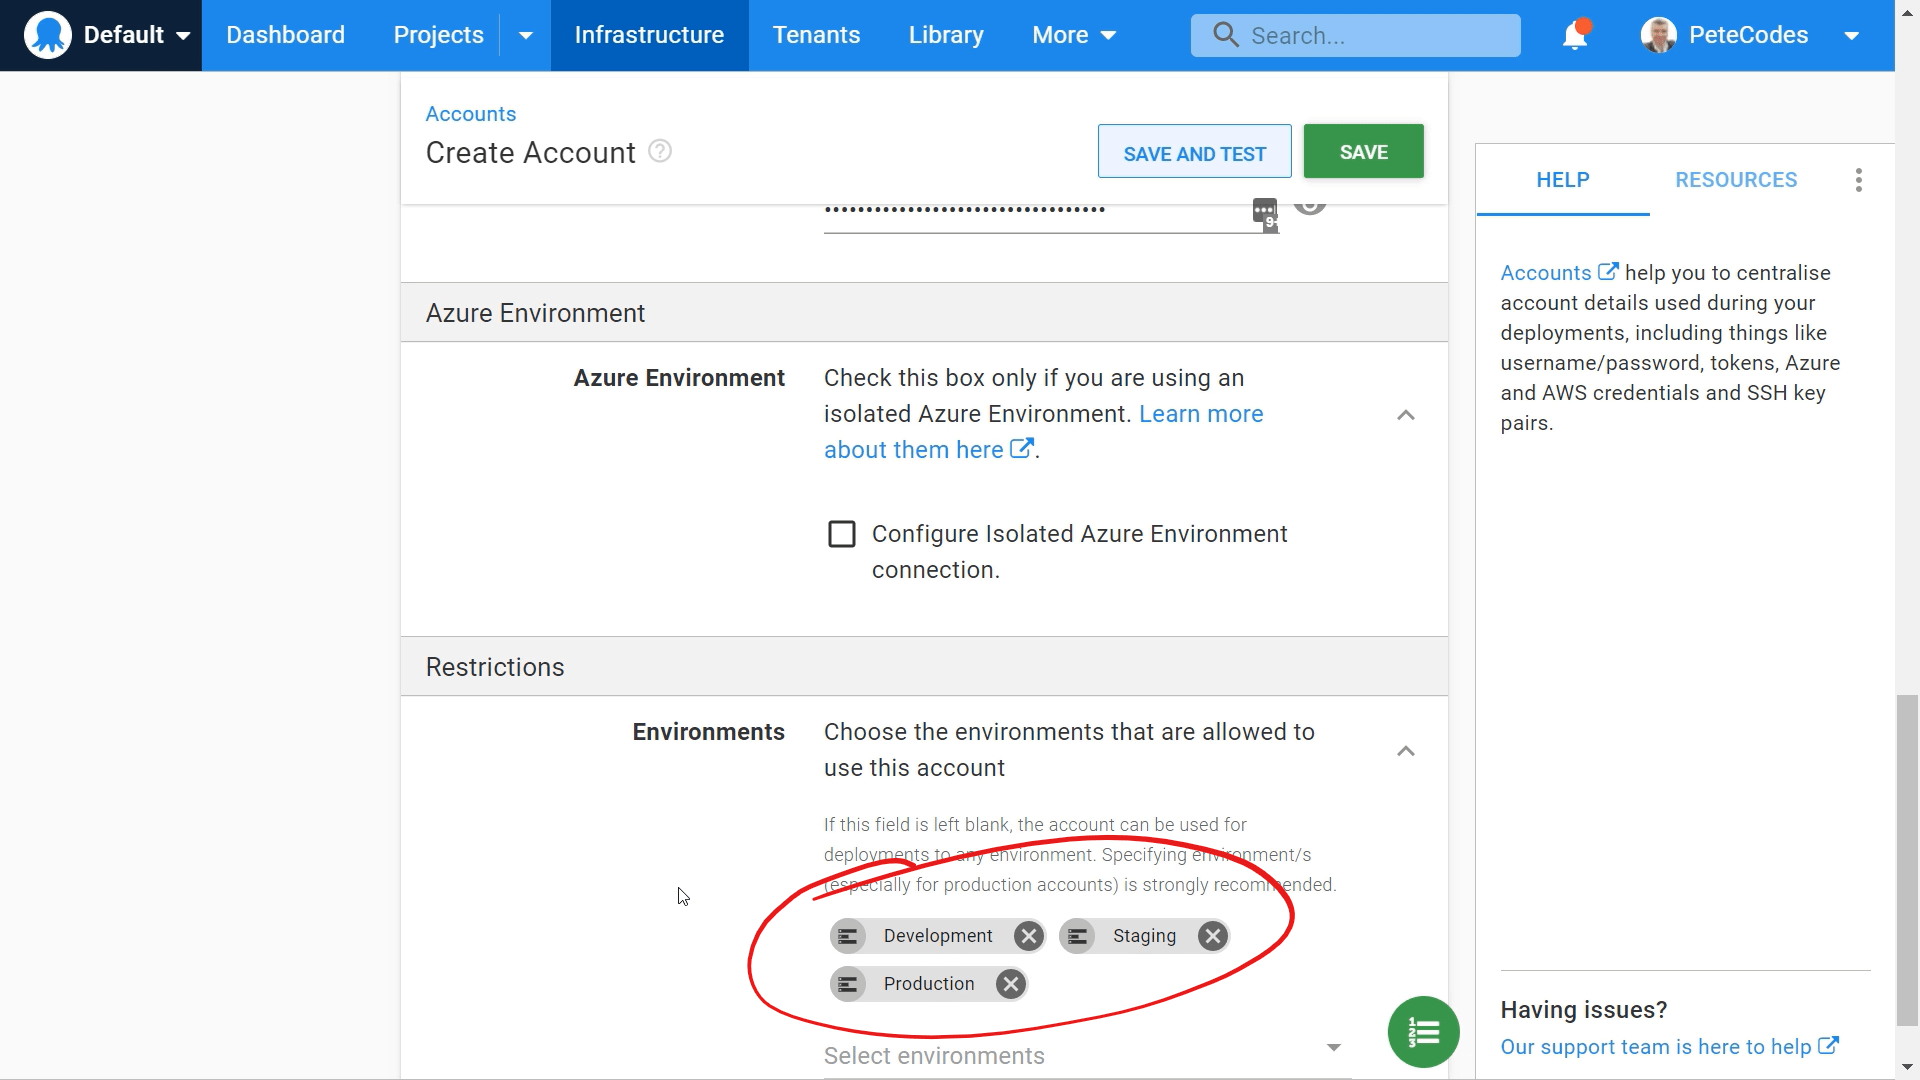
We can leave the “Azure Environment” “Configure Isolated Azure Environment connection” checkbox unchecked.
Next we need to set the Environments that this account will be used for. We’ll be using this same account across all our Environments, so we can select “Development”, “Staging” and “Production” from the options;
Application Role Assignment
At this point we’re almost finished setting up the Azure Account, however, if we were to try pressing the “Save and Test” button now, we’d be returned a failure;
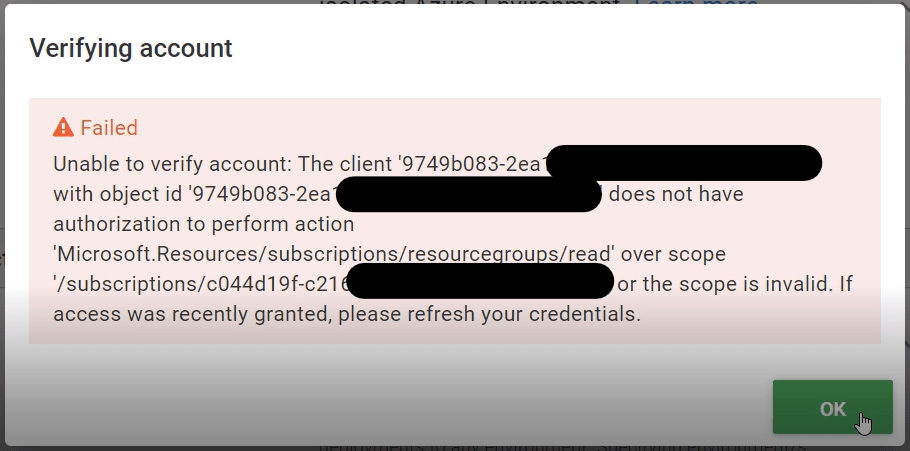
We need to assign a Role through Role Based Access Control (RBAC) to our application in order to give it sufficient access to our subscription.
If we return to the portal and navigate to our Subscription (Search for subscriptions, go to the subscriptions page and select the relevant subscription).
Clicking the “Access control (IAM)” menu item on the left will take us to the “Access Control (IAM)” page;
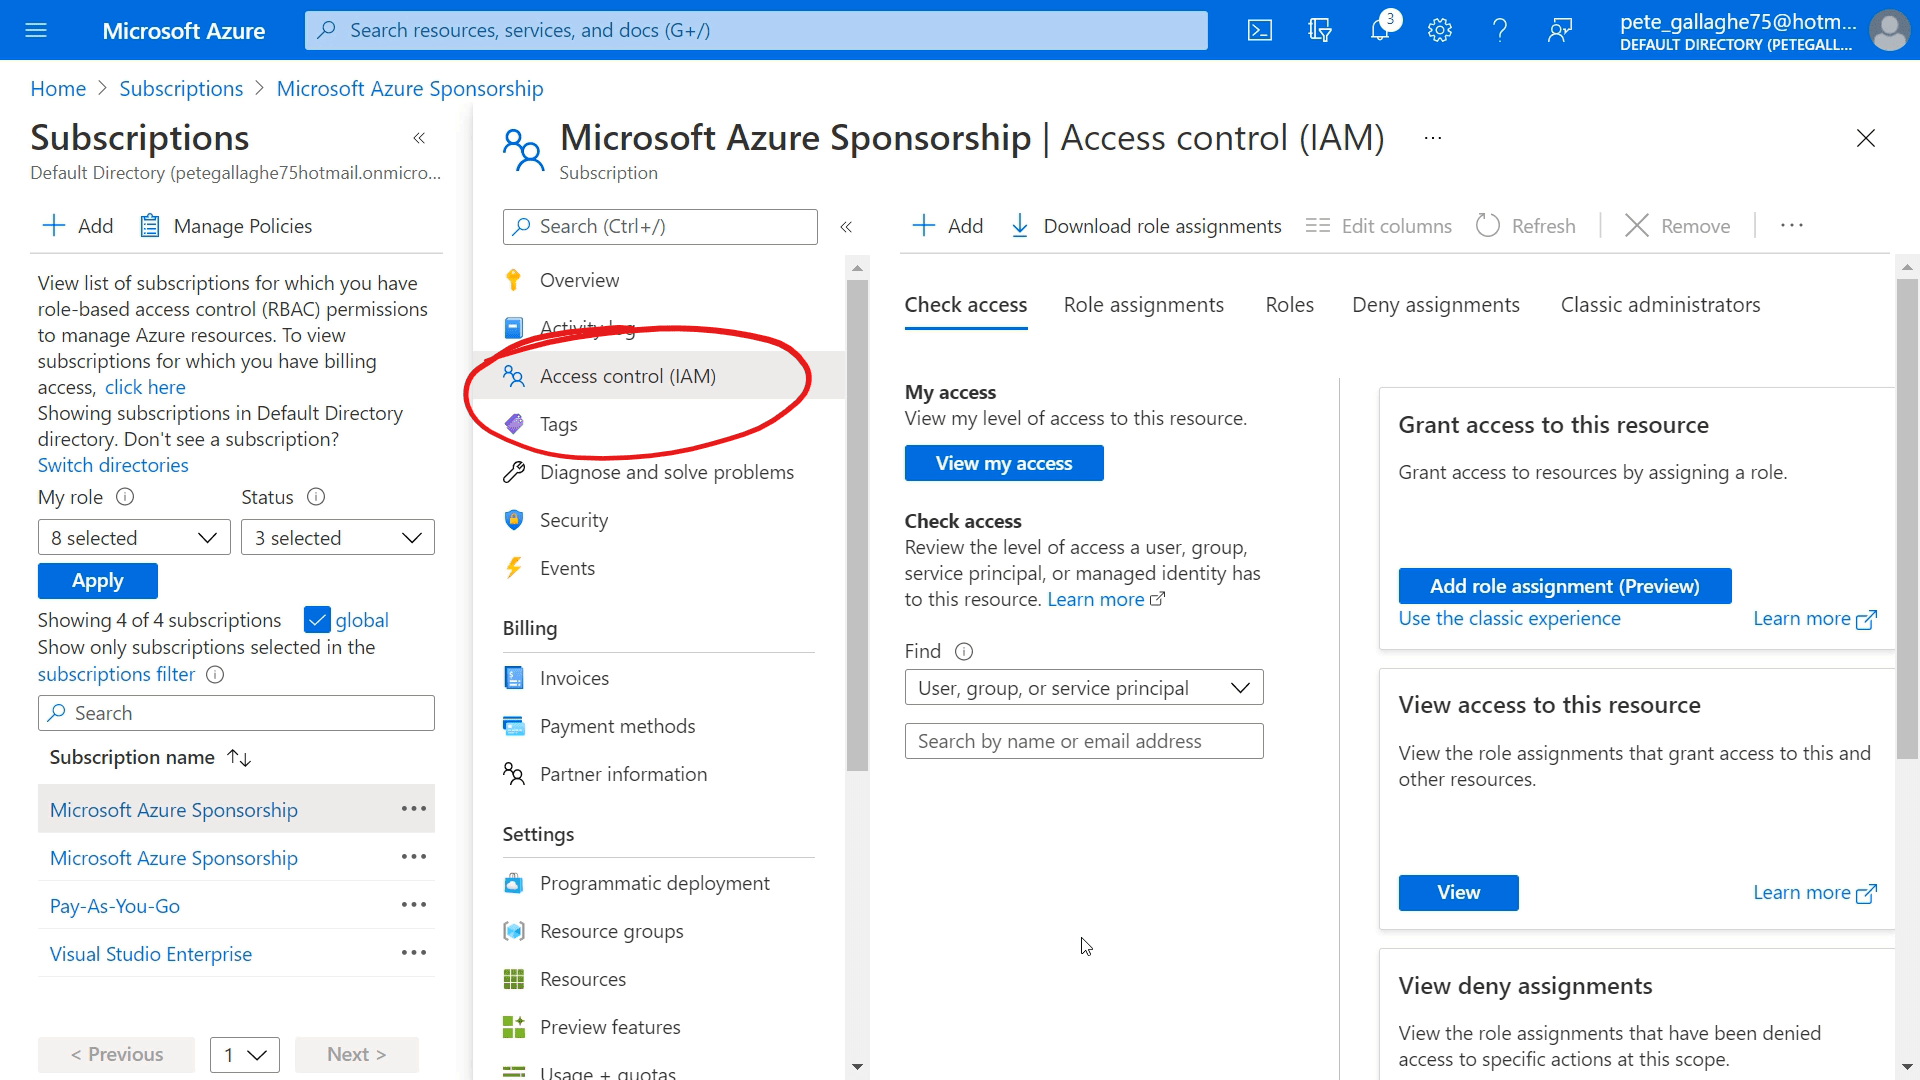
We can add a role assignment for our application by clicking the “Role assignments” tab at the top of the pane;
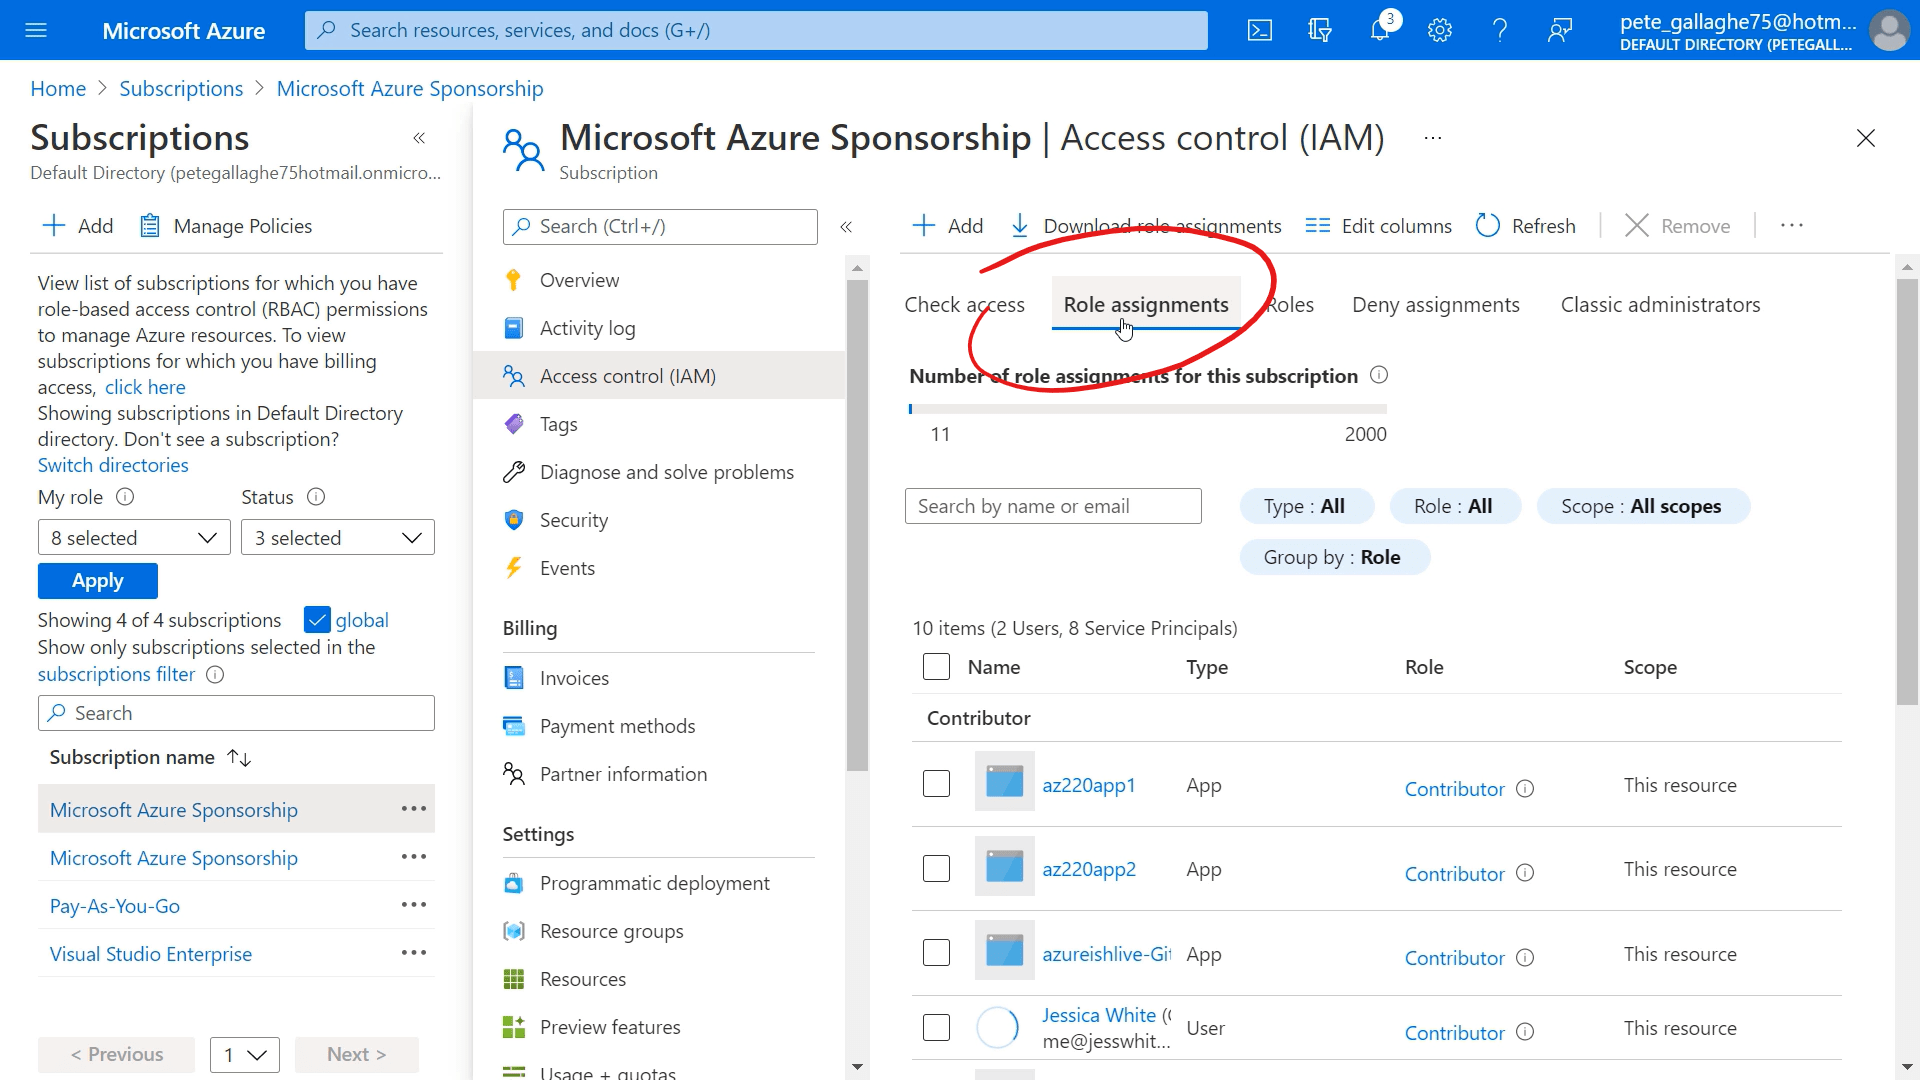
We can then click the “+ Add” button at the top of the pane, followed by the “Add role assignment” option;

We’ll then be shown the “Add role assignment” pane;
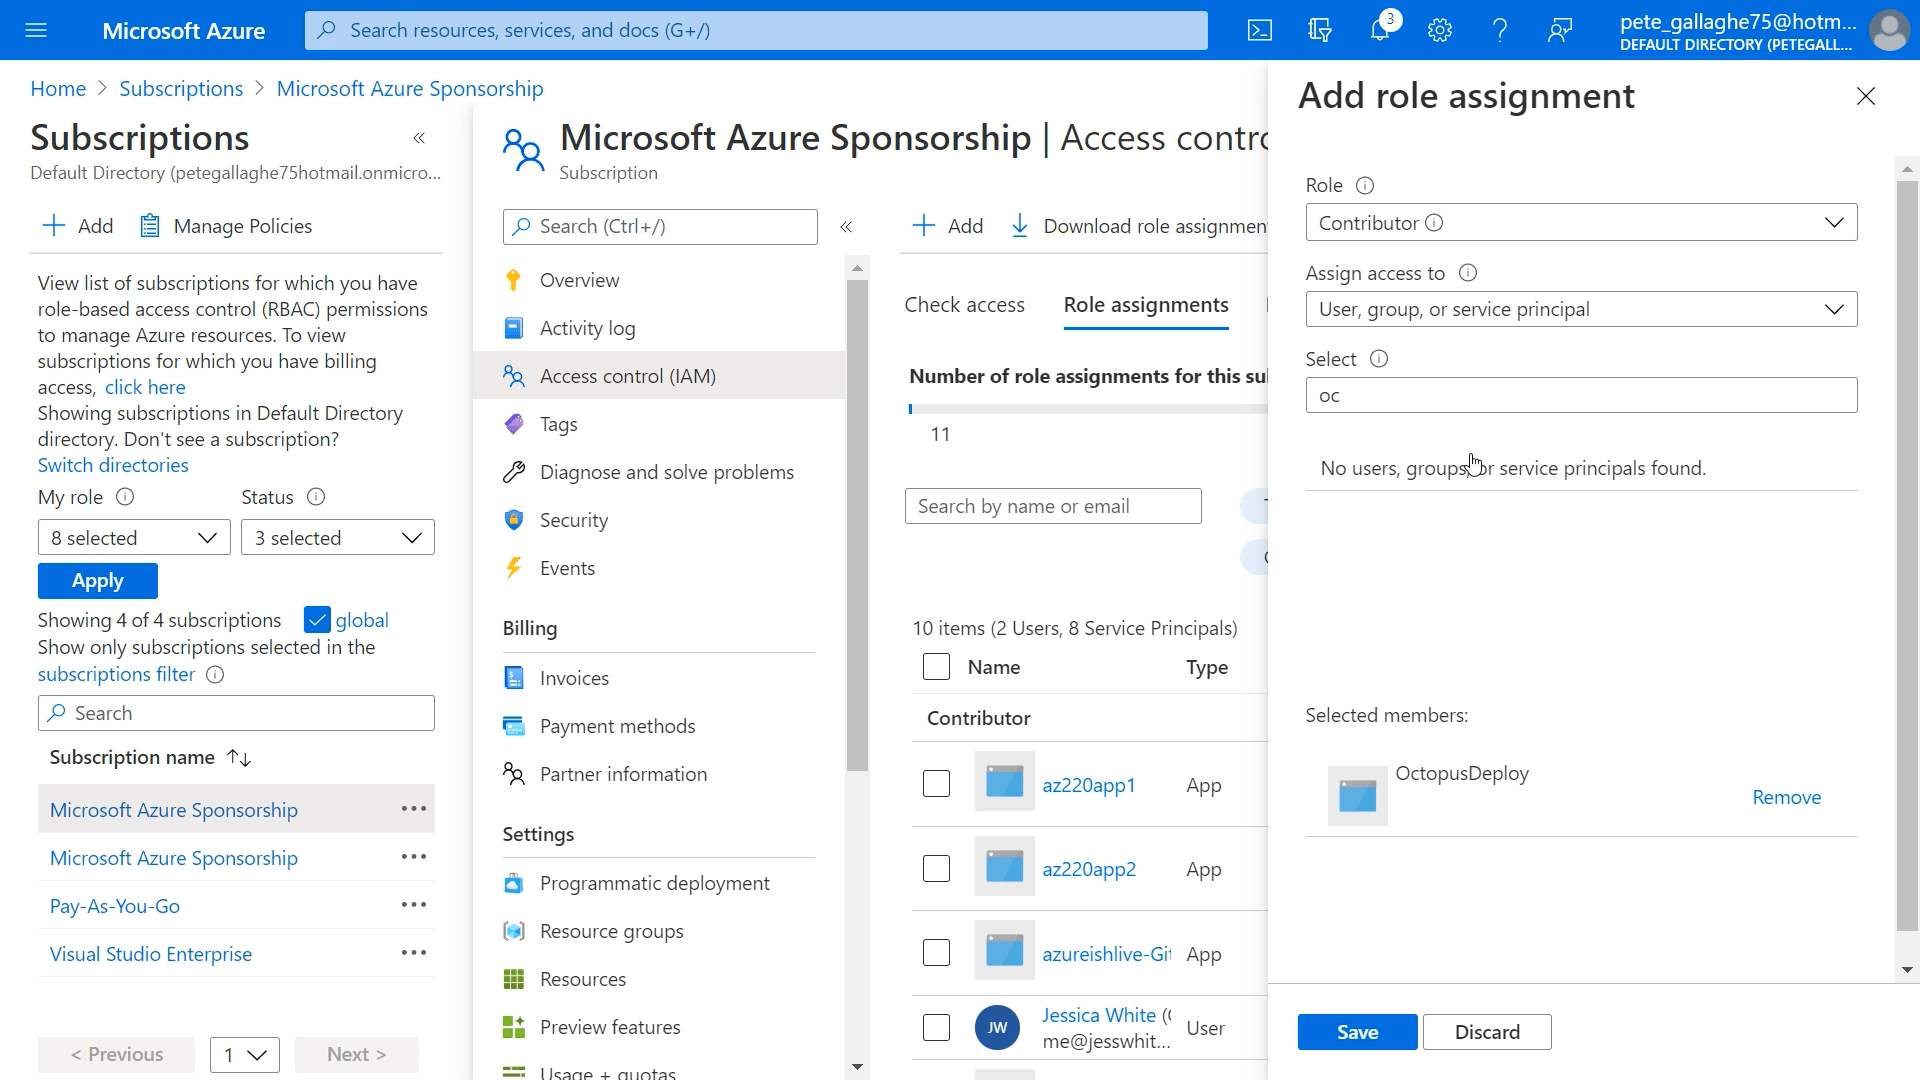
From the “Role” dropdown, select “Contributor”. Leave the “Assign access to” item as “User, group, or service principal”.
We can then enter “Octopus” in the “Select” box, which will filter the list of members to the “OctopusDeploy” item we created earlier. Select the “OctopusDeploy” item from the list and save the role assignment
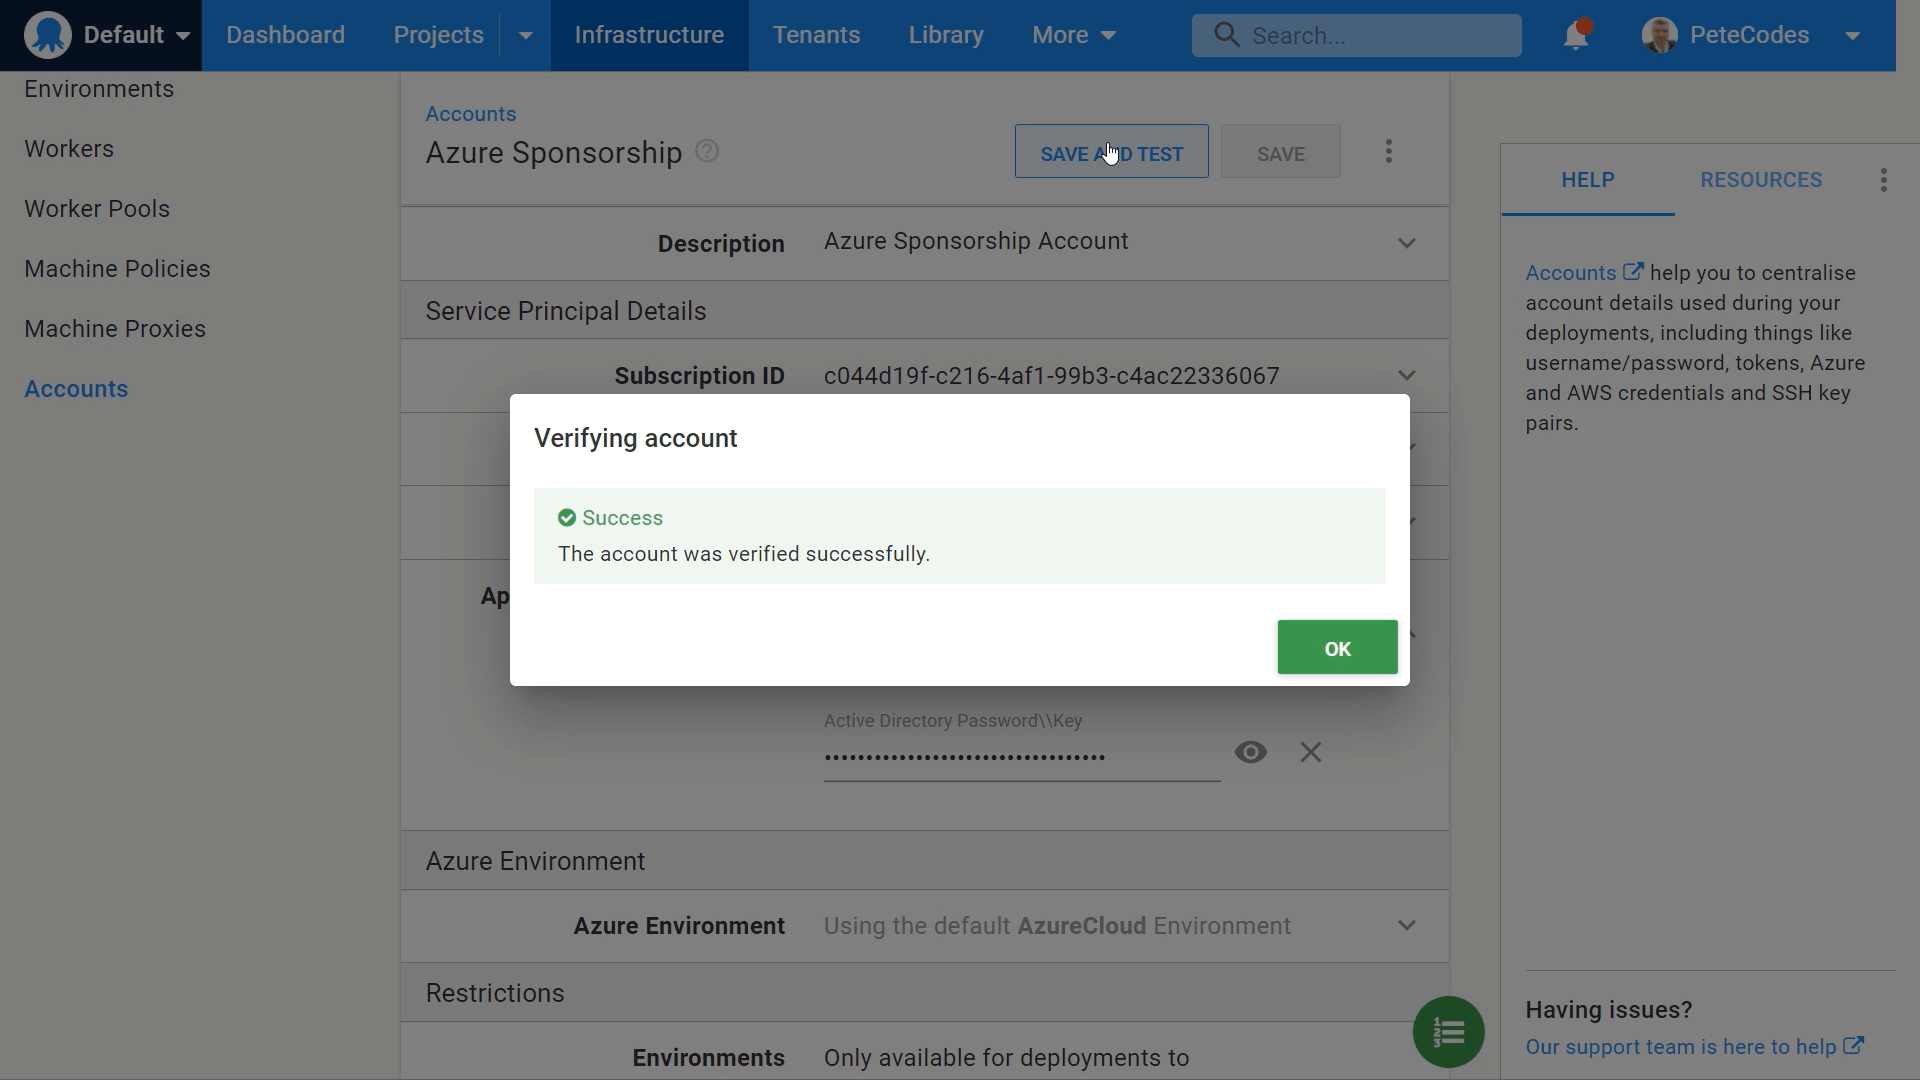
We can now return one more time to the Octopus Deploy Account Setup, and press the “Save and Test” button to confirm that everything is setup correctly;
Configure Azure Web App Account and Web App Target
With our Azure account all set up, we can return to the Azure Web App Deployment Target page and hit the refresh button next to the “Account” in the “Communication” section;

We can then select the new Azure Account from the list.
Next Time…
In the next post we’ll create our Azure Web Apps as well as creating our Staging and Production Deployment Targets.