What we did last time
In this series of posts we’re running through how to get Octopus Deploy setup, along with the required Azure Services, in order to deploy an ASP.NET Blazor app to Dev, Staging and Production environments.
In the previous post we linked our Azure Account to our Octopus Deploy instance and configured the account to allow Octopus Deploy to use it.
What we’re doing this time
In this post we’ll continue setting up our deployment location by creating our Azure Web Apps for Development, Staging and Production.
Contents
Part 1 – Environments and Deployment Targets
Part 2 – Linking Azure
Part 3 – Create Azure Web Apps + Staging and Production Deployment Targets
Part 4 – Create and Package a Blazor WebAssembly App
Part 5 – Octopus Deploy Projects, Variables and Processes
Part 6 – Create a Release
Part 7 – Send a Notification to Microsoft Teams
Prerequisites
Once again, for this tutorial you’ll need the following;
- An Azure Subscription
- Either a Cloud Hosted Octopus Deploy Environment or…
- … If you’re self hosting Octopus Deploy, a local SQL Server instance.
- The .NET 5 SDK
- Visual Studio Code
- For Teams Notifications – A Teams Environment with Admin access
Azure Web App Creation
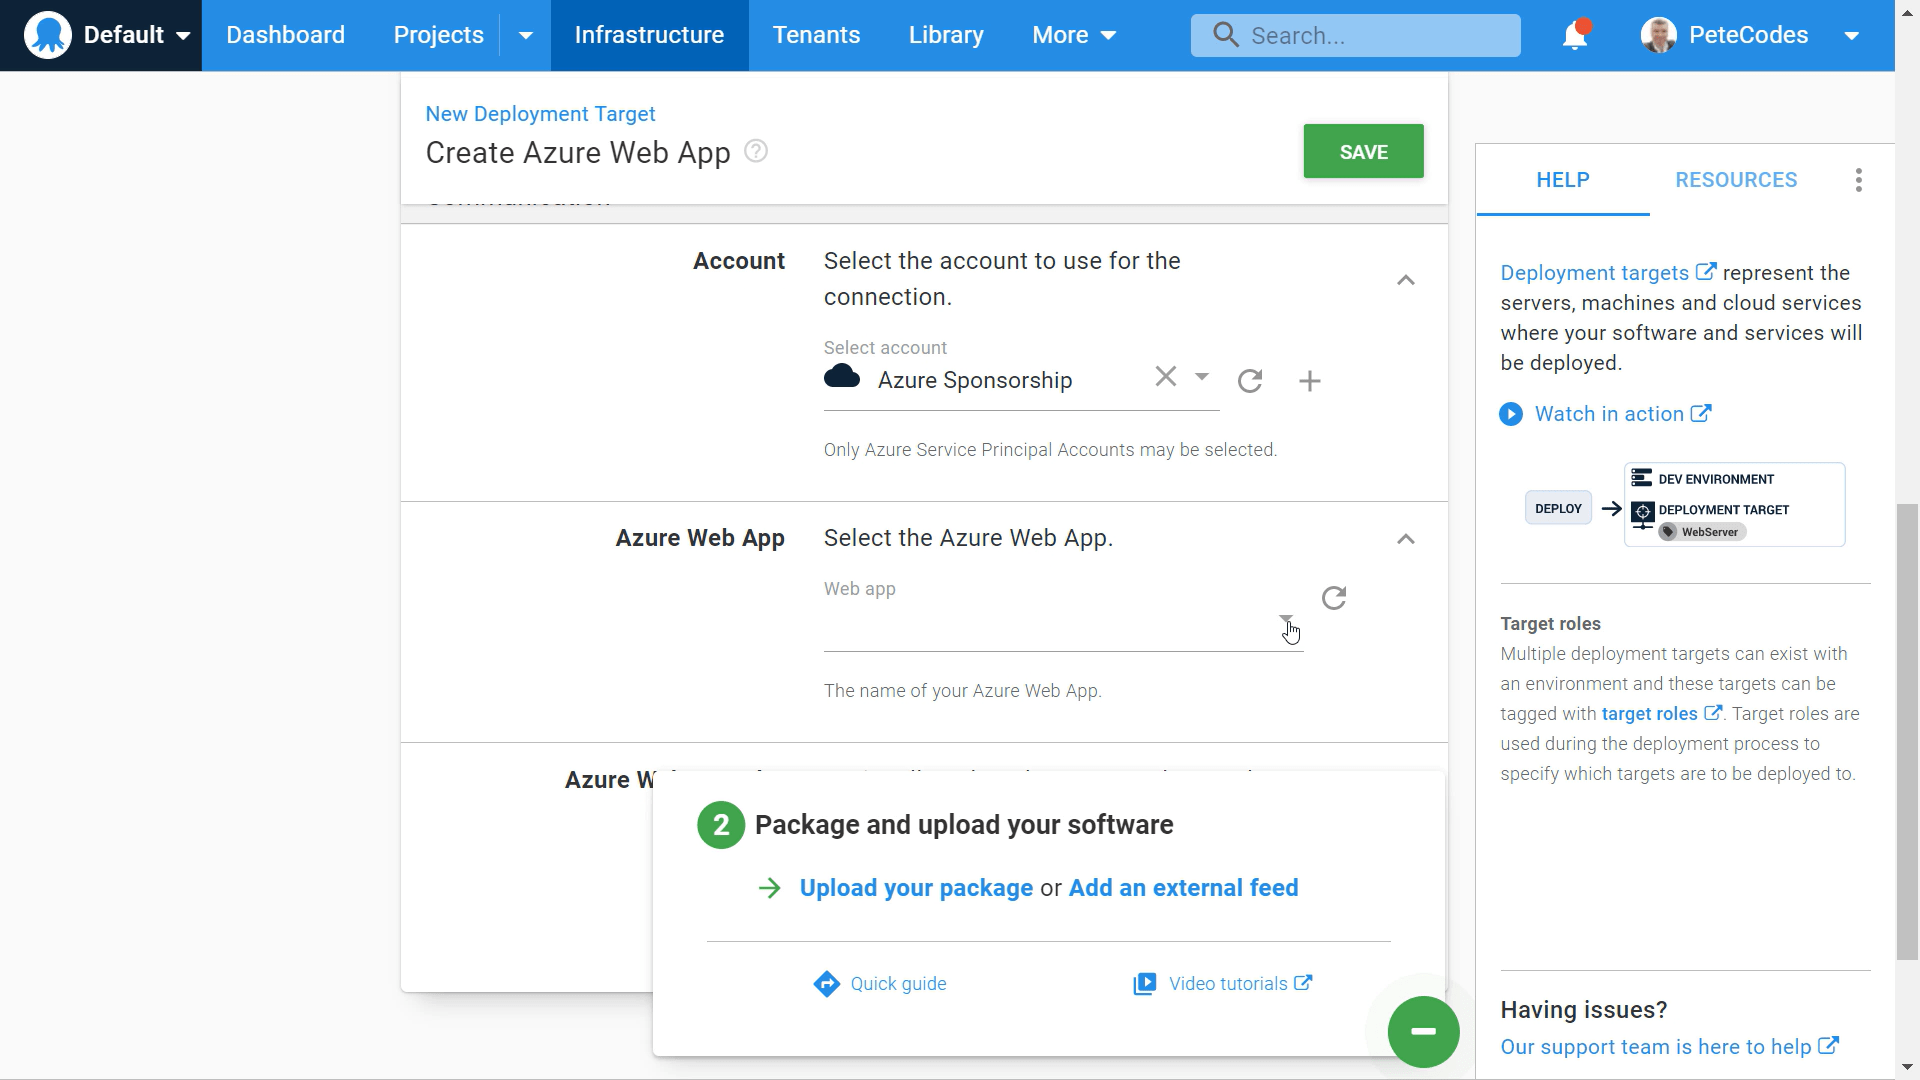
Beneath the Account selection area, we can choose from any existing Web Apps we have in our Azure Subscription.
We’ll be creating a set of new Web Apps for our demo, one for Development, another for Staging and one for Production.
If we return to the Azure Portal, we can search for “Web App” or “App Services” in the search bar, and select the “App Services” item;
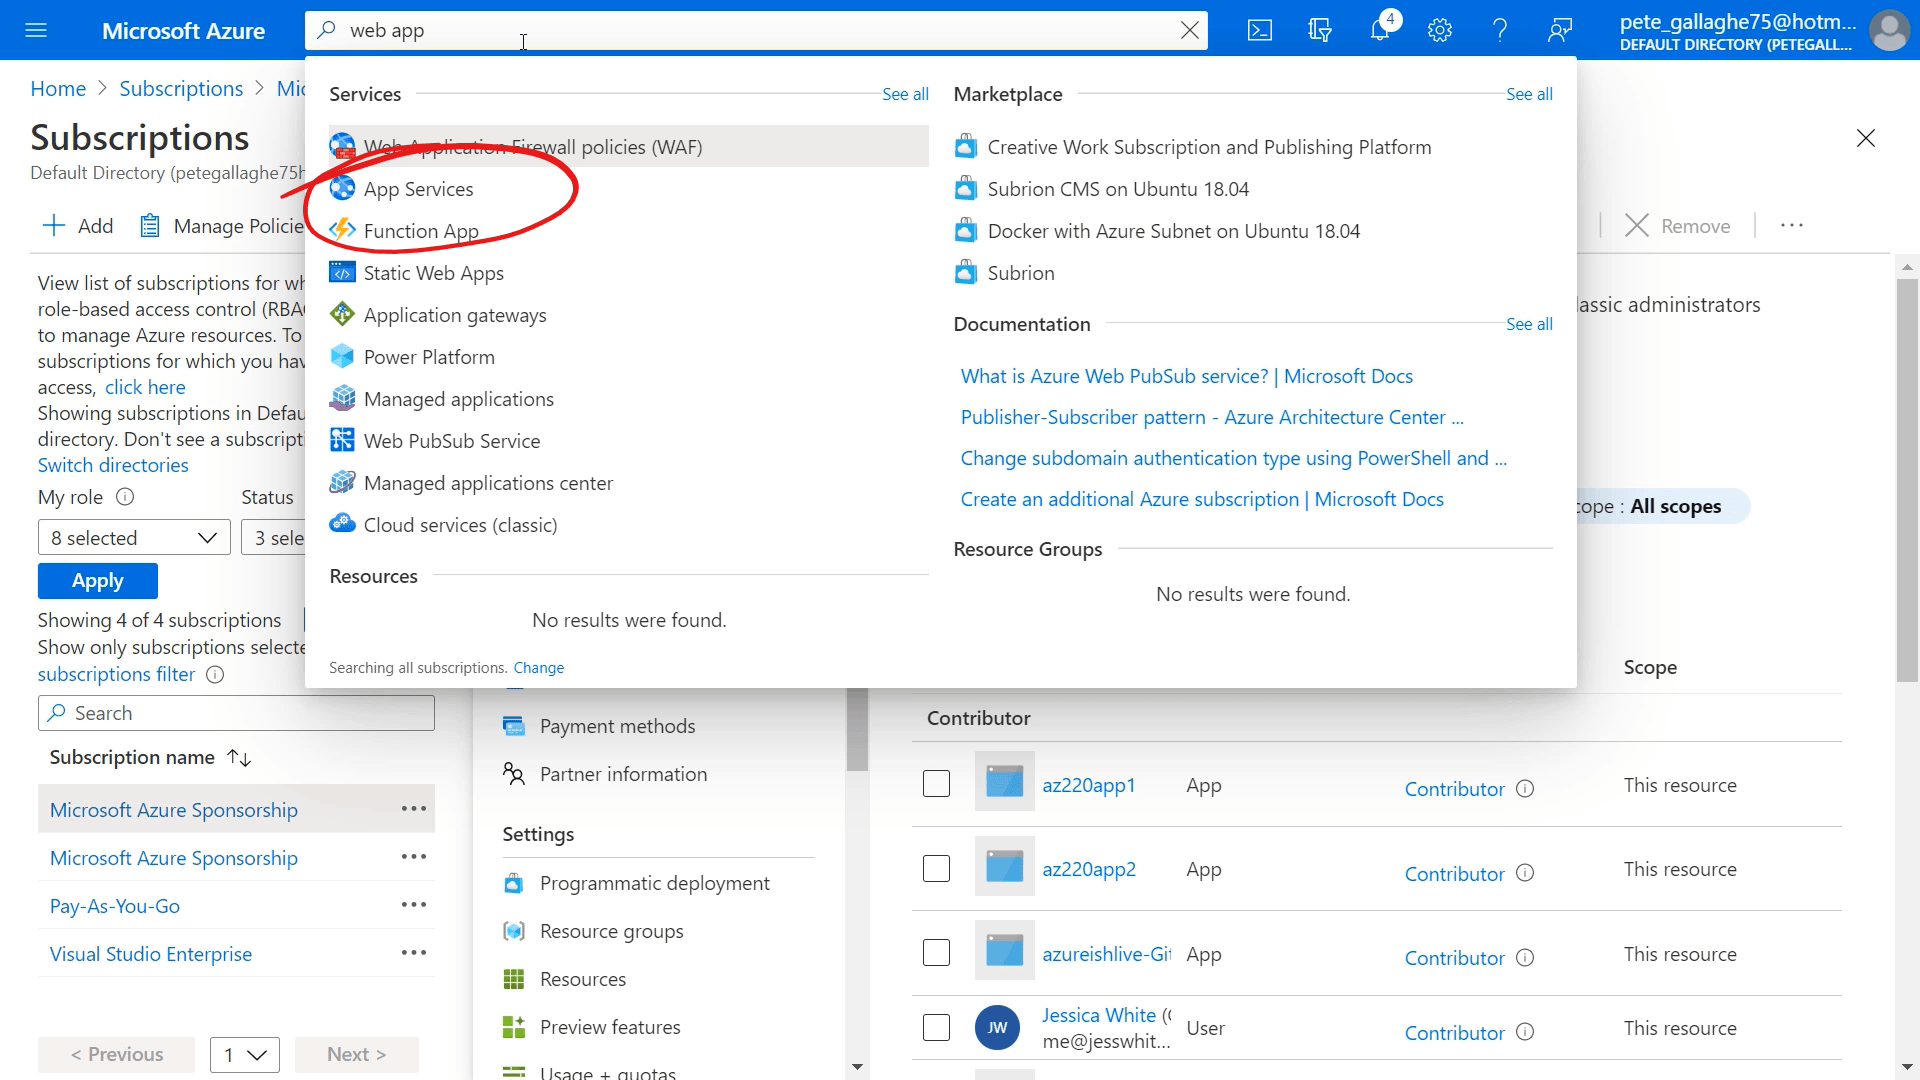
Clicking on the “App Services” search result will take us to our existing App Services list;

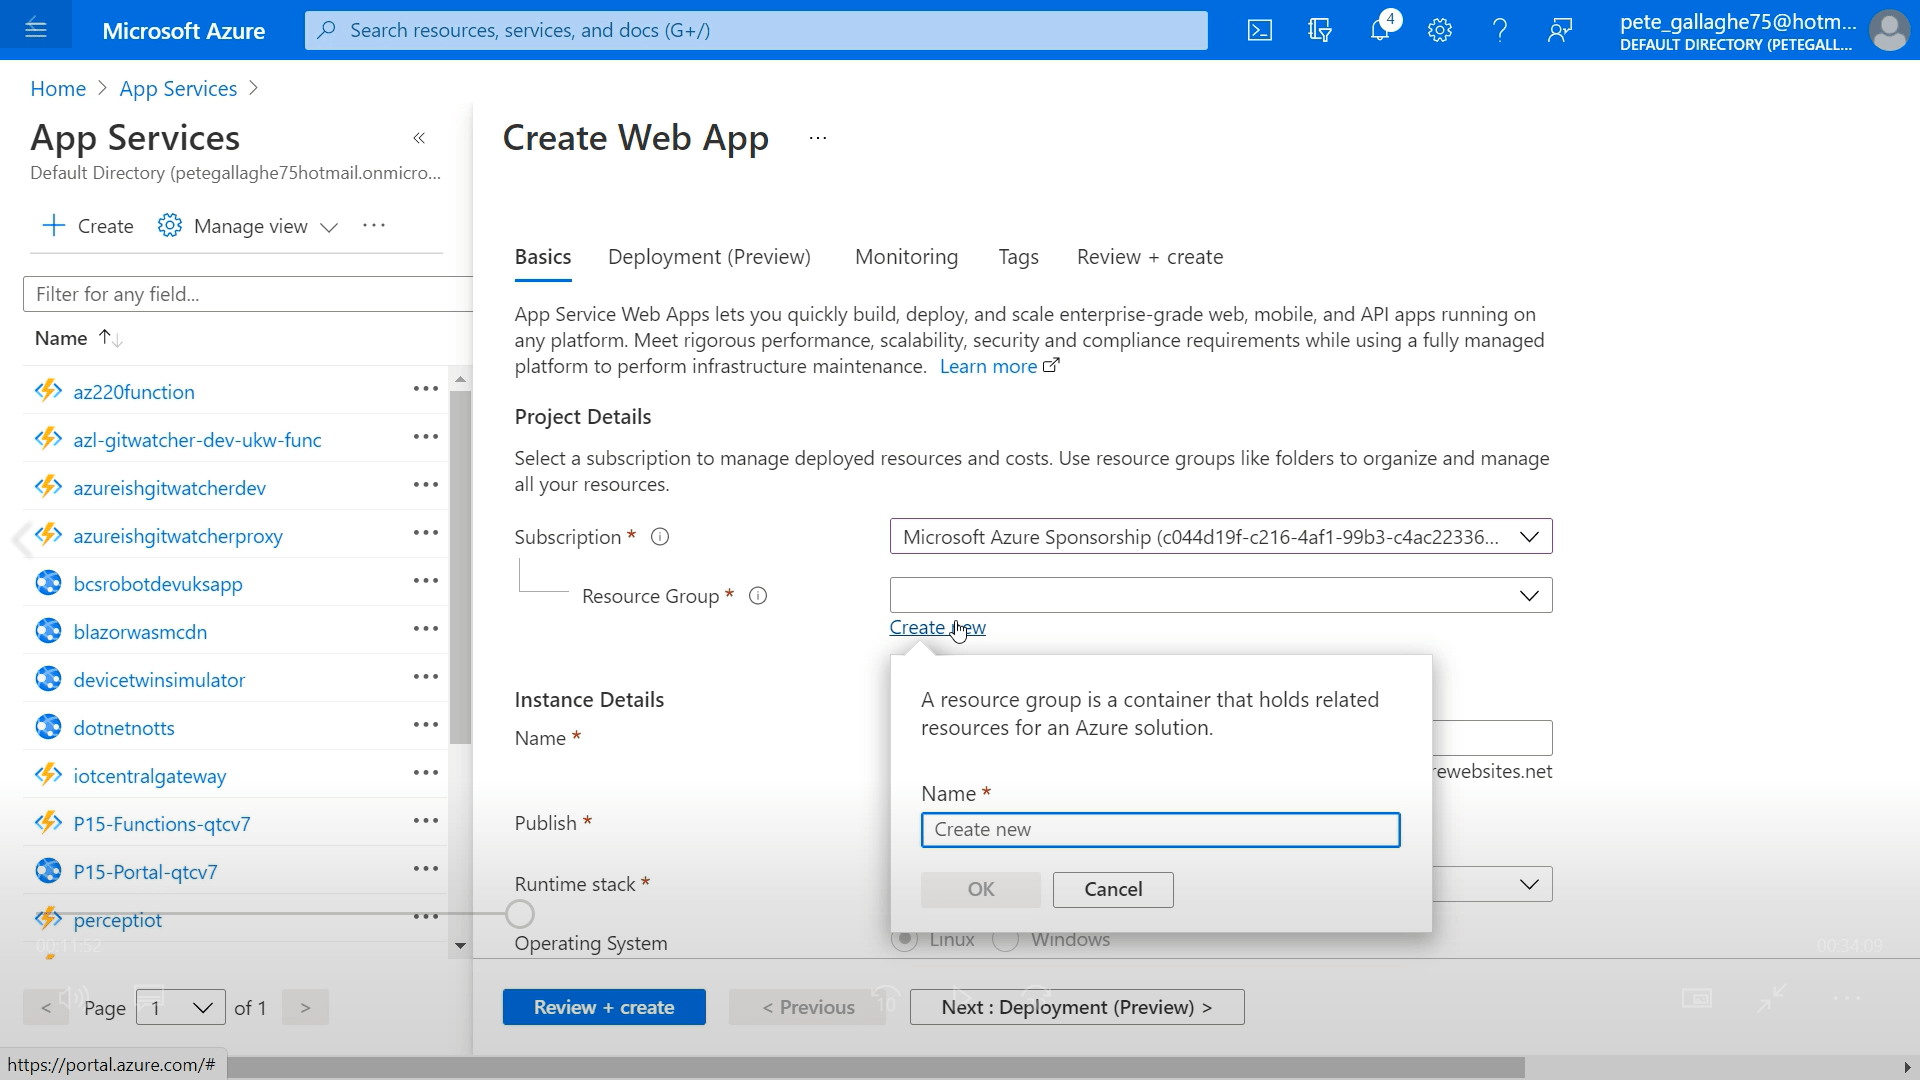
We can begin the process of creating our Web App by hitting the “+ Create” button in the top left of the screen.
This will take us to the first page of the Web App creation process;

Here we can select the subscription we’d like to use. We can then either choose an existing Resource Group, or create a new one. We’ll create a new resource group called “Octopus”;
We can then set a Name for our Web App. We’ll choose “petecodes-development”, as this will be our development website.
We can leave the “Publish” option as “Code”, and select “.NET 5” as the “Runtime Stack”.
We can leave the “Operating System” option as “Windows, and set the Region to a location close to us. We’ll choose “North Europe” here as this is geographically close to me.
Next we can create a new App Service Plan for our Web Apps by pressing the “Create new” link below the “Windows Plan” dropdown;
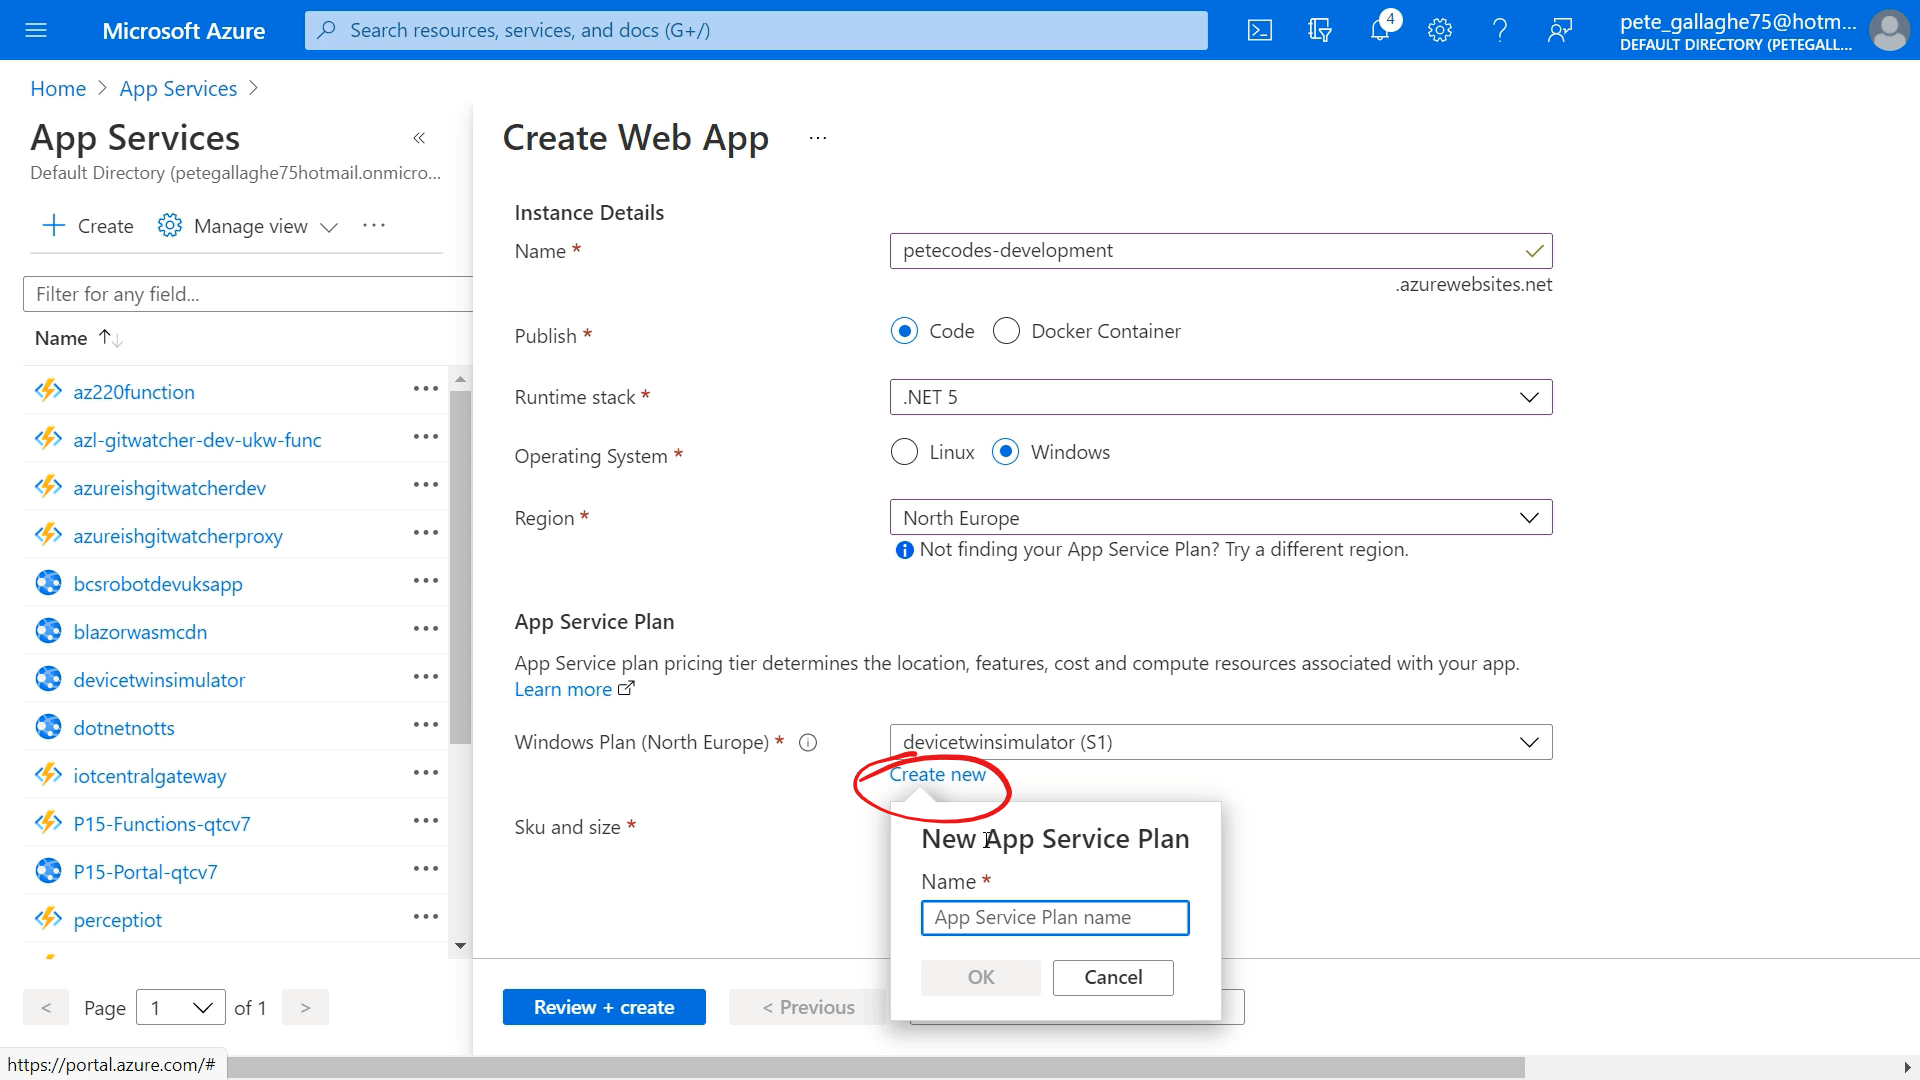
We’ll name our plan “Octopus” and hit the “OK” button to create the new plan.
Set the App Service Sku and Size
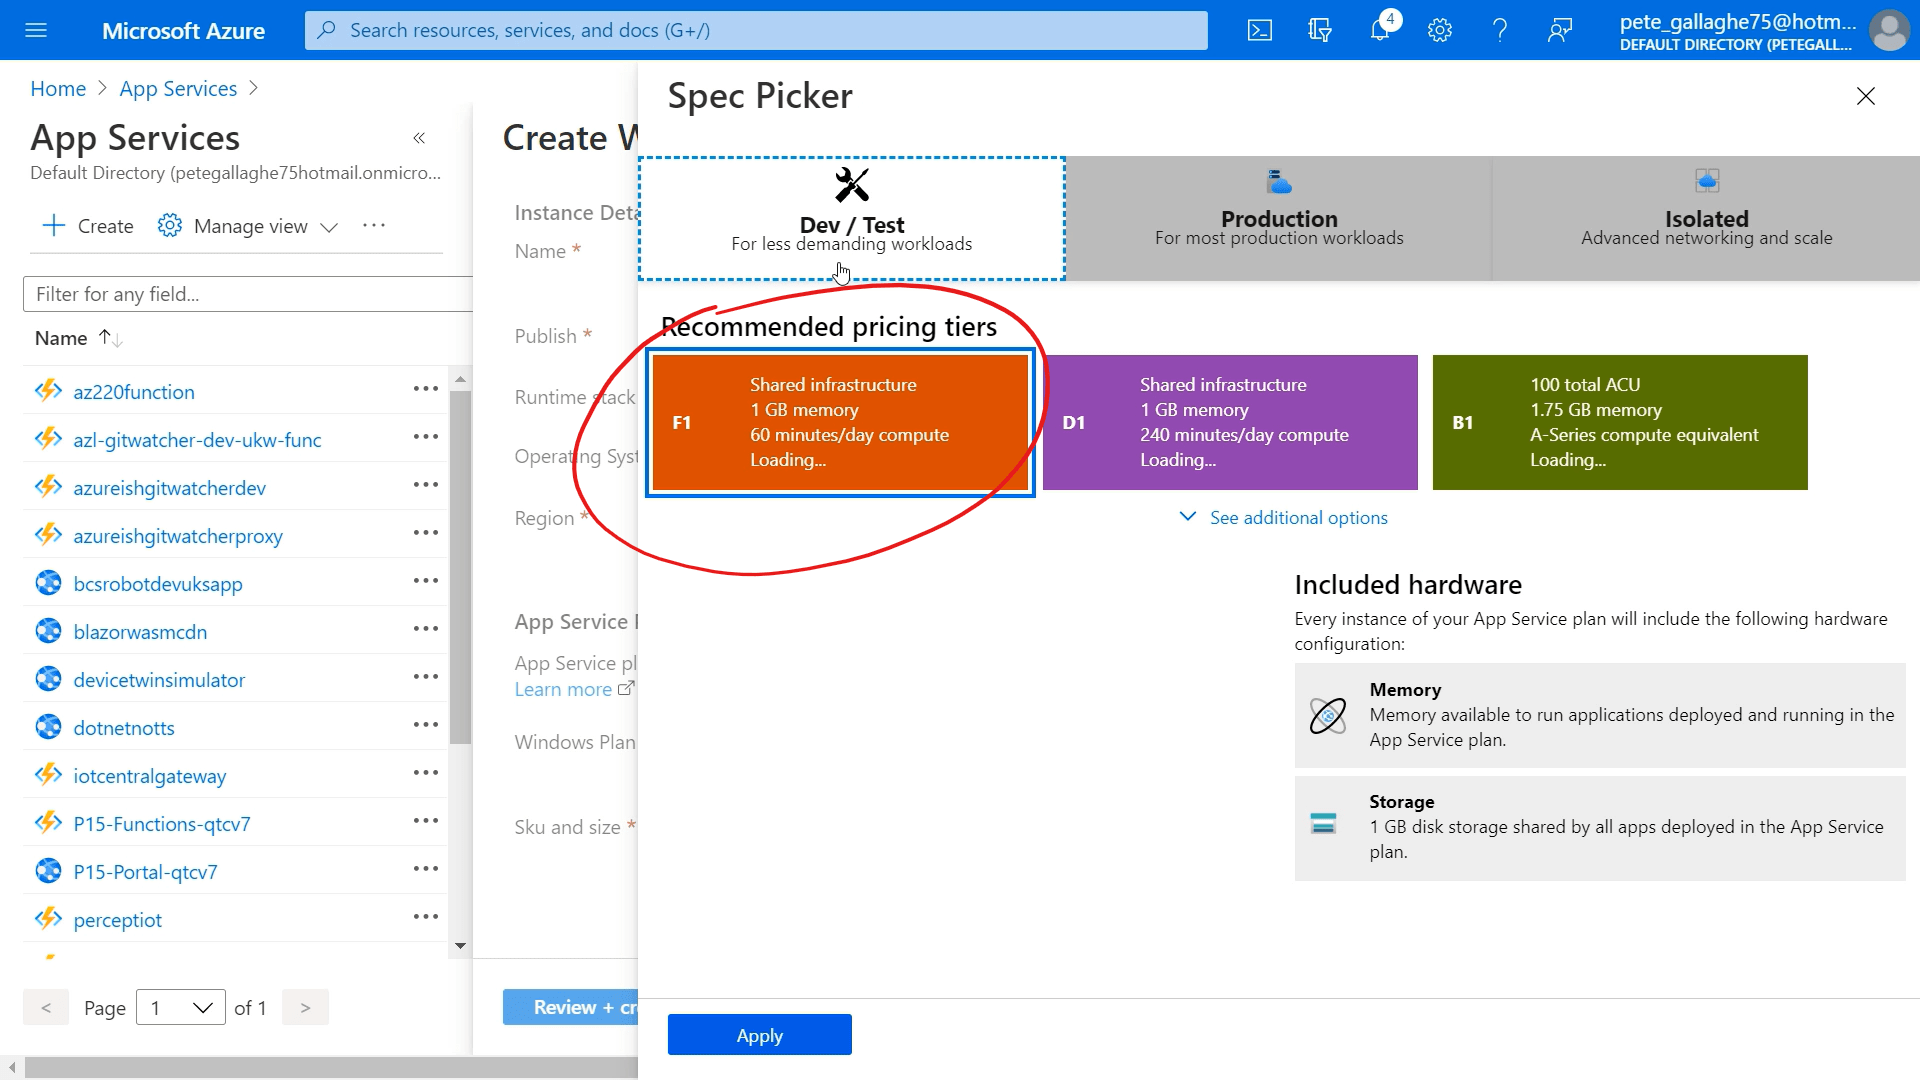
Next we can actually switch the “Sku and size” from “Standard S1” to the free tier by hitting the “Change size” link;

This will take us to the selection screen for the App Service Sku and Size, we can Select the “Dev and Test” tab and then choose the “F1” option and hit the “Apply” button;
Other Web App Settings
If we then click the “Next: Deployment >” button, we can leave the “Continuous Deployment” option set to “Disable”;

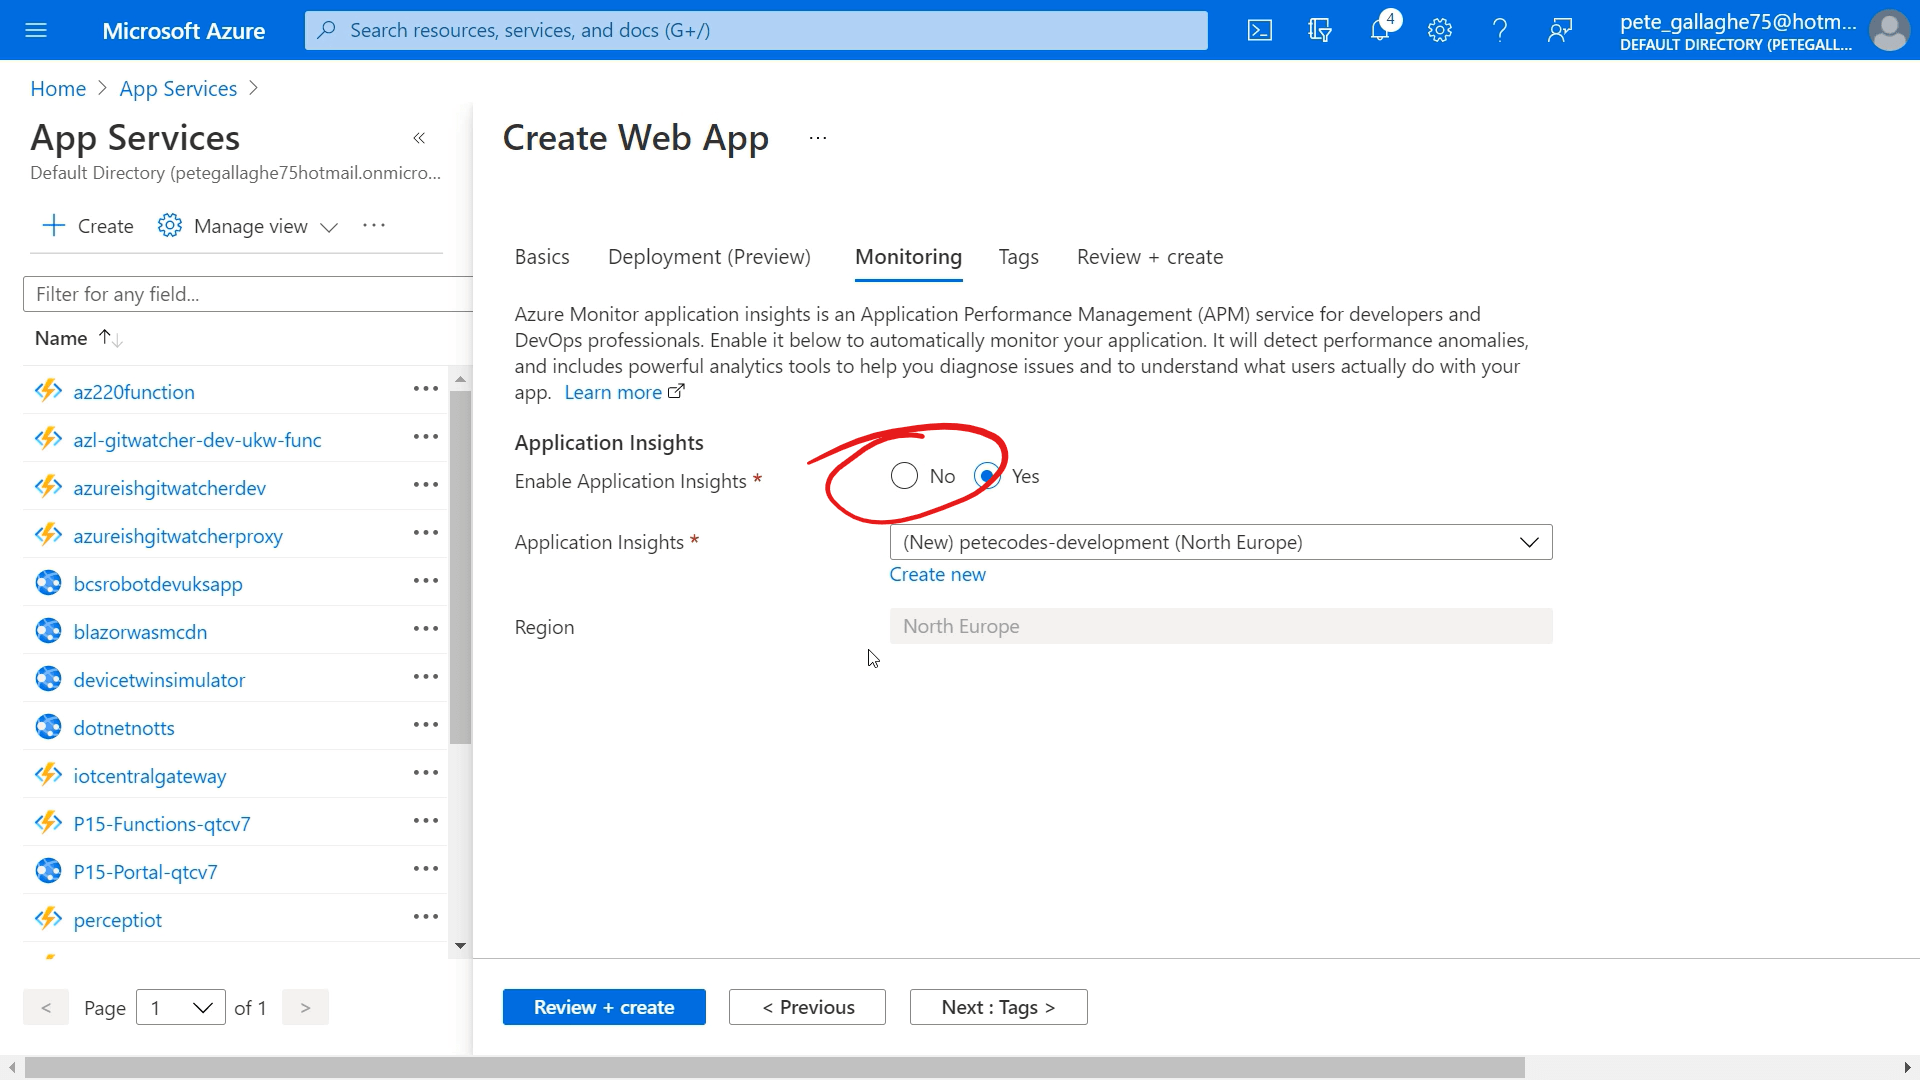
Clicking the “Next: Monitoring >” button, will take us to the Monitoring Page. We can disable “Application Insights” here as we won’t be using it;
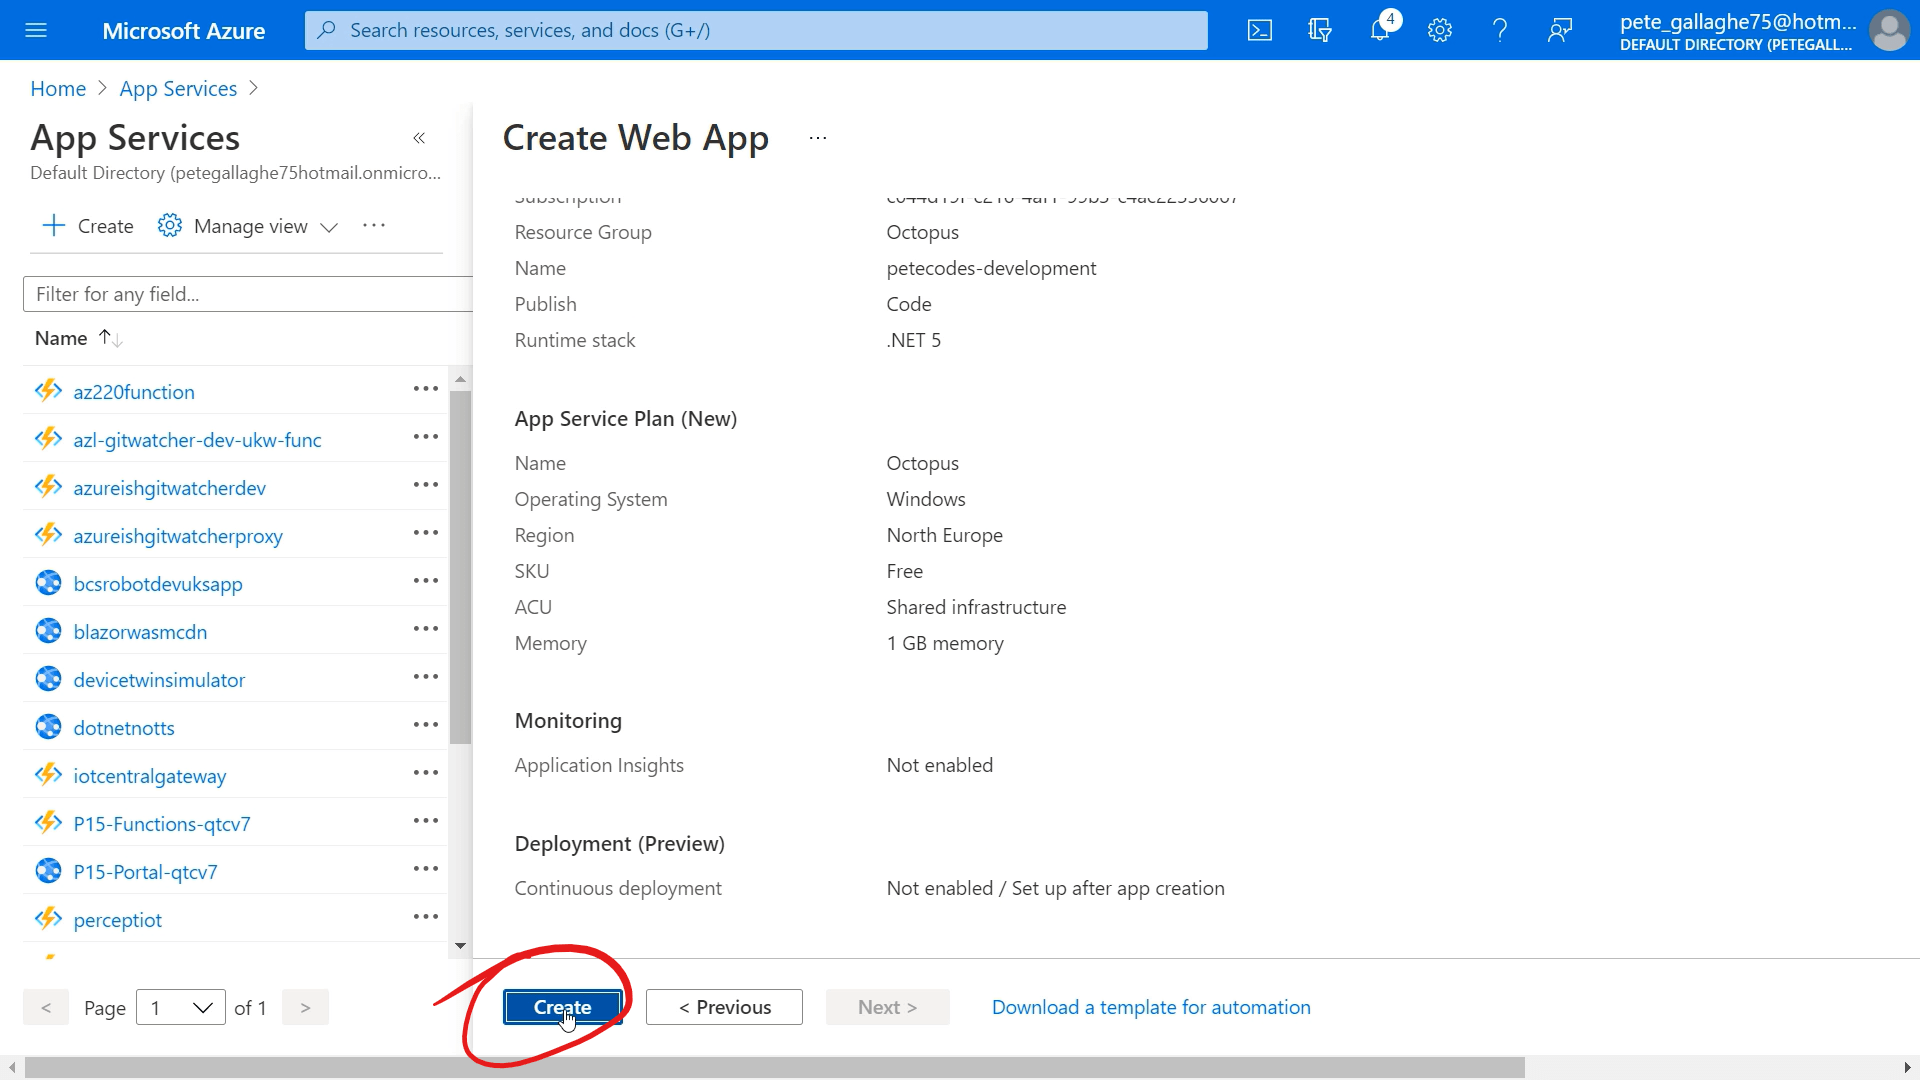
We can now hit the blue “Review + Create” button and confirm our selections by hitting the “Create” button;
Create Azure Web Apps for Staging and Production
We can then repeat all of the steps above to create our “Staging” and “Production” Web Apps.
We name our staging app “petecodes-staging” and the Production app we just name “petecodes”.
You should then have three web apps created;
- petecodes-development
- petecodes-staging
- petecodes
Select the Web App in Octopus Deploy
Once the Web App is created, we can return to Octopus Deploy. Hitting the Refresh button next to the Azure Web App list will refresh the list of Web Apps, so we can drop down the list and select our Web App;
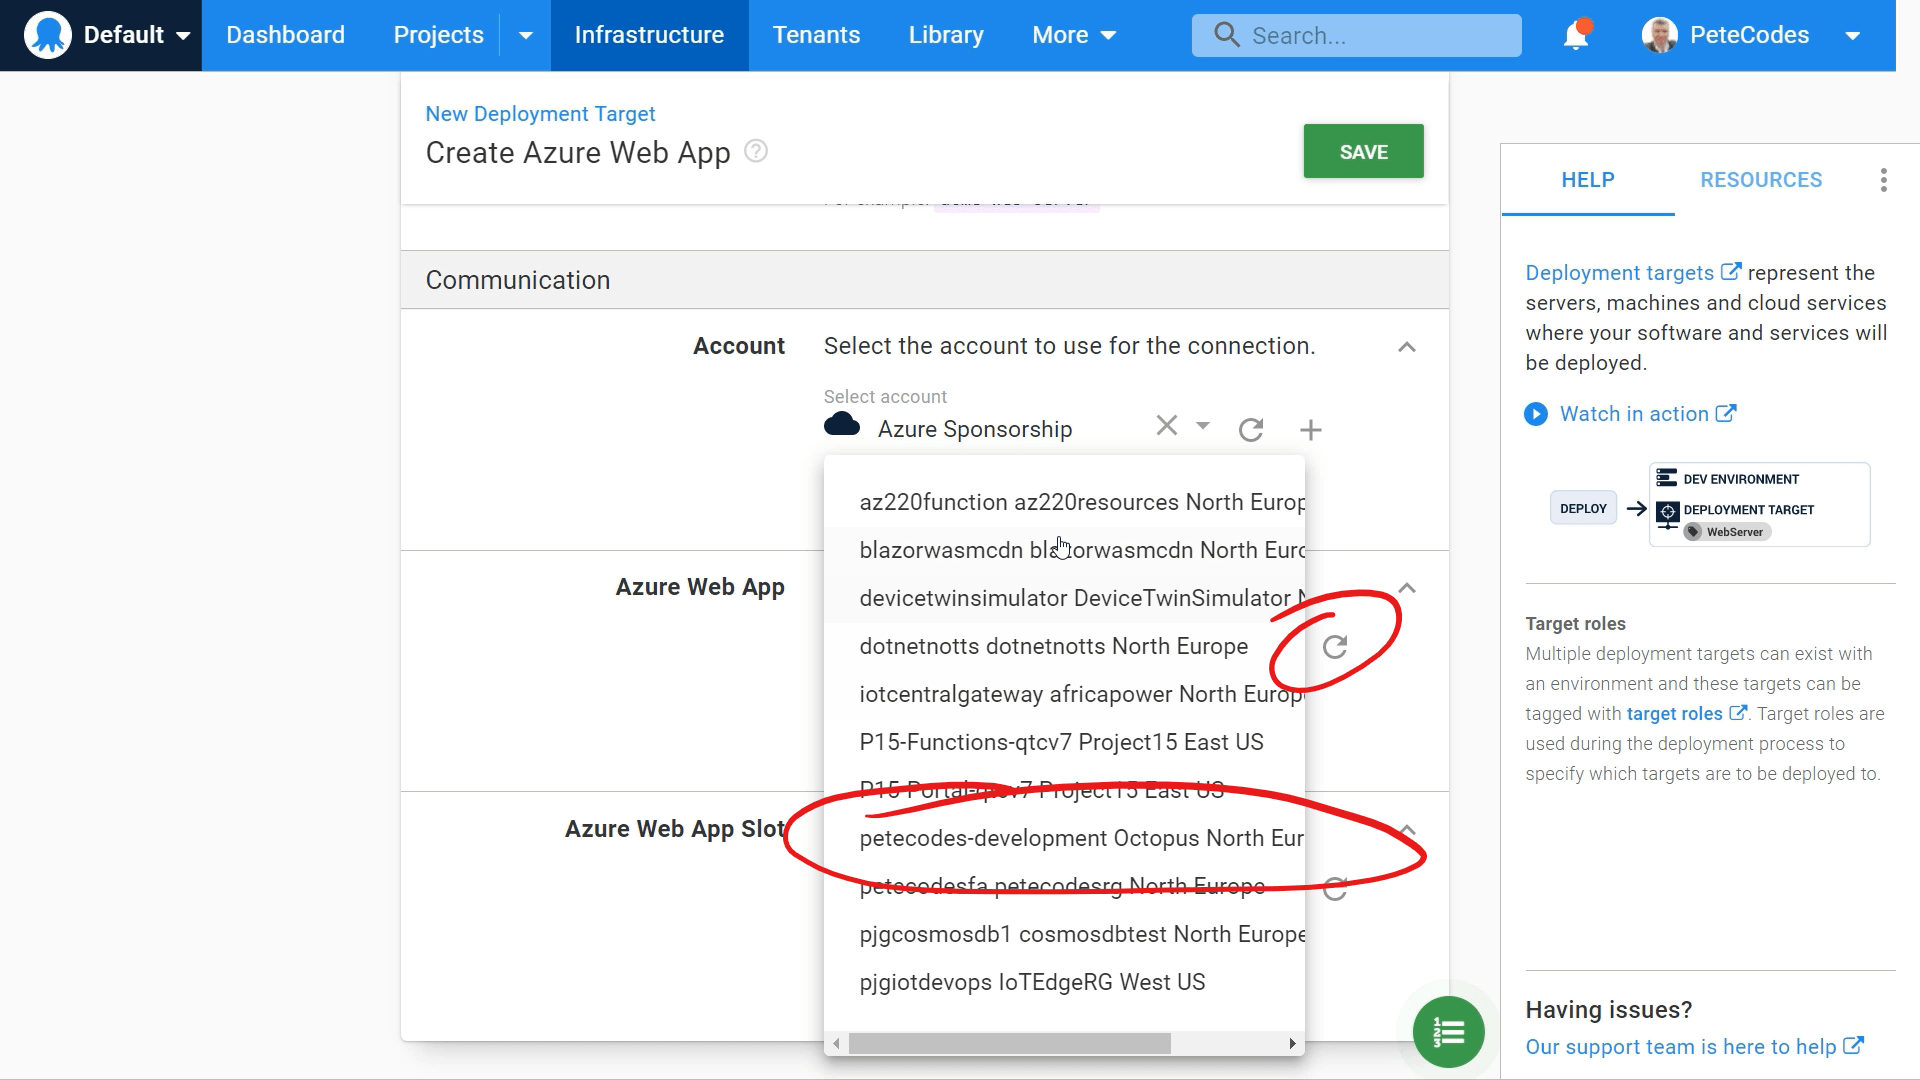
We can leave the “Azure Web App Slot” empty as we won’t be using it, then hit the green “SAVE” button at the top of the screen to save our Deployment Target.
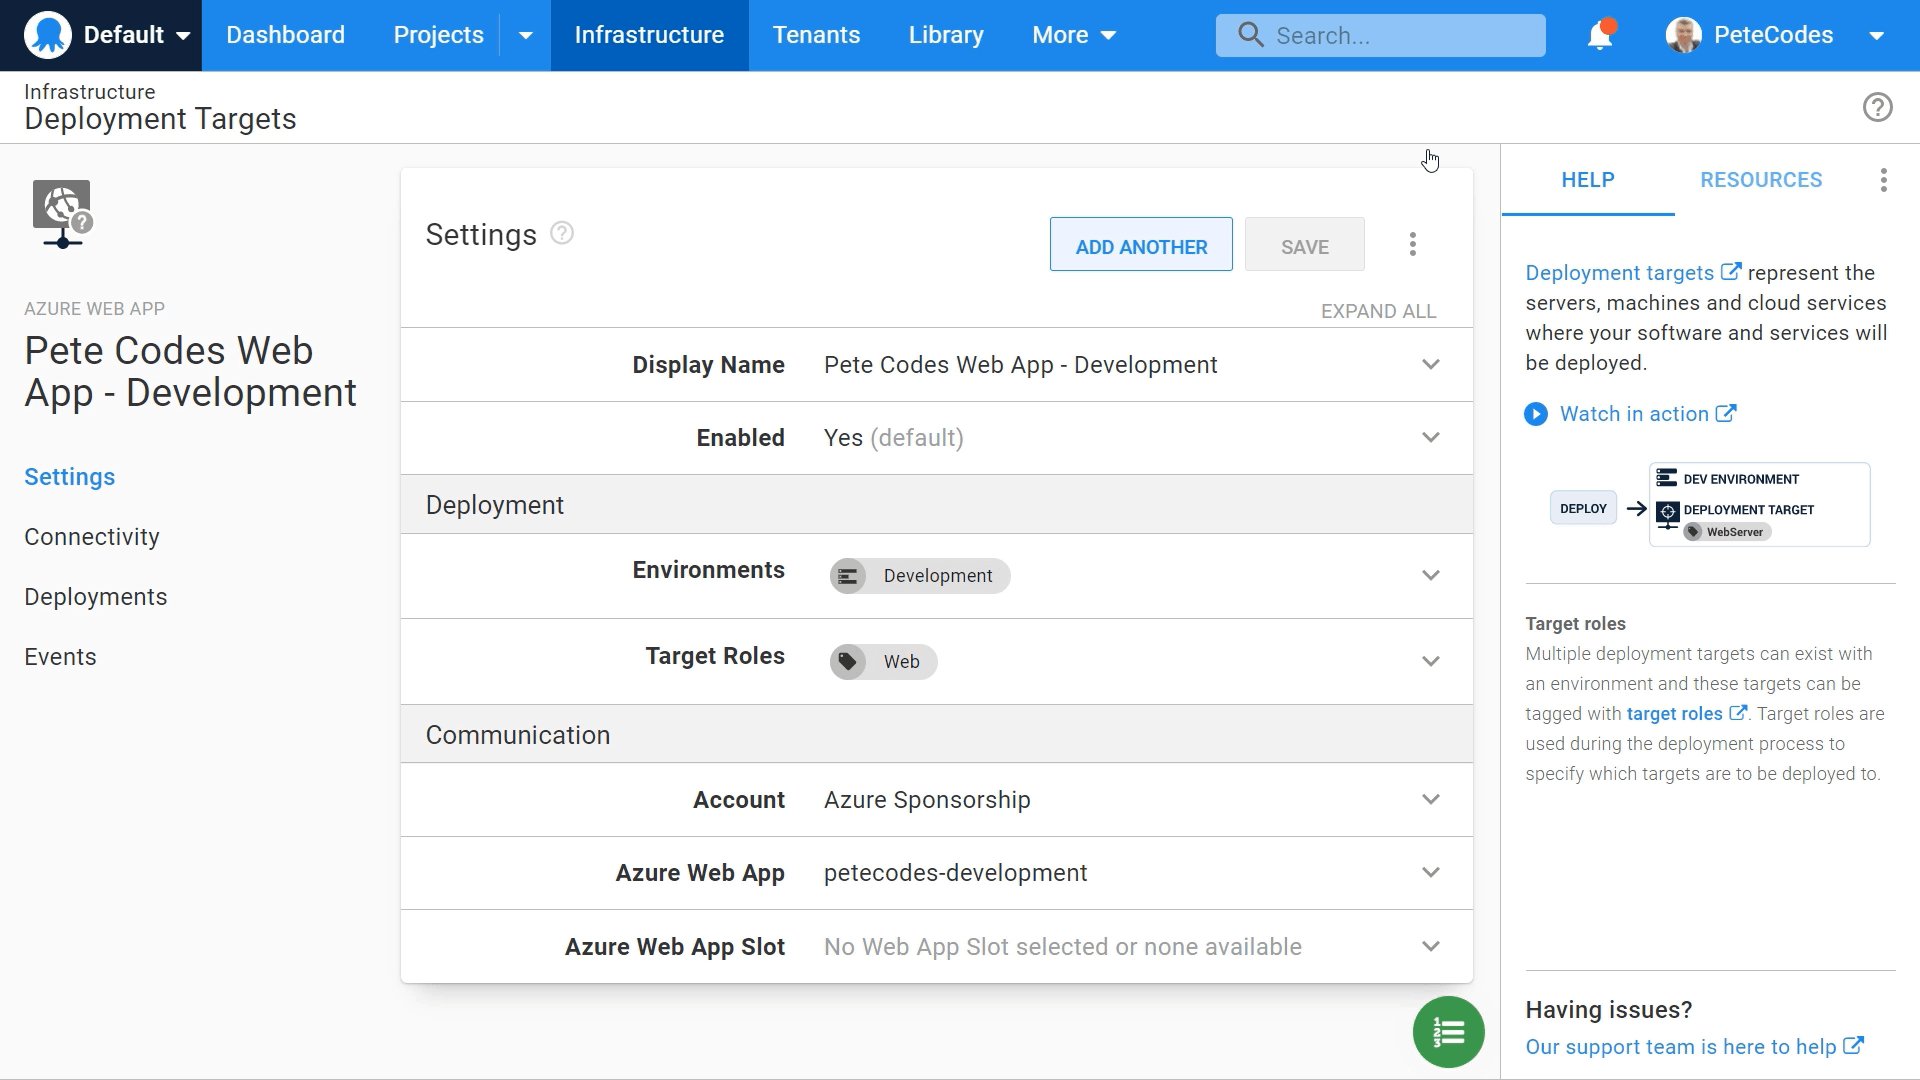
We’ll then be shown the settings page for our new Deployment Target;
Create Staging and Production Deployment Targets
We can now create the Deployment Targets for both Staging and Production.
If we had back to the “Infrastructure” page using the menu at the top, we’ll be shown our current infrastructure;

We can see that we’ve create a Deployment Target for Development (indiicated by the “1” to the right of “Development”.
If we click into the “Staging” Environment, we can setup a Deployment Target for that too;
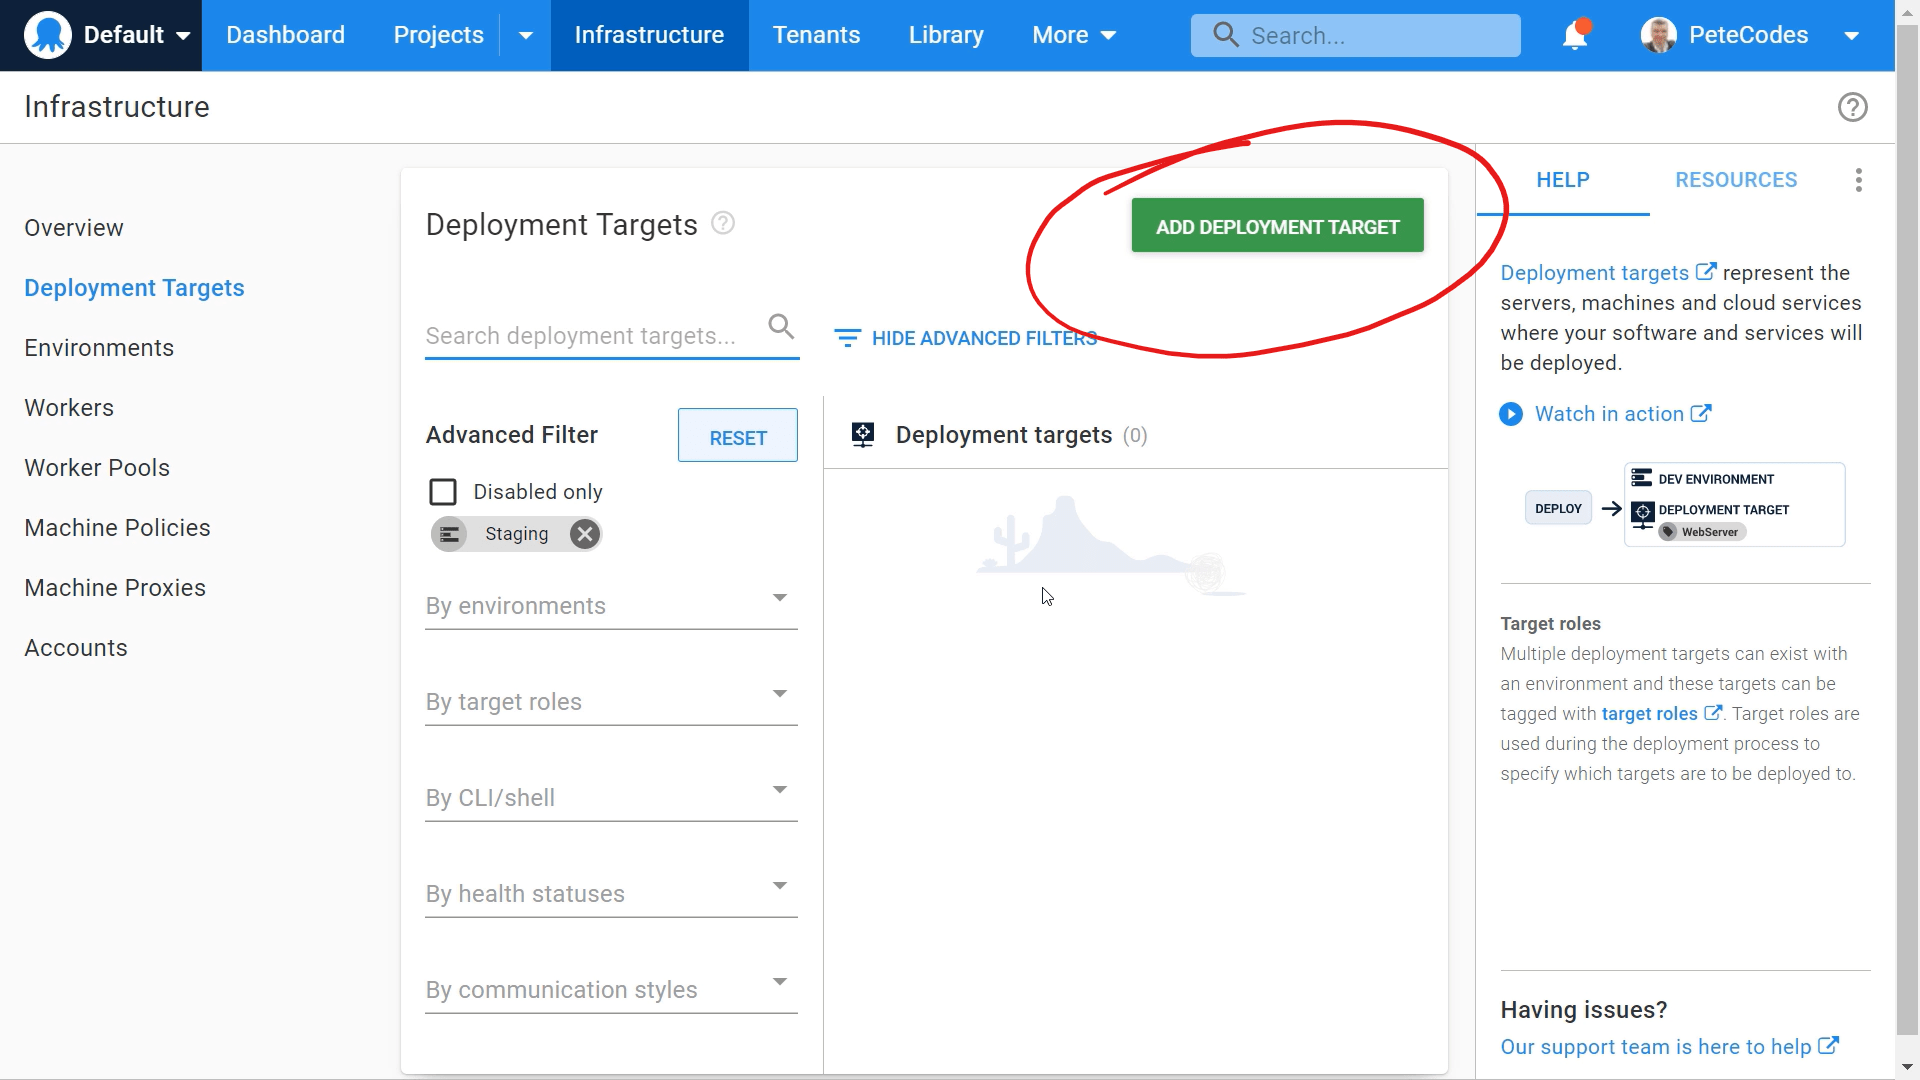
Clicking the green “ADD DEPLOYMENT TARGET” button will allow us to set this Deployment Target up for our Staging Environment.
We can then follow the same steps as we did for the Development Deployment target, choosing the Azure Category and selecting “Azure Web App” category as before.
We then use the following settings;
- Display Name = “Pete Codes – Staging”
- Environment = “Staging”
- Target Role = “Web”
- Account = “Azure Sponsorship”
- Azure Web App = “petecodes-staging Octopus North Europe”
We can then hit the green “SAVE” button in the top right to save this Deployment Target.
We can then repeat these steps for our Production Deployment Target with the following settings;
- Display Name = “Pete Codes – Production”
- Environment = “Production”
- Target Role = “Web”
- Account = “Azure Sponsorship”
- Azure Web App = “petecodes Octopus North Europe”
Next Time…
In the next post we’ll create and deploy a Hello World Blazor App to Azure!