
What we did last time
In this series of posts we’re running through how to get Octopus Deploy setup, along with the required Azure Services, in order to deploy an ASP.NET Blazor app to Dev, Staging and Production environments.
In the previous post we created our Blazor WebAssembly app and packaged it up ready to upload to Octopus Deploy.
What we’re doing this time
In this post we’ll upload our Package to the built in Octopus Deploy Registry.
We’ll then go on to create an Octopus Deploy Project, which will include creating some Project Variables which will allow us to affect the deployed state of our application.
Finally we’ll set up the Deployment Processes required to deploy our Blazor App to Azure.
Contents
Part 1 – Environments and Deployment Targets
Part 2 – Linking Azure
Part 3 – Create Azure Web Apps + Staging and Production Deployment Targets
Part 4 – Create and Package a Blazor WebAssembly App
Part 5 – Octopus Deploy Projects, Variables and Processes
Part 6 – Create a Release
Part 7 – Send a Notification to Microsoft Teams
Prerequisites
Once again, for this tutorial you’ll need the following;
- An Azure Subscription
- Either a Cloud Hosted Octopus Deploy Environment or…
- … If you’re self hosting Octopus Deploy, a local SQL Server instance.
- The .NET 5 SDK
- Visual Studio Code
- For Teams Notifications – A Teams Environment with Admin access
Octopus Deploy Built-in Package Repository
The Octopus Deploy Built-in Package Repository is where Octopus will pull your built binaries from to deploy them to a deployment target.
This isn’t designed to be a full package management offering like nuget, but is simply a library to store your packages.
Now that we’ve created a packaged version of our Blazor application, we can upload it to the Package Repository, ready to deploy to our Web App.
Heading to the Package Repository using the “Library” menu item at the top of the screen, we’re shown the Built-in Package Repository;

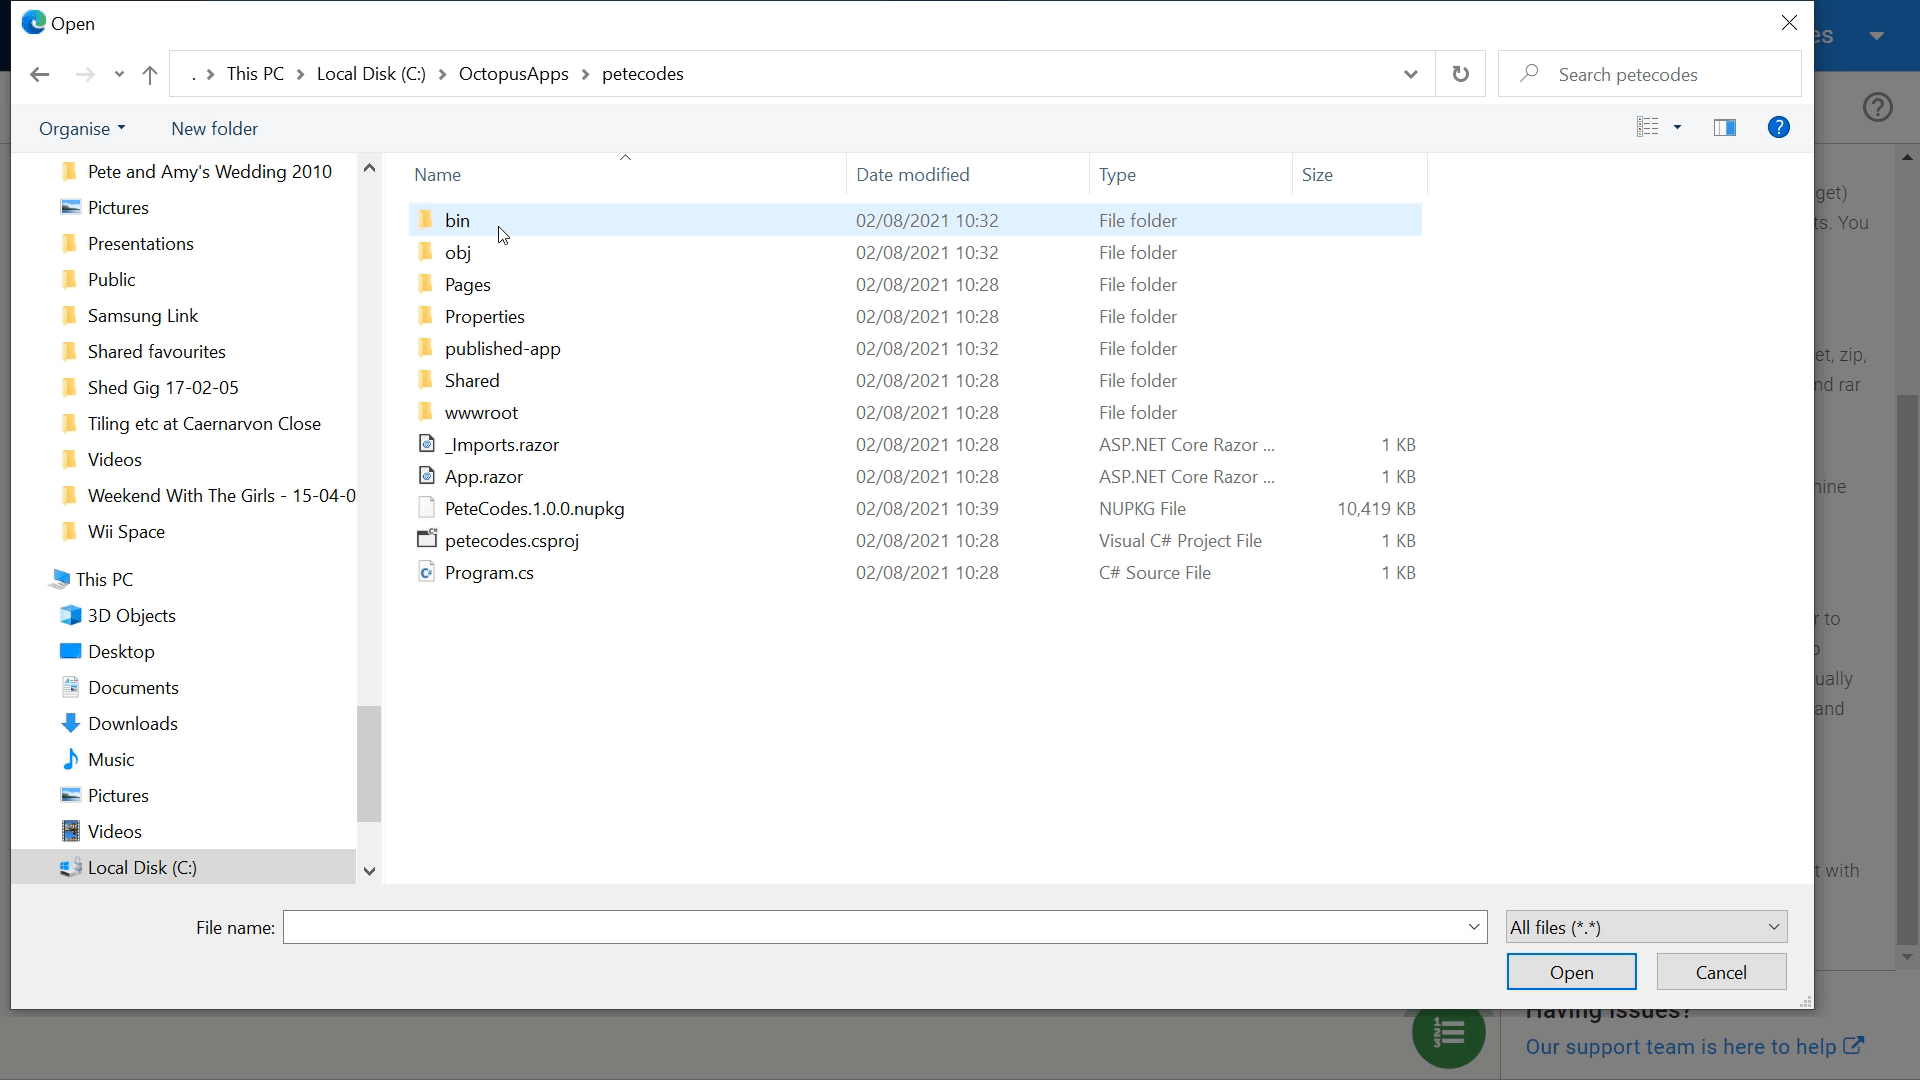
If we click the green “UPLOAD PACKAGE” button at the top right of the screen, we can navigate to our Blazor App directory, and upload the “petecodes.1.0.0.nupkg” file;
We’ll then be shown the details about our file;

Octopus Deploy Projects
Octopus Deploy Projects define the steps we take to go from our packaged binaries to the deployed app, including choosing the Release from the Repository, replacing variables, deploying to a target and so on.
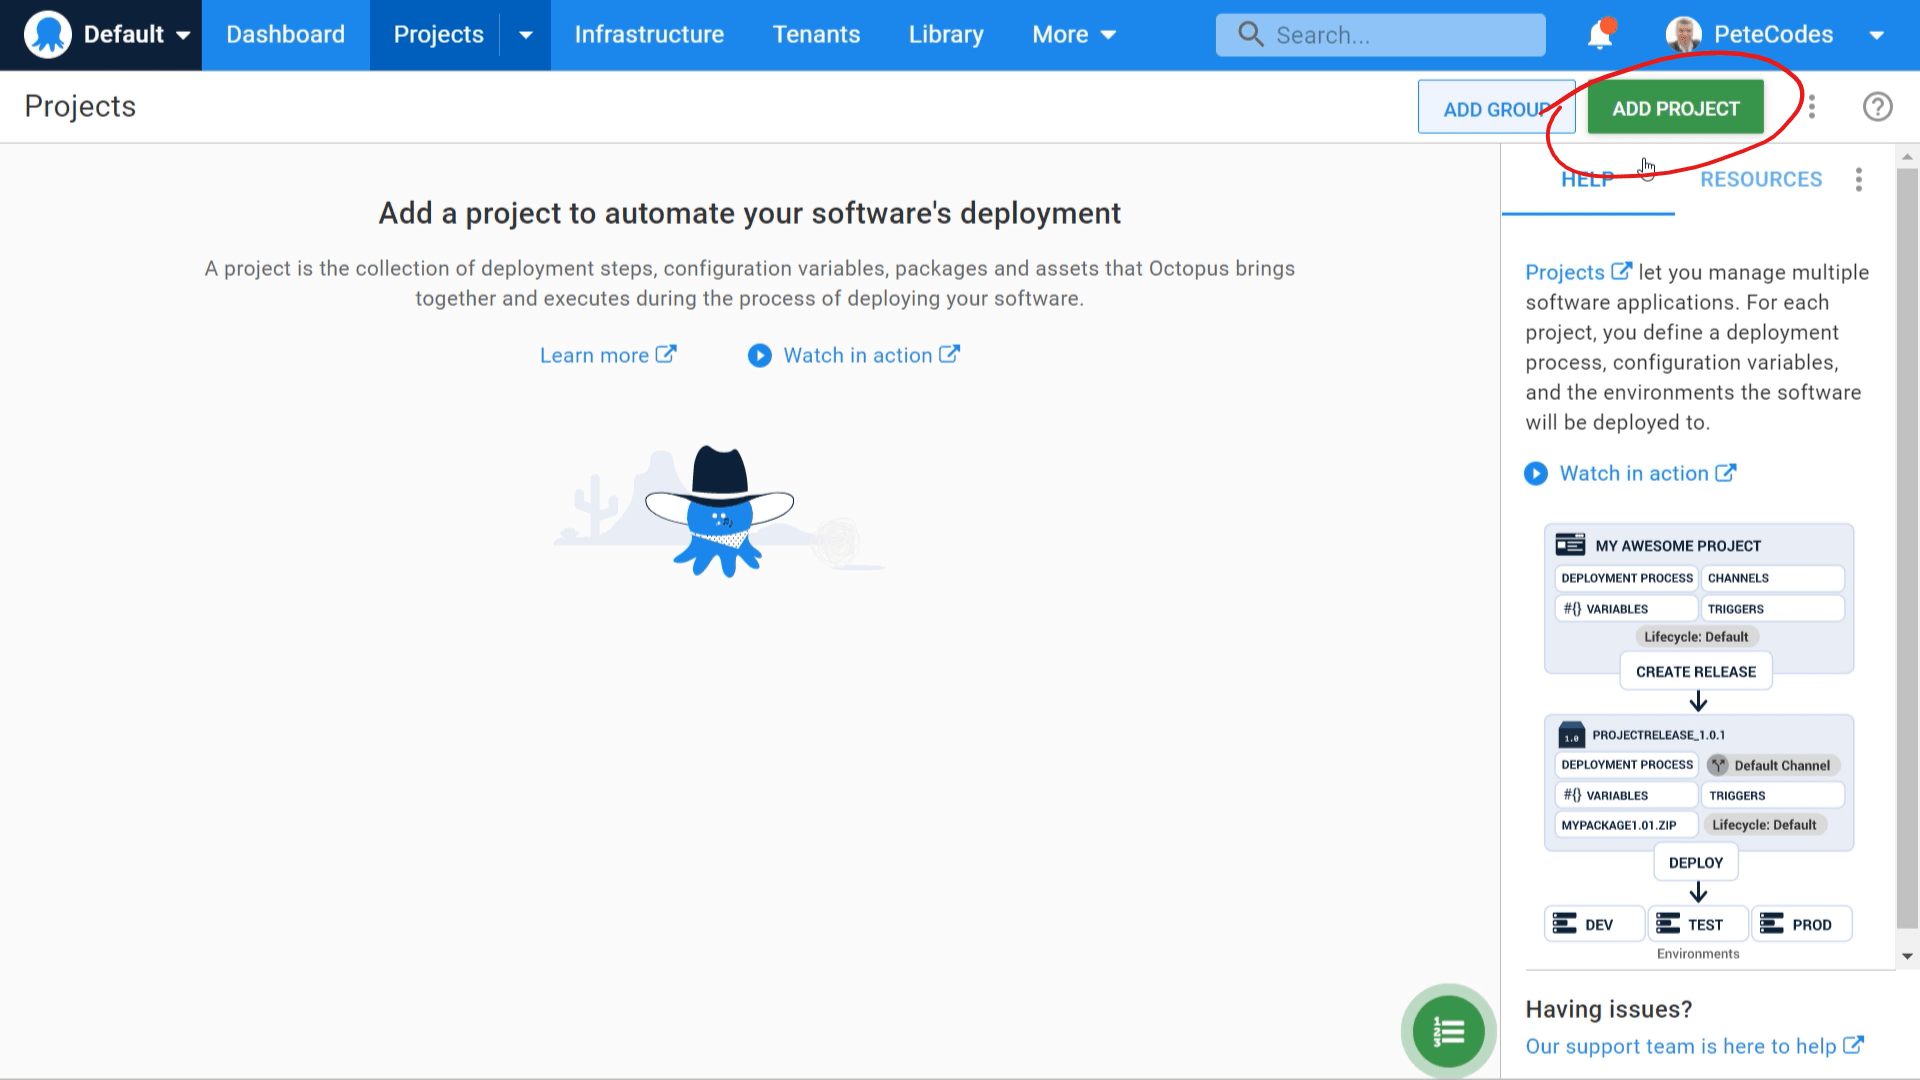
If we navigate to the “Projects” page using the menu item at the top, we can add a new Project using the green “ADD PROJECT” button at the top right corner of the screen;
We’ll be prompted for a Project Name, where we can enter PeteCodes and press the green “SAVE” button;

We’ll then be taken to the New Project page;

Octopus Deploy Project Variables
As we briefly went over earlier, one of the most powerful features of Octopus Deploy is it’s ability to replace variables in files dependant upon a set of particular cases.
We’d like to replace the “h1FontSize” variable in our “appsettings.json” file with different values dependant upon whether we’re deploying to Development, Staging or Production.
We can achieve this by first configuring the Variables in our project to match those in our “appsettings.json” file.
If we scroll down on the New Project page, we can click the “Variables” link in the menu on the left;

We’ll then be taken to the Project Variables page;
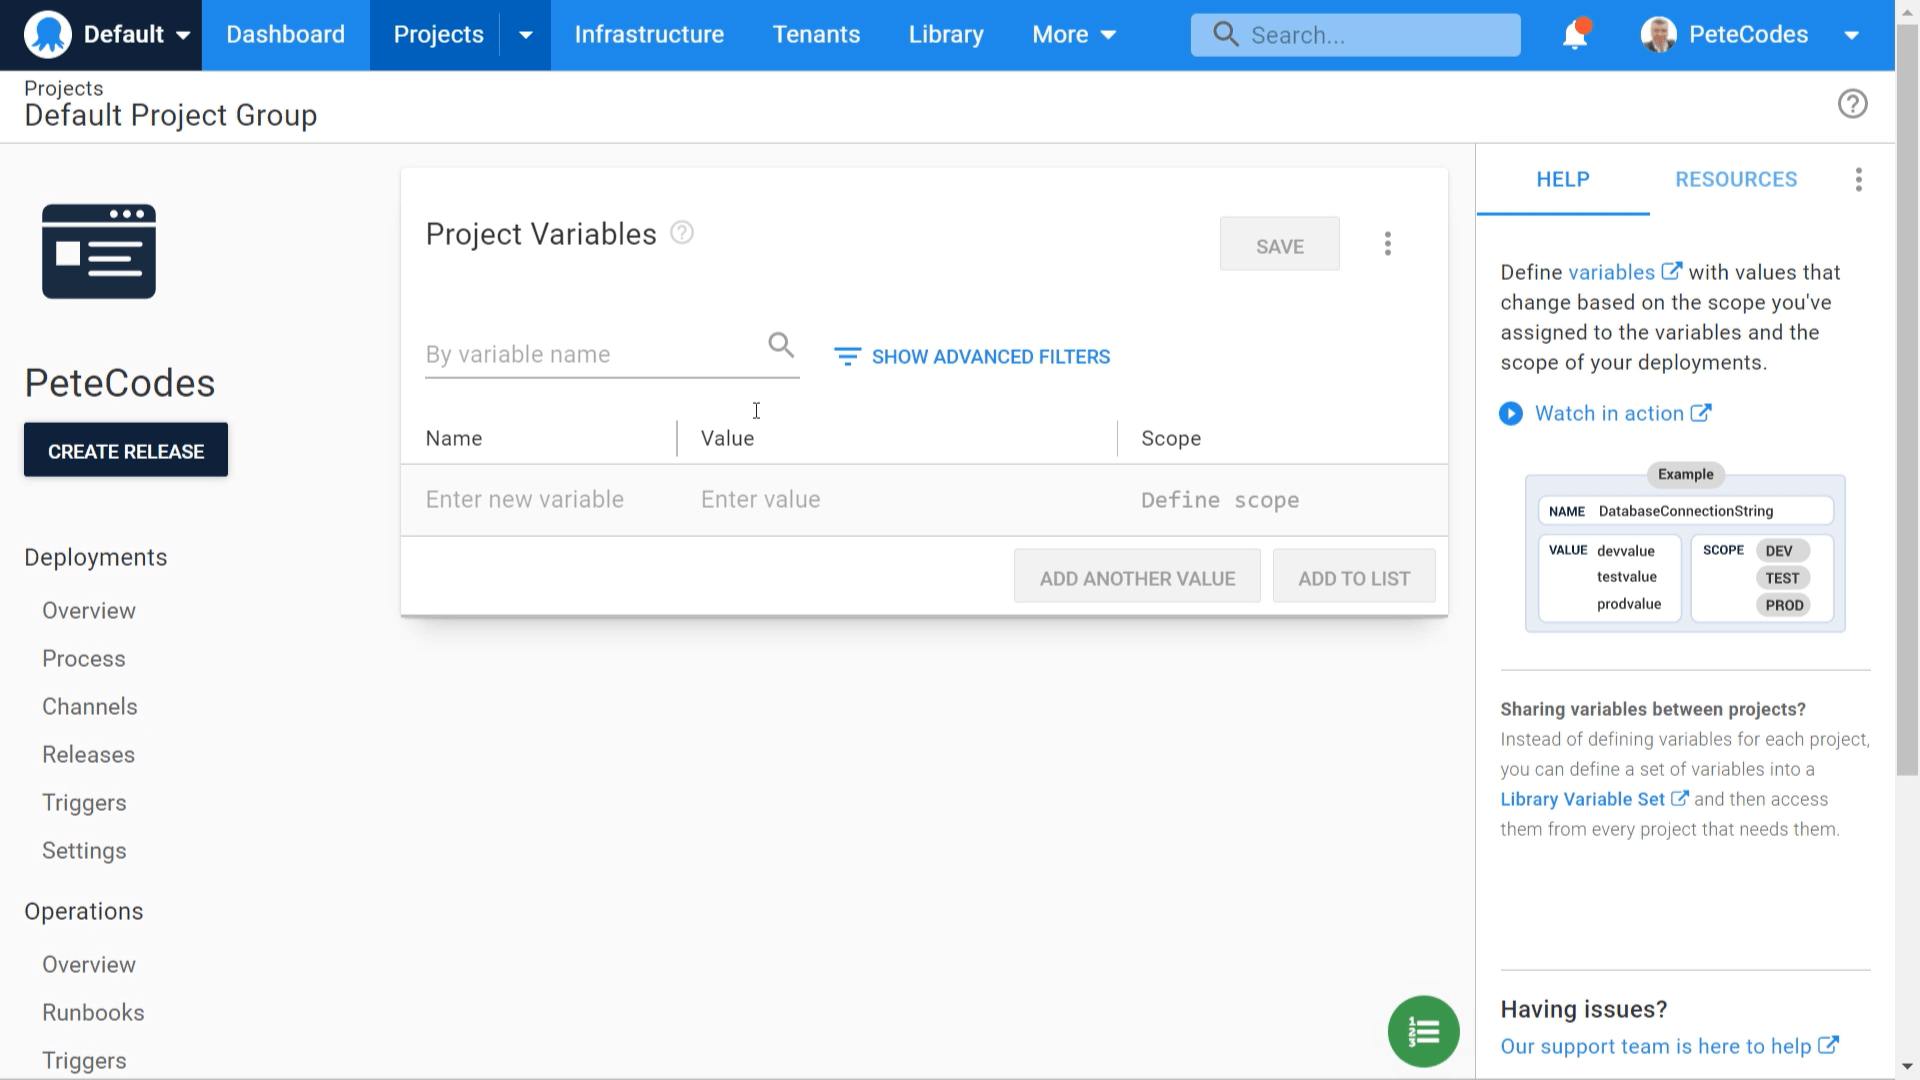
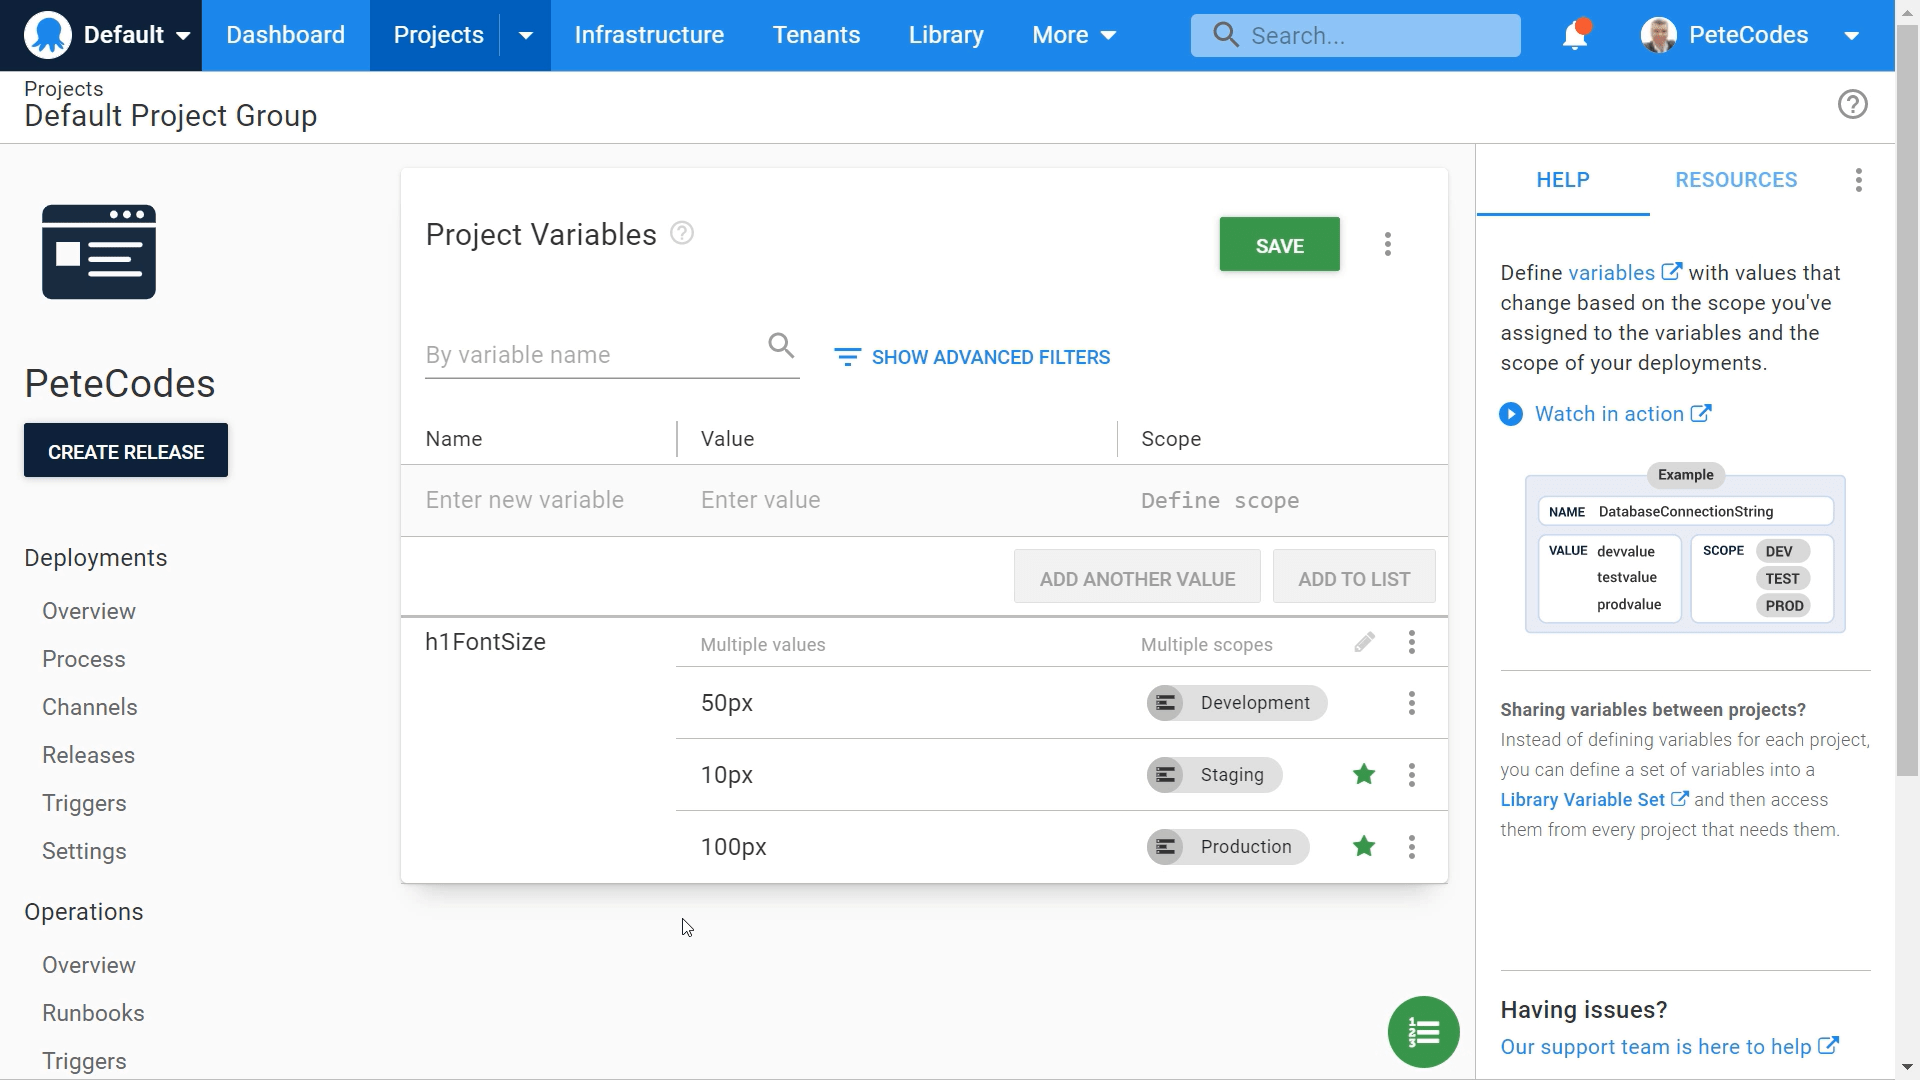
Here we can define the Variable Names, the value along with the Scope, which is under what conditions we’d like that variable to be the given value.
If we clicking into the “Name” box where we’re prompted to “Enter new variable”, and we enter “h1FontSize”. Then in the Value box we enter “50px”.
Next we can set the scope of this variable by clicking into the “Define scope” box;
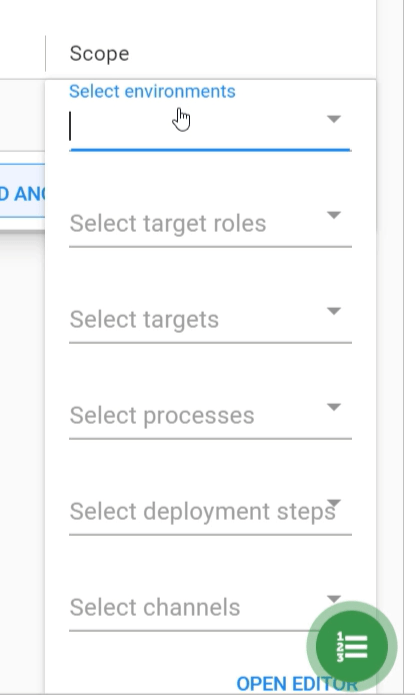
Here we’re presented with a host of different options to set the scope of this particular variable.
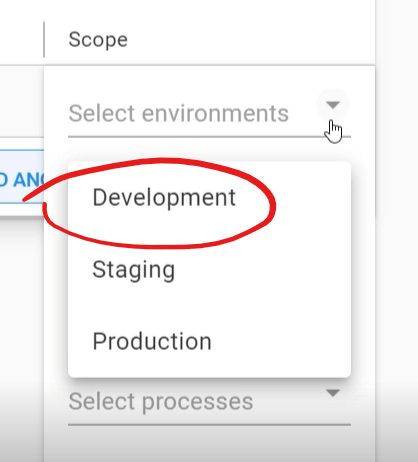
We want our “h1FontSize” variable to be set to 50px when we deploy to development. So, if we click on the “Select environments” dropdown, we’ll be able to choose our “Development” Environment from the list;
We can then repeat this process for our Staging and Production Environments, using “10px” for Staging and “100px” for Production;
Hitting the green “SAVE” button in the top right of the page will save our Variables.
Preview Octopus Deploy Variables
Now that we have our Variables set up, it can be useful to see how the value of our variable will change dependant upon the conditions.
We can achieve this by using the “Preview Variables” link in the menu on the left.
Clicking the link will take us to the “Deployment Variable Preview” page;
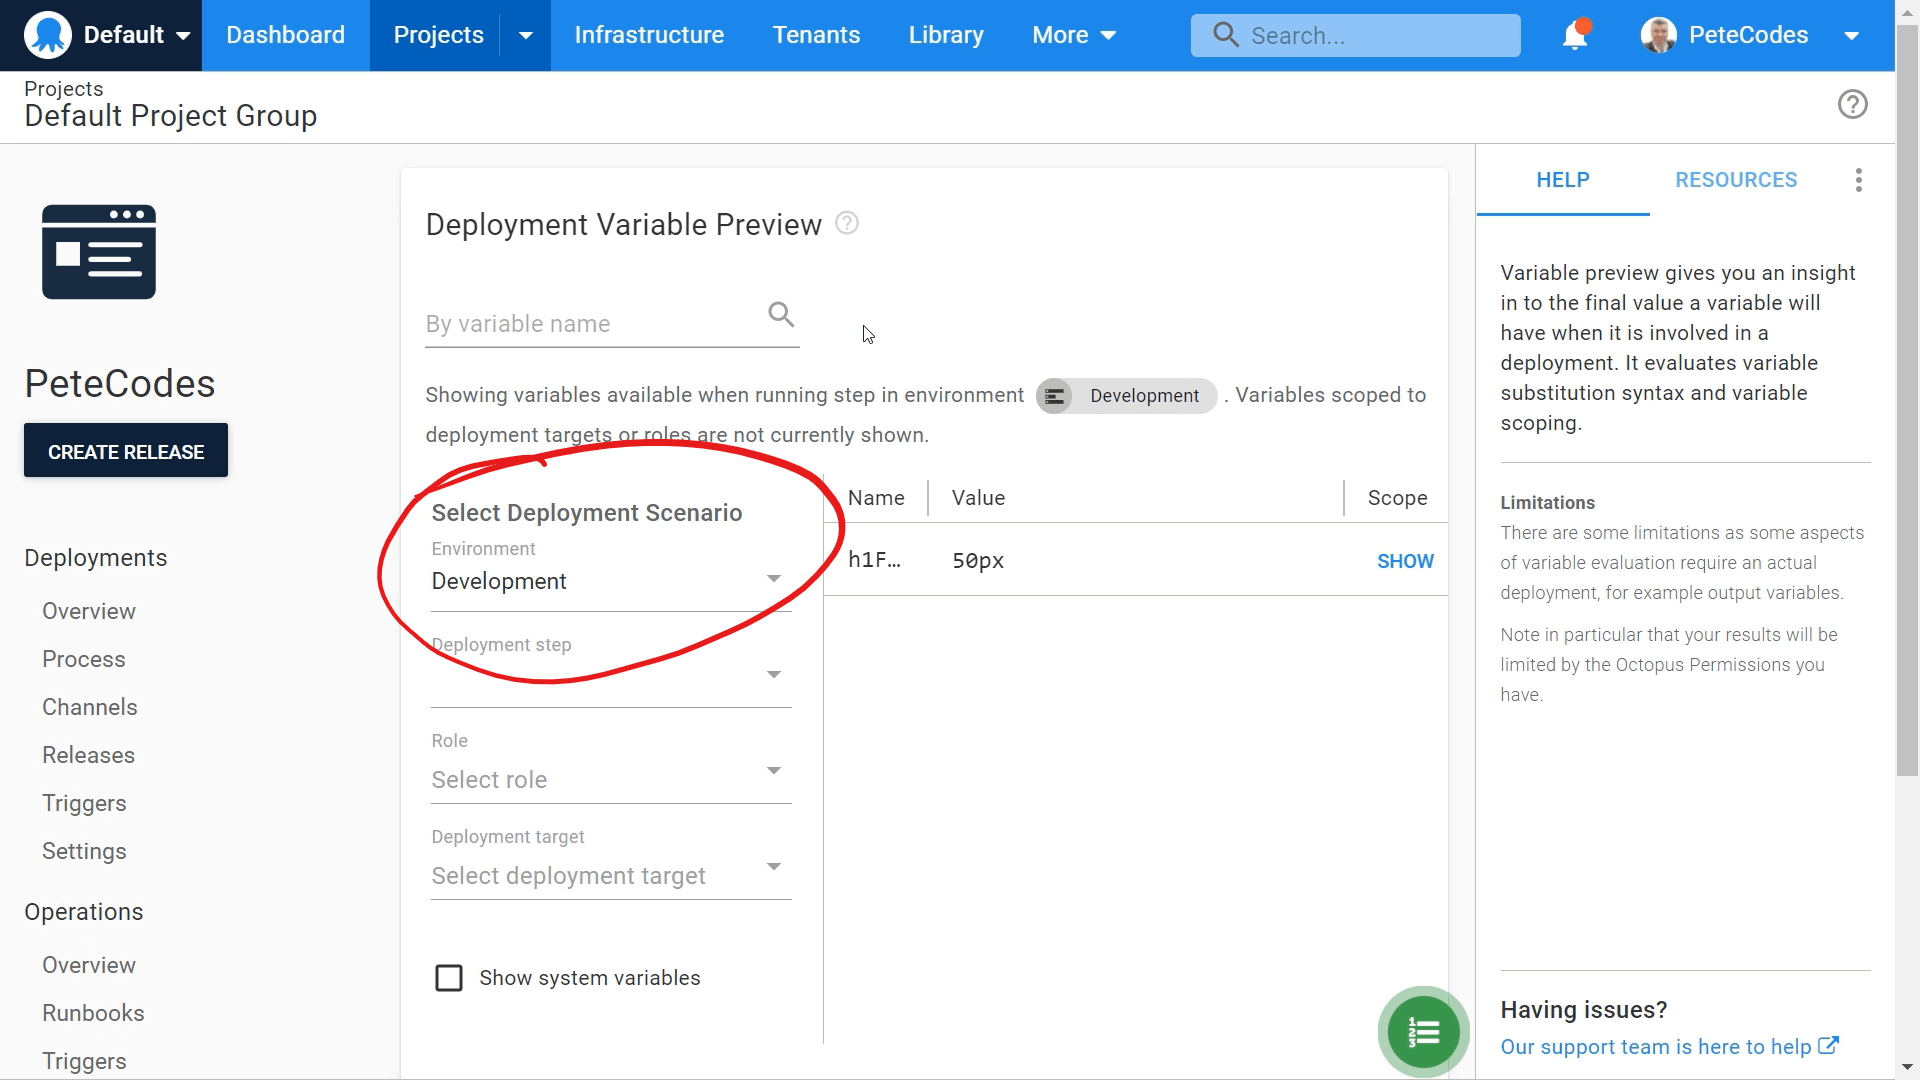
If we change the value in the “Environment” drop down, we can see the value of our “h1FontSize” variable change in the panel on the right;

It’s possible to share Variables across projects using the “Library Variable Sets” feature of Octopus Deploy, but we won’t be diving into this here.
Defining an Octopus Deploy Deployment Process
If we now return to the Project Overview page using the “Overview” menu item on the left, we can click the green “DEFINE YOUR DEPLOYMENT PROCESS” button at the top right corner of the screen;
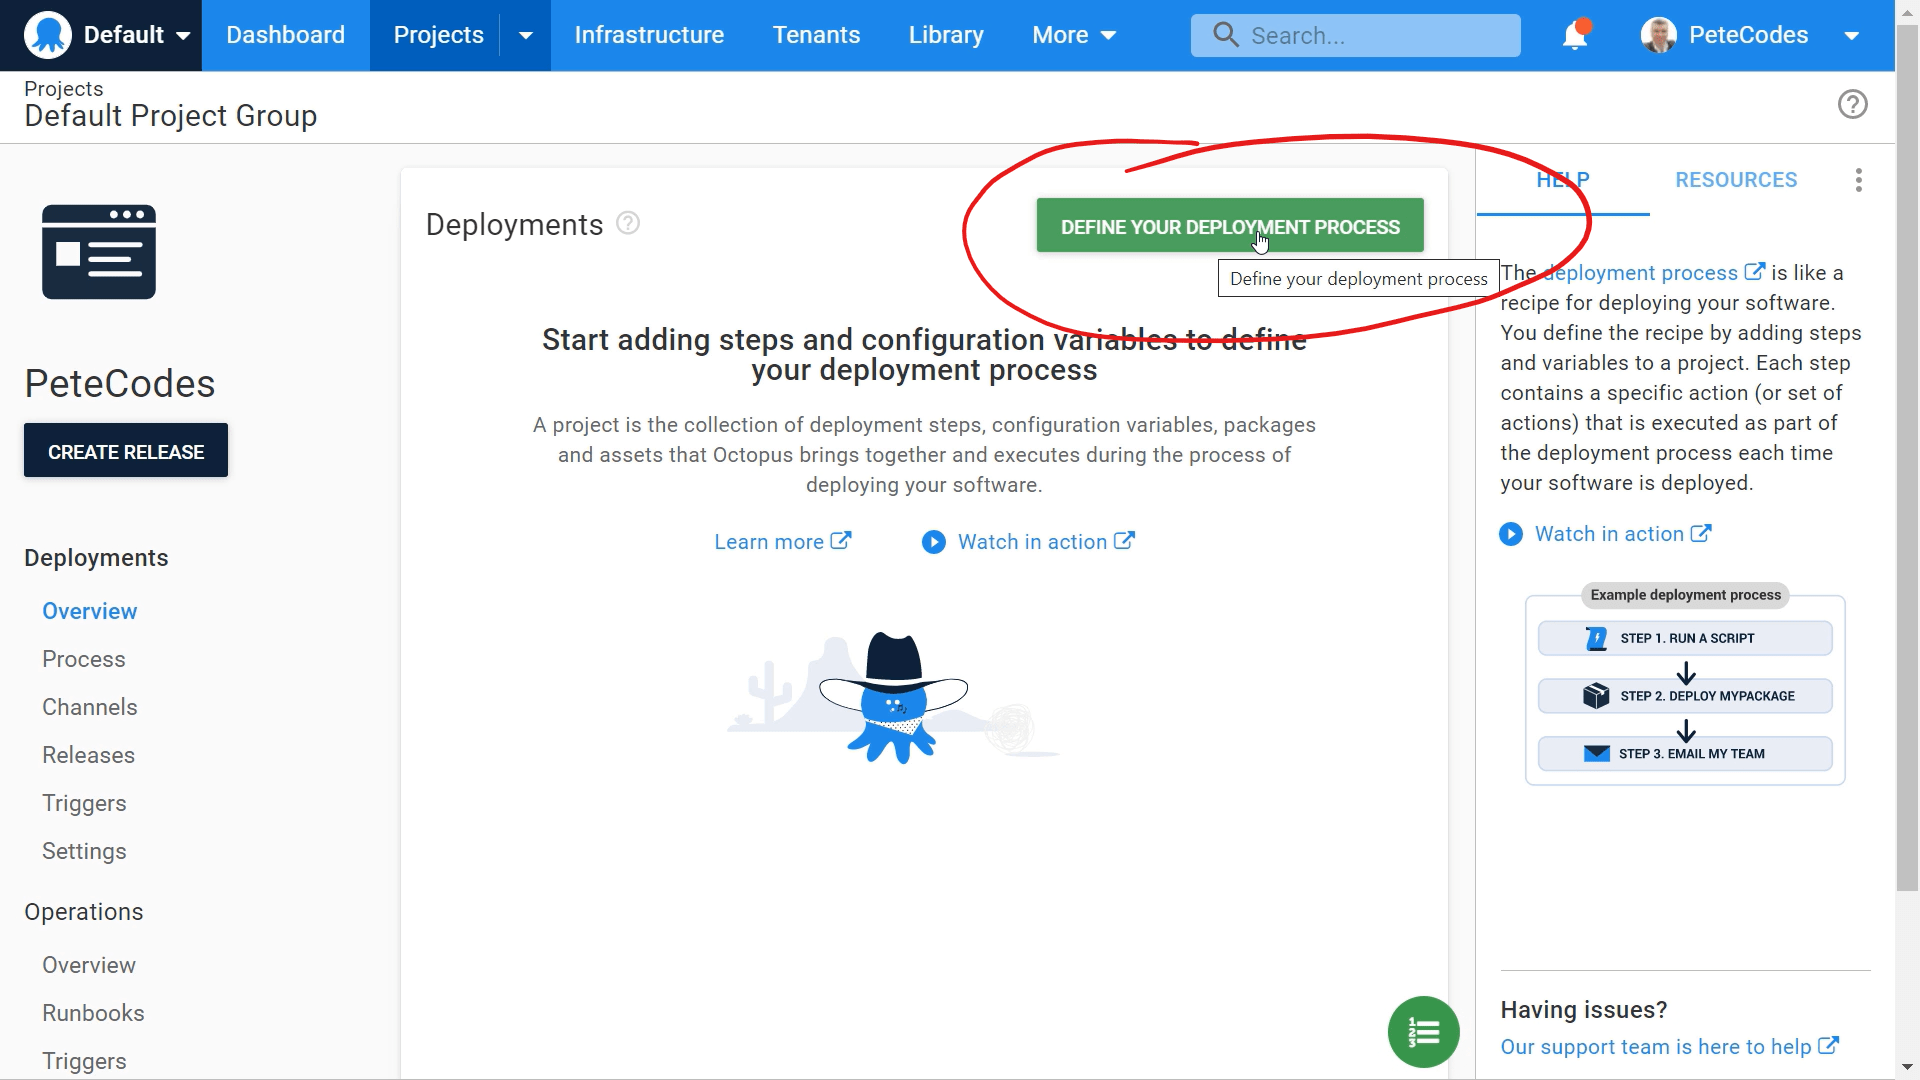
We’ll then be taken to Process page;
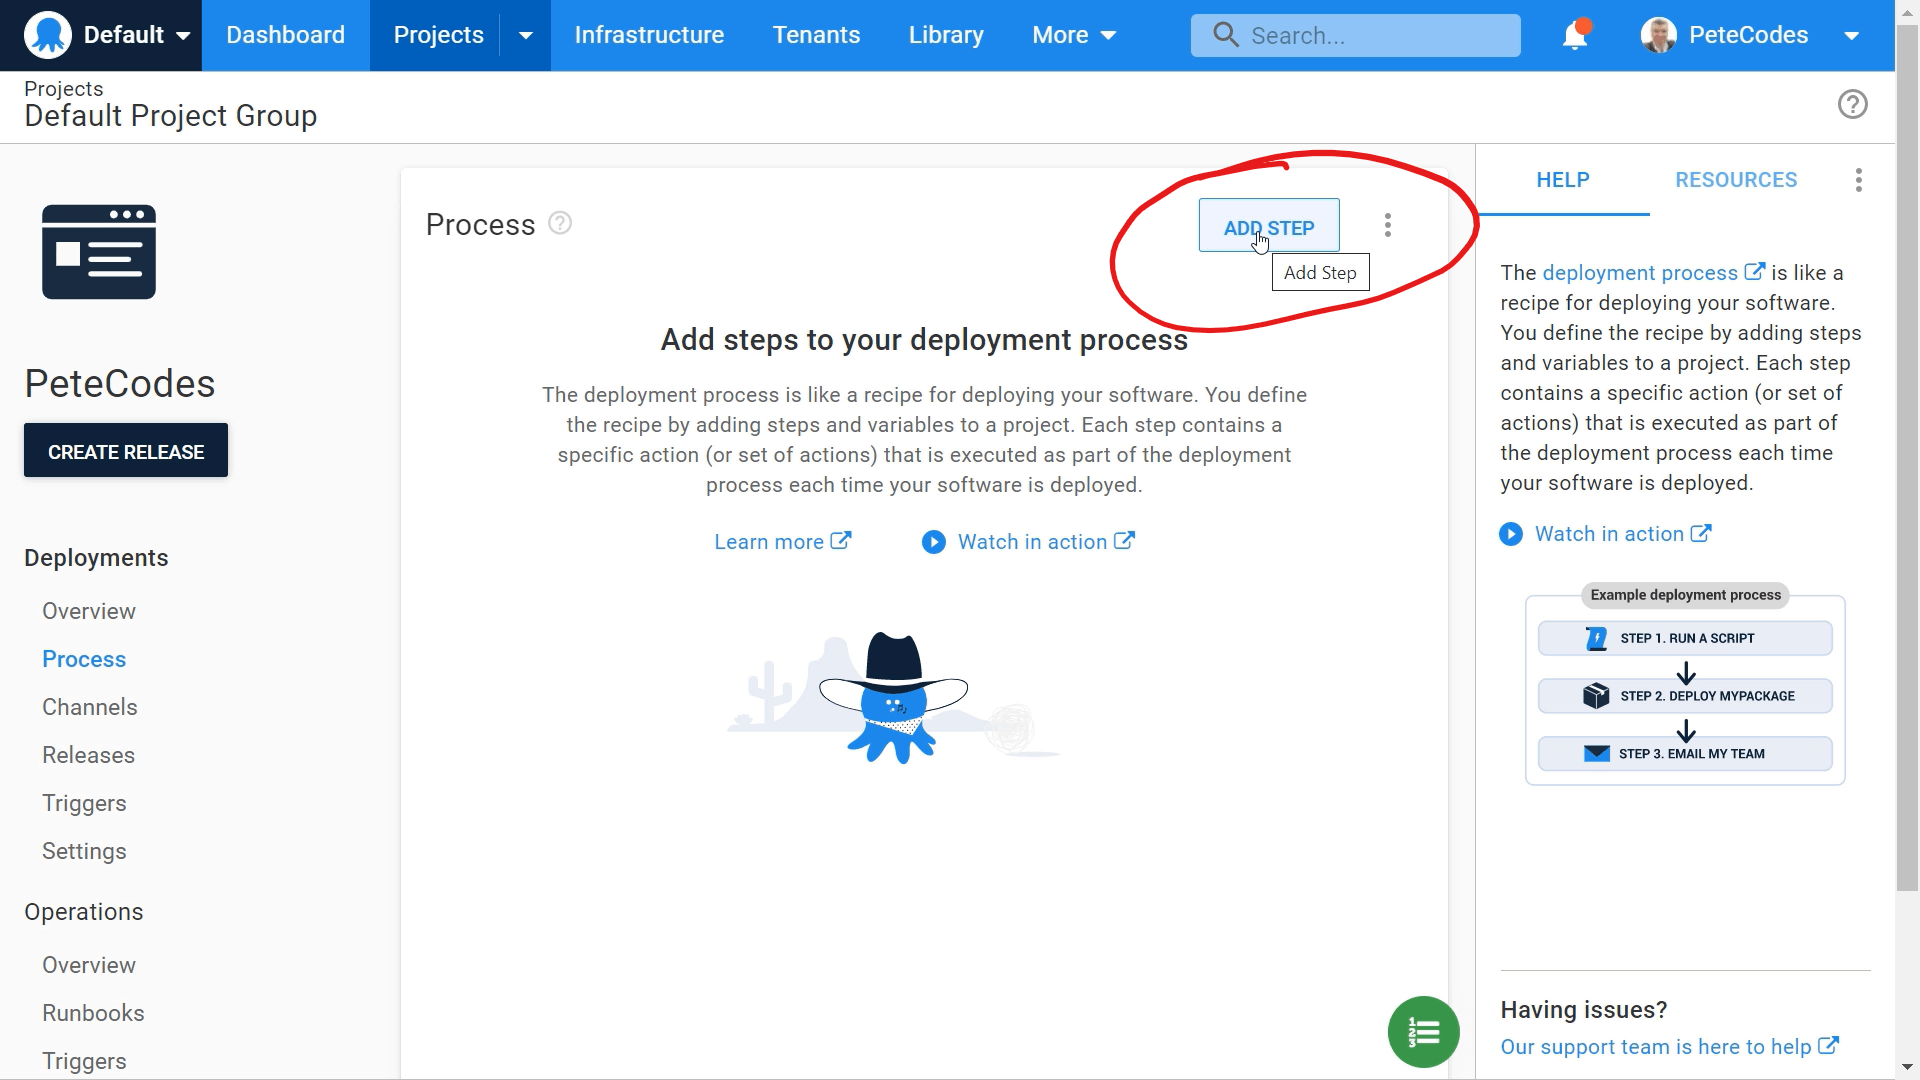
We can add our first step by hitting the “ADD STEP” button in the top right hand corner of the page;
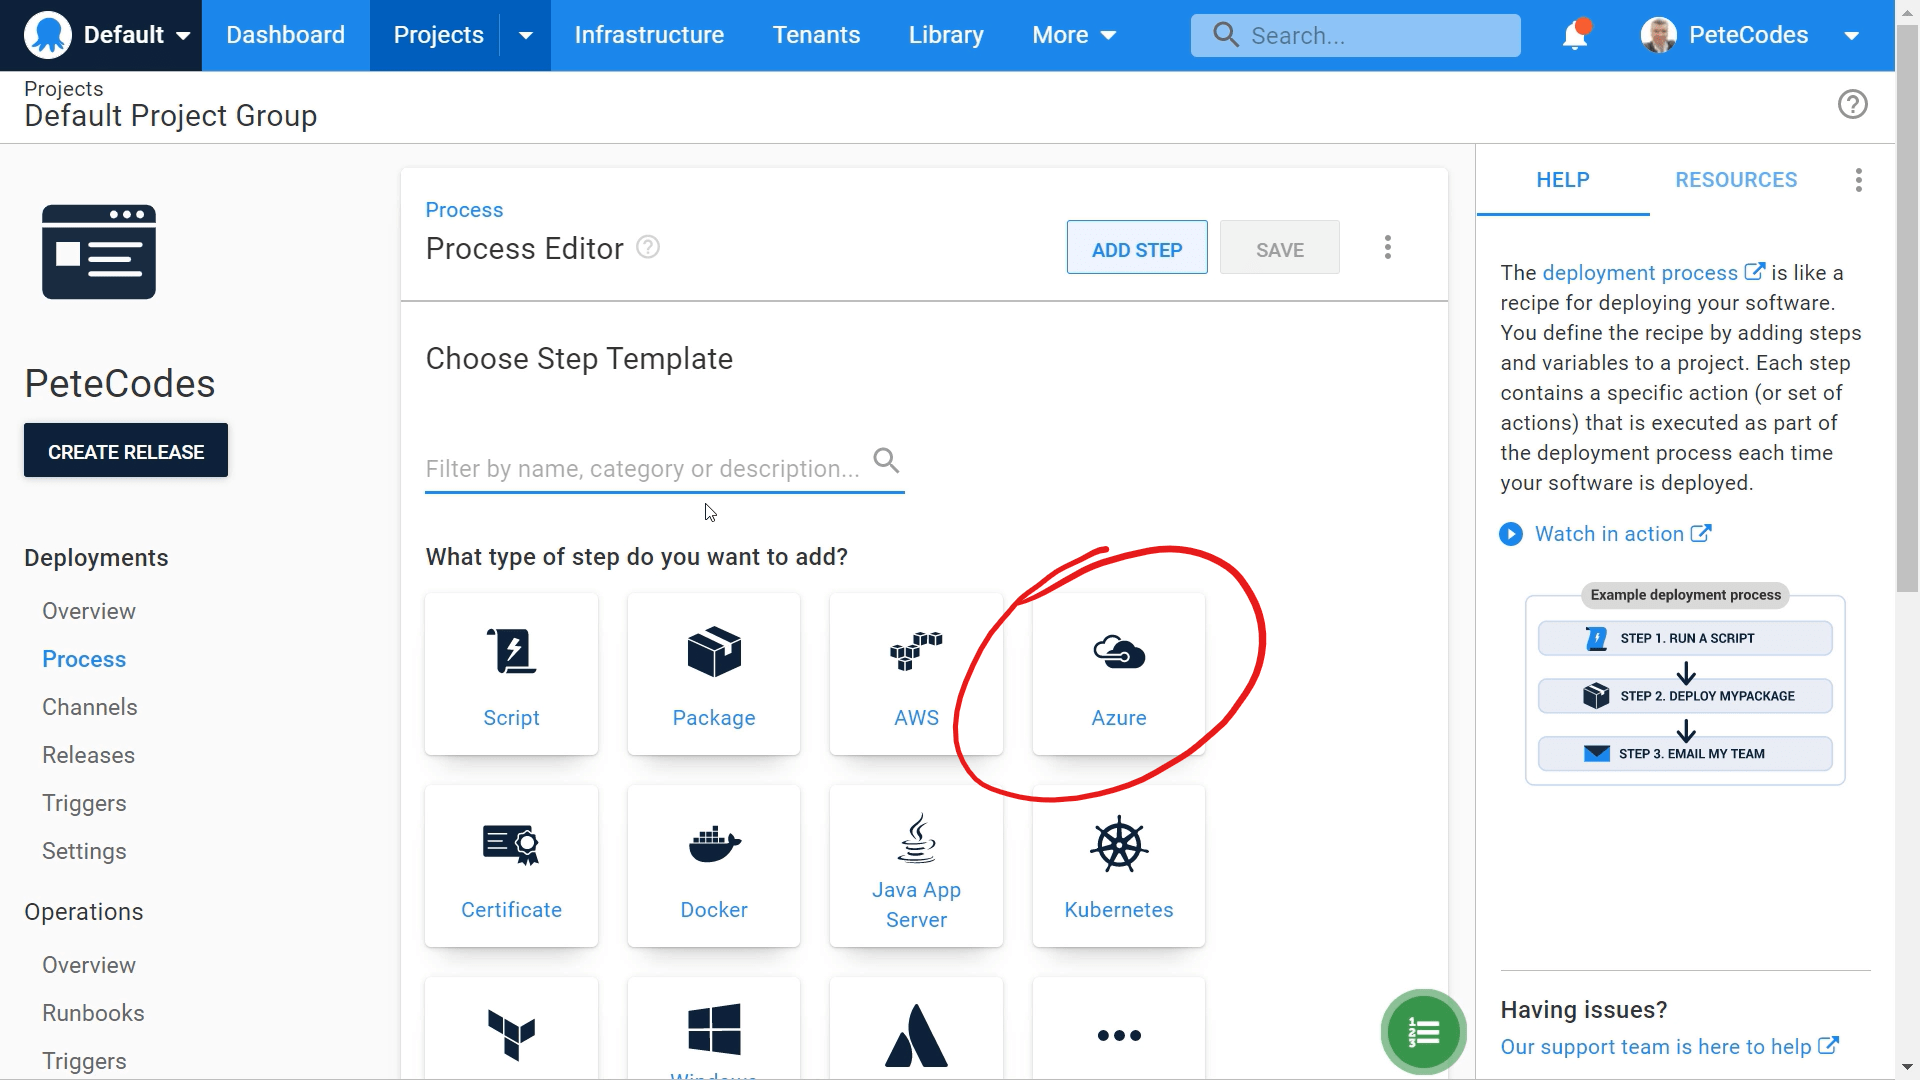
Here we’re presented with a host of options for Deployment Process steps, with everything from a basic Script, through Docker, Terraform and AWS.
We’ll be deploying an Azure Web App, so we can select the “Azure” option. This will show us the various Azure Deployment steps we can make use of;
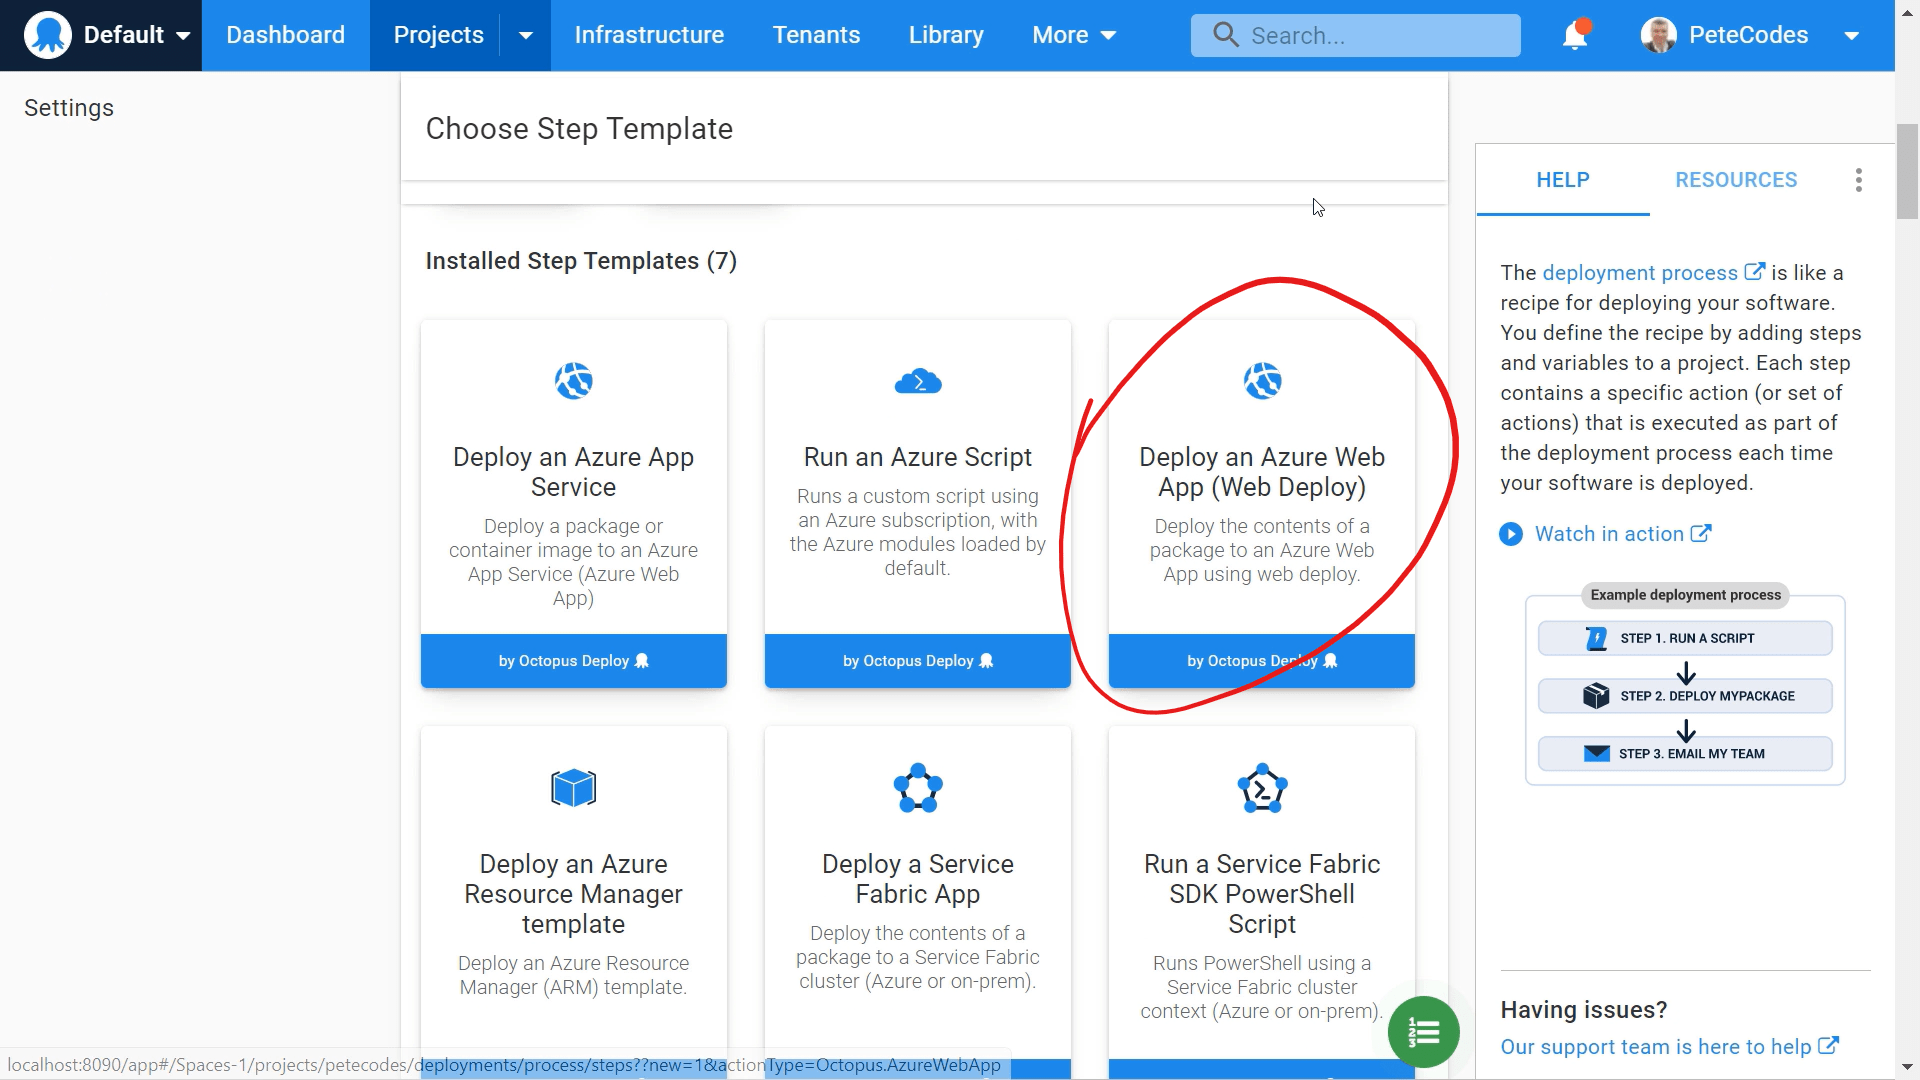
We can then choose the “Deploy an Azure Web App (Web Deploy)” option. This will take us to the Process Editor page for this step;
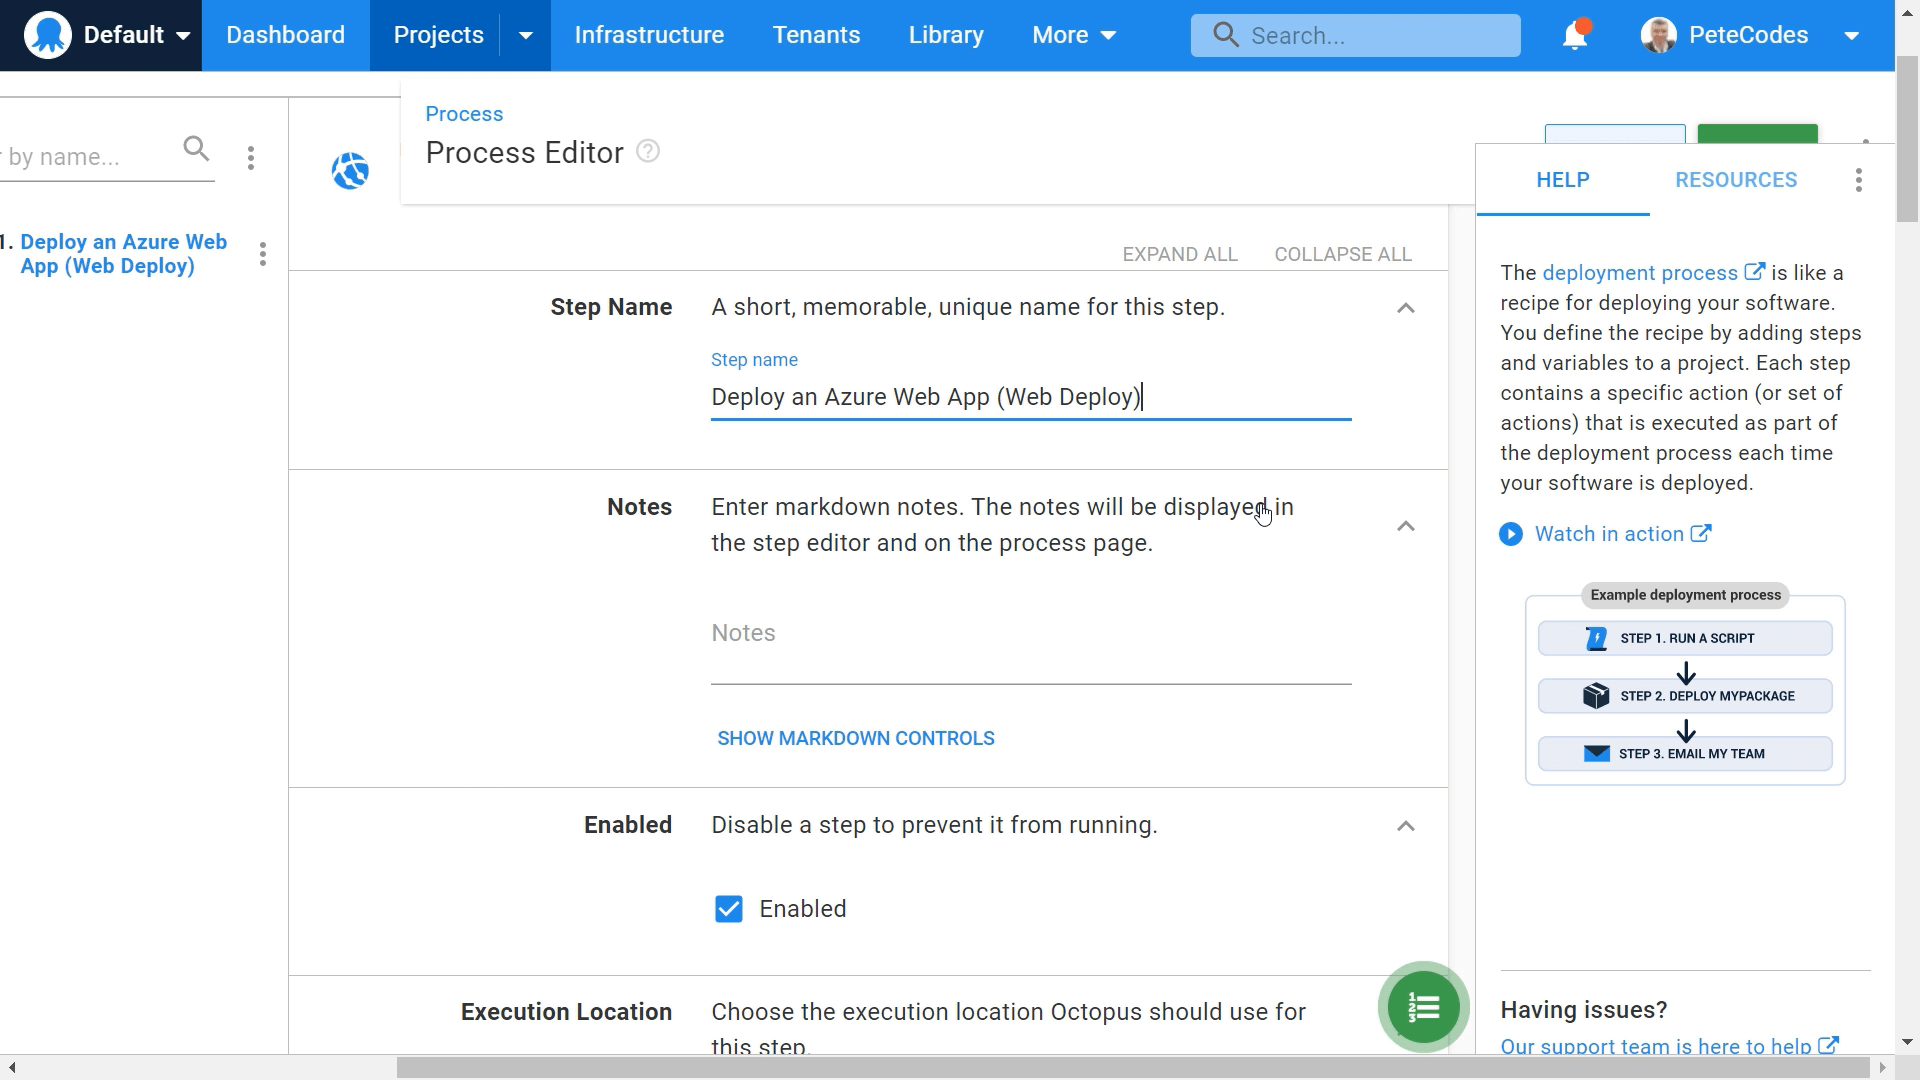
We can leave the “Step Name” option at “Deploy an Azure Web App (Web Deploy). We can enter some notes if we feel that the Step Name could be misunderstood in any way. We’ll enter “Deploying a Web App” for the Notes.
We can leave the step Enabled, set the “On Behalf Of” “Target role” to “Web” and leave the “Container Image” option as the default of “Runs directly on a worker (default)”.
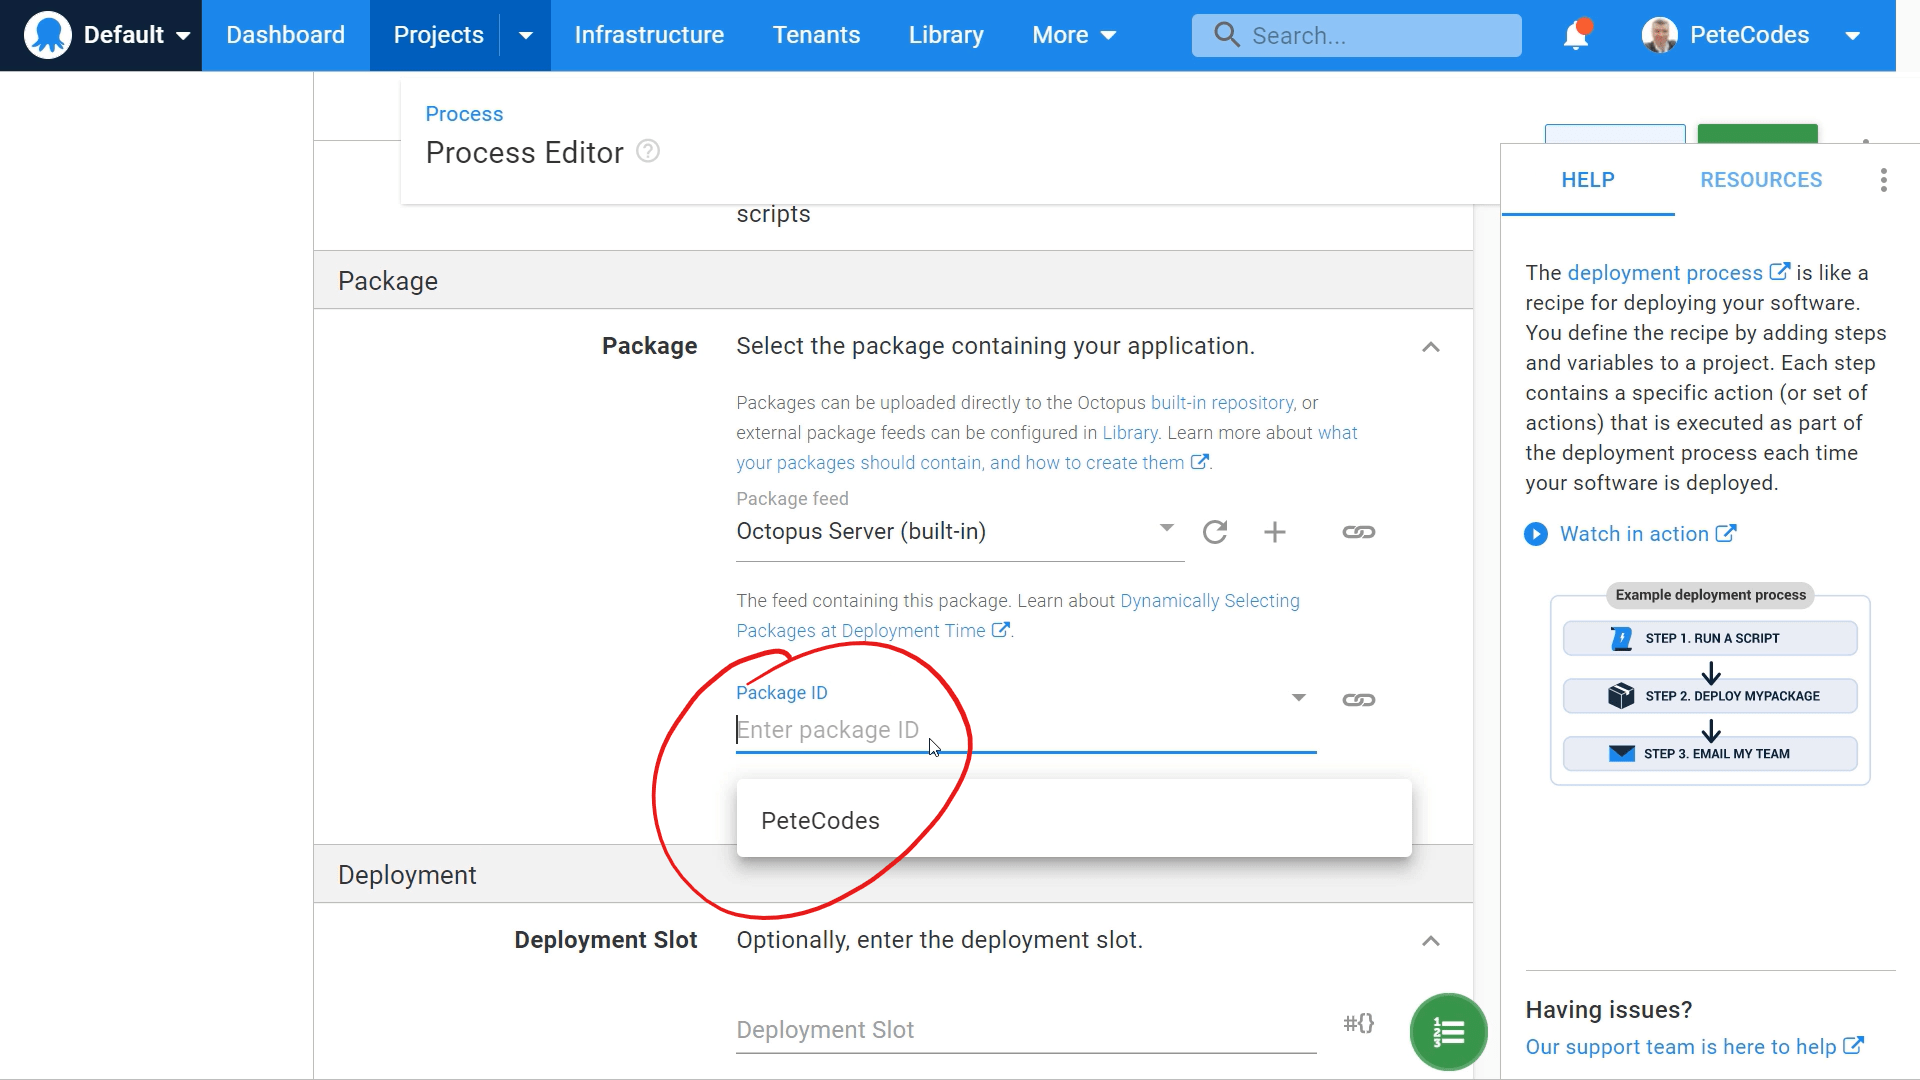
Next we can choose the package we’d like to deploy. Here we can select the “PeteCodes” package we uploaded earlier;
We can then leave the “Deployment Slot” and “Physical Path” options empty as we won’t be modifying those.
We can leave the “Remove Additional Files, Preserve “App_Data” and “Enable AppOffline” options deselected.
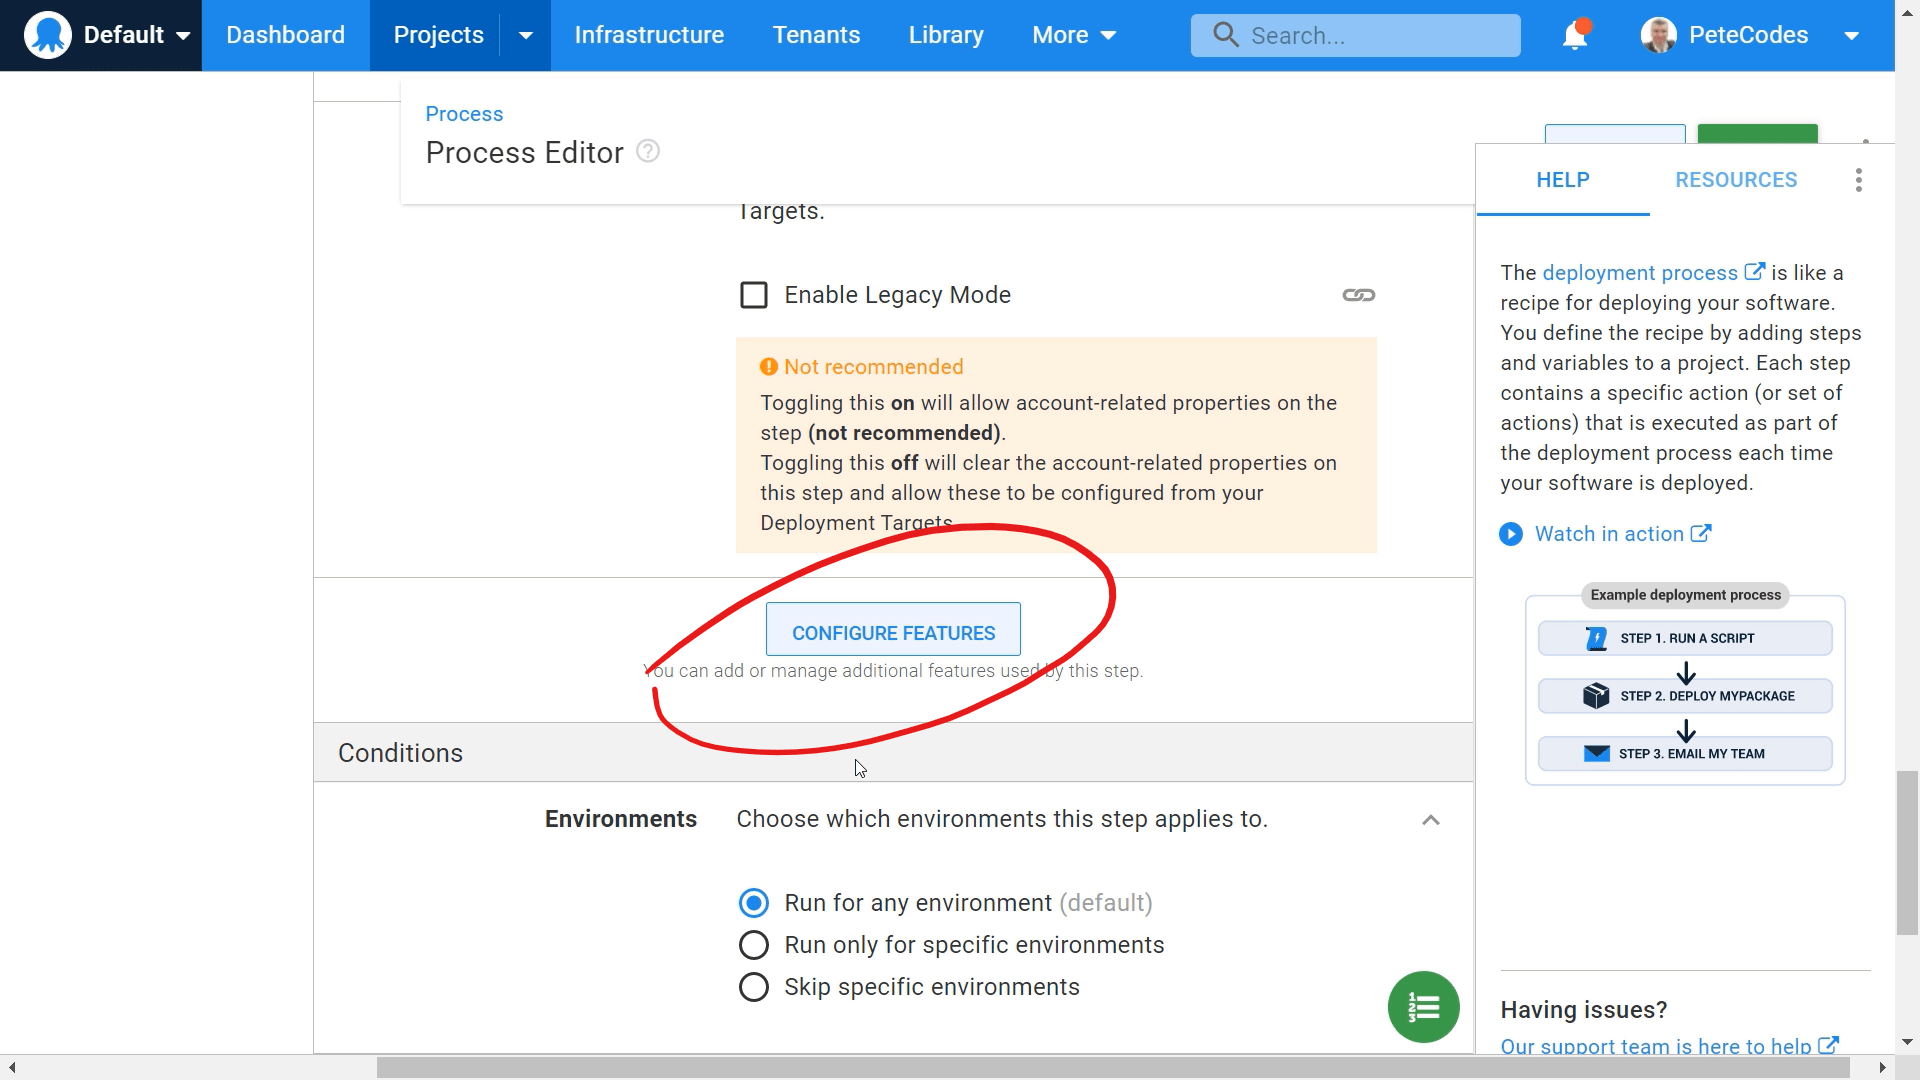
We can leave the “File Comparison” option at its default of “TimeStamp (default) and leave “Enable Legacy Mode” deselected.
Octopus Deploy – Deploy Azure Web App – Configure Features
Next we want to implement the feature to replace variables in our appsettings.json file. We can do that by configuring additional features within our step.
If we hit the “CONFIGURE FEATURES” button;
We’ll then be shown a set of options for the Features we can Configure;
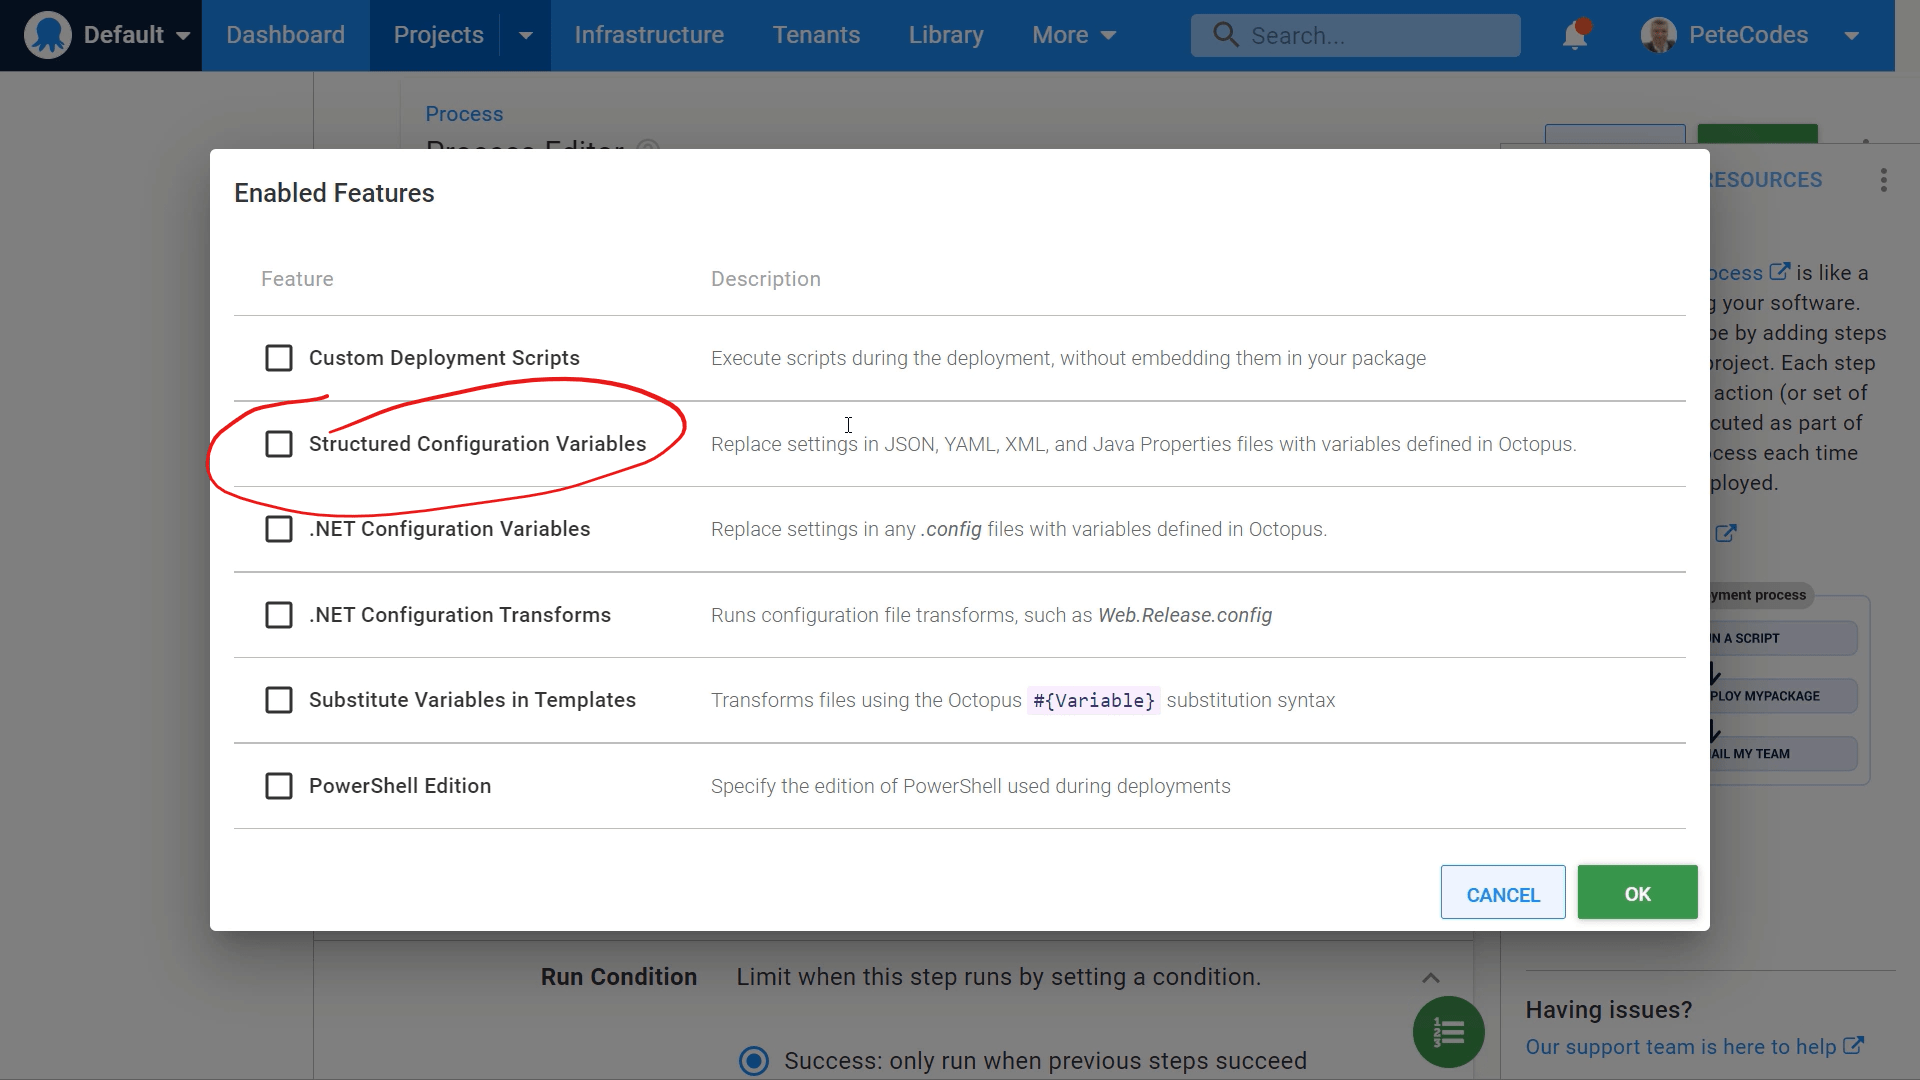
If we had a traditional .NET config file, we could select the “.NET Configuration Variables” option. However, we’ll be replacing variables in our “appsettings.json” file, so we’ll choose the “Structured Configuration Variables” option.
Hitting the green “OK” button in the bottom right of the dialog, we’ll be taken back to the Process Editor, and we’ll have a new entry area where we can enter the “Target files” we’d like to apply the variable replacements to.
We can enter the following to target our “appsettings.json” file in any directory in the project;
**\appsettings.json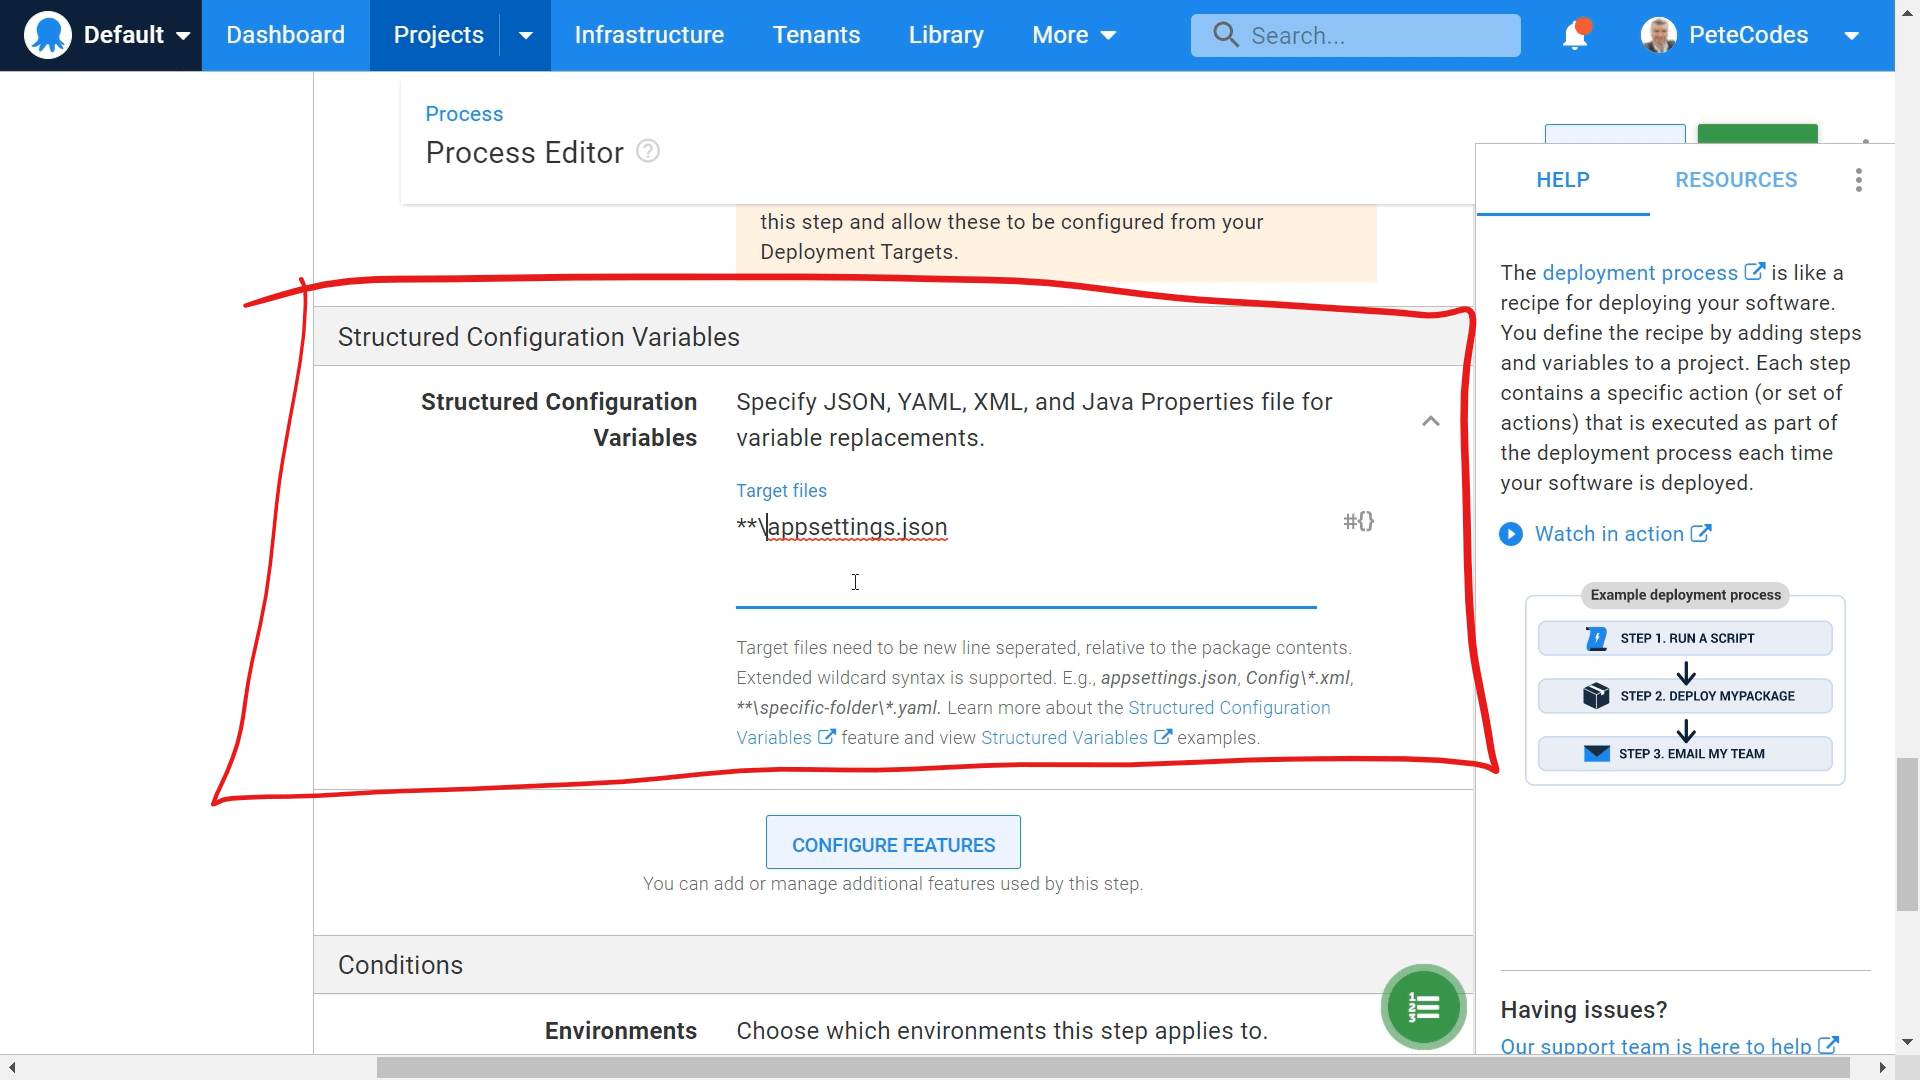
We can then leave “Environments” set to it’s default of “Run for any environment (default), “Run Condition” at the default of “Success: only run when the previous steps succeed (or is first step)”, and leave “Required” deselected.
When can then hit the green “SAVE” button in the top right corner of the page.
Octopus Deploy Manual Intervention Step
We’ll then be returned to the Process Editor Page.
It’s often desirable to gate deployments to certain environments. For instance, we may want to make sure a manager approves any deployments to the Production Environment.
We can achieve this by adding a “Manual Intervention Required” Step to our process.
If we once again click the “ADD STEP” button, we can then choose the “Built-in Steps” button;
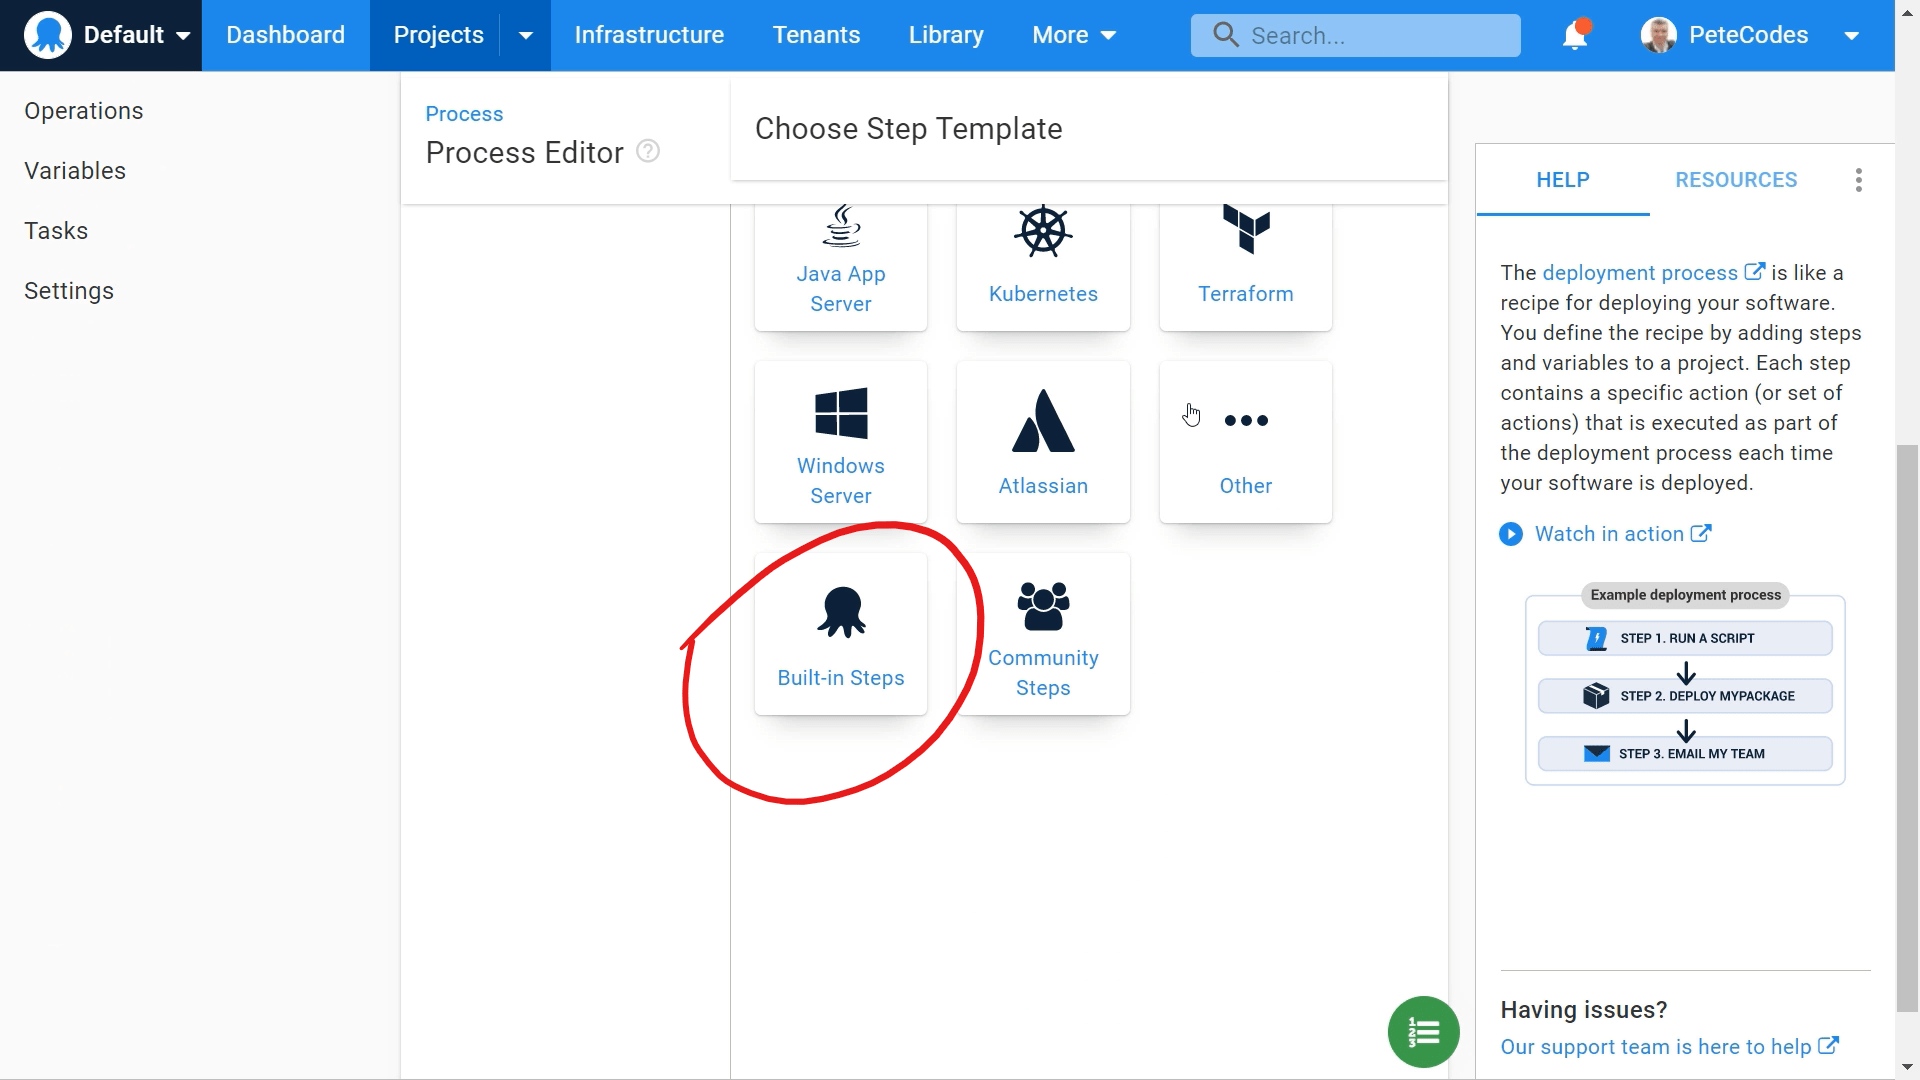
Clicking the “Built-in Steps” option will show us all of the Octopus Deploy Built in Steps.
If we scroll down, we’ll find the “Manual Intervention Required” step;
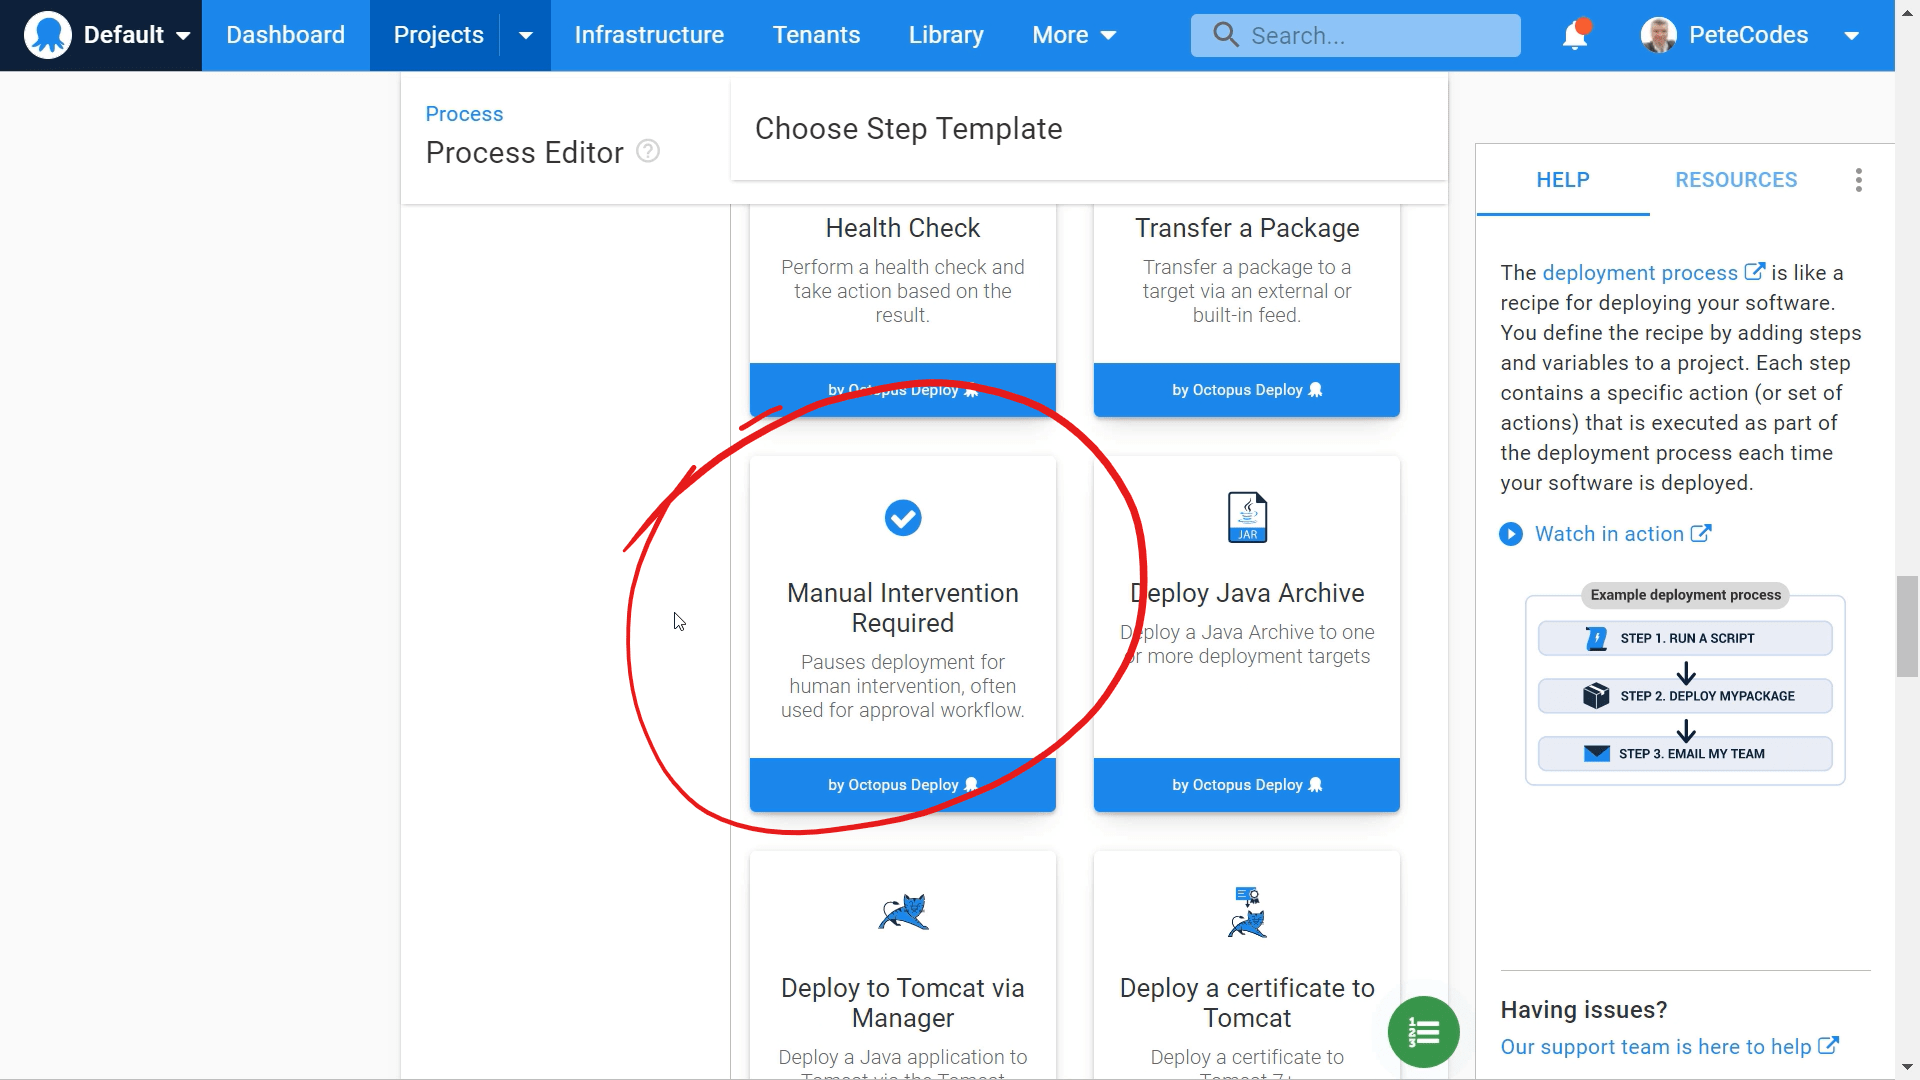
Clicking this option, will take us to the “Manual Intervention Required” step setup;
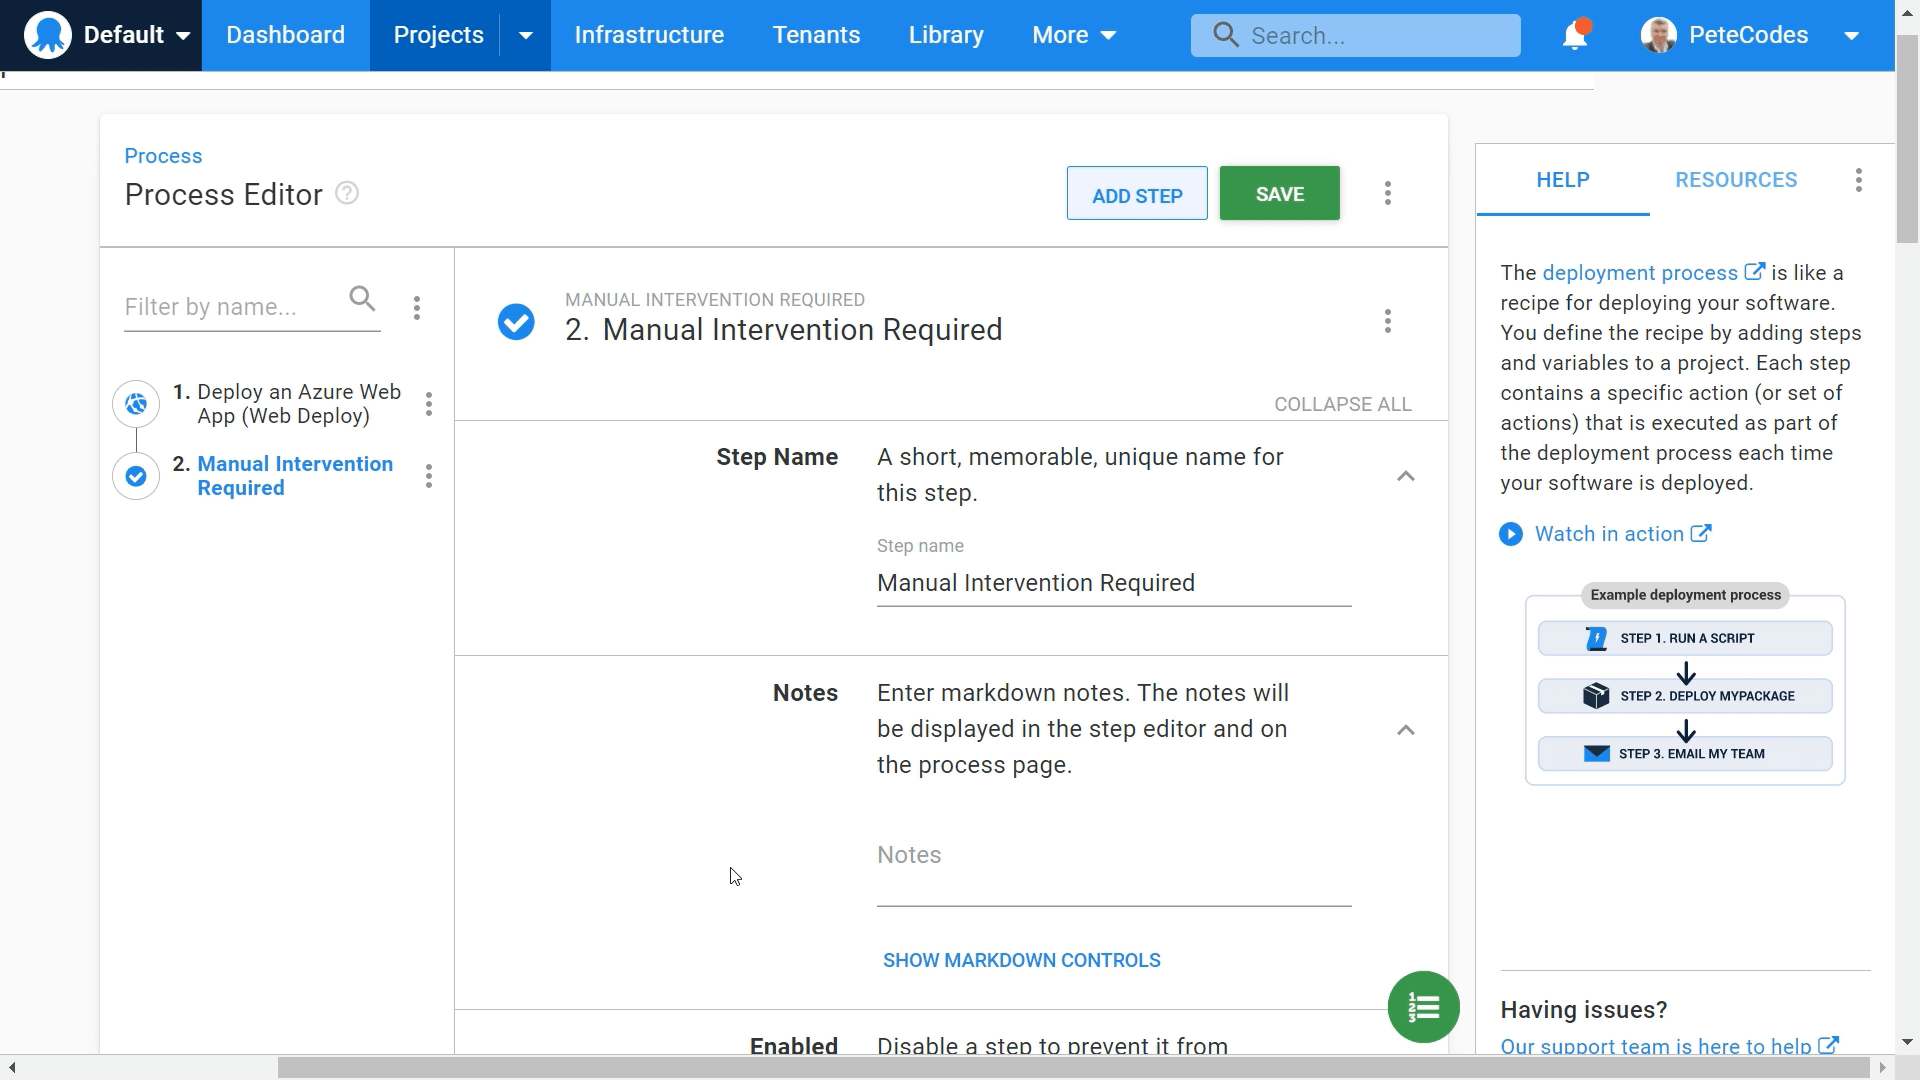
We can leave the “Step Name” as “Manual Intervention Required”, the “Notes” empty, leave the “Enabled” option selected and the “Container Image” option at its default of “Runs directly on the Octopus Server”.
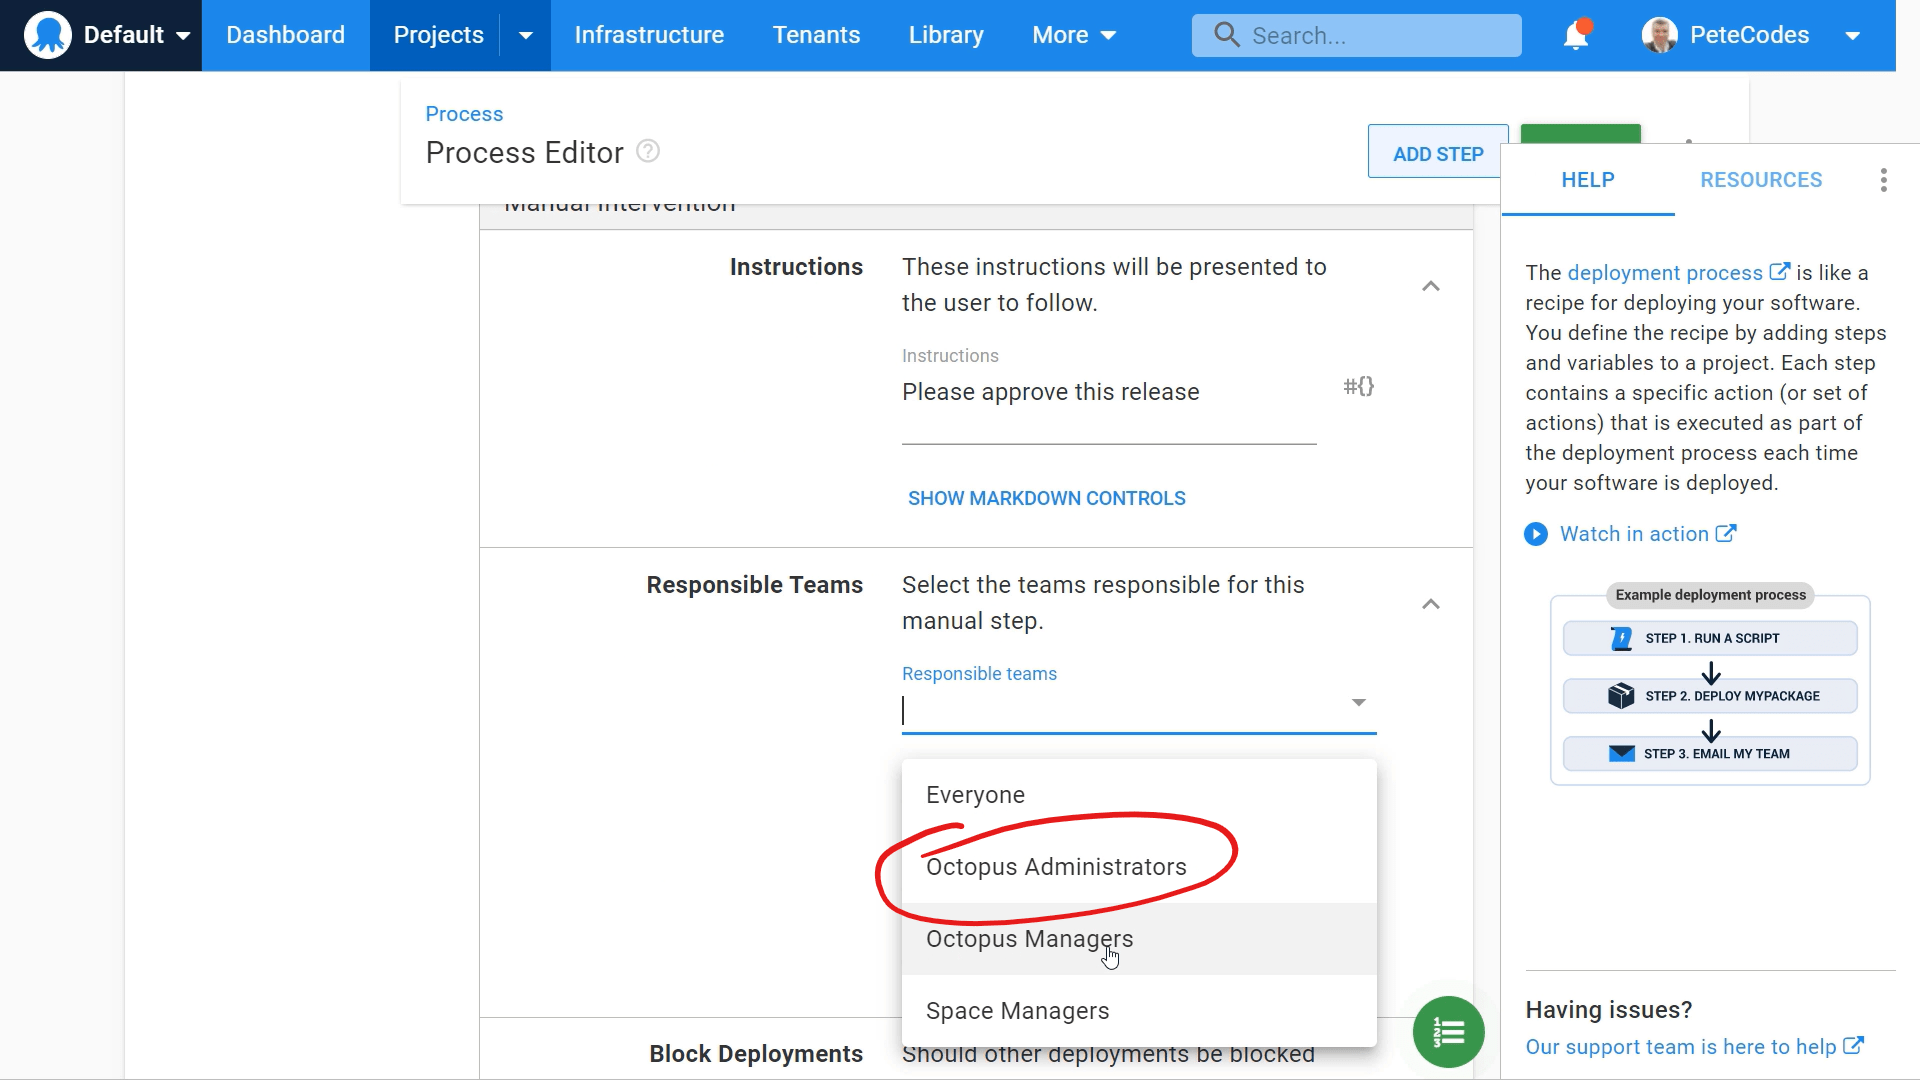
Next we can enter some instructions to let our manager know what needs to be done. We’ll enter “”Please approve this release”
We can then set the “Responsible Teams” to “Octopus Administrators”;
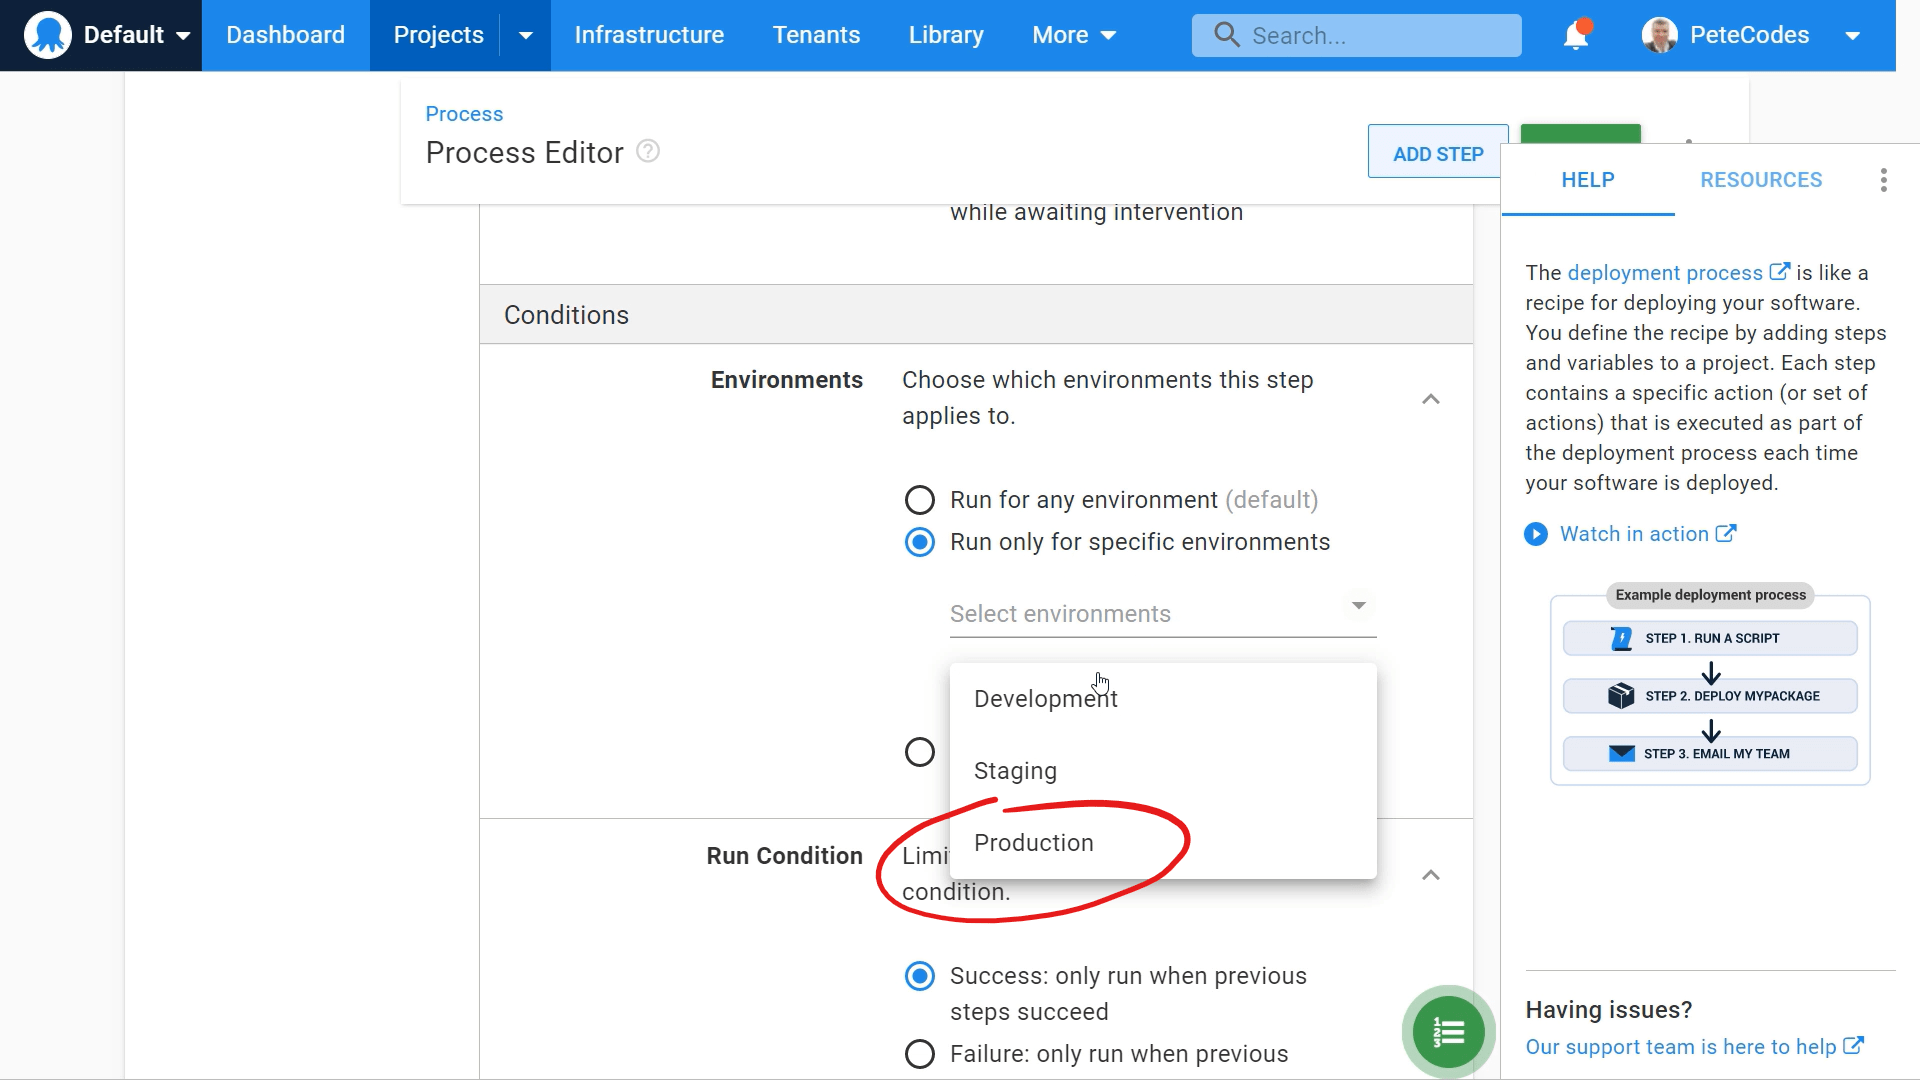
We can leave “Block Deployment” option at its default of “Allow another deployment to begin while awaiting intervention (default)”.
We only want to run this step if we’re deploying to Production, so we can then set the Environment to Production;
Finally we can leave “Run Condition” set to “Success: only run when previous steps succeed”, Start Trigger at its default of “Wait for the previous step to complete then start” and leave “Required” deselected.
We can then hit the green “SAVE” button in the top righthand corner, which will return us to our list of steps;
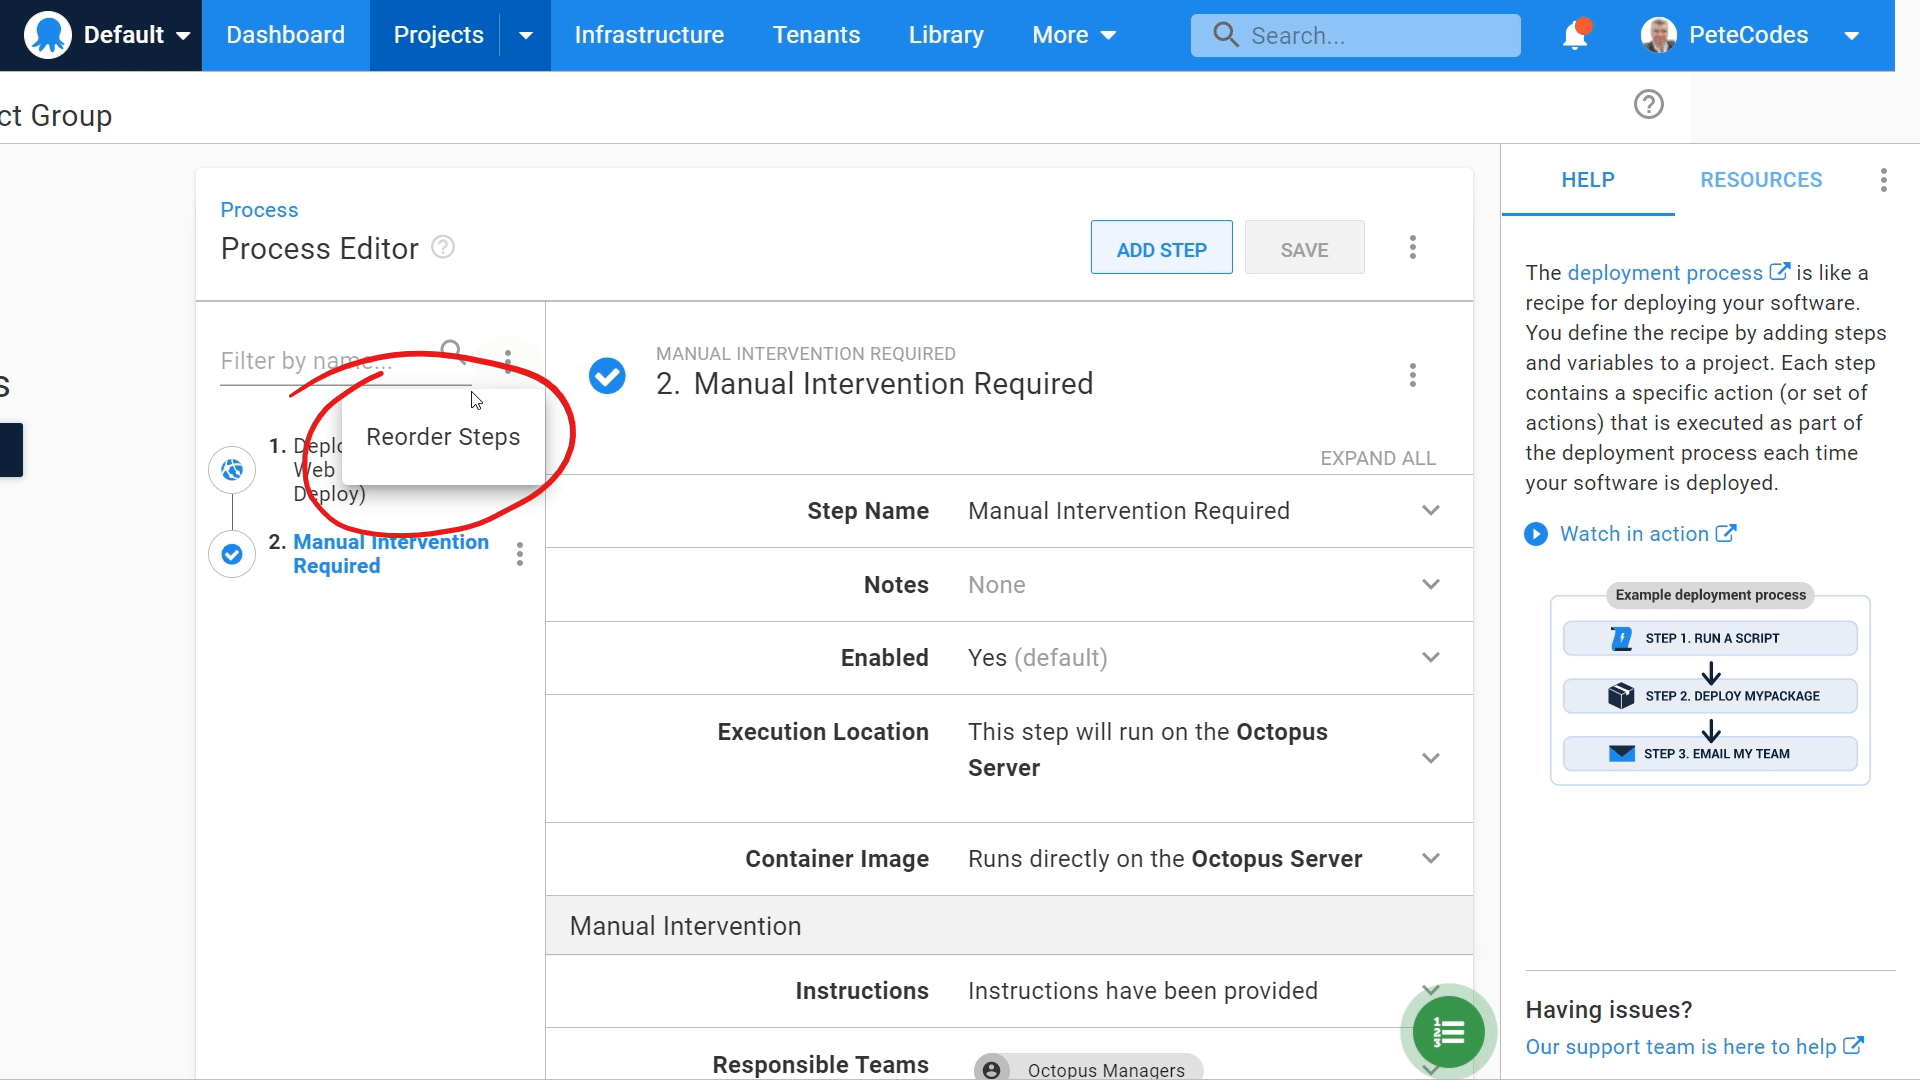
We’ll now see that our “Manual Intervention Required” step is going to occur after our deployment, which isn’t very useful. However, we can reorder the steps by hitting the menu button to the right of the “Filter by name…” search box and selecting “Reorder Steps”.
This will then allow us to drag the “Manual Intervention Required” step above the “Deploy and Azure Web App (Web Deploy)” step;
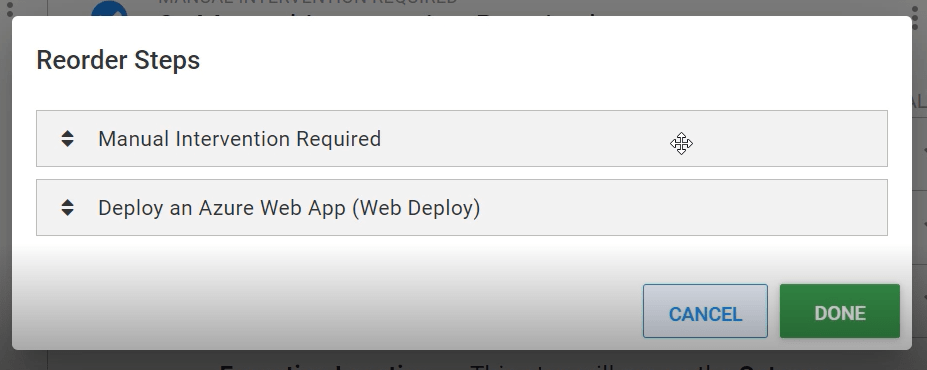
We can then hit the green “DONE” button to accept the order of our steps and return to the Process Editor Page;

We can then hit the green “SAVE” button at the top right of the screen to save our Deployment Process”.
Next Time…
In the next post we’ll deploy our package to Azure using an Octopus Deploy Release and view the results.