This is part 3 of a (at least) 4 part blog series on Dot Net Core on the Raspberry Pi….
You can see Part 1 – Installation and Hello World – right here…
You can see Part 2 – GPIO – right here…
You can see Part 4 – Receiving Azure IoT Hub Messages – right here…
You can see Part 5 – Remote Deployment and Debugging – right here…
On September 25th 2019, the Dot Net Team released version 3.0 of the Dot Net Core Framework at .Net Conf.
To join in the fun, I held a special with Notts IoT, the IoT group I organise in Nottingham, where I gave a talk on Dot Net Core 3.0 on the Raspberry Pi.
This blog post is what I’ve learnt along the way to preparing for the talk…!
Previously on Pete Codes…
In the last blog post we’d already gotten a Blazor App setup. We then created a Console app that flashed an LED. Finally we read the status of a button and flashed an LED when it was pressed.
In this post we’ll connect our console app to an Azure IoT Hub and send a message to the hub. We’ll then monitor the Hub for messages and view them using the Microsoft IoT Device Explorer application.
What you’ll need
- You’ll need to have completed the steps in the previous blog post – Read that here
- You’ll need an Azure subscription – Grab a trial here
- You’ll need the Azure IoT Device Explorer – Get it here
Putting the “I” in IoT
If you’ve followed along with the previous blog, you’ll already have installed the Dot Net Core 3.0 binaries and runtimes, and have a console app running that flashes an LED when you press a button.
Our next step is to hook our Raspberry Pi up to an Azure IoT hub to add some internet goodness.
To do this, we’ll be adding a reference to a Nuget package that allows us to communicate with the Azure IoT Platform, and the IoT Hub in particular.
We’ll then modify our button press code to allow us to send the message.
Finally we’ll add a subroutine that will create our message and send it across to the IoT Hub.
The return of the Nug(g)et
The first thing we need to is add a reference to the Microsoft.Azure.Devices.Client Nuget Package to our project.
As in the previous post we added the GPIO nuget package, we can add this by running;
dotnet add package Microsoft.Azure.Devices.Client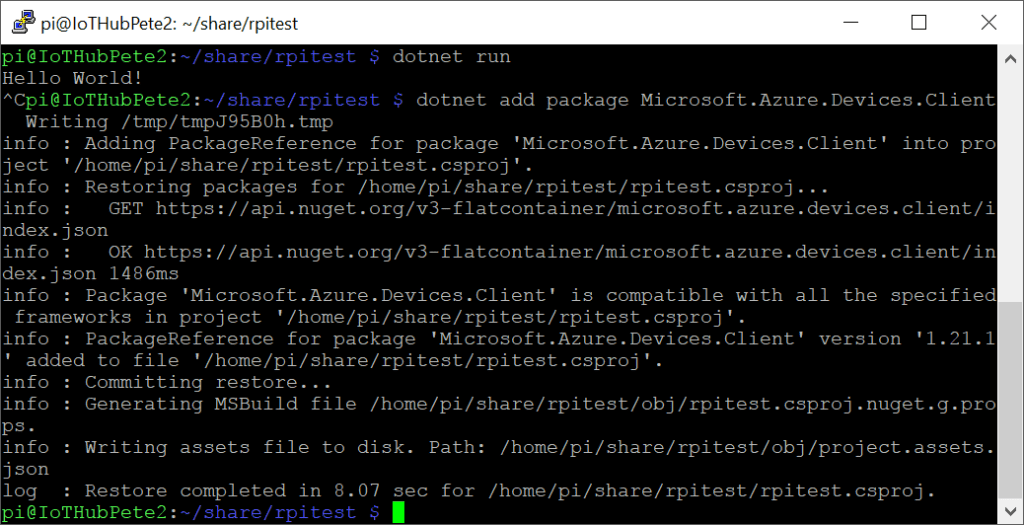
You can find some more information on the Microsoft.Azure.Devices.Client package here
Let’s see your references
Switching back to our program.cs file, we now need to add a reference Microsoft.Azure.Devices.Client to allow us to communicate with the IoT Hub, We’ll also need a reference to System.Text which will allow us to encode our message to the IoT Hub correctly.
Add the following to the references at the top of the file;
using Microsoft.Azure.Devices.Client;
using System.Text;
Global Variables
We’re going to need a couple of global variables. We’ll need a string to hold our IoT Hub Connection String. We’ll also need a reference to the object that we’ll be using to communicate with the Azure IoT Hub.
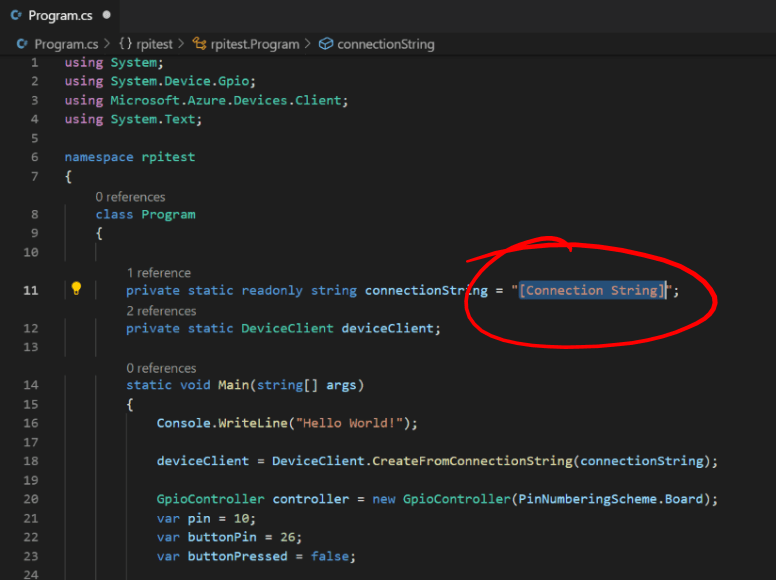
Add the following two lines above the void Main;
private static readonly string connectionString = "[Connnection String]";
private static DeviceClient deviceClient;
Local Variables
We now need to instantiate our deviceClient object. Add the following beneath the line where we instantiate the GpioController;
deviceClient = DeviceClient.CreateFromConnectionString(connectionString);More Button Pushing
As it stands, we’re constantly setting our LED to on or off depending on whether our button is pressed or not. While this works well for that use case, we only really want to send one message to the IoT Hub once when the button is pressed.
Firstly, we’ll add a variable which we’ll set when the button is pressed…
var buttonPressed = false;Next up, we can use this variable to make sure we only send our message once. Within the first if section where we checking to see if the ButtonPin is false add the following after setting the LED Pin to Low;
if (buttonPressed == false)
{
    buttonPressed = true;
}
Now that we know that the button is pressed, we need to clear the flag when we release the button. So add the following line into the “else” statement after setting the LED Pin to High;
buttonPressed = false;Message in a bottle
We’ve now got the basic framework written, it’s time to create the subroutine that will send a message the IoTHub.
After the closing brace to our “main” sub create a new private async void subroutine called ” SendDeviceToCloudMessageAsync;
private static async void SendDeviceToCloudMessageAsync()
{
}
We’re creating an Async Void here because the function we’re using to send a message to the IoT Hub will be an Async one also.
We now need to create a variable to hold the message we want to send to the IoT Hub, add the following line to the new SendDeviceToCloudMessageAsync routine;
var messageString = "Button Pressed";The IoT Hub expects messages to be encoded correctly. In this case, we’ll be encoding our message as a series of ASCII Bytes. Add the following line below the new string to encode the message;
Message message = new Message(Encoding.ASCII.GetBytes(messageString));We can now add some properties to our message. It’s possible to then use these properties to filter messages in Azure later on if required;
message.Properties.Add("buttonEvent", "true");At this stage we have everything we need to send a message to the IoT Hub;
await deviceClient.SendEventAsync(message);Here’s we’re using an Async call – SendEventAsync to send our encoded message to the IoT Hub.
So we’re able to see in our console that we’re successfully sending the message let’s add;
Console.WriteLine("Sending Message {0}", messageString);The SendDeviceToCloudMessageAsync sub should now look like;
private static async void SendDeviceToCloudMessageAsync()
{
    var messageString = "Button Pressed";
    Message message = new Message(Encoding.ASCII.GetBytes(messageString));

    message.Properties.Add("buttonEvent", "true");

    await deviceClient.SendEventAsync(message);
    Console.WriteLine("Sending Message {0}", messageString);
}
The final thing we need to do is actually send our message when the button is pressed, so we simply add a call just below setting the “buttonPressed” variable to true in our Main sub;
SendDeviceToCloudMessageAsync();The Finished Code
Your finished code should now look like;
using System;
using System.Device.Gpio;
using Microsoft.Azure.Devices.Client;
using System.Text;

namespace rpitest
{
    class Program
    {

        private static readonly string connectionString = "[Connnection String]";
        private static DeviceClient deviceClient;

        static void Main(string[] args)
        {
            Console.WriteLine("Hello World!");

            deviceClient = DeviceClient.CreateFromConnectionString(connectionString);

            GpioController controller = new GpioController(PinNumberingScheme.Board);
            var pin = 10;
            var buttonPin = 26;
            var buttonPressed = false;

            controller.OpenPin(pin, PinMode.Output);
            controller.OpenPin(buttonPin, PinMode.InputPullUp);

            try
            {
                while (true)
                {
                    if (controller.Read(buttonPin) == false)
                    {
                        controller.Write(pin, PinValue.High);

                        if (buttonPressed == false)
                        {
                            buttonPressed = true;
                            SendDeviceToCloudMessageAsync();
                        }
                    }
                    else
                    {
                        controller.Write(pin, PinValue.Low);
                        buttonPressed = false;
                    }
                }
            }
            finally
            {
                controller.ClosePin(pin);
            }
        }

        private static async void SendDeviceToCloudMessageAsync()
        {
            var messageString = "Button Pressed";
            Message message = new Message(Encoding.ASCII.GetBytes(messageString));

            message.Properties.Add("buttonEvent", "true");

            await deviceClient.SendEventAsync(message);
            Console.WriteLine("Sending Message {0}", messageString);

        }
    }
}
Through the Portal
Now we have some software, we need to create an IoT Hub. Head over to portal.azure.com and sign in.
Create an IoT Hub
Once your signed in click the Create Resource button at the top left;

In the search box that appears, enter “IoT Hub”;

Pressing enter will show the IoT Hub resource;
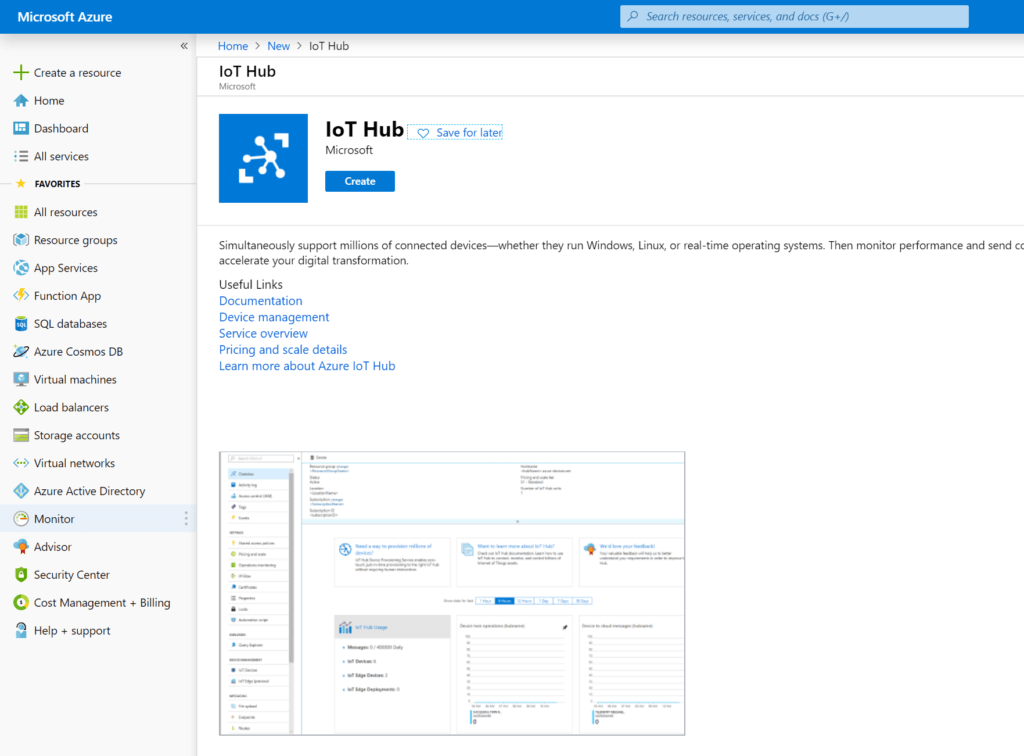
Create the IoT Hub by hitting the “Create” button;

Iot Hub Options
You’ll be shown the basic page of the process to create an IoT Hub;
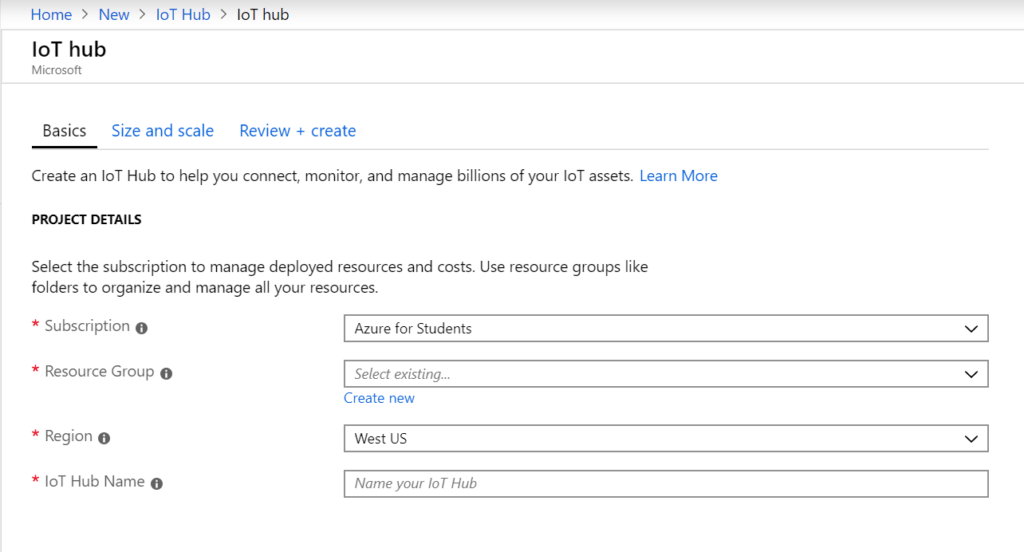
Firstly choose your subscription. Next you should create a new Resource Group using the blue “Create new” link under the Resources Group section. Name this something like “dotnetcorerg”
Next choose your resource group. I chose North Europe.
Finally enter a name for your IoT Hub, for instance, “dotnetcoreiothub”.

Next press the “Next: Size and Scale >” Button;

You’ll now see the Size and Scale settings page;

Here we can set a variety of options, however, we’re only really interested in the “Pricing and Scale Tier” setting. For our purposes, we’ll set this to “F1: Free Tier”. That way, there’ll be no charge at all.
Review and Create
Press the “Review and Create” button, then check that all the settings are correct;

If you’re happy with the settings, then feel free to press the blue “Create” button at the bottom of the screen.
You’ll be taken to a holding page while the IoT Hub is created;

Once the IoT Hub is created, you’ll see the “Deployment Complete” screen;
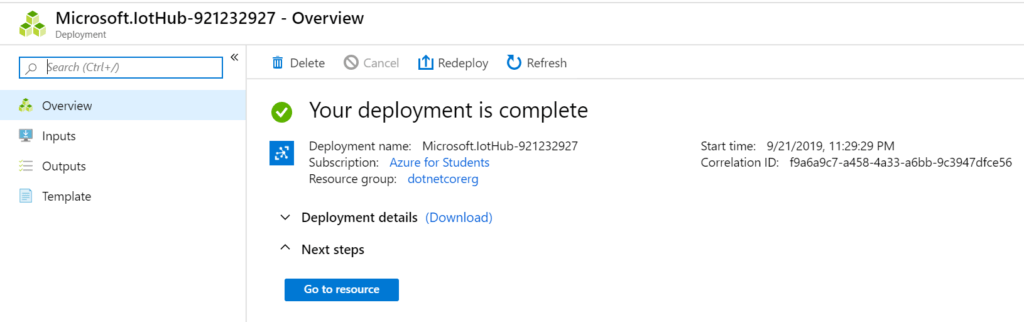
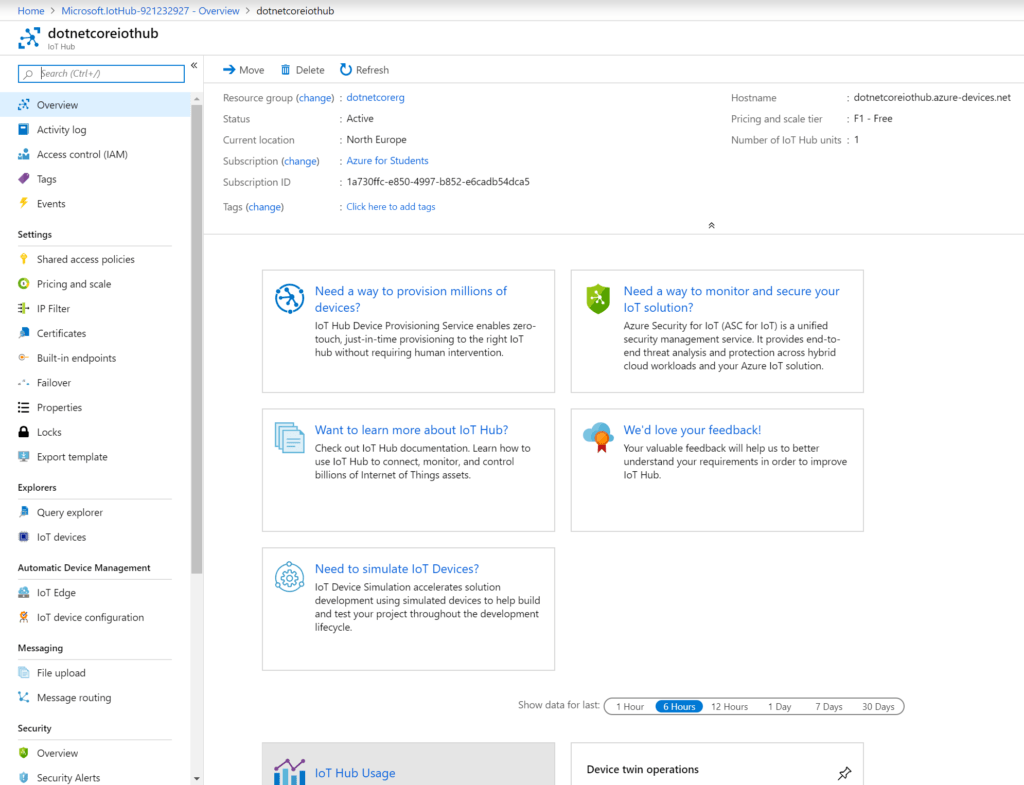
Hit the blue “Go to resource” button to navigate to our new IoT Hub;
IoT Hub SDK Device Explorer
Now we have an IoT Hub setup, let’s get the IoT Hub Device Explorer running. If you haven’t done so already, and you’re running Windows, then download the Windows Installer Package for the Device Explorer Application.
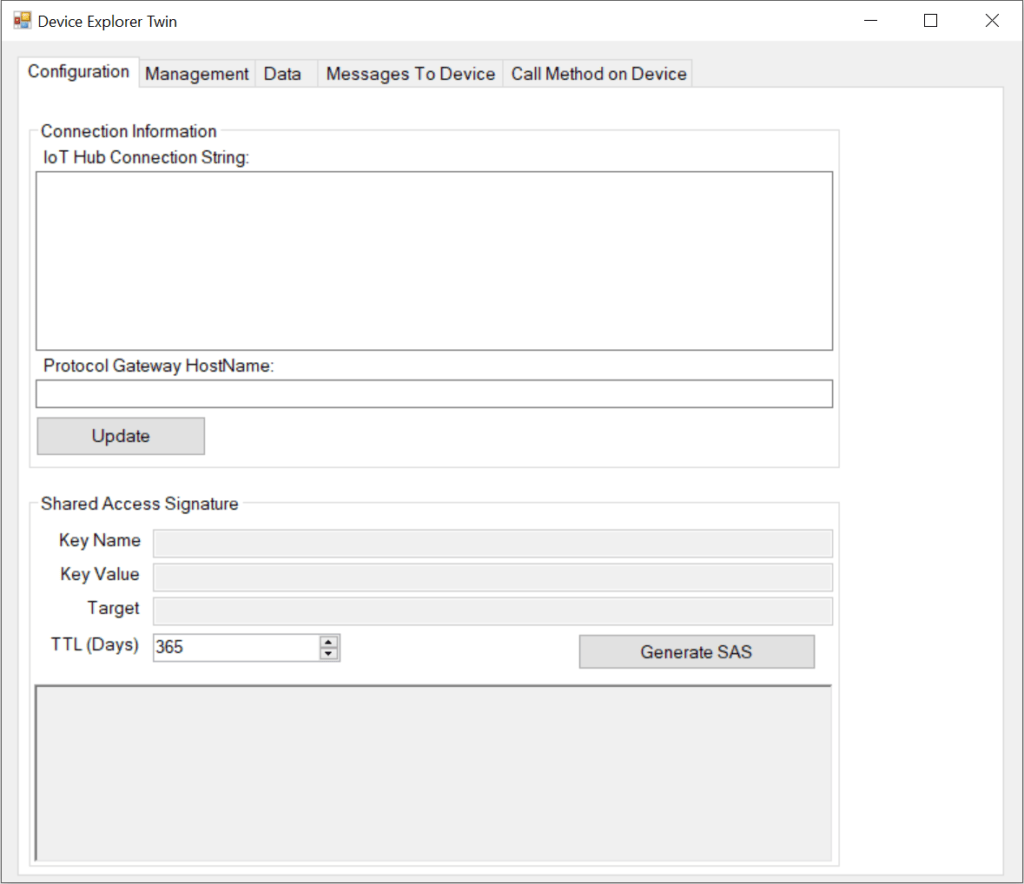
Launching the Device Explorer will show the Configuration Tab and a space for the IoT Hub Connection String;
Device Explorer Connection String
We’ll be using the Device Explorer to monitor messages between the IoT devices (Our Raspberry Pi) and the IoT Hub. We can also use it to manage individual devices, find connection strings, and also control individual IoT devices by sending messages and calling methods.
Because we need this much control, we’ll need a connection point which affords us overall control. For this we’ll use a Shared Access Policy which is an Azure IoT Hub level access point.
Shared Access Policy
From the menu on the left of your IoT Hub, choose “Shared Access Policies”;

You’ll now see the IoT Hub Shared Access Policies screen. We’re going to create a new Access Policy for the IoT Device Explorer to connect to the IoT Hub. Hit the “+ Add” button in the top left;

We can now enter the details for our Shared Access Policy, where we can enter “DeviceExplorer” for the “”Access Policy Name”, select all of the checkboxes to give the Device Explorer full access and hit the blue “Create” button at the bottom right of the screen;

The new Shared access policy will be shown in the list;

Click on the new DeviceExplorer Shared Access Policy, and hit the blue Copy button next to the “Connection String – primary key” box;

Return to the Device Explorer and past the Connection String into the “Connection Information” box. Pressing the Update Button will , if all is well, show a message box saying “Settings updated successfully”;

Add an IoT Device
We now need to create an IoT Device for our Raspberry Pi to communicate with. Each physical IoT device (in our case a Raspberry Pi), get’s it’s own corresponding IoT Hub Device to communicate with.
To create an Azure IoT Device, return now to the Azure Portal and to your IoT Hub and click the “IoT Devices” menu item on the left;

You’ll now be shown the IoT Devices List. Create a new IoT Device by hitting the “+ New” button at the top left;

You’ll then see the “Create a Device” screen. Enter a name for your device, for instance “RaspberryPi”, leave the other settings as they are and hit the blue “Save” button in the bottom left;

You’ll now see that the new “RaspberryPi” device will be shown in the, if your device isn’t shown, then hit the “Refresh” button. Now click on our new “RaspberrryPi” device to access it’s properties;
We can now copy the new IoT Device’s Connection String by hitting the blue Copy button next to the “Primary Connection String” box;

Filling in the Blanks
We now need to fill in the connection string for our Raspberry Pi. Return to VS Code and our “program.cs”.
Replace the [Connection String] text with your copied IoT Device Connection String (make sure to keep the quotes!”;
Save your file and return to your PuTTY terminal window.
Run Time!
Make sure you’re in the “share/rpitest” directory, make sure your code builds by running;
dotnet buildAll being well, the code will build successfully;
If your code builds ok, then run the following to run the new code;
dotnet runOnce your code is running, get both the Device Explorer and Terminal Window on the screen at the same time.
If you click the “Management” tab in the Device Explorer then you’ll see your RaspberryPi IoT Hub Device;

Now click the “Data” tab and make sure that your “RaspberryPi” device is shown in the “Device Id” dropdown. Then hit the “Monitor” button to start monitoring IoT Hub messages. The “Event Hub Data” box should show “Receiving events…”;

Push the Button
Now, push the button on the board and you should see a message in the Terminal Window and also a message received by the Device Explorer;
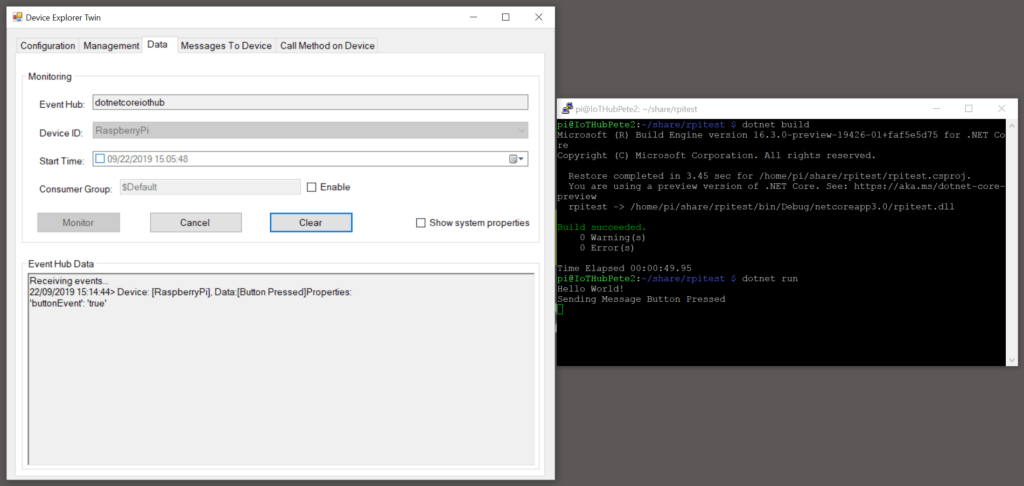
In Summary
With that, we’re now sending messages from our Raspberry Pi to an Azure IoT Hub, and we’re able to monitor those messages in the Azure IoT Device Explorer.
Thanks for reading!
Next Time
In the next post we’ll modify our code to allow us to receive messages from