In the first post in this series we took a first look at the Azure Percept and it’s primary components.
In this post we’ll take a look at the Azure Percept Audio Module, which allows for the recognition of Custom Keywords and Commands.
Azure Percept Audio
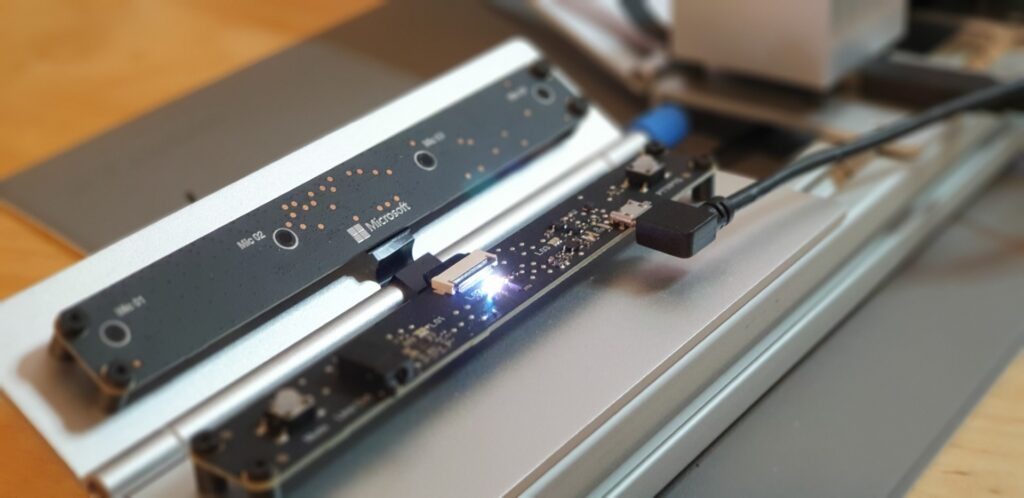
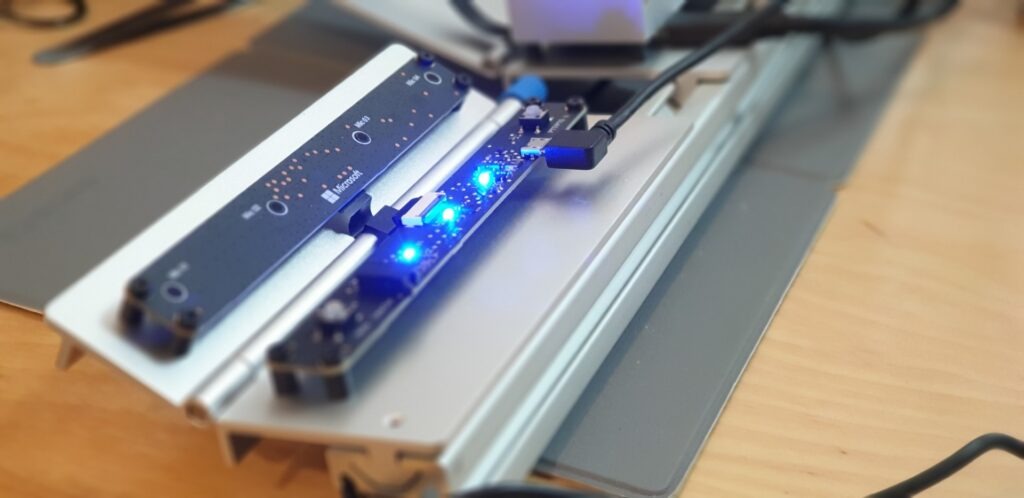
The Azure Percept Audio is a System on a Module (SoM), which is designed as the Audio Interface for Audio Processing at the edge for the Azure Percept.
Along with the Carrier Board, Azure Percept Studio, Microsoft LUIS and Speech, the system can recognise keywords and commands to control devices using voice at the edge. This works both online and offline with the aid of the Carrier Board.
Azure Percept Audio Specifications
The basic specs for the Azure Percept Audio SoM are;
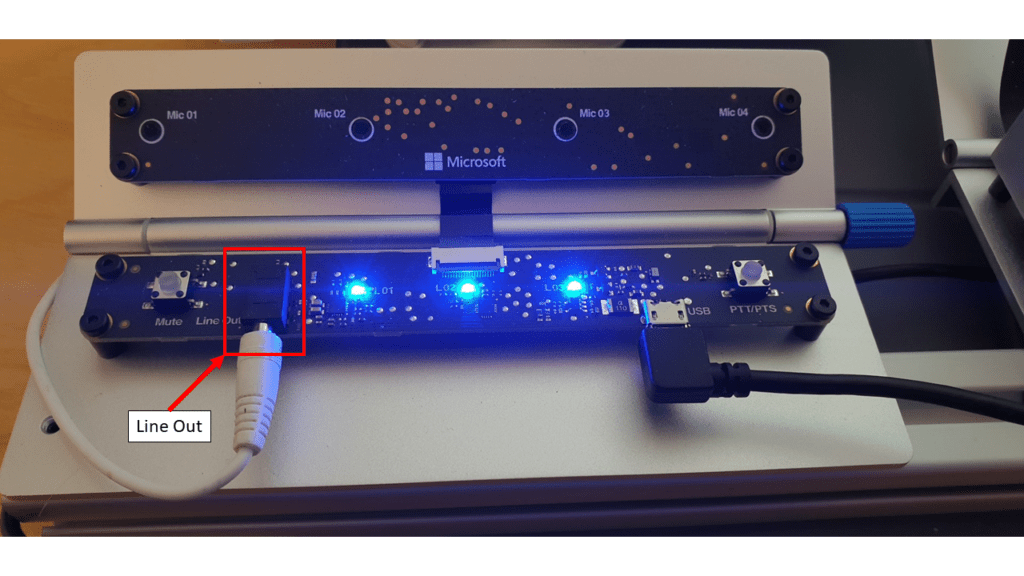
- Four-microphone linear array and audio processing via XMOS Codec
- 2x buttons
- 3x LEDs
- Micro USB
- 3.5 mm audio jack
You can find the full specifications here
Target Industries
Microsoft have a set of industries in mind for the Azure Percept Audio SoM;
- Hospitality
- Healthcare
- Smart Buildings
- Automotive
- Retail
- Manufacturing
With applications such as;
- In-room Virtual Concierge
- Vehicle Voice Assistant and Command/Control
- Point of Sale Services and Quality Control
- Warehouse Task Tracking
Azure Percept Audio – Required Azure Services
The Azure Percept Audio SoM makes use of a couple of Azure Services to process Audio.
LUIS (Language Understanding Intelligent Service)
LUIS is an Azure service which allows interaction with applications and devices using natural language.
Using a visual interface, we’re able to train AI models without the need for deep Machine Learning experience of any kind.
The Azure Percept uses LUIS to configure Custom Commands, allowing for a contextualised response to a given command.
Cognitive Speech
Cognitive Speech is an Azure Service offering Text-to-speech, speech-to-text, speech translation and speaker recognition.
Supporting over 92 languages, this service can convert speech to text allowing for interactivity with apps and devices.
On the flip side, with support for over 215 different voices in 60 languages, the Speech Service can also convert Text to-Speech improving accessibility and interaction with devices and applications.
Finally, the Speech Service can also translate between 30 different languages, allowing for real-time translation using a variety of programming languages.
The Percept uses this service amongst other things, to configure a wake word for the device, by default this is the word “computer“. (See Star Trek IV – The Voyage Home!).
Azure Percept Audio – Sample Applications
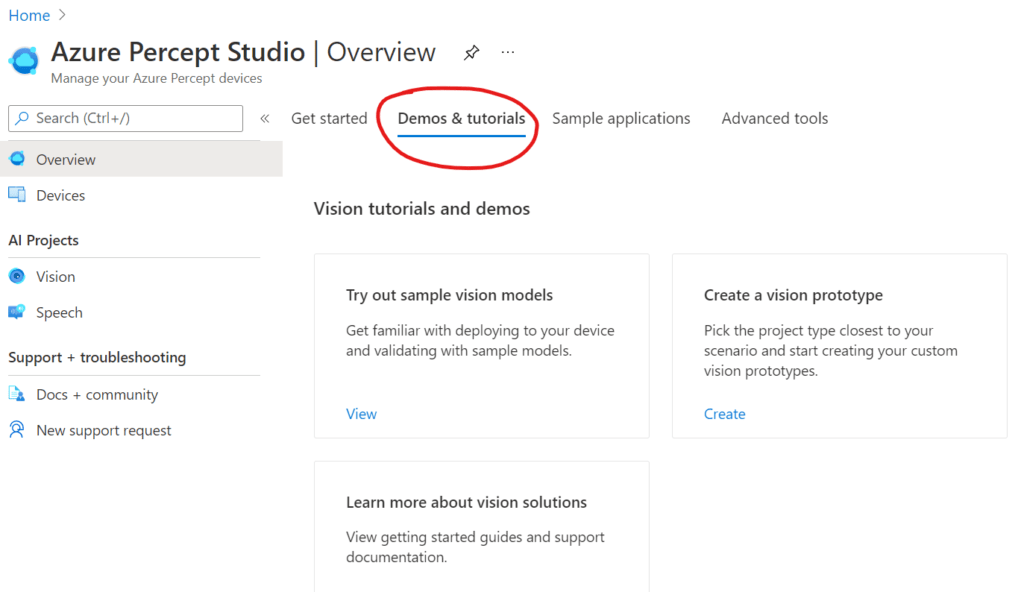
If we navigate to Azure Percept Studio, from the Overview Page we can select the “Demos & tutorials” tab at the top;
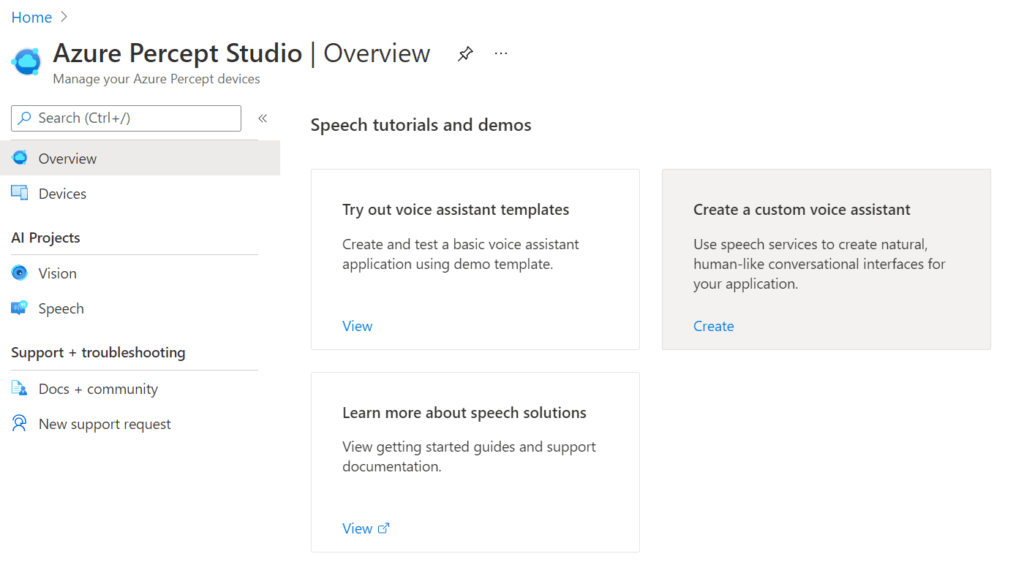
If we scroll to the bottom of this page, we have some links to some Speech tutorials and demos.
The first thing we’ll choose is “Try out voice assistant templates”. Clicking this link presents us with a fly out with a selection of templates to choose from;
Azure Percept Audio – Hospitality Sample Template Setup
Choosing the “Hospitality” option, agreeing to the terms and continuing on, we’re shown the resource creation flyout.
Here we can select the subscription and resource group we’d like to deploy the various resources to.
We’re also prompted for an Application Prefix. This allows the template to create resources with unique ids.
We can then choose a region close to us. At the time of writing we can choose between West US and West Europe.
Finally, we can leave the “LUIS prediction pricing tier” at “Standard”, as the free tier doesn’t support speech requests.
Hitting the “Create” button, then begins the process of deploying the speech theme resources.
We’re then prompted that this process can take between 2 and 4 minutes to complete….
Azure Percept Audio – Hospitality Sample Template Demo
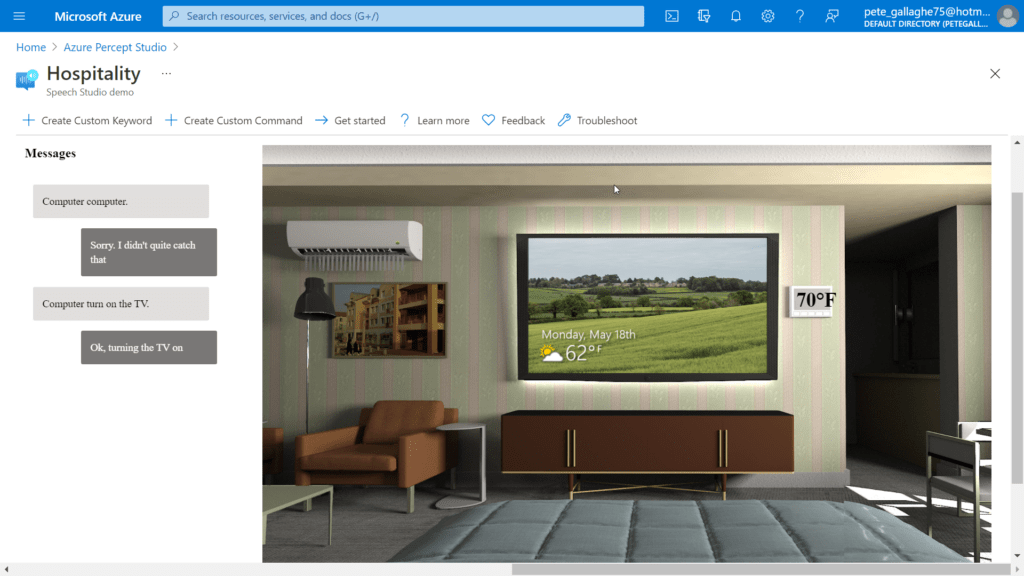
Once the template has completed deploying we’re then shown a demo Hospitality environment.
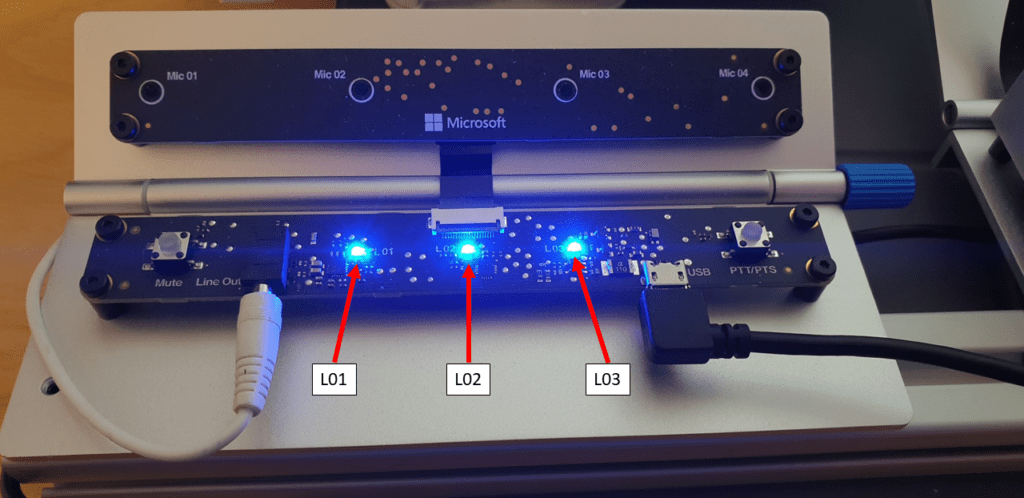
We should also now have 3 blue LEDs showing on the Percept;
The Percept Audio LEDs will indicate different statuses depending upon their colour and flash pattern;
| LED | LED State | Ear SoM Status |
|---|---|---|
| L02 | 1x white, static on | Power on |
| L02 | 1x white, 0.5 Hz flashing | Authentication in progress |
| L01 & L02 & L03 | 3x blue, static on | Waiting for keyword |
| L01 & L02 & L03 | LED array flashing, 20fps | Listening or speaking |
| L01 & L02 & L03 | LED array racing, 20fps | Thinking |
| L01 & L02 & L03 | 3x red, static on | Mute |
The LEDs are labelled as shown in the following picture, with L01 on the left of the SoM, L02 in the middle and L03 on the far right;
Returning to the Hospitality demo environment. The screen is split up into several sections.
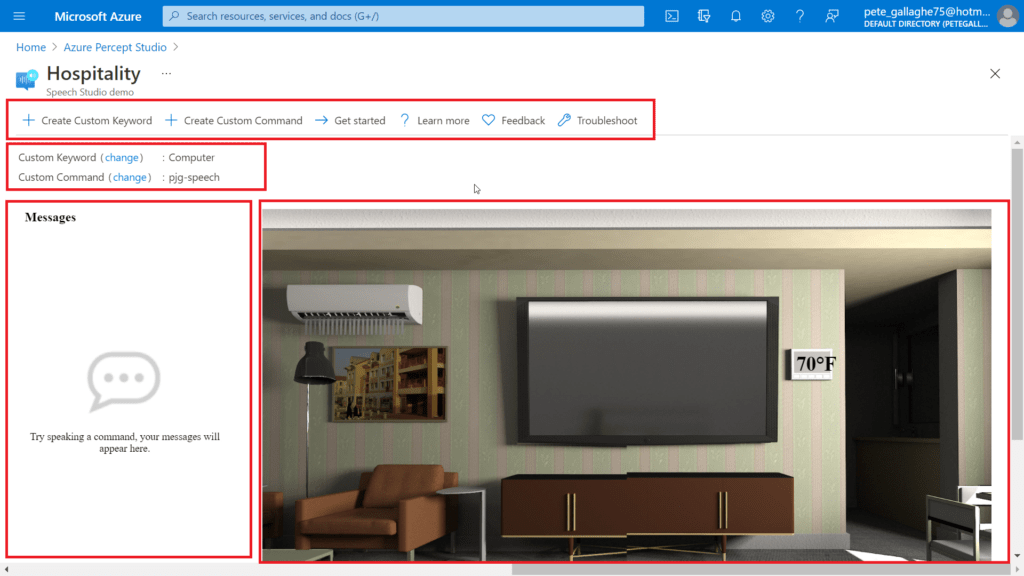
At the top of the demo environment we have an toolbar containing;
- Create Custom Keyword
- Create Custom Command
- Get Started
- Learn More
- Feedback
- Troubleshoot
Just below that we have the current keyword and command and links to change them should we wish.
On the left we have an interaction area where we can enter commands for the Percept to action.
On the right we have a visual representation of the current environment, which reflects the actions our commands invoke.
Audio Output
Before we try executing any commands, the Percept uses the Speech Service to convert it’s command responses to spoken word.
For us to be able to hear that, we’ll need to connect some speakers to the device.
The Percept has a 3.5mm audio jack output for exactly that purpose… Hooking up some relatively low powered portable speakers to the line out jack will allow us to hear the responses to our commands
Executing Commands
We can now try executing some commands. The Custom Keyword or Wake Word for the Percept defaults to “Computer” we can say that followed by one of a few commands which are applicable to this particular sample;
- Turn on/off the lights
- Turn on/off the TV.
- Turn on/off the AC.
- Open/close the blinds.
- Set temperature to X degrees. (X is the desired temperature, e.g. 75.)
I noticed, and perhaps due to my English accent, that it took a while for the Percept to recognise my pronunciation of “Computer”… I did try pronouncing it with an American Accent, but that didn’t seem to help.
Eventually it did work, and I quickly learnt how to say the word for a relatively repeatable wake up.
Once I’d mastered the wake word, all the other instructions worked pretty well.
By instructing the Percept to turn on the TV, the simulation on the right would show the TV on, and so on through the commands.
The only command that didn’t work as intended was the “Set Temperature” command, which didn’t accept the actual temperature as a parameter to the command. Perhaps looking through the Azure Speech Project contents could yield a reason for that.
Next Steps
In the next post I’ll take you through how to configure a custom wake Keyword as well as some custom commands.

