There are a few options for creating applications for embedded Linux with a GUI (Graphical User Interface). We could use GTK, QT, Tkinter… You could use Winforms and Mono Develop or even use Windows 10 IoT.
However, with the release of Uno Platform v3, there’s now preview support for UWP applications for Linux!
Uno Platform
Welcome Uno to the Linux Scene… Uno Platform is a Universal Windows Bridge which makes it possible to create UWP apps for Windows, Mac, Android, iOS and importantly Linux!
Created by Jerome Laban, Uno allows developers to create pixel perfect cross platform applications.
Since Uno V3, there are preview features that allow Uno Platform apps to target Linux. Making use of Skia and GTK, C# developers can deploy apps written in XAML to devices like the Raspberry Pi.
PreRequisites
This guide depends on the fact that you’ve installed the following dependencies;
- A PC with Windows 10 19042 or above.
- .NET 5 SDK on your PC
- .NET 5 SDK installed on your Raspberry Pi
- SSH enabled on the Raspberry Pi – Use the Raspberry Pi Config Utility.
- Visual Studio Code installed on your PC
- The C# Extension installed for Visual Studio Code
If you don’t want to use the Single Line Setup Script, then you should also Install the Windows Dot NET Debugging package
Single Line Setup
Rather than following along with the step by Step instructions, you can simply run the single line setup script I’ve created;
Open a command prompt as Administrator, navigate to your root directory and run the following command;
curl --output remotedebugsetup_uno.bat https://raw.githubusercontent.com/pjgpetecodes/dotnet5pi/master/remotedebugsetup_uno.bat && remotedebugsetup_uno.batHere I’ve chosen to skip the steps to setup remote deploy and debugging as I have already carried out those steps previously;
The script will automatically create a new Uno Platform project and all the necessary requirements to Remote Deploy and Debug the project on a Raspberry Pi. The project will then automatically open in VS Code.
Run and Debug the Application
We’re now ready to test out our Hello World Uno Platform app.
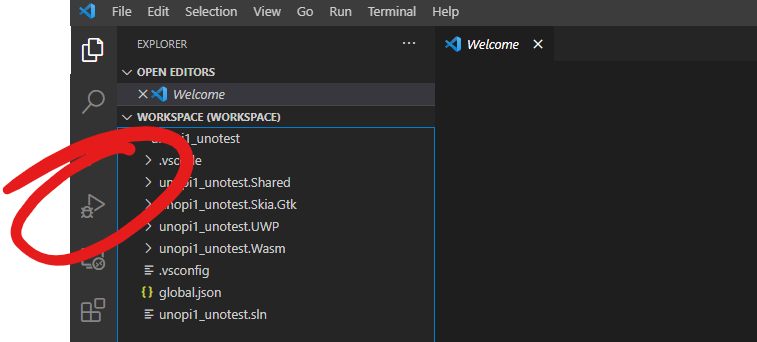
Switch to the Run tab by hitting the Run button in the toolbar on the left.
Next, from the Run drop down, select the new “.NET Core Launch (remote)” Task;

We’re now ready to run our application. Go ahead and either press the green run button, or press the F5 key.
Either by having a screen connected to your Pi, or using VNC, and If everything has gone according to plan, you should now have deployed and run your first Uno Application!
The Step by Step Method…
If you want to have a go at achieving what the single line setup script does yourself then feel free to following along!
Hello Uno World
Let’s create our first Uno Project. Open a command prompt, and run the following command to install the Uno Templates from here;
dotnet new --install Uno.ProjectTemplates.Dotnet::3.5.0-dev.270This will download the latest dev branch of the Uno Templates for Dot NET. This will include the new Linux bits we need.
Now let’s create our Uno Project. Navigate to a suitable directory and run the following command;
dotnet new UnoApp -o unoapp1 -ios=false -android=false -macos=false -wasm=false -skia-wpf=false -st=false && cd unoapp1We’ve disabled all but the Skia.GTK project, the Shared project and the UWP project here.
You may also notice that an errant WASM project is left, this is a bug in the template which will likely be fixed soon.
Now open the solution in Visual Studio Code with;
code .As an aside…
We’re going to do something slightly different to the previous method we’ve used to deploy and debug Dot NET applications.
Uno Applications will need access to the screen. If we were running this program directly from the pi, then we would need to make sure that the user we were running the app as could access the display.
There are a couple of things that normally need to be done to enable users access to the screen. The first is that that user needs to have the correct privileges to access the screen. The following command gives privelages to access to the screen to the specified user;
sudo xhost +si:localuser:<user>Next the system needs to know which display the user will be accessing. This is achieved by the use of the DISPLAY environment variable. This can be set using the following command;
export DISPLAY=:0Here we’ve specified that the current session will be using display 0. Normally, we could add this exported environment variable to the .bashrc file of the user profile, and this ensures that when a terminal session is started, the display is assigned correctly.
We’ll be using VS code and the SSH command to launch the application on the Pi. We’ll be launching the application as the built in “pi” user, which already has access privileges to the display… So, we don’t need to worry about using xhost.
However, the SSH session pays no respect to the setup of the built in session and so ignores the .bashrc file, and any associated environment exports.
This means, that when we launch the application from VS Code, the application won’t know which display to use and will fail to start.
The following instructions allow us to work around that by the use of a debugging stub script which is downloaded automatically as part of the .NET 5 setup script.
Work around an issue with the Roslyn Analysers
There’s currently an incompatibility between Uno Projects and the C# Rosyln Analysers which leads to an error while building the projects.
Open up the Skia.Gtk and the Shared csproj files and add the following line to the first Project – Property Group section;
<UnoUIUseRoslynSourceGenerators>false</UnoUIUseRoslynSourceGenerators>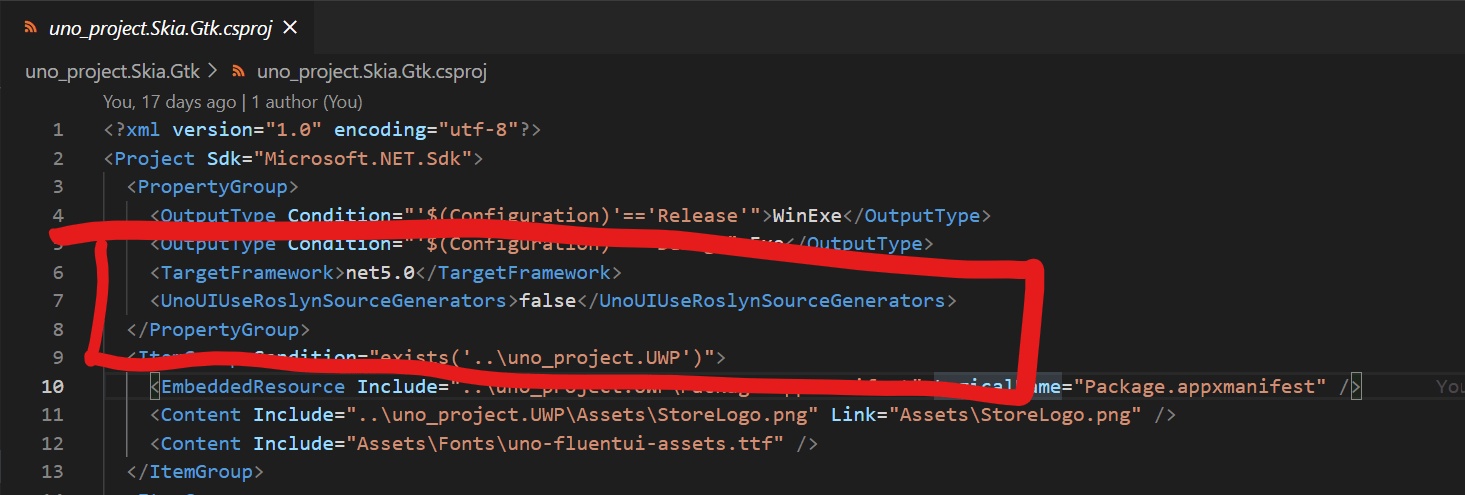
Configure the Project for Debugging
We now need to configure our project to deploy to the Raspberry Pi and begin debugging.
There are a couple of things we normally need to do here, the first is that the user must have the correct privileges to access the screen. These can be granted by running the following command
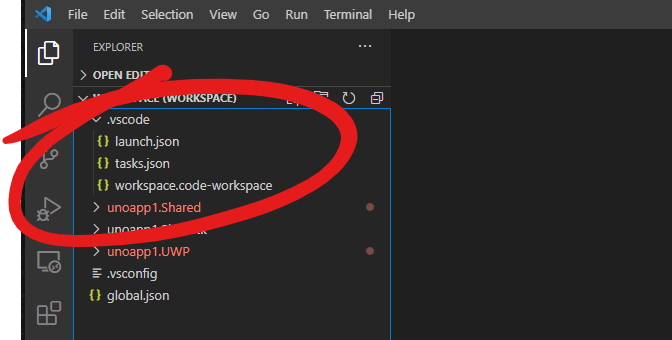
Create a folder called “.vscode” in the root of the solution;
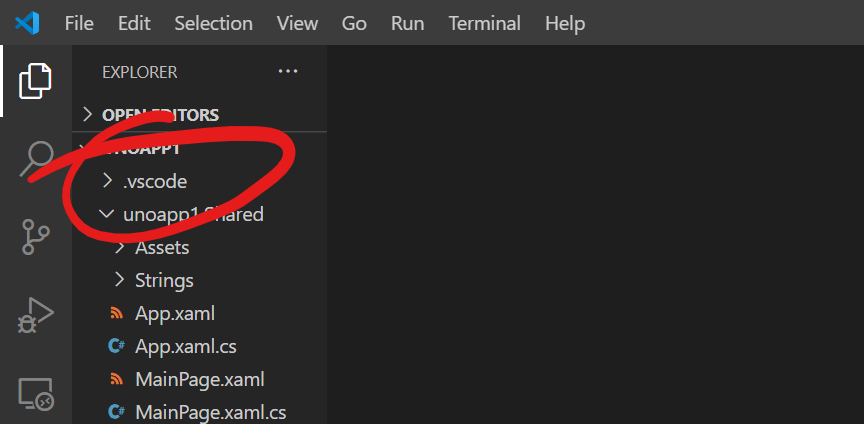
Create a file called “launch.json“, another file called “tasks.json” in the new “.vscode” folder
workspace.code-workspace
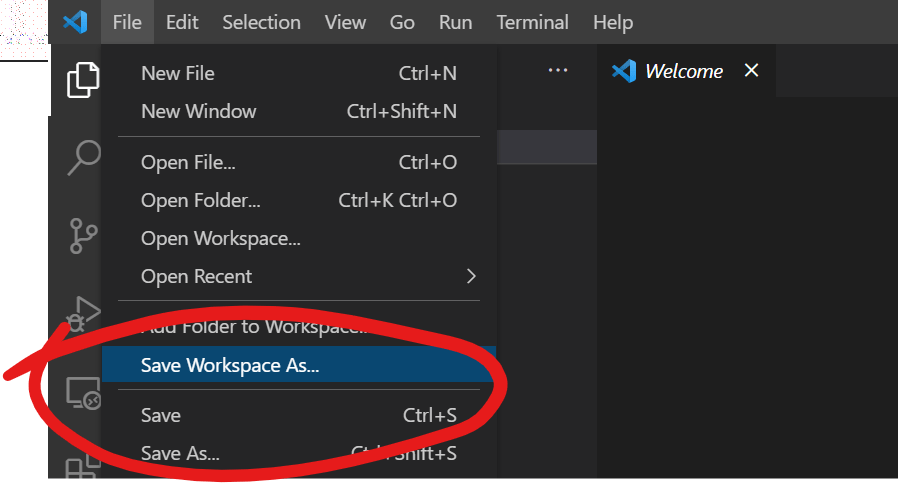
So we can make use of Workspace Settings, we’ll create a new Workspace for our solution.
Go to the file menu and click the “Save Workspace As…” item;
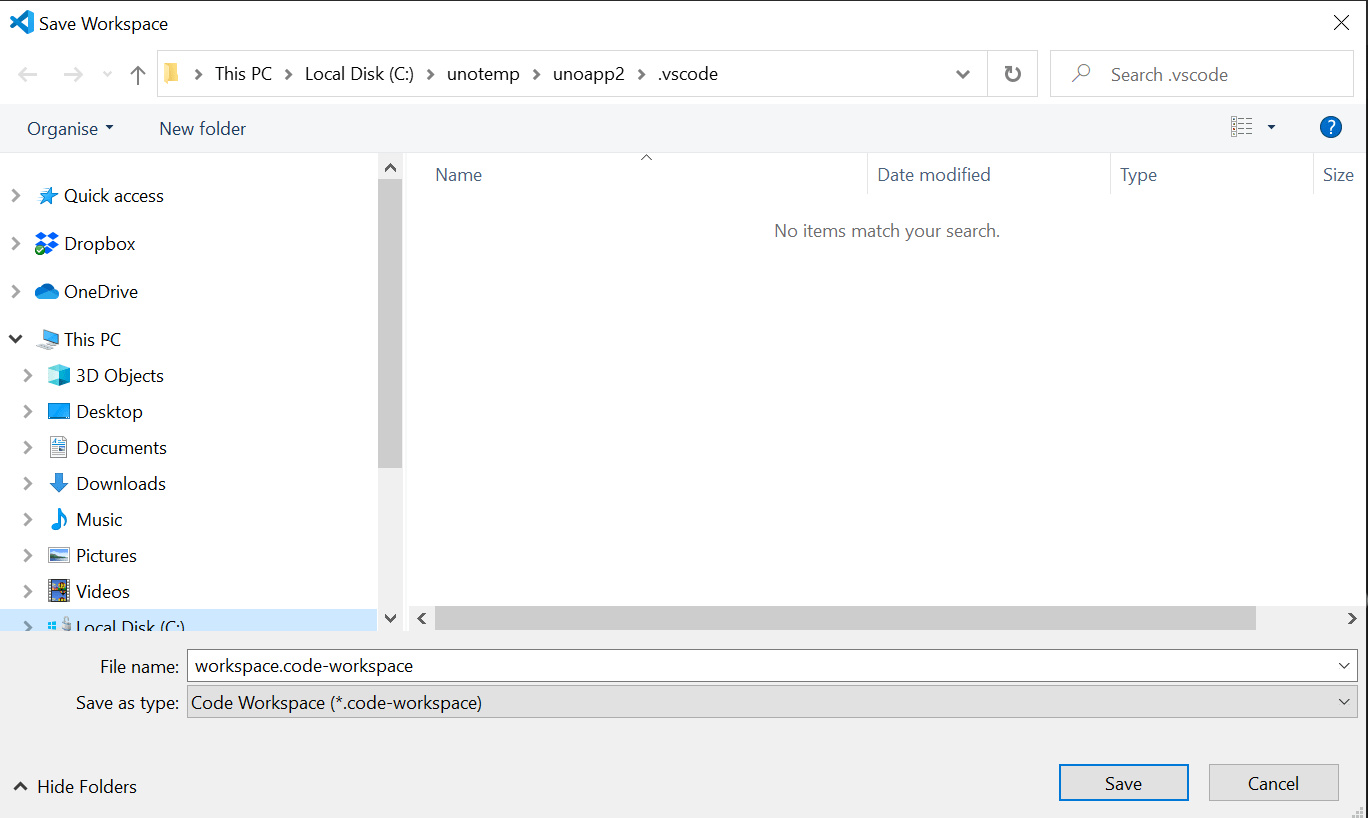
Choose the default location and name for the Workspace which should be in the .vscode folder and named “workspace.code-workspace”.
Paste the following over the contents of the “workspace.code-workspace” file;
{
	"folders": [
		{
			"path": ".."
		}
	],
	"settings": {
		"piUserName": "<Pi User Name>",
    	"piHostName": "<Pi Host Name>"
	}
}
You’ll need to replace the “<Pi Host Name>” and “<Pi Host Name>” placeholders with the relevant values for your setup. The “<Pi User Name>” will most likely be “pi“. The “<Pi Host Name>” will be whatever you have set your Raspberry Pi Host Name as… Most likely “raspberrypi“.
You should now have a “.vscode” folder with 3 files; “launch.json“, “tasks.json” and “workspace.code-workspace“;
launch.json
Paste the following JSON into the “launch.json” file;
{
    // Use IntelliSense to find out which attributes exist for C# debugging
    // Use hover for the description of the existing attributes
    // For further information visit https://github.com/OmniSharp/omnisharp-vscode/blob/master/debugger-launchjson.md
    "version": "0.2.0",
    "configurations": [
         {
             "name": ".NET Core Launch (console)",
             "type": "coreclr",
             "request": "launch",
             "preLaunchTask": "build",
             // If you have changed target frameworks, make sure to update the program path.
             "program": "${workspaceFolder}/${workspaceFolderBasename}.Skia.Gtk/bin/Debug/net5.0/${workspaceFolderBasename}.Skia.Gtk.dll",
             "args": [],
             "cwd": "${workspaceFolder}",
             // For more information about the 'console' field, see https://aka.ms/VSCode-CS-LaunchJson-Console
             "console": "internalConsole",
             "stopAtEntry": false
         },
         {
             "name": ".NET Core Attach",
             "type": "coreclr",
             "request": "attach",
             "processId": "${command:pickProcess}"
         },
         {
             "name": ".NET Core Launch (remote)",
             "type": "coreclr",
             "request": "launch",
             "preLaunchTask": "RaspberryPiDeploy",
             "program": "~/./dotnetdebug.sh",
             "args": ["dotnet /home/${config:piUserName}/${workspaceFolderBasename}/${workspaceFolderBasename}.Skia.Gtk.dll"],
             "cwd": "/home/pi/${workspaceFolderBasename}",
             "stopAtEntry": false,
             "console": "internalConsole",
             "pipeTransport": {
                 "pipeCwd": "${workspaceFolder}/${workspaceFolderBasename}.Skia.Gtk",
                 "pipeProgram": "ssh",
                 "pipeArgs": [
                     "${config:piUserName}@${config:piHostName}"
                 ],
                 "debuggerPath": "/home/pi/vsdbg/vsdbg"
             }
         }
     ]
 }
This Launch task is slightly different to the regular launch task as it’s now making use of a .NET 5 stub debug script which is included in the .NET 5 Pi install script.
This script automatically exports the Display environment variable and then launches the app with the parameters we pass in in the “args” property.
This way, the app has access to the screen and we keep the Visual Studio Debugger attached and ready to go.
tasks.json
Next we need to configure the Build, Publish (to Linux ARM32 binaries) and Deploy tasks.
Paste the following JSON into the “tasks.json” file;
{
    "version": "2.0.0",
    "tasks": [
        {
            "label": "build",
            "command": "dotnet",
            "type": "process",
            "args": [
                "build",
                "${workspaceFolder}/${workspaceFolderBasename}.Skia.Gtk/${workspaceFolderBasename}.Skia.Gtk.csproj",
                "/property:GenerateFullPaths=true",
                "/consoleloggerparameters:NoSummary"
            ],
            "problemMatcher": "$msCompile"
        },
        {
            "label": "publish",
            "command": "dotnet",
            "type": "process",
            "args": [
                "publish",
                "${workspaceFolder}/${workspaceFolderBasename}.Skia.Gtk/${workspaceFolderBasename}.Skia.Gtk.csproj",
                "/property:GenerateFullPaths=true",
                "/consoleloggerparameters:NoSummary"
            ],
            "problemMatcher": "$msCompile"
        },
        {
            "label": "watch",
            "command": "dotnet",
            "type": "process",
            "args": [
                "watch",
                "run",
                "${workspaceFolder}/${workspaceFolderBasename}.Skia.Gtk/${workspaceFolderBasename}.Skia.Gtk.csproj",
                "/property:GenerateFullPaths=true",
                "/consoleloggerparameters:NoSummary"
            ],
            "problemMatcher": "$msCompile"
        },
        {
            "label": "RaspberryPiPublish",
            "command": "sh",
            "type": "shell",
            "dependsOn": "build",
            "windows": {
                "command": "cmd",
                "args": [
                    "/c",
                    "\"dotnet publish ${workspaceFolder}/${workspaceFolderBasename}.Skia.Gtk/${workspaceFolderBasename}.Skia.Gtk.csproj -r linux-arm -o ${workspaceFolderBasename}.Skia.Gtk\\bin\\linux-arm\\publish --no-self-contained\""
                ],
                "problemMatcher": []
            }

        },
        {
            "label": "RaspberryPiDeploy",
            "type": "shell",
            "dependsOn": "RaspberryPiPublish",
            "presentation": {
                "reveal": "always",
                "panel": "new"
            },
            "windows": {
                "command": "c:\\cwrsync\\rsync -rvuz --rsh=\"c:\\cwrsync\\ssh\" --chmod=700 ${workspaceFolderBasename}.Skia.Gtk/bin/linux-arm/publish/ ${config:piUserName}@${config:piHostName}:/home/${config:piUserName}/${workspaceFolderBasename}/"
            },
            "problemMatcher": []
        }
    ]
}
You’ll again need to replace the “<Pi Host Name>” placeholder with the Hostname of your Raspberry Pi, e.g. raspberrypi
Run and Debug the Application
Navigate to your project directory and to the .vscode folder and double click on the workspace.code-workspace file to open your project.
We’re now ready to test out our Hello World Uno Platform app.
Switch to the Run tab by hitting the Run button in the toolbar on the left.
Next, from the Run drop down, select the new “.NET Core Launch (remote)” Task;
We’re now ready to run our application. Go ahead and either press the green run button, or press the F5 key.
Either by having a screen connected to your Pi, or using VNC, and If everything has gone according to plan, you should now have deployed and run your first Uno Application!