On 30th June 2022, Raspberry Pi released a new version of their in house designed Microcontroller Board, the Raspberry Pi Pico.
The new Raspberry Pi Pico W board now has onboard Wi-Fi enabling online connectivity for the diminutive board.
In this blog post, I’ll take you through everything you need to get started with the Raspberry Pi Pico W and get a simple web server up and running.
For this post I’ll be using Windows 11, however for the most part, the guide will be the same on other operating systems.
Buying a Pico W in the UK
With only a £2 price hike, the new Raspberry Pi Pico W is a highly affordable IoT device at only £6.
For the UK Market, there are a few licensed retailers for the Pico W. As of the time of writing, everywhere is out of stock sadly. However, this stock initial shortage will likely ease in the coming weeks.
The following retailers supply the Raspberry Pi Pico W;
Download the MicroPython Firmware for the Raspberry Pi Pico W
Before we can start using our Raspberry Pi Pico W, we’ll need to flash the correct Firmware onto the device.
The first thing to do is download the latest MicroPython firmware for Raspberry Pi Pico W from the MicroPython site here;
Download Raspberry Pi Pico W MicroPython Firmware.
There will be a list of available firmware files available, all with a .UF2 extension. Choose the latest file;
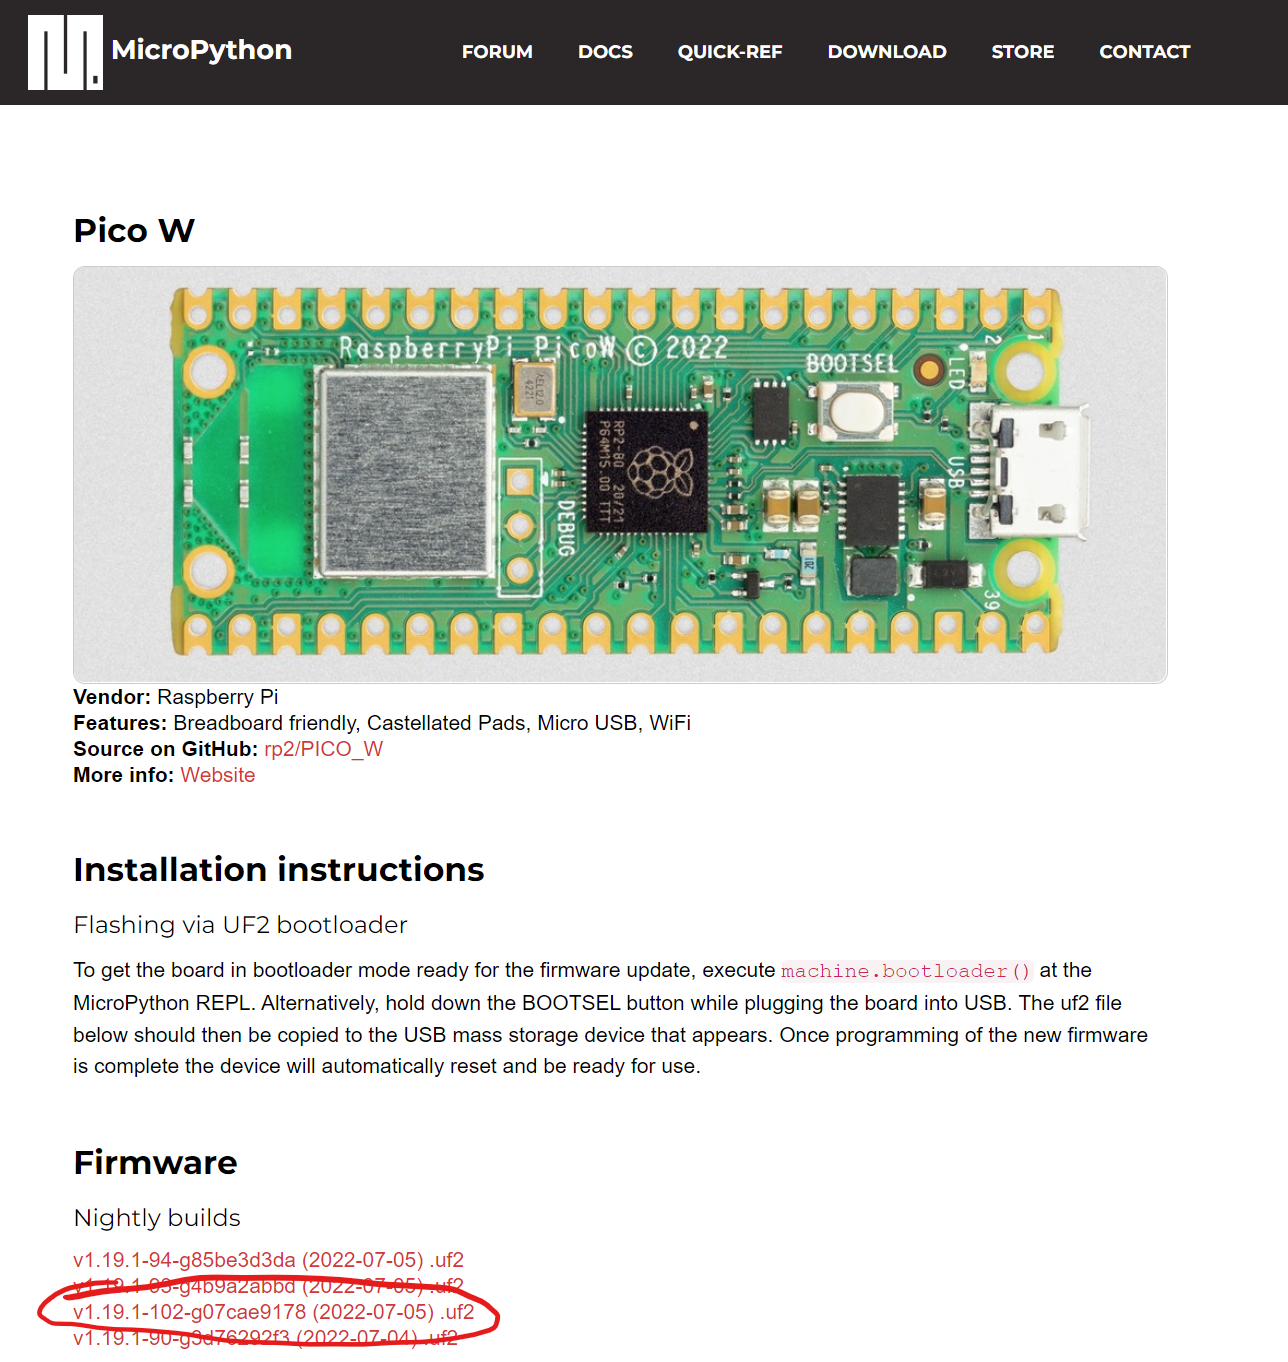
For this blog post I used v1.19.1-102-g07cae9178 (2022-07-05) .uf2
Flash the MicroPython Firmware onto the Raspberry Pi Pico W
Next we need to flash the MicroPython Firmware onto the Raspberry Pi Pico W.
For this process, we’ll need to put the Pico in Bootloader mode.
To do this we need to hold the “BOOTSEL” button down while connecting the Pico W to our machine;
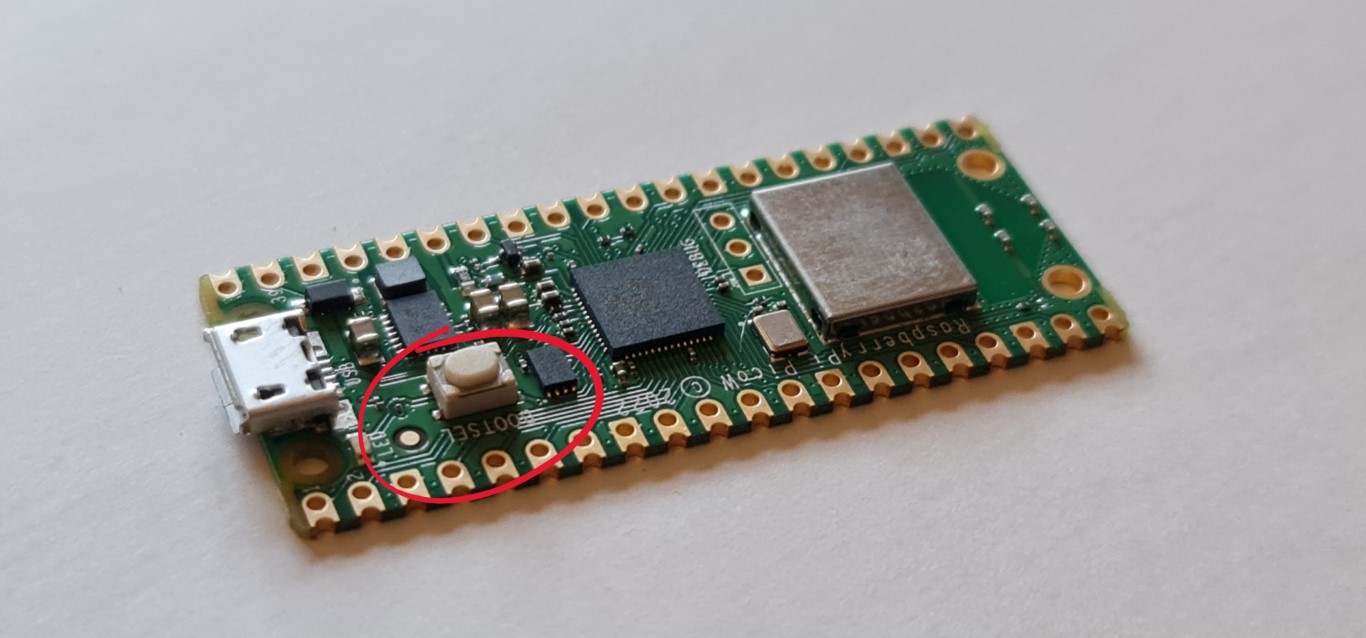
If you open File Explorer now, you should see your Raspberry Pi Pico W appearing as a Drive;

We can now drag the Firmware file we downloaded onto the Raspberry Pi Pico W Drive to flash the MicroPython firmware;

At this point you’ll see and likely hear the Pico disconnect from the PC and dissapear from the drive list.
The Pico is now running MicroPython and ready for us to start developing on
Downloading and installing Thonny
At this point we need a way to interact with MicroPython on the Pico W. We can do this via Thonny, which is an IDE for Python.
You can download Thonny from here.
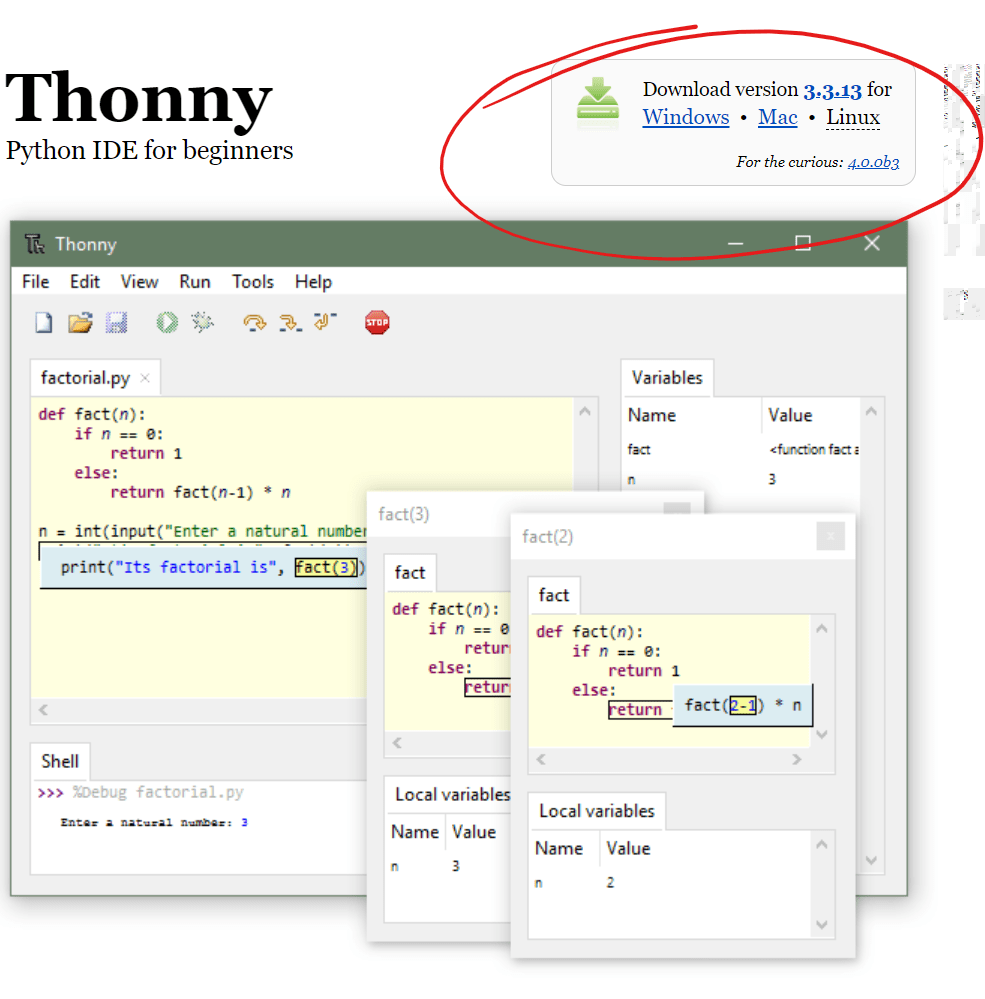
Once you’ve downloaded Thonny, go ahead and install it;
Testing MicroPython on the Raspberry Pi Pico W
With Thonny installed, go ahead and launch it. You’ll be shown the main Thonny IDE;
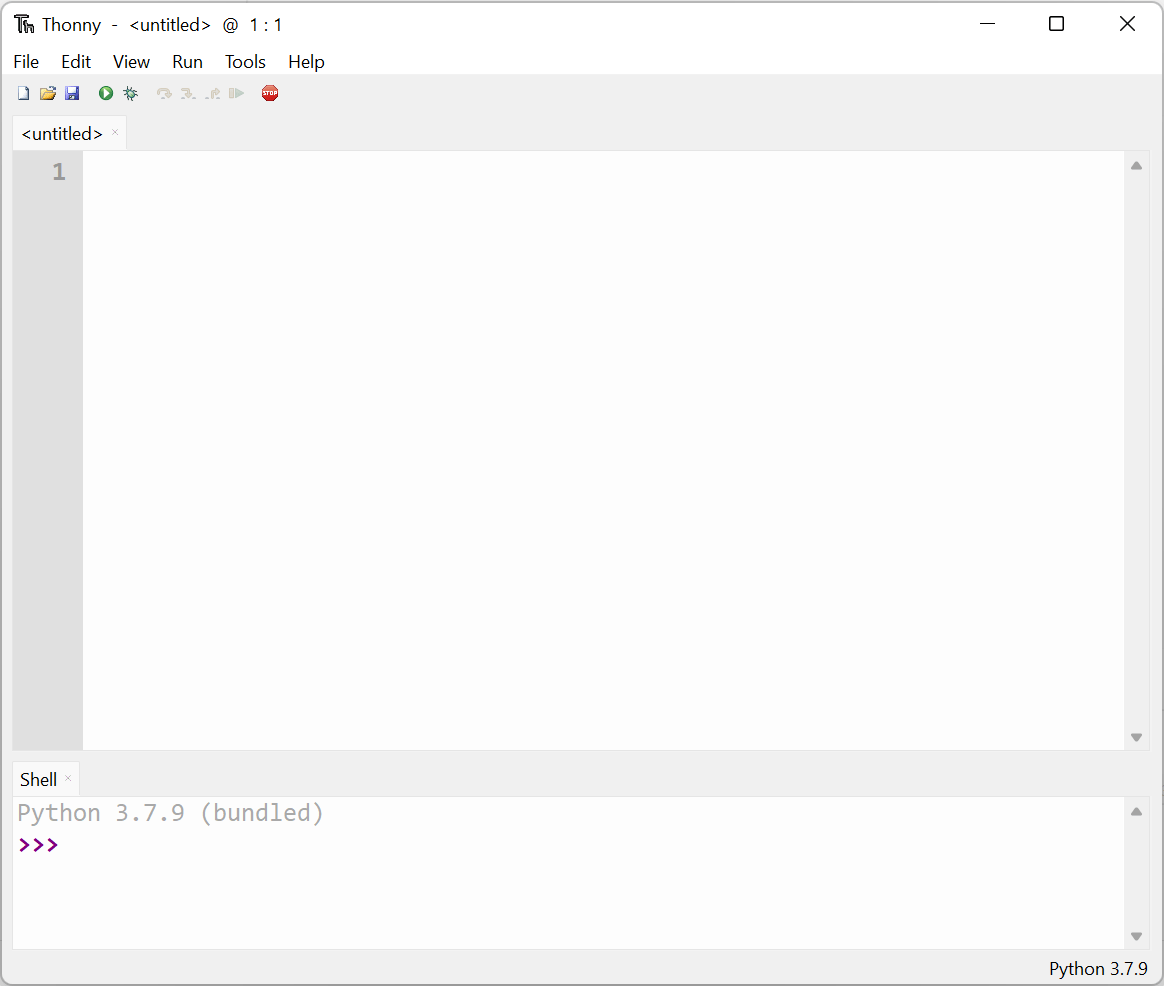
The top portion of the window is the editor are for our code, the bottom are is the shell and gives us access to the REPL, or “Read Evaluate Print Loop”.
The REPL allows us to directly interact with Python, where we can enter and run commands and have Python evaluate these commands and return a response.
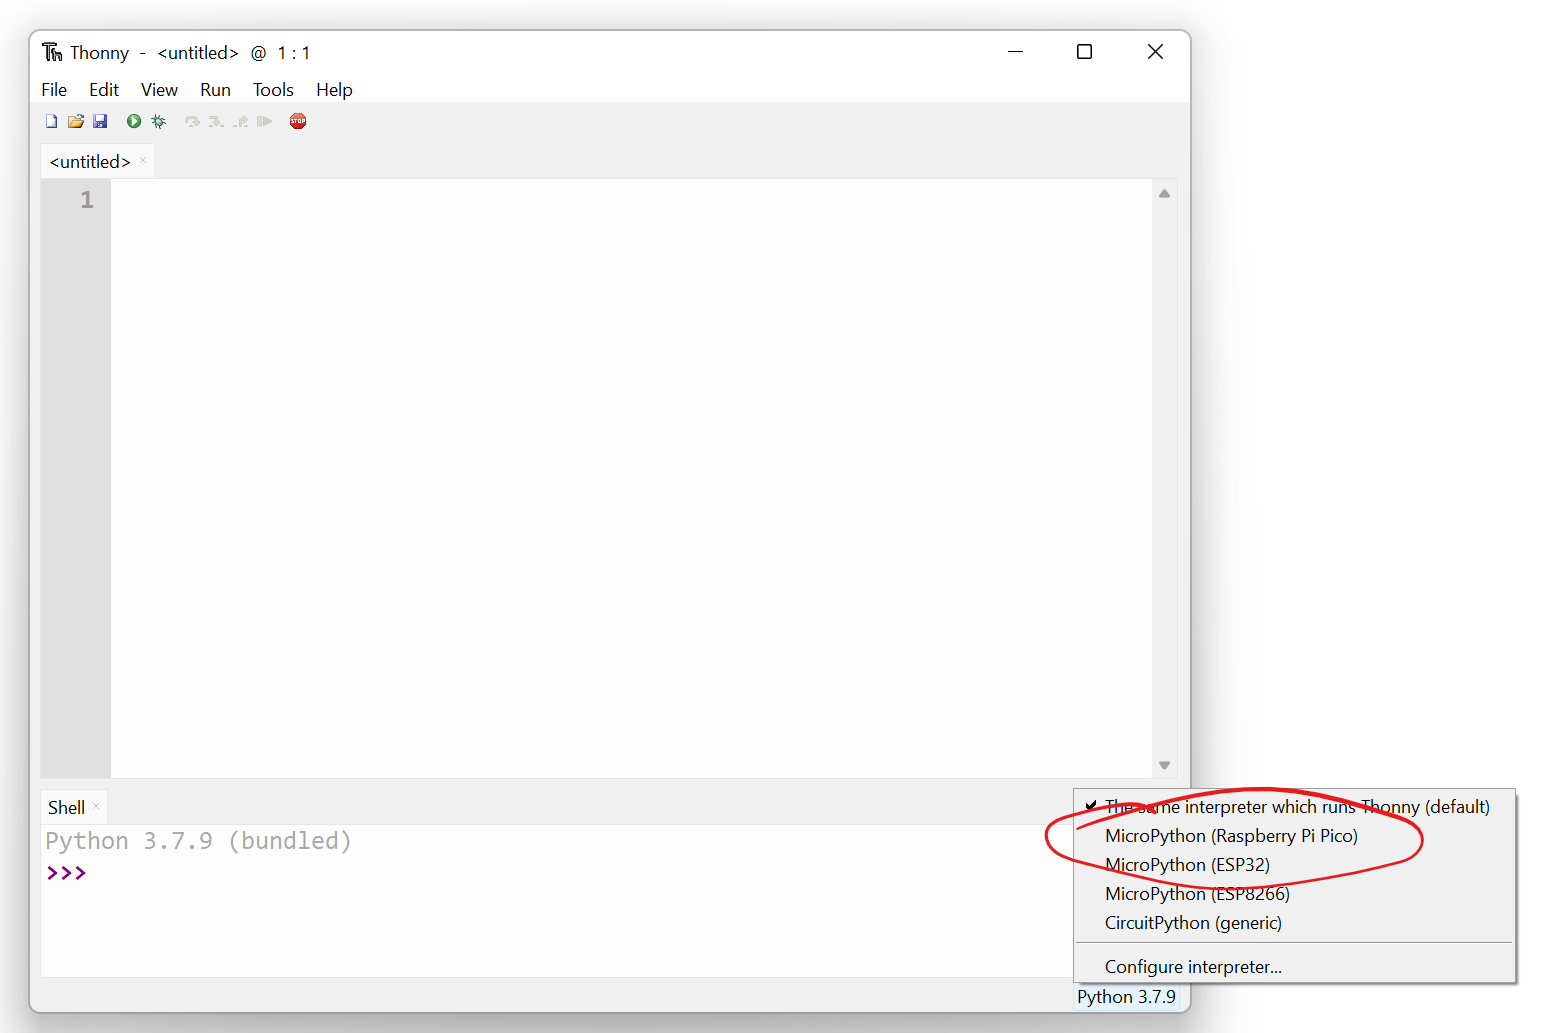
We can interact with the MicroPython on the Raspberry Pi Pico W by selecting it from the Interpreter list in the bottom right hand corner of the Thonny Window;
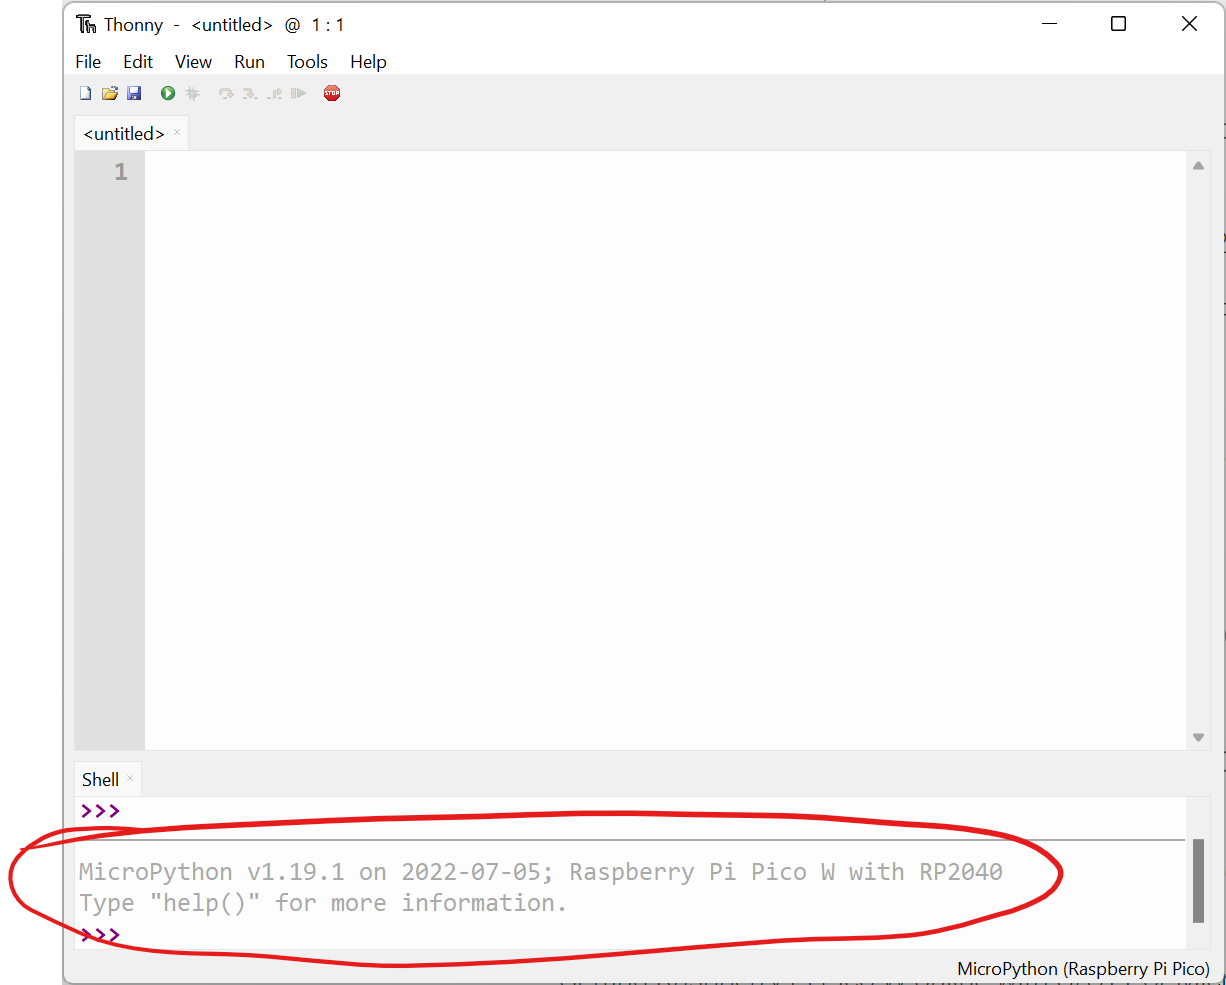
Once you select the Raspberry Pi Pico W from the Interpreter list, you’ll see the Shell area update informing us that it’s connecting successfully;
If we now enter the following at the REPL prompt, we should see the Raspberry Pi Pico W MicroPython Interperter return us the result;
print('hello Raspberry Pi Pico W!')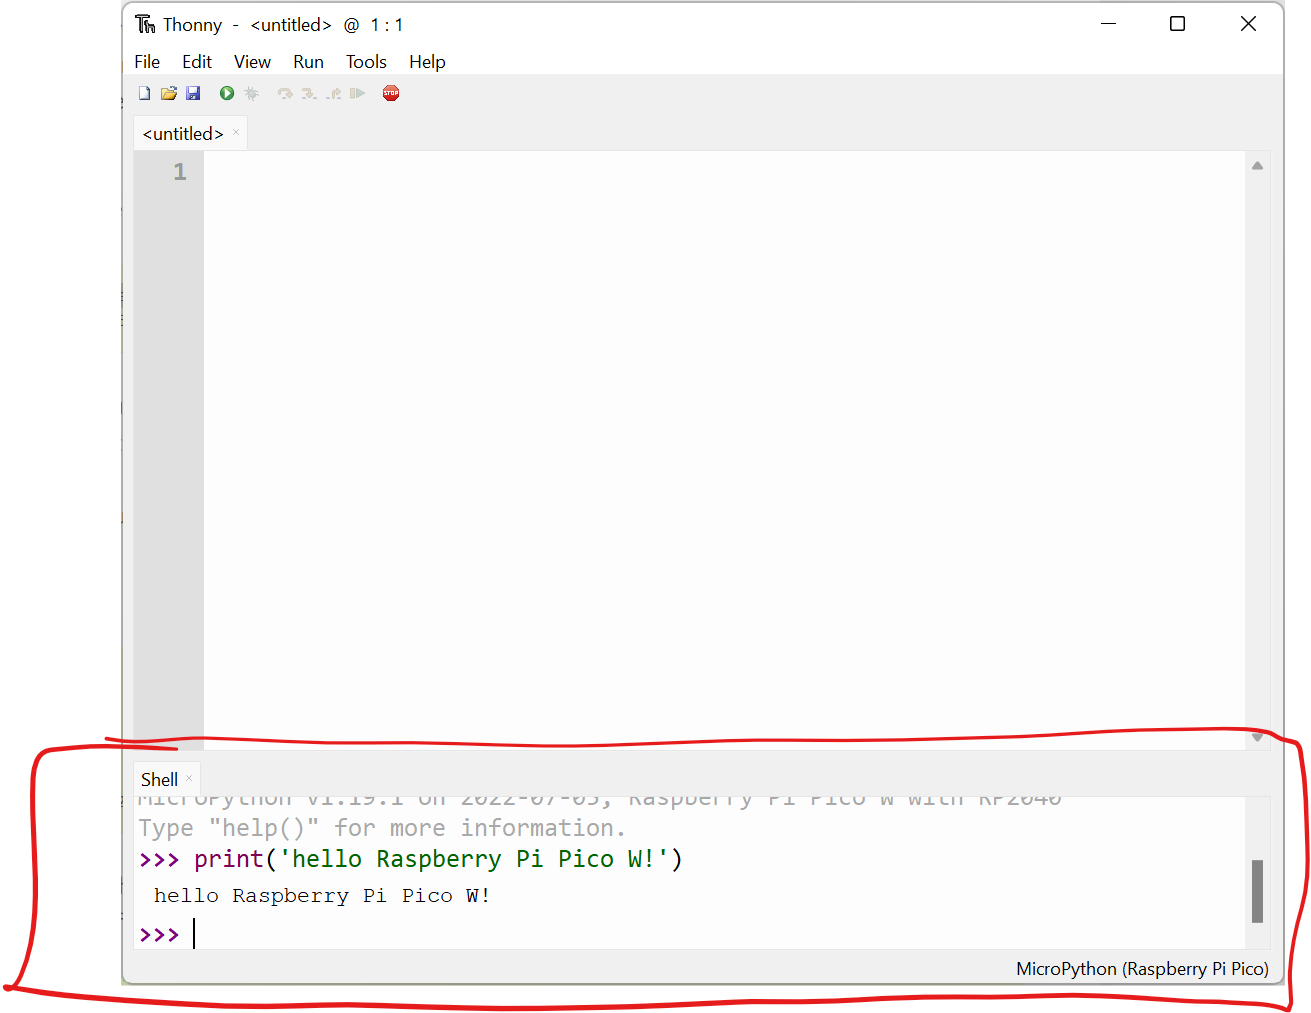
Flashing the Raspberry Pi Pico W Onboard LED
Now it’s time for the traditional Hello World for IoT Projects… Flashing an LED!
It’s worth noting that the onboard LED for the Pico W has now been moved from it’s traditional Pin 0 to the Wi-Fi control chip. This means that we need to reference the onboard LED slightly differently.
Copy and paste the following code into the Thonny Editor area;
import machine
from machine import Pin, Timer
intled = machine.Pin("LED", machine.Pin.OUT)
tim = Timer()
def tick(timer):
intled.toggle()
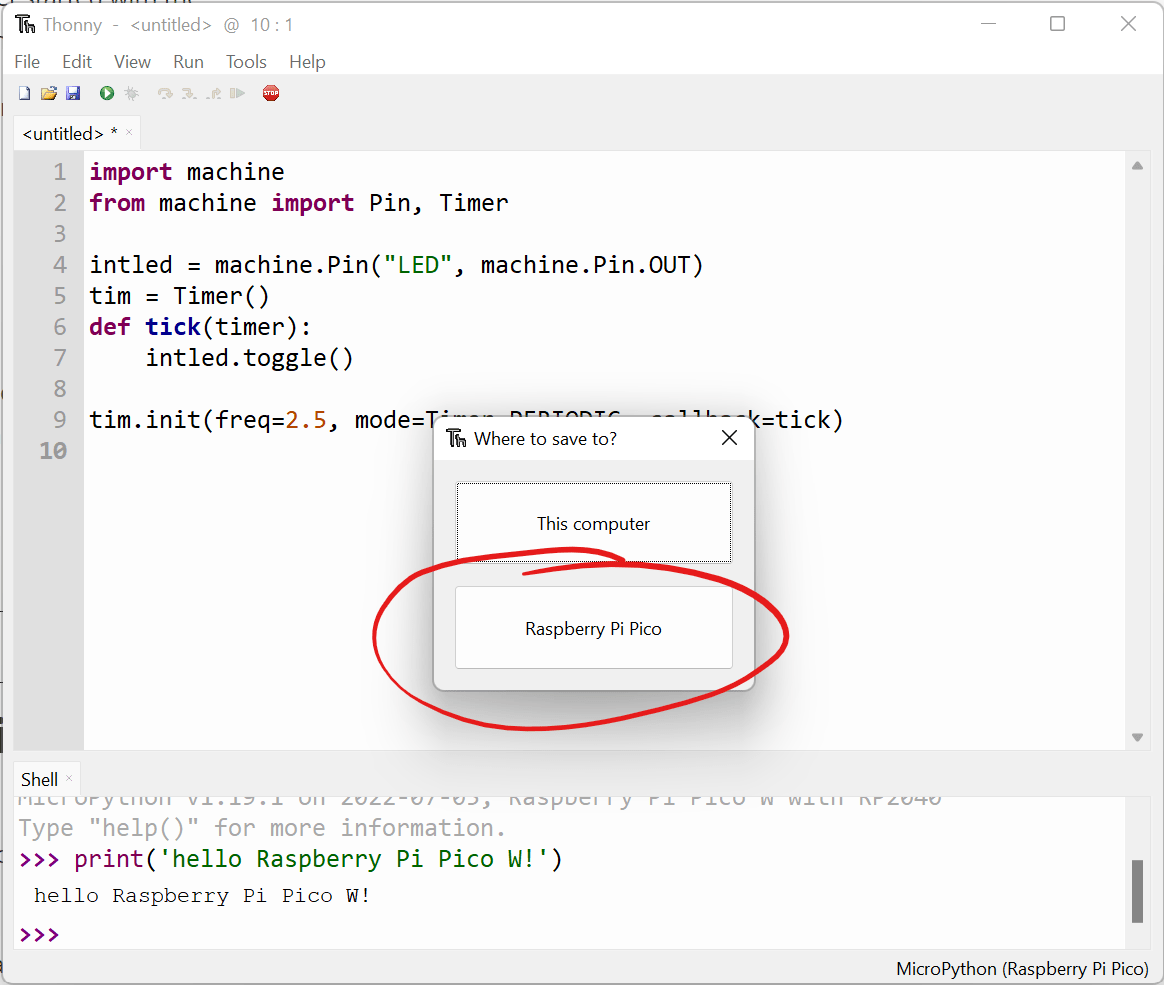
tim.init(freq=2.5, mode=Timer.PERIODIC, callback=tick)If you hit the save button or ctrl+s, then you can save the code to the Pico W by pressing the “Raspberry Pi Pico” button on the “Where to save to?” prompt;
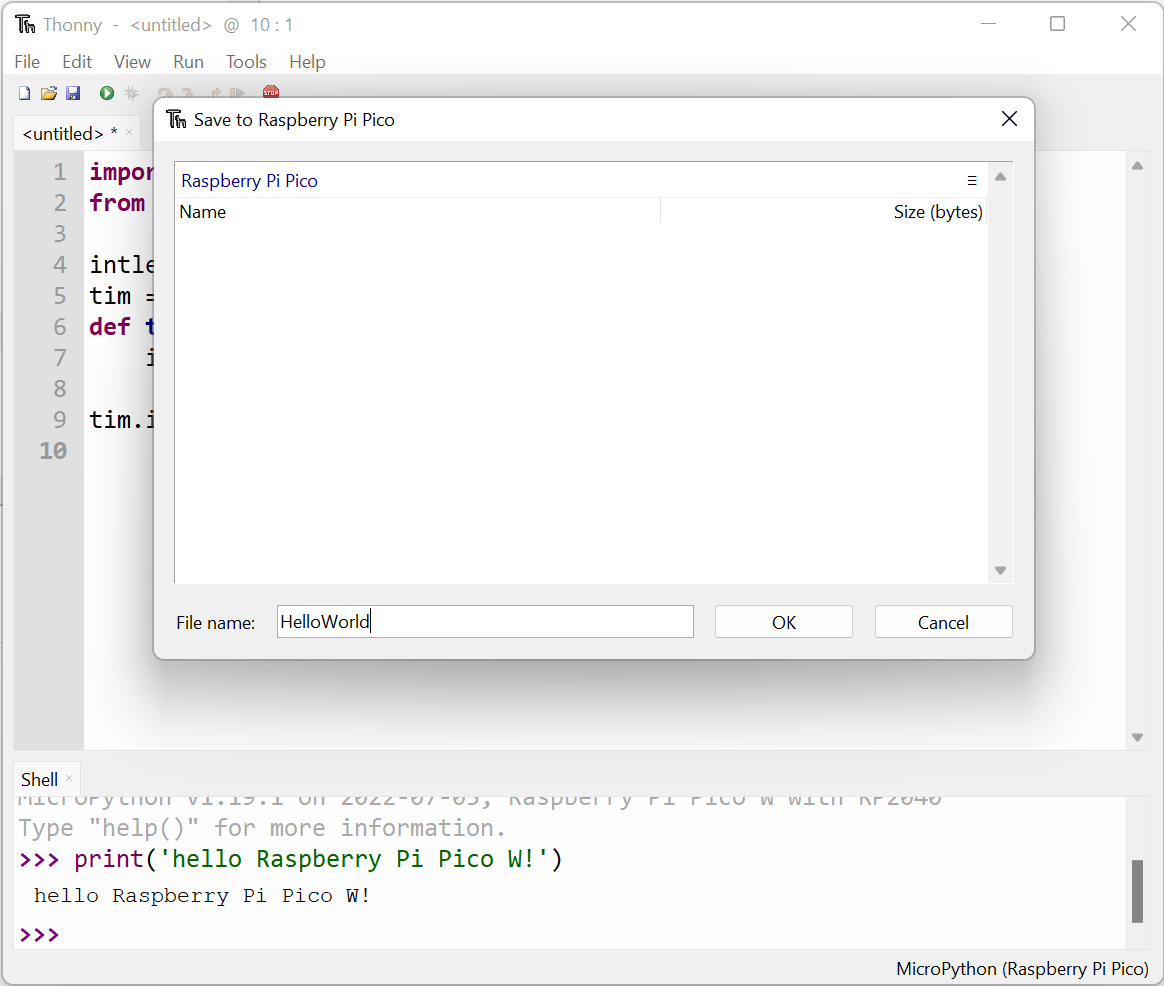
We can enter “HelloWorld” for the filename and press the ok button;
We can now run the code by pressing the green Run button, or hitting the F5 key;
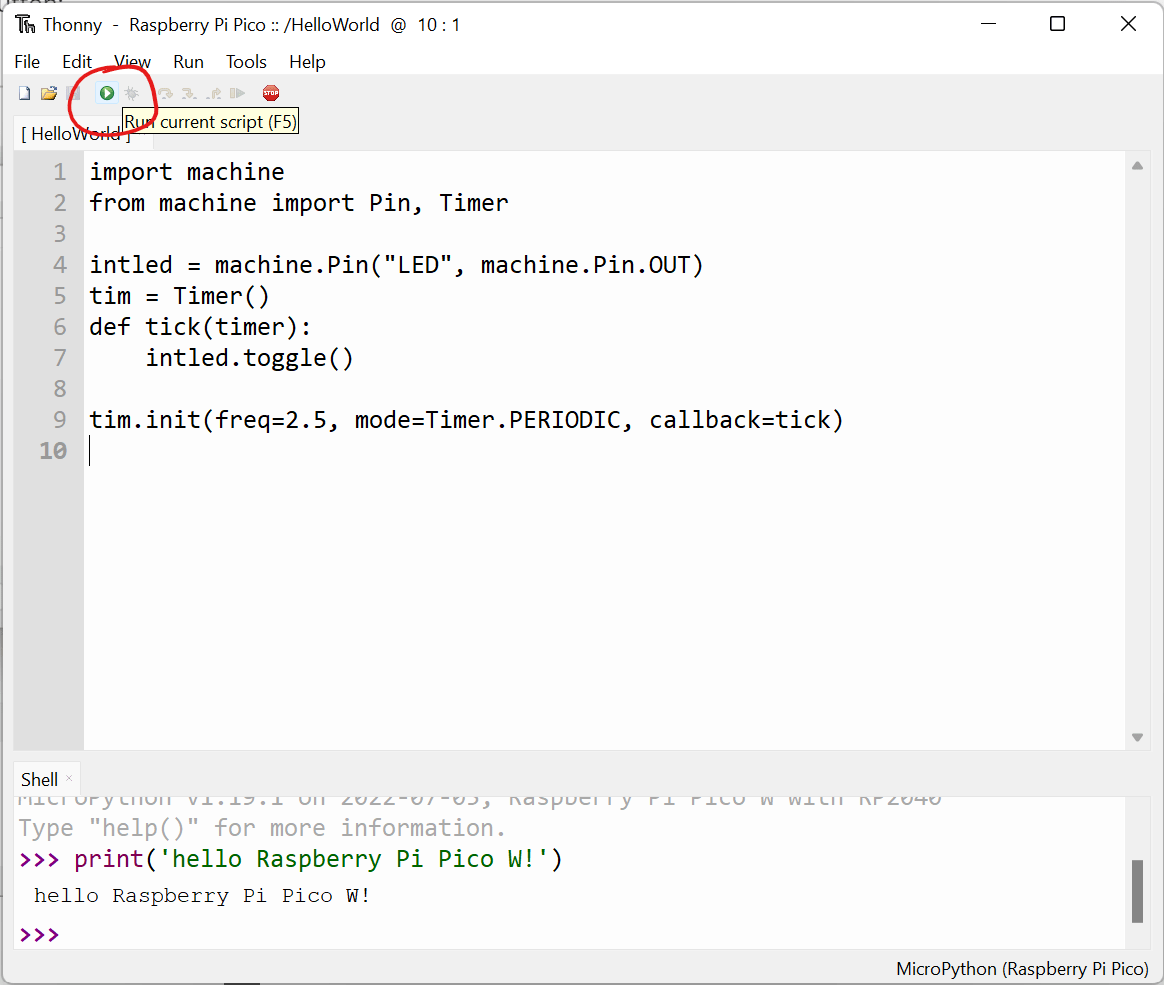
You should now see the onboard LED on the Pico W flashing happily to itself!
Reading the Google Home Page using the Raspberry Pi Pico W and Sockets
Ok, now that we’ve got control of our Raspberry Pi Pico W, it’s time to start exploring the Wi-Fi capability.
Stop the program, create a new file in Thonny and paste in the following code;
import time
import network
ssid = 'ENTER YOUR SSID'
password = 'ENTER YOUR Wi-Fi PASSWORD'
wlan = network.WLAN(network.STA_IF)
wlan.active(True)
wlan.connect(ssid, password)
# Wait for connect or fail
max_wait = 10
while max_wait > 0:
if wlan.status() < 0 or wlan.status() >= 3:
break
max_wait -= 1
print('waiting for connection...')
time.sleep(1)
# Handle connection error
if wlan.status() != 3:
raise RuntimeError('network connection failed')
else:
print('connected')
status = wlan.ifconfig()
print( 'ip = ' + status[0] )
# Get IP address for google
import socket
ai = socket.getaddrinfo("google.com", 80)
addr = ai[0][-1]
# Create a socket and make a HTTP request
s = socket.socket()
s.connect(addr)
s.send(b"GET / HTTP/1.0\r\n\r\n")
# Print the response
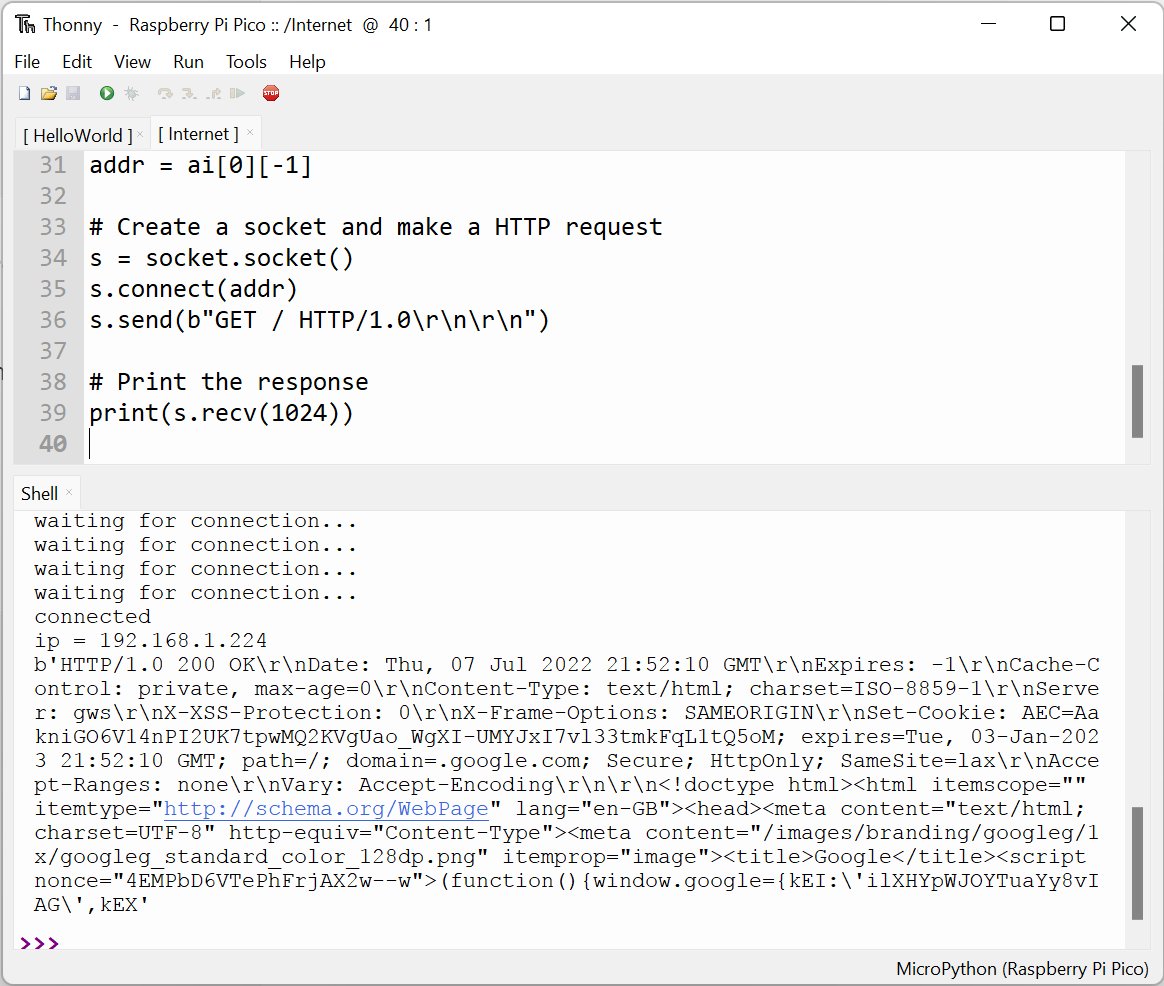
print(s.recv(1024))You’ll need to enter your Wi-Fi SSID and Password, then go ahead and save this file to the Pico W with the filename of “Internet”.
This code performs the following functions;
- Connects to your network using Wi-Fi
- Gets the IP Address of the Google homepage,
- Connects to the returned IP address using a Socket connection
- Performs a GET request
- Prints the result of the GET Request in the Shell.
We can see the result of the program in the Shell area at the bottom of the Thonny window;
Reading the Google Home Page using the Raspberry Pi Pico W and urequests
We can simplify the code above by using a Python library called urequests.
urequests is a Network Request module and wraps up a heap of useful network functionality.
In our case we’re going to make use of the GET Request functionality that urequests offers to simplify our code.
The firmware we flashed onto our Pico W earlier has this library included, so we can go ahead an use it.
Stop the Program, create another new File and copy and paste the following code into the window;
import time
import network
ssid = 'ENTER YOUR SSID'
password = 'ENTER YOUR Wi-Fi PASSWORD'
wlan = network.WLAN(network.STA_IF)
wlan.active(True)
wlan.connect(ssid, password)
# Wait for connect or fail
max_wait = 10
while max_wait > 0:
if wlan.status() < 0 or wlan.status() >= 3:
break
max_wait -= 1
print('waiting for connection...')
time.sleep(1)
# Handle connection error
if wlan.status() != 3:
raise RuntimeError('network connection failed')
else:
print('connected')
status = wlan.ifconfig()
print( 'ip = ' + status[0] )
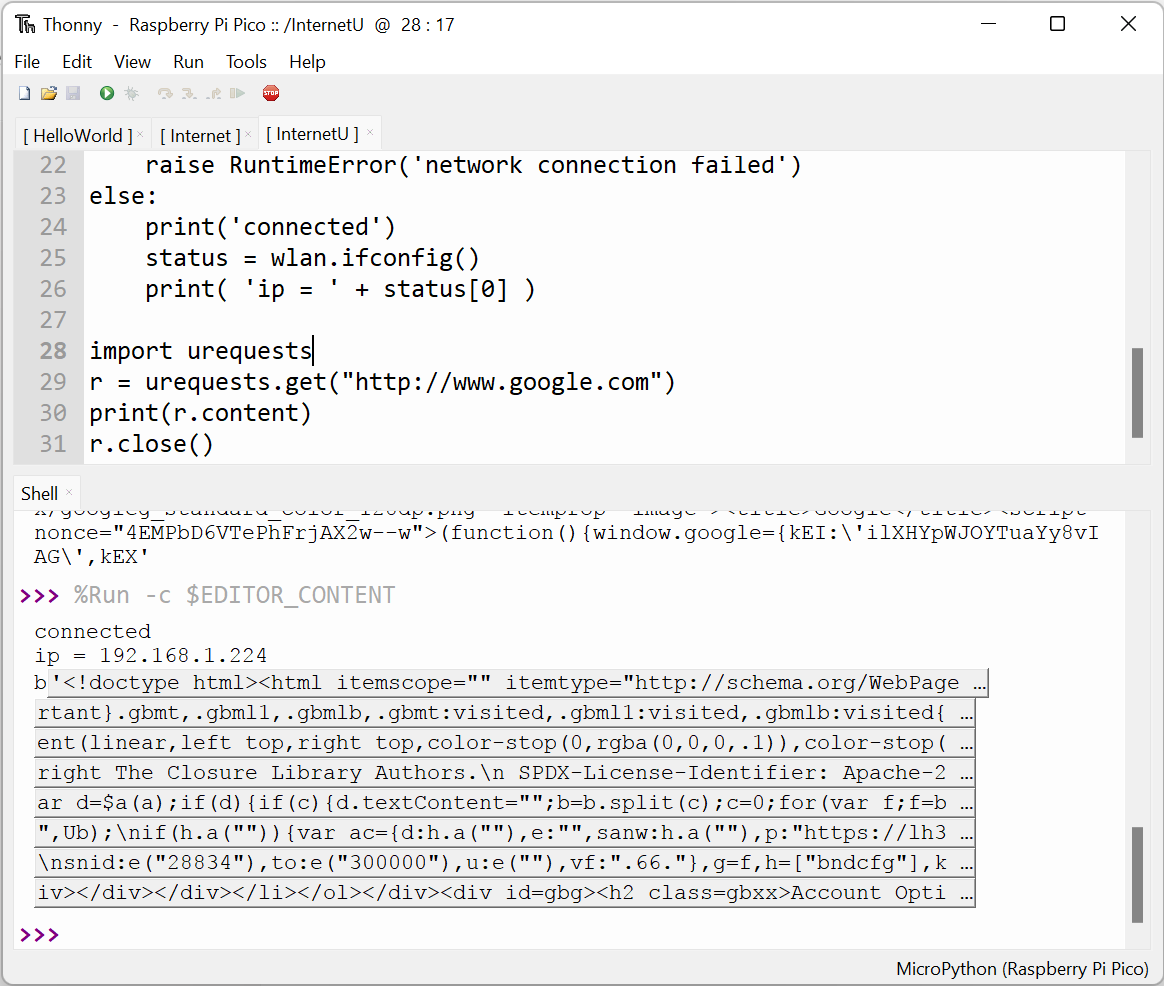
import urequests
r = urequests.get("http://www.google.com")
print(r.content)
r.close()Change the Wi-Fi SSID and Password, then save the file to the Pico as before and run it.
You should see a slightly different formatted version of the Google homepage returned in the Shell area;
Hosting a Basic Web Server using the Raspberry Pi Pico W
Now it’s time for us to create a basic Web Server using our Raspberry Pi Pico W.
This Web Server will return a simple Web Page when we navigate to the IP address assigned to our Pico W.
Stop the program, create a new file and copy and paste the following code into the editor;
import network
import socket
import time
ssid = 'ENTER YOUR SSID'
password = 'ENTER YOUR Wi-Fi PASSWORD'
wlan = network.WLAN(network.STA_IF)
wlan.active(True)
wlan.connect(ssid, password)
html = """<!DOCTYPE html>
<html>
<head> <title>Pico W</title> </head>
<body> <h1>Pico W</h1>
<p>Hello World</p>
</body>
</html>
"""
# Wait for connect or fail
max_wait = 10
while max_wait > 0:
if wlan.status() < 0 or wlan.status() >= 3:
break
max_wait -= 1
print('waiting for connection...')
time.sleep(1)
# Handle connection error
if wlan.status() != 3:
raise RuntimeError('network connection failed')
else:
print('connected')
status = wlan.ifconfig()
print( 'ip = ' + status[0] )
# Open socket
addr = socket.getaddrinfo('0.0.0.0', 80)[0][-1]
s = socket.socket()
s.bind(addr)
s.listen(1)
print('listening on', addr)
# Listen for connections
while True:
try:
cl, addr = s.accept()
print('client connected from', addr)
request = cl.recv(1024)
print(request)
request = str(request)
response = html
cl.send('HTTP/1.0 200 OK\r\nContent-type: text/html\r\n\r\n')
cl.send(response)
cl.close()
except OSError as e:
cl.close()
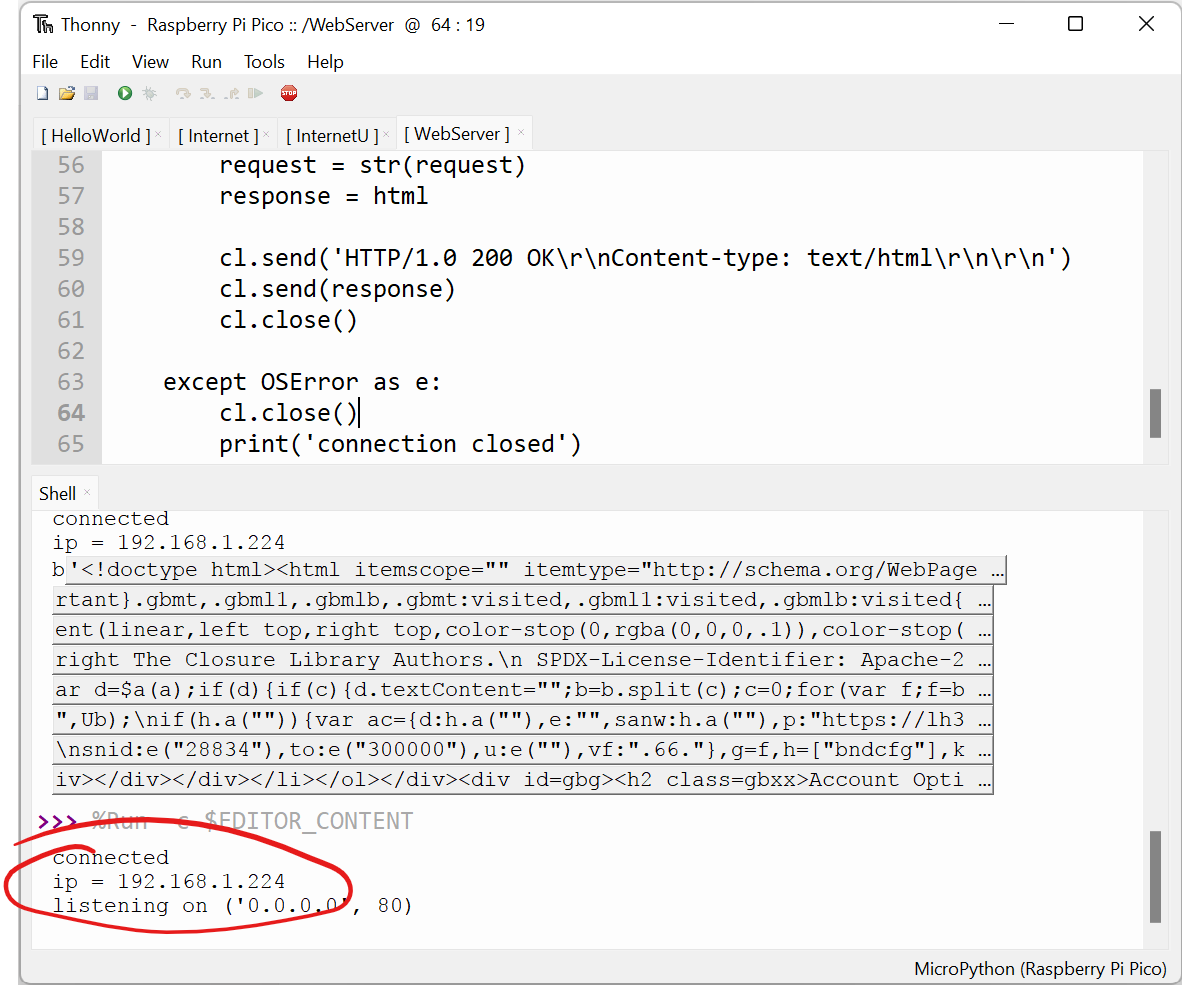
print('connection closed')Change the Wi-Fi SSID and Password, then save the file as “WebServer”, then run the script.
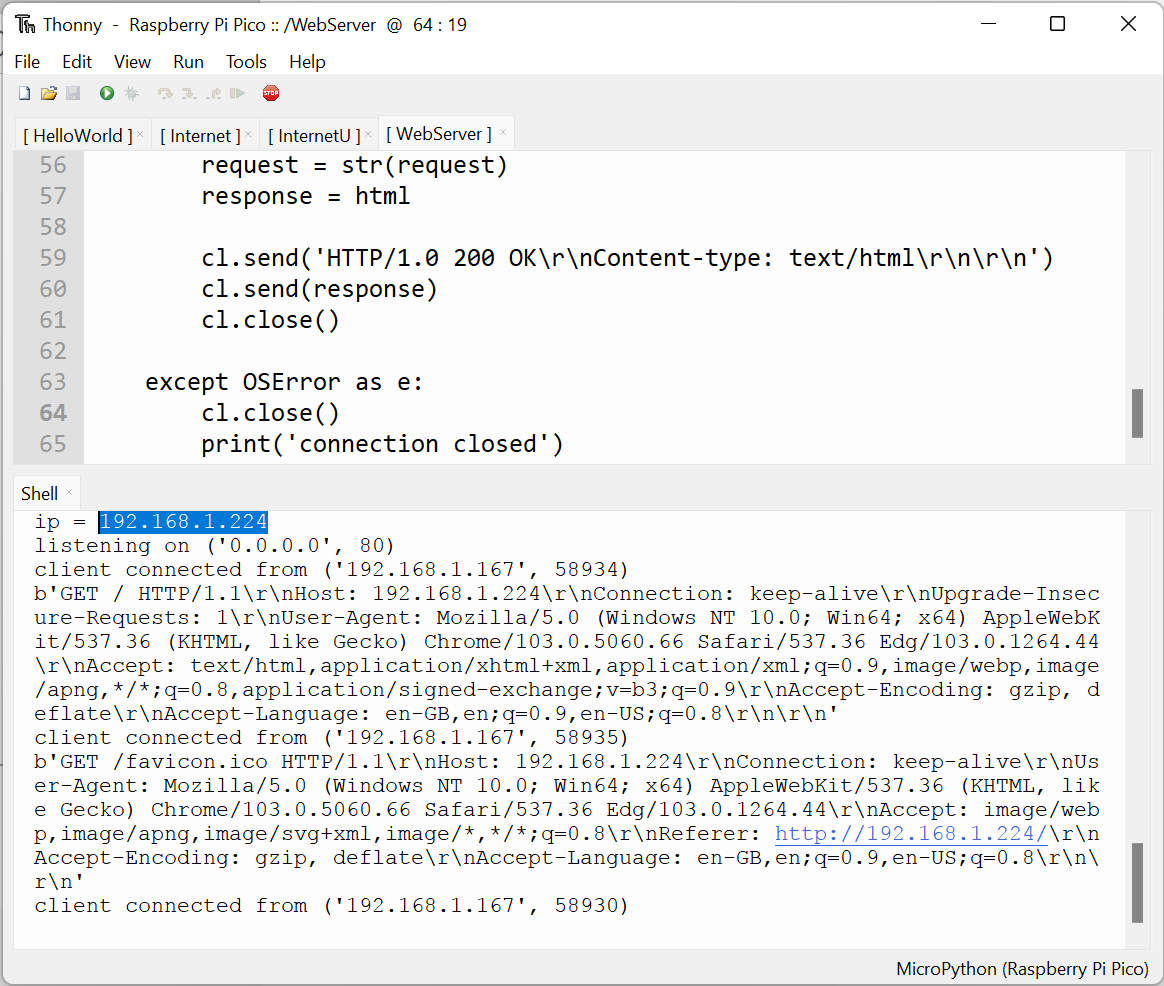
The Shell will show the IP address assigned to our Raspberry Pi Pico W;
If we navigate to the IP address of our Pico, we’ll be shown our web page;

The Thonny IDE will also show the HTML that has been sent to our web browser as well as the IP address of the client that connected to it;
Controlling the OnBoard LED using a Web Server
Now that we’ve got a basic Web Server up and running, we can now move on to controlling the onboard LED of the Pico W using the Web Server.
Stop the program, then create a new file and copy and paste the following code into the editor;
import network
import socket
import time
import machine

from machine import Pin

intled = machine.Pin("LED", machine.Pin.OUT)

ssid = 'ENTER YOUR SSID'
password = 'ENTER YOUR Wi-Fi PASSWORD'

wlan = network.WLAN(network.STA_IF)
wlan.active(True)
wlan.connect(ssid, password)

html = """<!DOCTYPE html>
    <html>
        <head> <title>Pico W</title> </head>
        <body> <h1>Pico W</h1>
            <p>Hello World</p>
            <p>
            <a href='/light/on'>Turn Light On</a>
            </p>
            <p>
            <a href='/light/off'>Turn Light Off</a>
            </p>
            <br>
        </body>
    </html>
"""

# Wait for connect or fail
max_wait = 10
while max_wait > 0:
    if wlan.status() < 0 or wlan.status() >= 3:
        break
    max_wait -= 1
    print('waiting for connection...')
    time.sleep(1)

# Handle connection error
if wlan.status() != 3:
    raise RuntimeError('network connection failed')
else:
    print('connected')
    status = wlan.ifconfig()
    print( 'ip = ' + status[0] )

# Open socket
addr = socket.getaddrinfo('0.0.0.0', 80)[0][-1]

s = socket.socket()
s.bind(addr)
s.listen(1)

print('listening on', addr)

stateis = ""

# Listen for connections
while True:
    try:
        cl, addr = s.accept()
        print('client connected from', addr)

        request = cl.recv(1024)
        print(request)

        request = str(request)
        led_on = request.find('/light/on')
        led_off = request.find('/light/off')
        print( 'led on = ' + str(led_on))
        print( 'led off = ' + str(led_off))

        if led_on == 6:
            print("led on")
            intled.value(1)
            stateis = "LED is ON"

        if led_off == 6:
            print("led off")
            intled.value(0)
            stateis = "LED is OFF"

        response = html + stateis

        cl.send('HTTP/1.0 200 OK\r\nContent-type: text/html\r\n\r\n')
        cl.send(response)
        cl.close()

    except OSError as e:
        cl.close()
        print('connection closed')
Change the Wi-Fi SSID and Password, then save the file as “WebServerLED” and run the program.
Once again, the IP address of the Pico W will be shown in the Shell window.
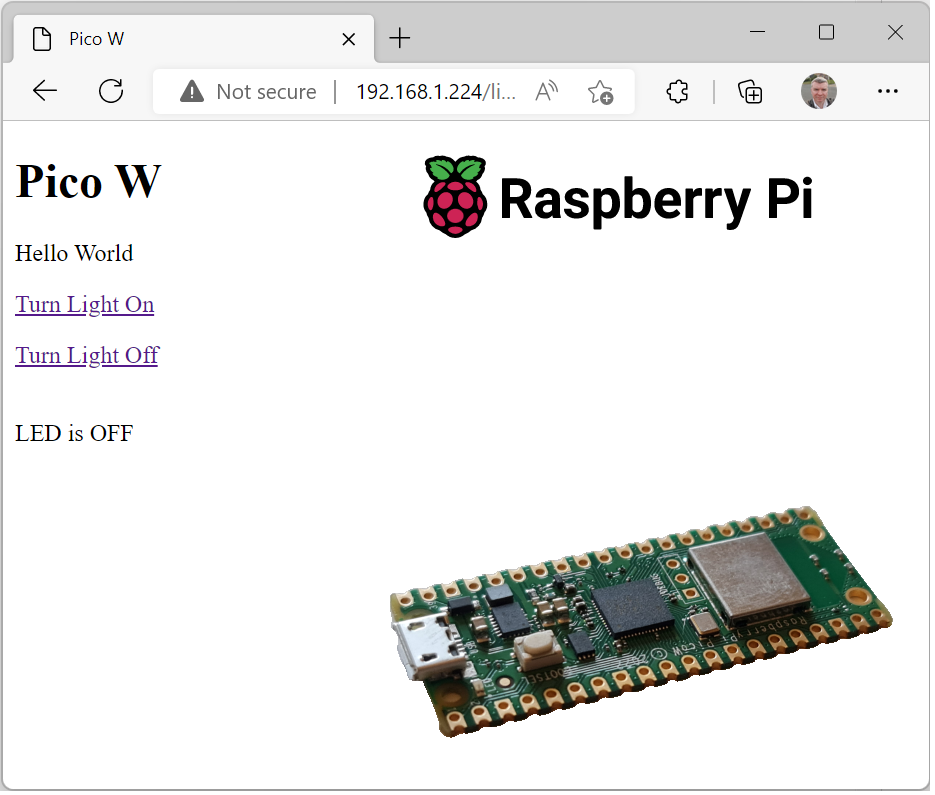
Navigating to the Pico W IP Address will show the new Webpage;
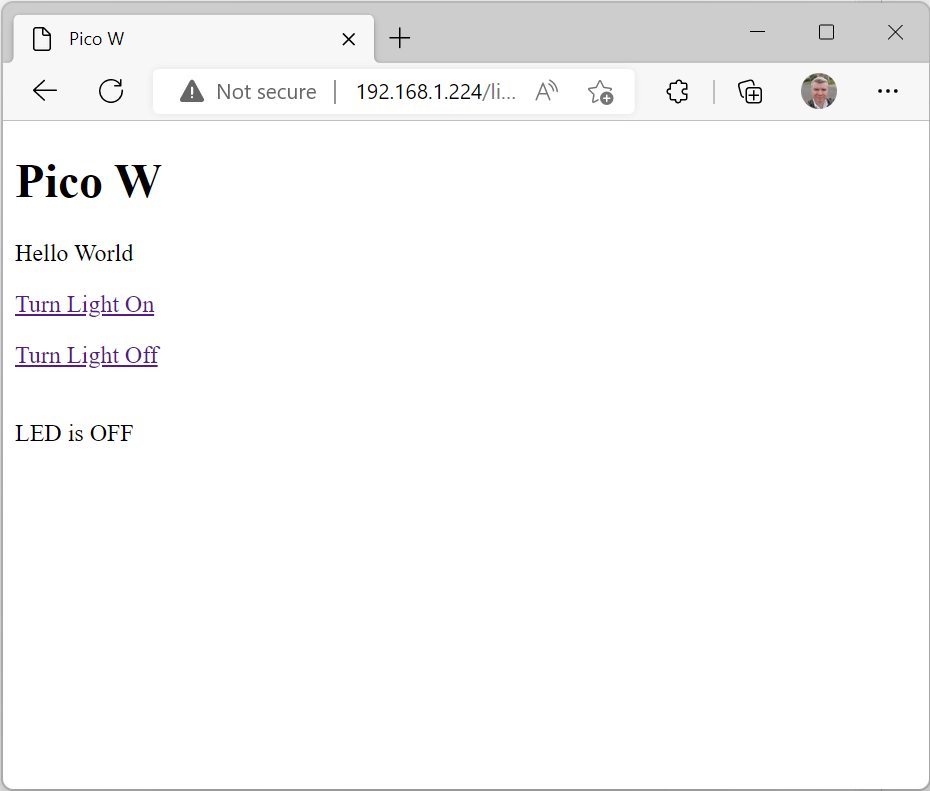
You will now be able to click the “Turn Light On” link to turn the Pico W onboard LED On, followed by clicking the “Turn Light Off” link to turn the Pico W onboard LED back off again.
The current status of the LED will be shown on the page too.
Signing Off
With that, you’ve now explored some of the network functionality of the new Raspberry Pi Pico W.
I’d love to hear what projects you make, so do go ahead and send me a tweet at @pete_codes