This is part 1 of a (at least) 5 part blog series on Dot Net Core on the Raspberry Pi….
You can see Part 2 – GPIO – right here…
You can see Part 3 – Sending Azure IoT Hub Messages – right here…
You can see Part 4 – Receiving Azure IoT Hub Messages – right here…
You can see Part 5 – Remote Deployment and Debugging – right here…
Note: This post is up to date as of 29/08/2021, for the following versions;
– Dot Net Core 3.1.412
– ASP.NET Core 3.1.18
On September 25th 2019, the Dot Net Team released version 3.0 of the Dot Net Core Framework at .Net Conf.
To join in the fun, I held a special with Notts IoT, the IoT group I organise in Nottingham, where I gave a talk on Dot Net Core 3.0 on the Raspberry Pi.
This blog post is what I’ve learnt along the way to preparing for the talk…!
Thanks Shawty
I started out by following along with some great instructions by Peter “Shawty” Shaw. This took me through step by step how to get an ASP.Net Preview 4 of Dot Net Core Blazor up and running on a Raspberry Pi.
I had to make a few adjustments to bring this up to date with the release version of Dot Net Core, but overall the original instructions worked really well… So thanks Shawty!
What you’ll need
- A recent Raspberry Pi – Go shopping at the Pi Hut.
- You’ll also need to setup a Samba Share, create a folder in your home directory called “share” and share that – Here’s a link to a good guide.
- Then you’ll need a SSH Client like PUTtY – Get it here.
- Next up you’ll need a Code Editor – Use Visual Studio Code!
I’ll be using a Raspberry Pi 3B+… It’s important to note that Dot Net Core will only work on an AMR32v7 processor or above… So that’s a Raspberry Pi 2 and upwards… Unfortunately this rules out the Pi Zero and Pi Zero W as they have V6 processors.
There’s now a Script!
Whoop… I’ve now created a script that installs everything below in one go!
On your Pi, just go ahead and run the following command;
wget -O - https://raw.githubusercontent.com/pjgpetecodes/dotnetcore3pi/master/install.sh | sudo bashThis runs the install script as root, so obviously take your own precautions here…. But, if you want to see what’s inside, feel free to click the expandable section below…
Click here to see the contents of the install.sh file
The “Bash Commands Only” Version…
Click here if you’d like the “Straight to the point” Bash Commands Only version..
Update Pi
sudo apt-get -y update
sudo apt-get -y upgrade
Install Missing Dependencies
sudo apt-get -y install libunwind8 gettextGet Dot Net Core ARM32 Binaries
wget https://download.visualstudio.microsoft.com/download/pr/5aef7e5d-2112-4868-8d7c-4c82f04363c5/e4fe30dc136634001cf357f26c825506/dotnet-sdk-3.1.412-linux-arm.tar.gz
Get ASP.NET Core ARM32 Runtime
wget https://download.visualstudio.microsoft.com/download/pr/56d6e6bb-34e4-4e8e-8d6f-ce11be174182/6a3daf4d44793478df8f5f291cc8b029/aspnetcore-runtime-3.1.18-linux-arm.tar.gz
Create Main Directory
sudo mkdir /opt/dotnetExtract Dot NET Core Binaries
sudo tar -xvf dotnet-sdk-3.1.412-linux-arm.tar.gz -C /opt/dotnet/Extract ASP.NET Core Runtime
sudo tar -xvf aspnetcore-runtime-3.1.18-linux-arm.tar.gz -C /opt/dotnet/Link Binaries to Account
sudo ln -s /opt/dotnet/dotnet /usr/local/binEdit .bashrc
cd /home/pi
sudo nano .bashrc
Add the following to the bottom of the .bashrc file;
export DOTNET_ROOT=/opt/dotnetCheck it’s all working…
dotnet --infoGet Blazor Templates
dotnet new -i Microsoft.AspNetCore.Components.WebAssembly.Templates::3.2.0-rc1.20223.4New Console App
dotnet new consoleNew Blazor Server App
dotnet new blazorserverNew Blazor Web Assembly App
dotnet new blazorwasmSetting the Pi up
The first thing that we need to do is get the latest version of Dot Net Core onto the Pi.
Step by Step
Following along with the instructions, we need to make sure that our Pi is up to date… We can do this by running the following two instructions;
sudo apt-get -y update
sudo apt-get -y upgrade
Next up, we need to install a couple of dependencies which are needed to run Dot Net Core apps on the Pi. These packages are required by Dot Net Core applications but aren’t installed as standard with Raspbian. Further, as we don’t have an install package for Dot Net Core for Raspbian, we’ll need to install these ourselves;
sudo apt-get -y install libunwind8 gettextNow we download the Dot Net Core SDK and ASP.Net Core Runtimes.
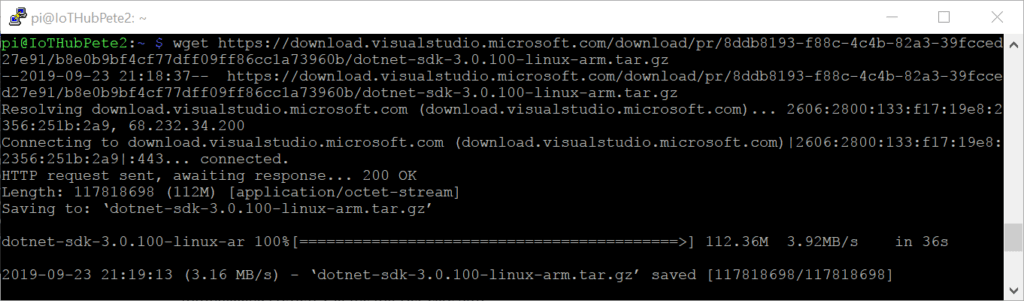
First up the Dot Net Core SDK. This is the ARM32 set of binaries;
wget https://download.visualstudio.microsoft.com/download/pr/5aef7e5d-2112-4868-8d7c-4c82f04363c5/e4fe30dc136634001cf357f26c825506/dotnet-sdk-3.1.412-linux-arm.tar.gz
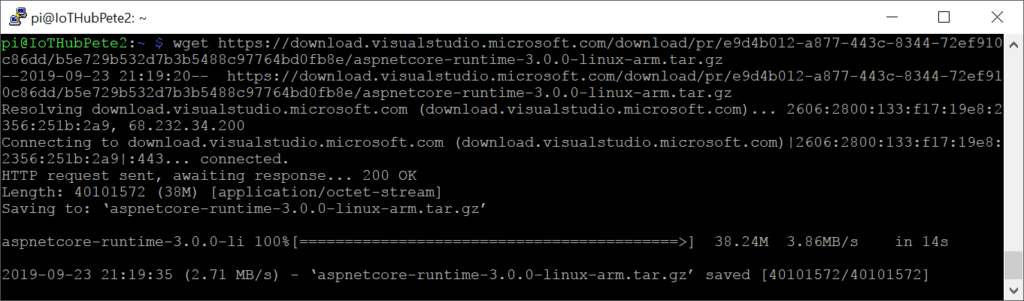
After this download the ASP.Net core Runtime, again, we’re downloading the ARM32 version here;
wget https://download.visualstudio.microsoft.com/download/pr/56d6e6bb-34e4-4e8e-8d6f-ce11be174182/6a3daf4d44793478df8f5f291cc8b029/aspnetcore-runtime-3.1.18-linux-arm.tar.gz
Once the files have finished downloading, we need to extract them… First we need to store the files in a place where the whole operating system can gain access to them. So create a directory in opt;
sudo mkdir /opt/dotnetFirst extract the SDK;
sudo tar -xvf dotnet-sdk-3.1.412-linux-arm.tar.gz -C /opt/dotnet/
Next we extract the ASP.Net runtime;
sudo tar -xvf aspnetcore-runtime-3.1.18-linux-arm.tar.gz -C /opt/dotnet/
Once the files have been extracted we need to make a symbolic link between the opt/dotnet directory to the bin directory so that the operating system has access to them when we run our Dot Net Core apps. This in essence means that the SDK and runtime exist at both locations;
sudo ln -s /opt/dotnet/dotnet /usr/local/binAre we there yet?
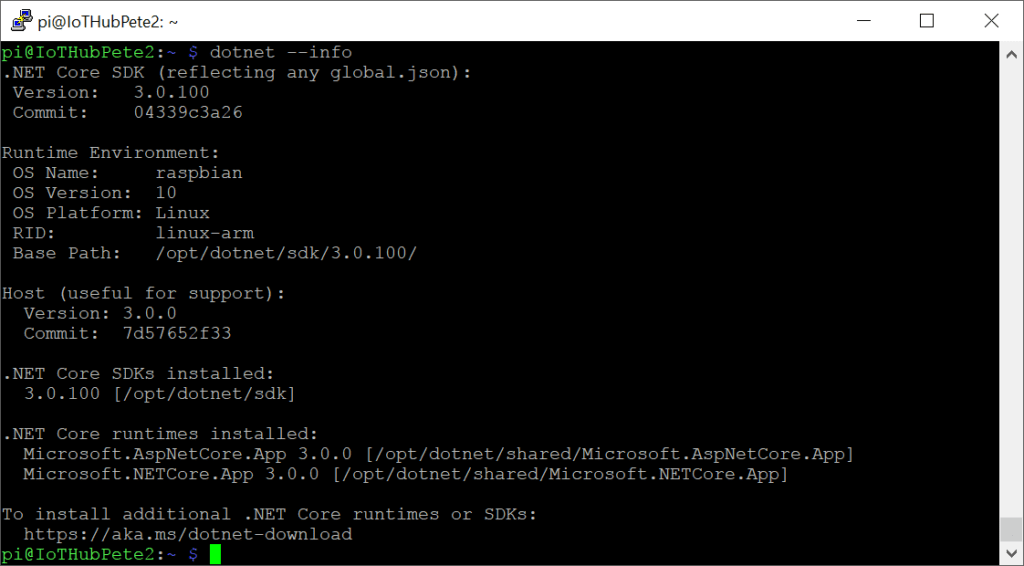
At this stage the setup of Dot Net Core should be done… So time to find out if everything is working… Run the following to see if it’s all ok;
dotnet --infoIf all went well, you should see the Dot Net Version Information reported in the terminal window;
Hello (Blazor) World
Now that we have Dot Net Core up and running (Whoop by the way!), it’s time to get our first ASP.Net Core website working…
Before we create our first ASP.net Core app though, we need to install the Blazor Template Pack;
dotnet new -i Microsoft.AspNetCore.Components.WebAssembly.Templates::3.2.0-rc1.20223.4What’s this Blazor thing I just installed then?
Originally developed as a pet project by Steve Sanderson at Microsoft, Blazor is Web UI Framework which is based on C#, Razor and HTML. Blazor compiles down to WebAssembly, which makes it super (or blazingly) fast (Hence the Razor with a “B”).
Blazor allows developers to write client side .net… You may say “Oh, like Silverlight?”… Nope, no plugins needed… It’s just supported natively in most modern browsers.
One last thing to setup
We now need to make sure that the Operating system knows where to find our new Dot Net Core binaries.
So we don’t need to run a command every time we log in to the Pi, we need to add a line to our .bashrc file. This file will be run up each time the Pi starts up;
cd /home/pi
sudo nano .bashrc
Scroll right to the bottom and add the following line;
export DOTNET_ROOT=/opt/dotnet
Now hit “ctrl+x” to exit and press “y” to save the file.
Reboot Time!
At this point you’ll need to reboot your pi for the changes to take effect. This is because we’ve made changes to the .bashrc file. Specifically, we’ve added an environment variable to the .basrc file that tells the system where to find the .NET runtime. This variable won’t be loaded until after we restart our session.
If you don’t reboot, when you try to run your application for the first time, you may receive the following warning;
A fatal error occurred. The required library libhostfxr.so could not be found.
So go ahead and reboot with;
sudo rebootNote: If you’re feeling brave, you can try simply restarting your bash session instead with;
exec bashTime to scaffold our app
Firstly we need to create a directory for our project;
cd share
mkdir rpiblazor
cd rpiblazor
Now we can scaffold our new ASP.Net Core Blazor App;
dotnet new blazorserver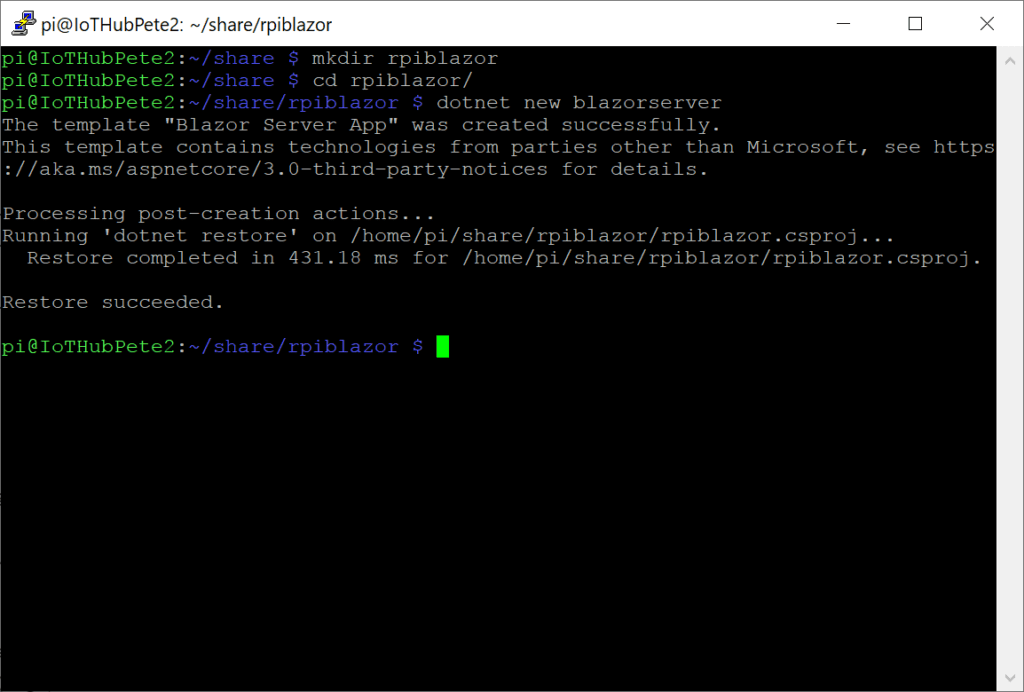
Show me the files!
At this stage we need access to the files on our Pi as we need to make some edits….
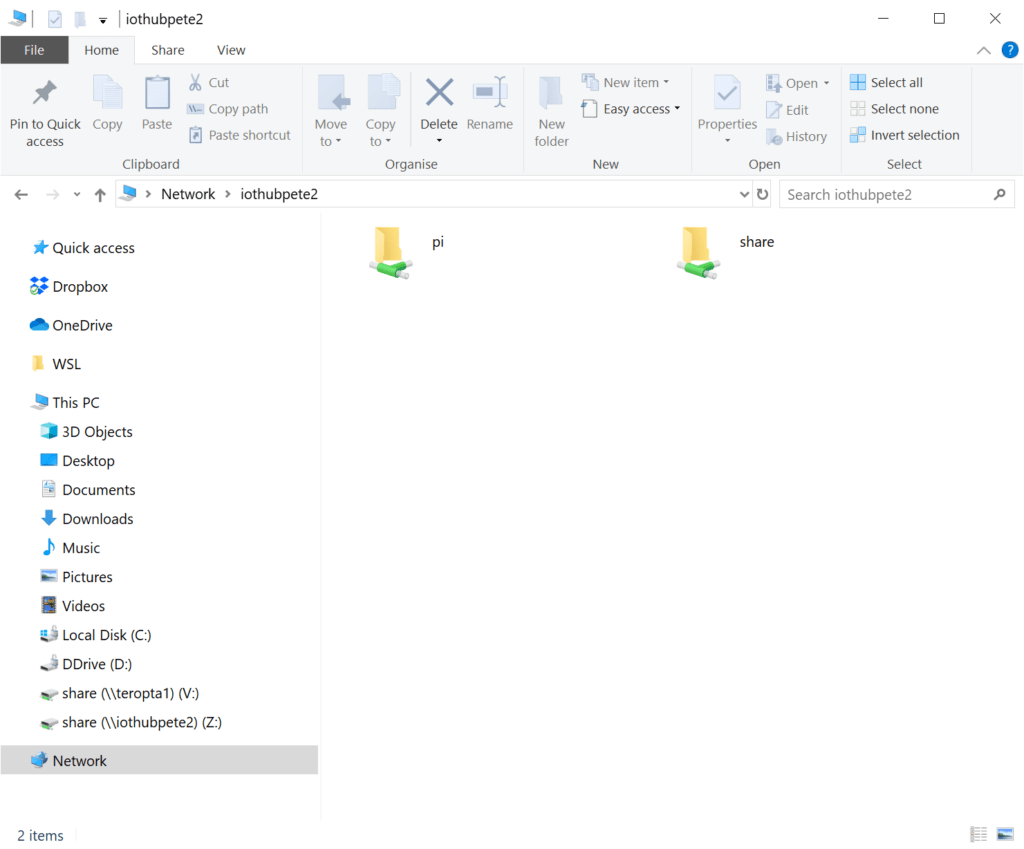
If you’ve followed along with the guide I mentioned above, you’ll have set up a shared folder on your Pi called Share.
On a Windows machine, we can map this shared folder to a drive on our machine, so we have an easy way of accessing it.
Go ahead and open Windows Explorer and navigate to your Pi. If you’ve simply installed vanilla Raspbian on your Pi, it’s no doubt still called “RaspberryPi”. So you can type the following into the Windows Explorer address bar;
\\raspberrypiIn my case, I’ve renamed my Pi, but overall it’ll look something like;
Now, if you right click on the “share” folder, you’ll see a menu which includes a “Map Network Drive…” option;
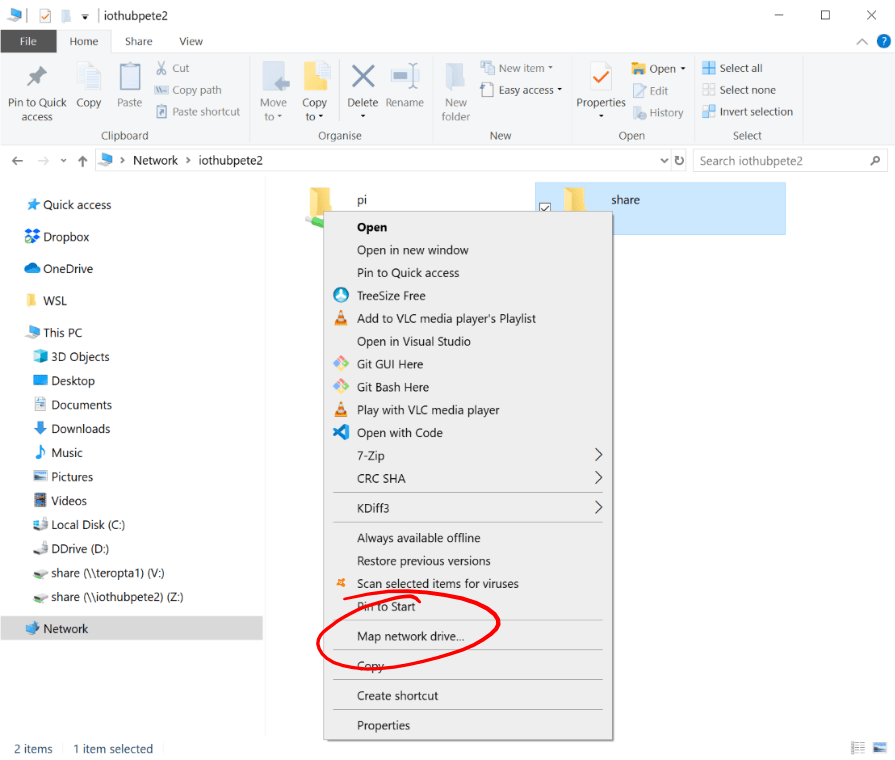
Hitting this menu option will show the “Map Network Drive” dialog;
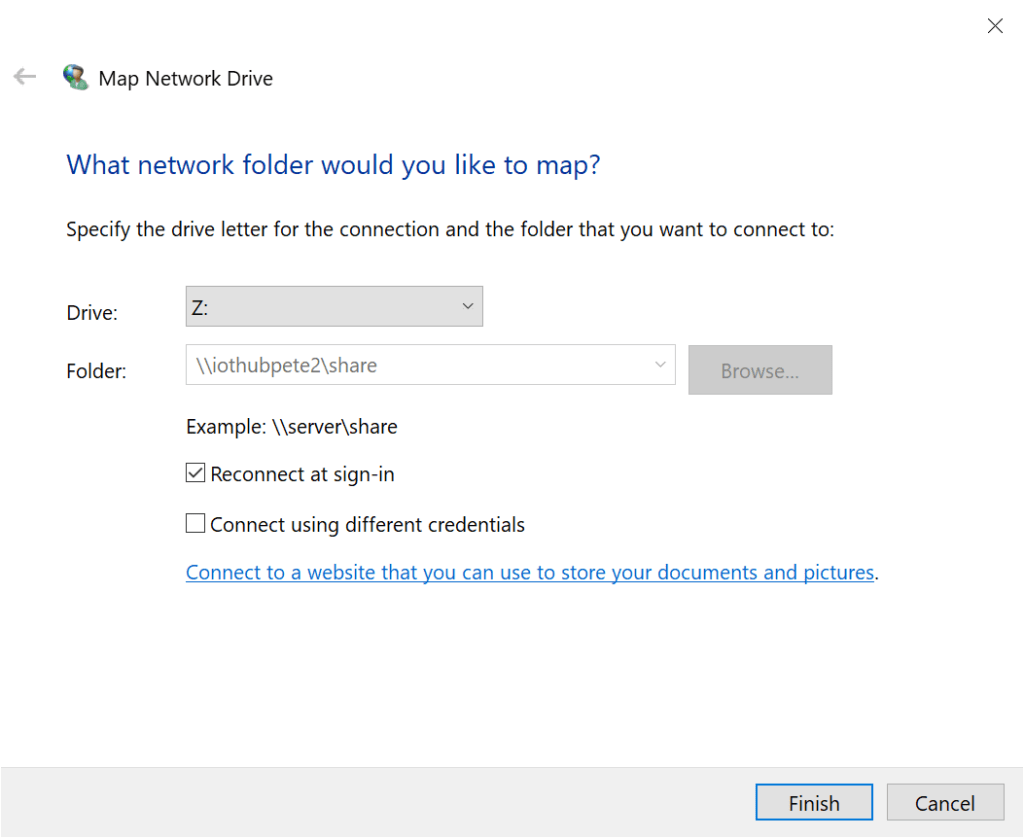
Just press the “Finish” button to map your Network Drive.
Are you listening?
Now we have access to our files, we can make the edits we need…
Basically, before we can test that our “Hello World” style Blazor app is working, we need to allow the app to be accessed from an external PC (That is, unless you’re happy to test directly on the Pi).
We can accomplish this by adding an extra line to the “program.cs” file in the root of our project.
First, let’s open our project in Visual Studio Code… if you’re on Windows and you’ve followed along with the steps above, you can enter your “rpiblazor” folder, find some blank space and right click. The menu shown will include a “Open with Code” item;
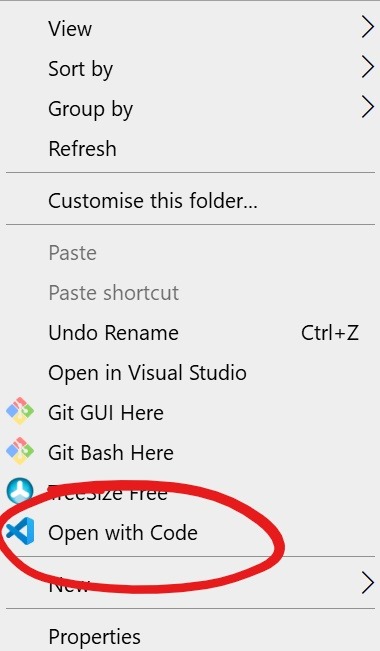
Hitting “Open with Code” will open the whole folder in Visual Studio Code, allowing us easy access to all the files.
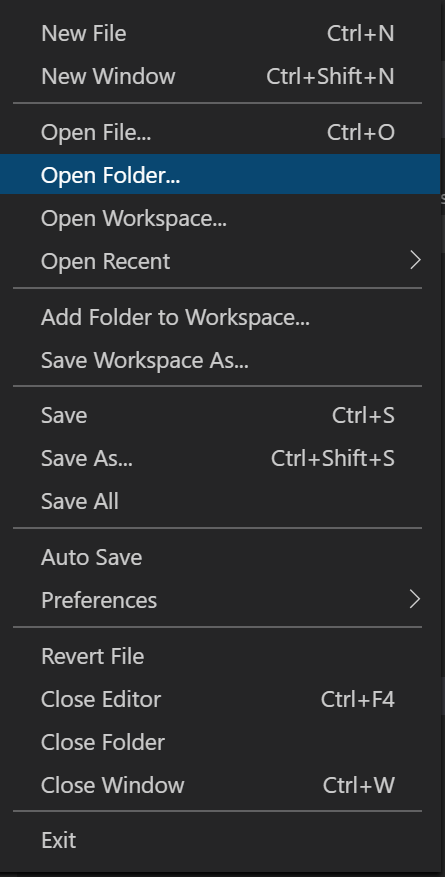
Alternatively, you can open VS Code yourself and choose the “Open Folder” option from the File Menu;
Once you have your project loaded in VS Code, then open the “Program.cs” file from the Explorer on the left;
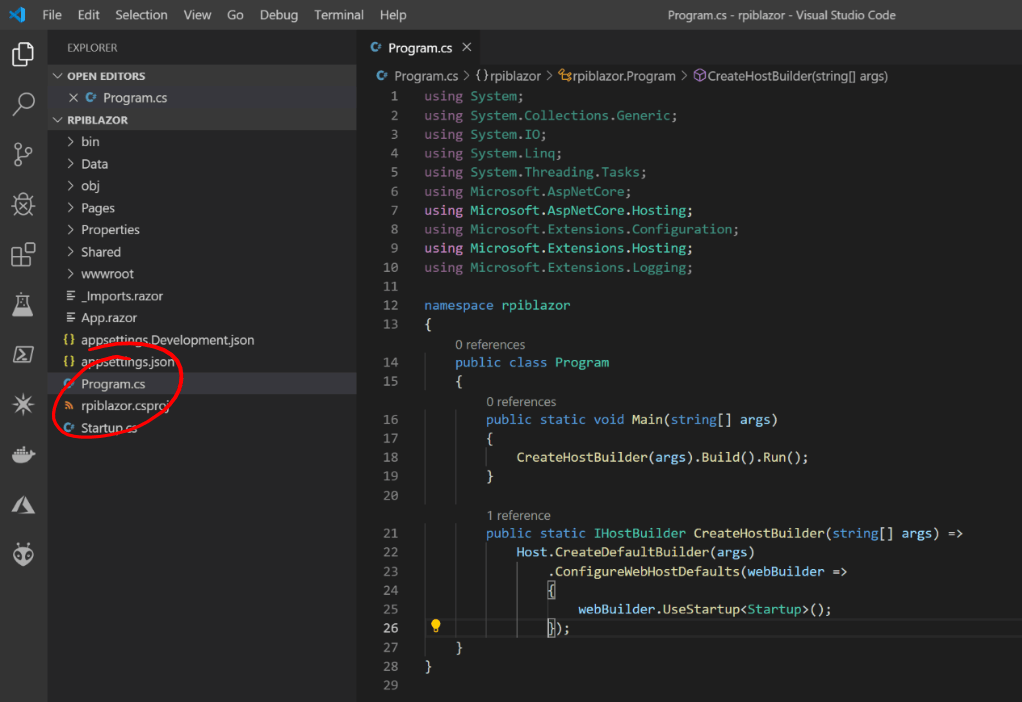
Towards the bottom of the file is the “CreateHostBuilder” function… Here’s where we set up various settings for our web applications including Dependency Injection, Middleware etc
Here is where we can set our application to listen on from all IP addresses rather than just on localhost, which, as the name suggests, can only be accessed locally.
Below the “webBuilder.UserStartup<Startup>();” line add the following line;
webBuilder.UseUrls("http://*:5000"); This will instruct Dot Net to run this webapp at Port 5000 and listen out too all IP addresses (The * is a wildcard here).
Your finished code should now look like;
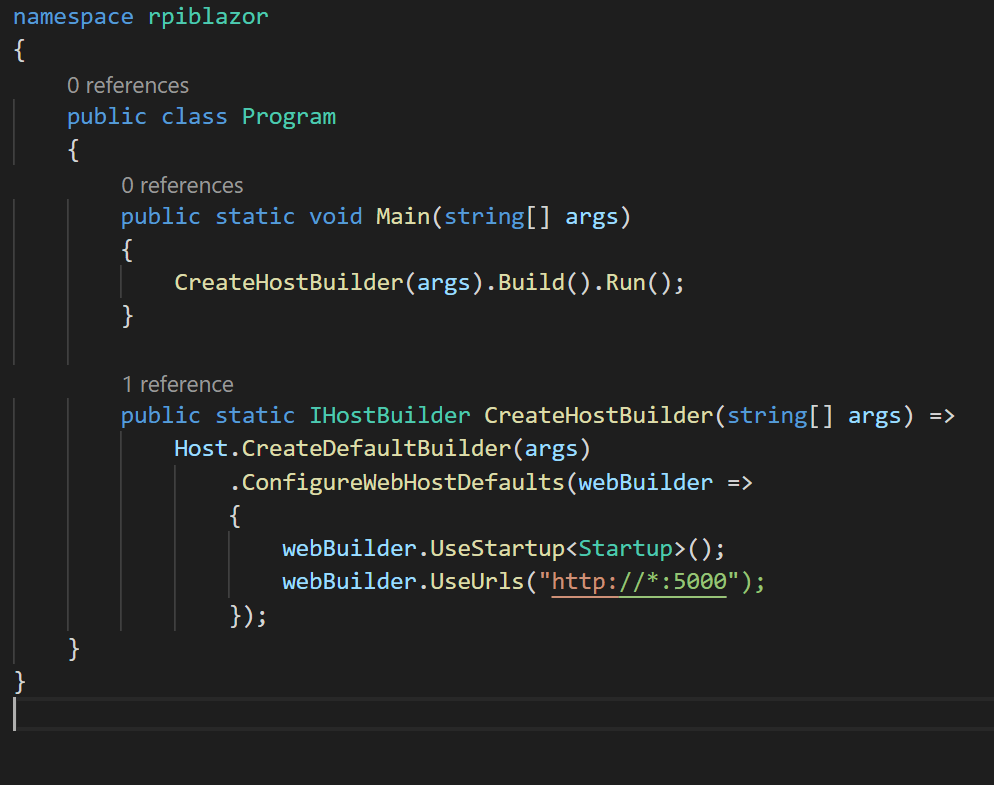
Go ahead and save your file now.
Run Forest Run!
We’re now ready to run our Web App. Return to your SSH client and make sure you’re in your “rpiblazor” directory.
Then run the following command to build your ASP.Net Core Blazor Web App;
dotnet buildThis may take some time on a Pi (2 or possibly even 3 minutes), as there’s quite a lot to do for this diminutive device! So just leave it be and wait for the magic to complete. It may look like nothing is happening for a while, so just be patient!
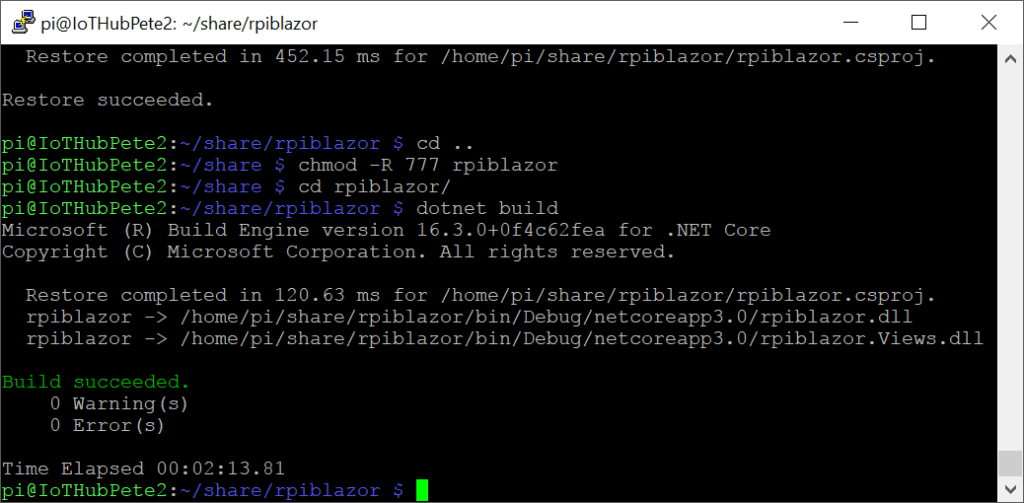
You can see in the above image that this took 2 minutes and 13 seconds on my Pi 3B+.
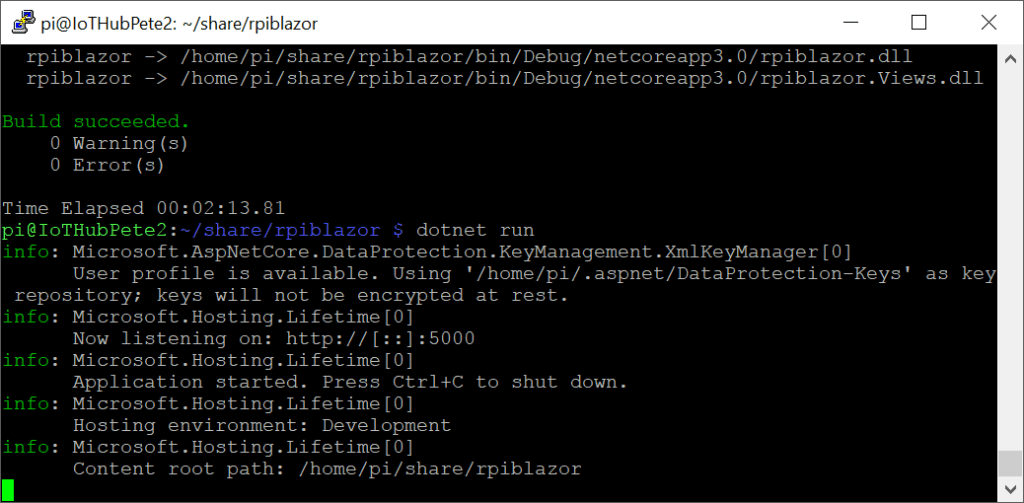
Next up, we can run our app… YEY! Still in the SSH client, run the following command to spin up the server;
dotnet runThis will take slightly less time than building, so you should see some results pretty quickly;
Once you get to this point, all that remains is to open your favourite browser and navigate to your Pi… For the most part, the address will be;
http://raspberrypi:5000The address is of course different for my Pi, as I changed the name… However, all being well, you should be shown your brand new Dot Net Core 3.0 ASP.Net Blazor Web App…
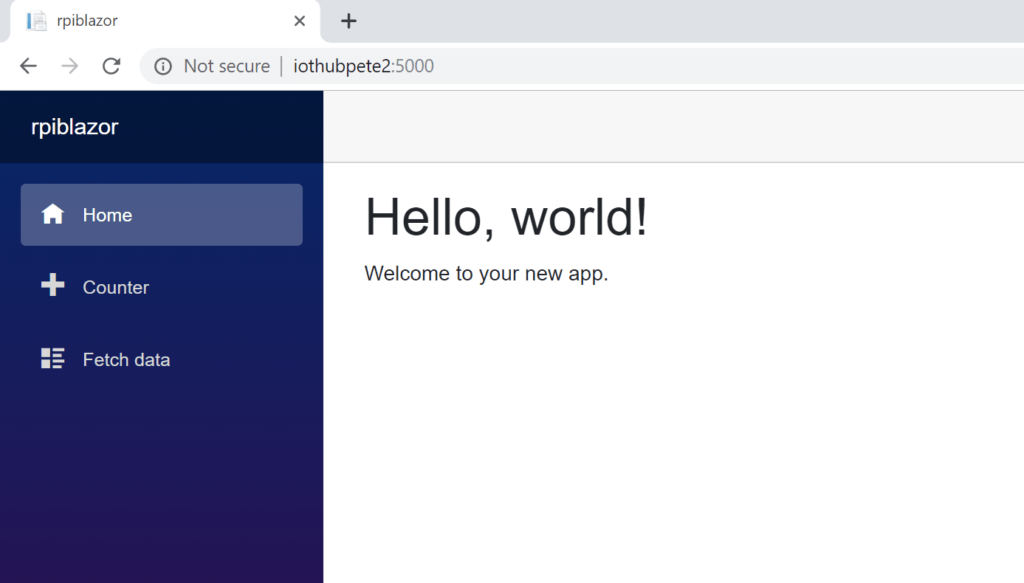
So, with that, you’ve gotten your first ASP.Net Core 3 Blazor Web App up and running…
In the next blog post, I’ll take you through how to get a simple console App up and running and how to toggle an LED on and off…
Thanks for reading!
Next time…
In the next post we’ll look at how to control the Raspberry Pi GPIO pins to control LEDs and Buttons.
Part 2 – Controlling Raspberry Pi GPIO with Dot NET Core 3 >