
This post is a series of posts in which I detail my journey to bring OctoPrint to the Seeed Studio reTerminal.
Day 2 – 06-09-2022
In today’s post we’ll be look at OctoEverywhere, getting a Virtual Environment setup, Configuring VS Code, and running OctoPrint for the first time from VS Code.
Contents
Day 1 – 05–09–22 – Getting Started:
- Getting Started – 05/09/2022
- My Initial Plans
- Cloning the Repos
- A pointer in the right direction from the folks at OctoPrint3D – Plugins
- OctoPrint Plugin Mixin Development Docs
- Getting the Development Environment setup
- Installing Python
- Checking out the OctoPrint Sources
- Creating and Activating a Virtual Environment
- Build Tools for Visual Studio 2019
- Setting up VirtualEnv
- Adding VirtualEnv to the Windows Path
- Upgrading Pip
- Setting up the Virtual Environment
Day 2 – 06–09–22 – Setting up the Environment:
- OctoEverywhere – 06-09-22
- Continuing with VirtualEnv
- Activating the Virtual Environment
- Setting up the Virtual Environment
- Installing Microsoft Visual C++ 14.0
- Using pip to install packages in the Virtual Environment
- Git Pre-Commit
- Git Changes, Blame and Ignore
- Configuring VS Code
- Running OctoPrint for the first time
- Changing the Python Interpreter
- Running the OctoPrint from VS Code
Day 3 – 07–09–22 – Setup Wizard:
- Setting up OctoPrint in the Debug Environment – 07-09-22
- Setup Wizard – Access Control
- Setup Wizard – Online Connectivity
- Setup Wizard – Usage Tracking
- Setup Wizard – Plugin Blacklist
- Setup Wizard – Printer Profile
- Setup Wizard – Please Reload
- Setup Wizard – Setup Printer (Again)
- Setup Wizard – Server Commands
- Setup Wizard – Webcam and Timelapse Recordings
- Setup Wizard – Finish
- Virtual 3d Printer Plugin
- Beginning Plugin Development
OctoEverywhere – 06-09-22
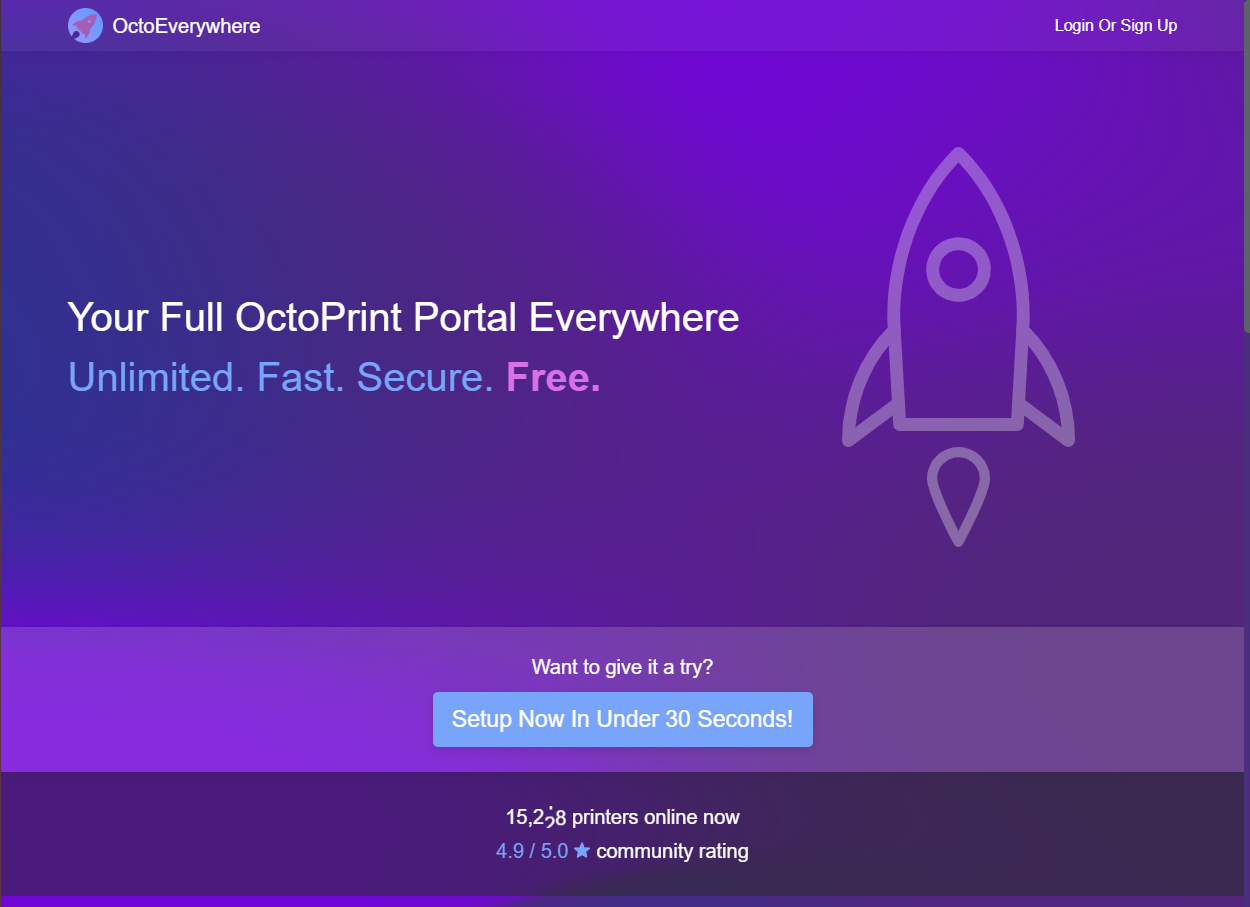
This morning I had a lovely tweet from the folks over at OctoEverywhere mentioning their service for accessing OctoPrint from Anywhere for free;
Looking at their web site, this service, which is also a Plugin for OctoPrint, looks awesome;
I’ve also persuaded their lead developer to come speak at possibly both Dot NET Notts and Notts IoT, which is awesome! So keep your eyes peeled on the Dot NET Notts and Notts IoT Meetup pages!
I’ll definitely circle back with this service and see how I can make use of it.
Continuing with VirtualEnv
I left off last night with a different command to use to create a virtual environment, where we use Python instead of virtualenv to create the environment;
python -m venv c:\repos\OctoPrint\So let’s see what what does;

Well, that appeared to do nothing… Running a dir;
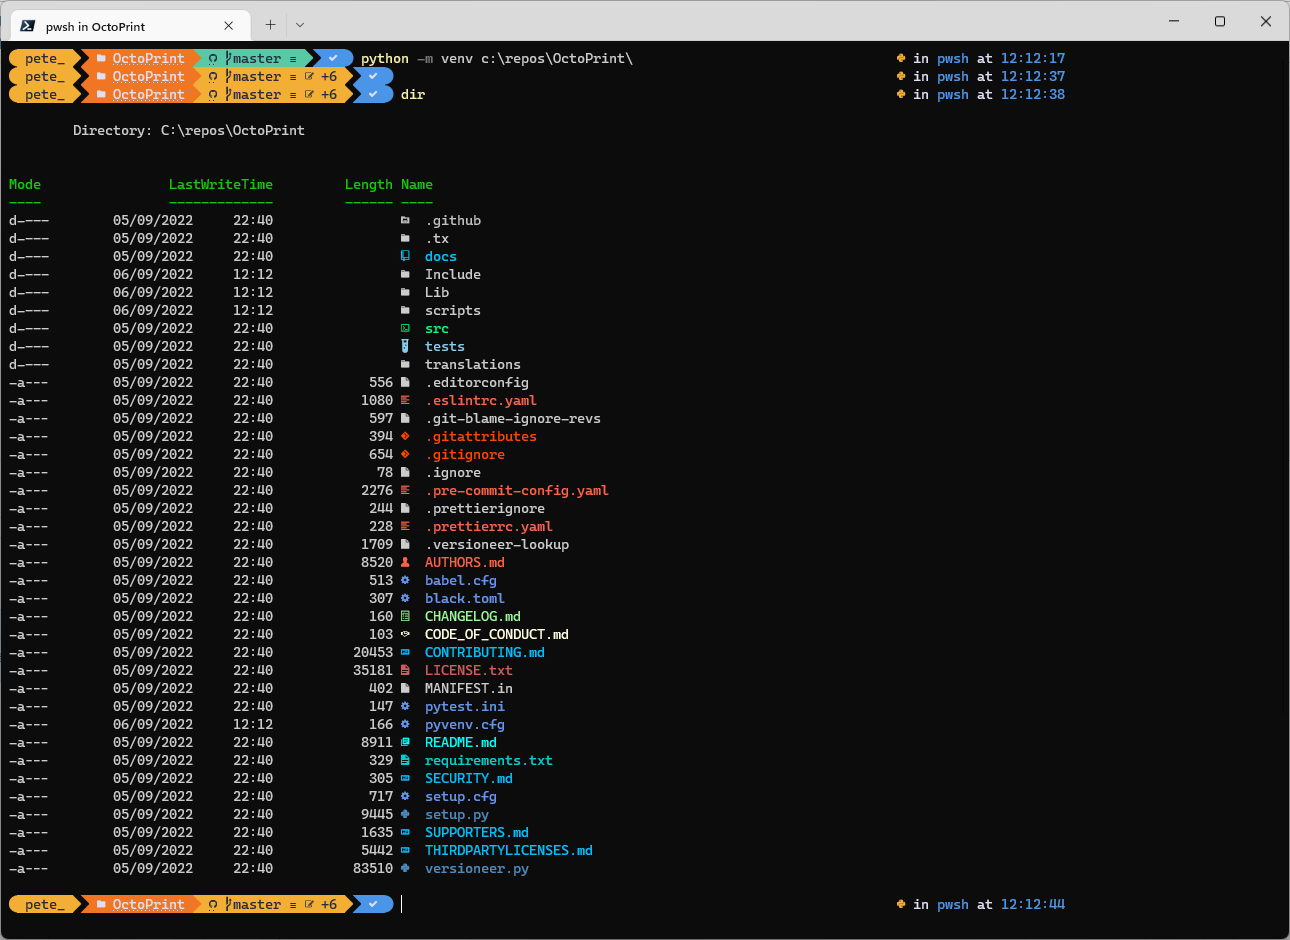
I can’t see anything… Let’s see if perhaps it just doesn’t create anything in the folder, and use the source command to activate the environment;
source ./venv/Scripts/activate
Hmm… So that didn’t work… I’m really showing I know nothing about Python Virtual Environments here aren’t I!
I’m just going to double check the version of virtualenv;

Looks like I’ve got version 20.16.4… So it’s definitely installed ok…
Doing another search for setting up a Python Virtual Environment on Windows, there’s a site mothergeo-py with some detail;
Where again, it shows the following command;
virtualenv --python C:\Path\To\Python\python.exe venvBut this command looks like the paramaters are specified slightly differently to the previous ones in the main docs;
virtualenv --python=C:/Python3/python.exe venvSo, the new version from the other site would correlate to the following for my installation;
virtualenv --python C:\Users\pete_\AppData\Local\Microsoft\WindowsApps\PythonSoftwareFoundation.Python.3.10_qbz5n2kfra8p0\python.exe venvSo, let’s give that a go;

Ooo… Is that working?
Activating the Virtual Environment
Ok, we now need to activate the virtual environment… The new information I found at the mothergeo-py site shows the following to activate the Virtual Pyhthon Environment;
.\venv\Scripts\activateSo this looks like there should be a physical directory present now… Let’s run a dir;
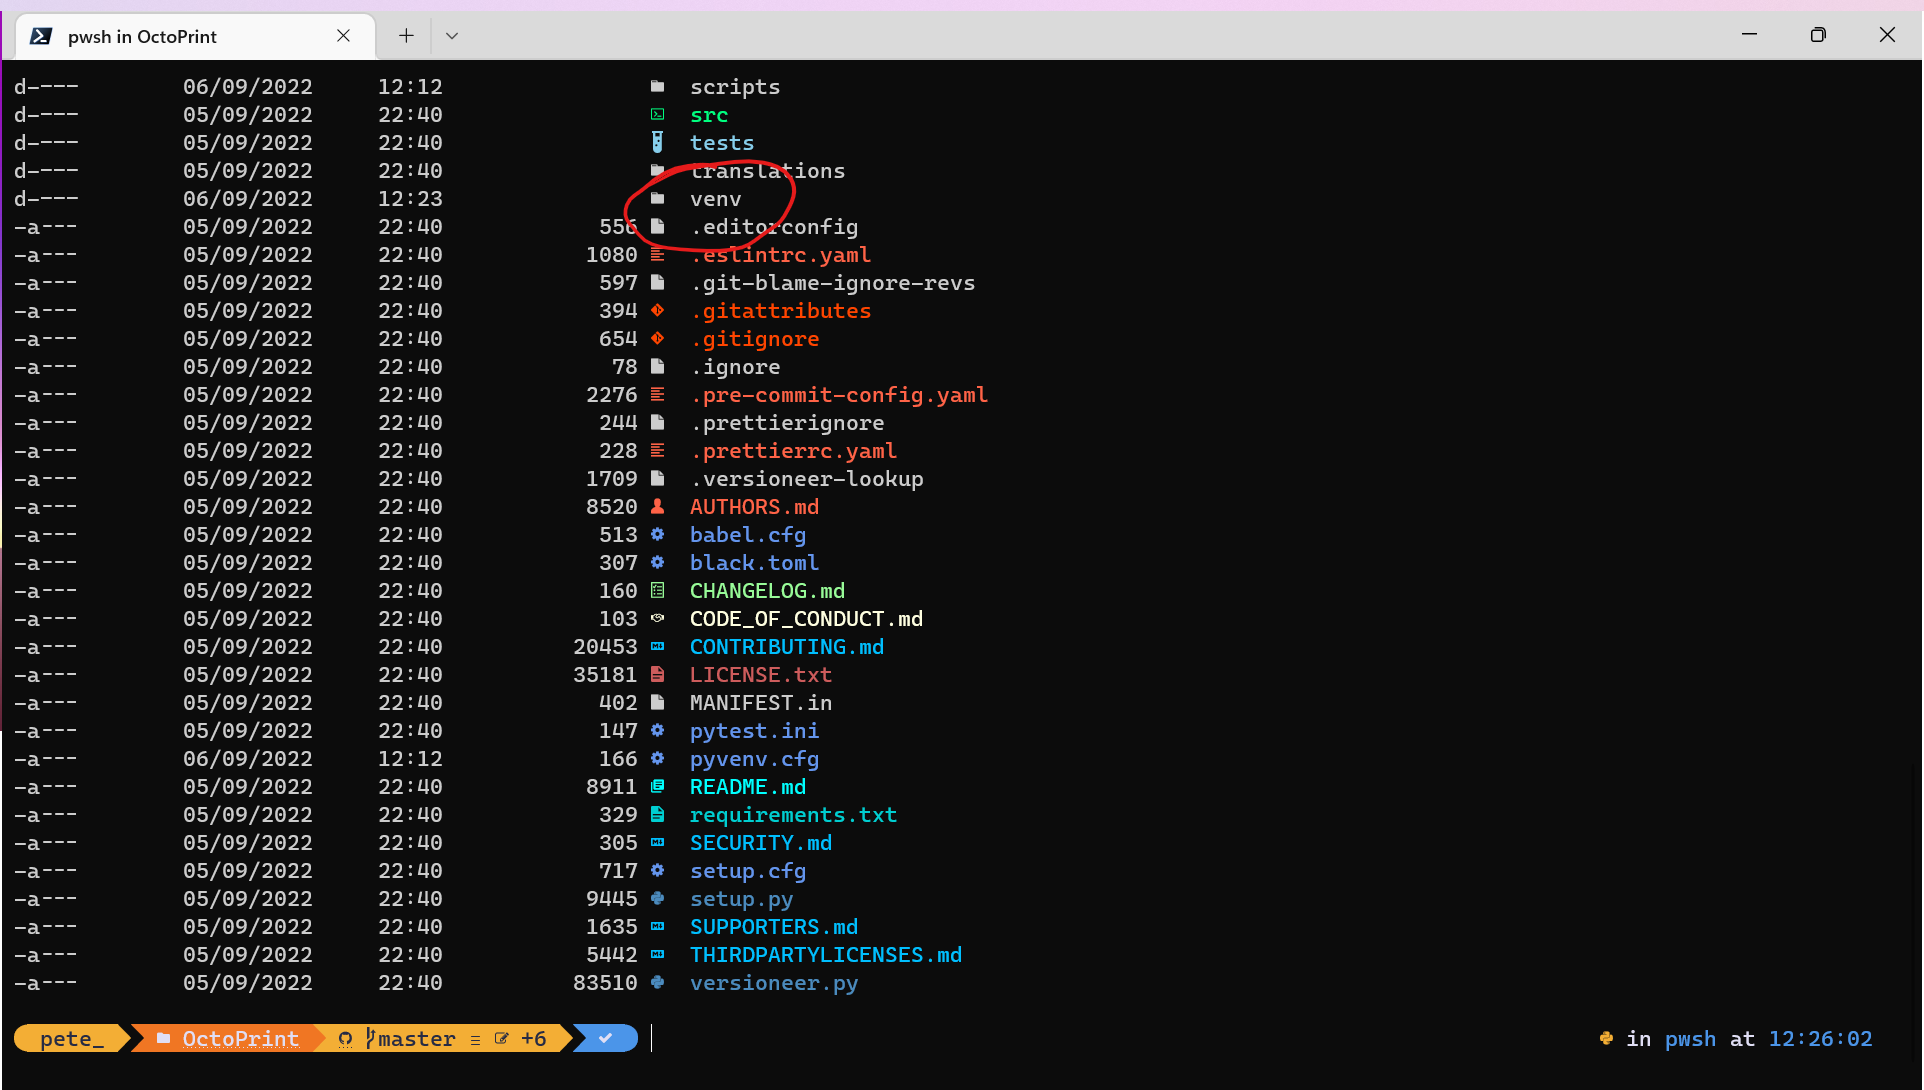
Look at that, there’s now a venv directory. The command above seems to think there should be a scripts and an activate in there… Let’s have a look;
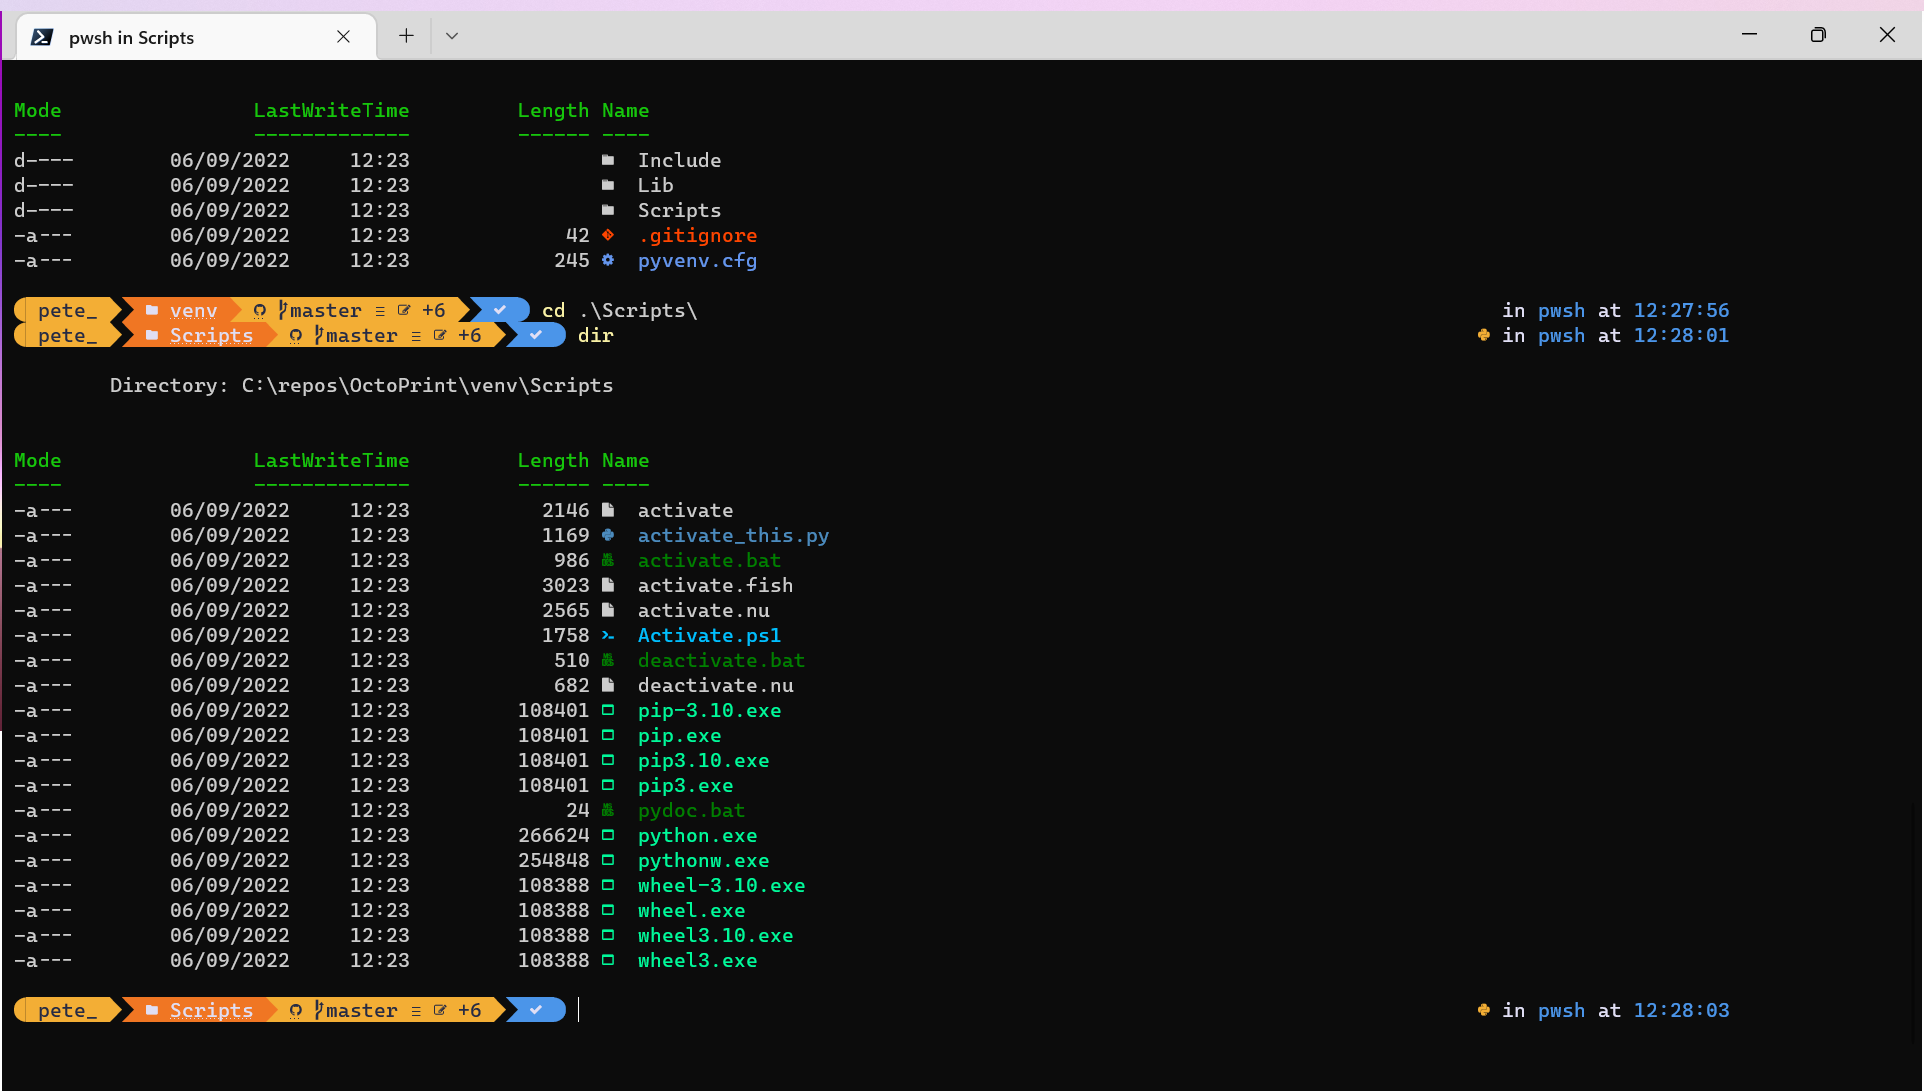
There is indeed. So, let’s hop back to our project root and run the command to activate the environment;
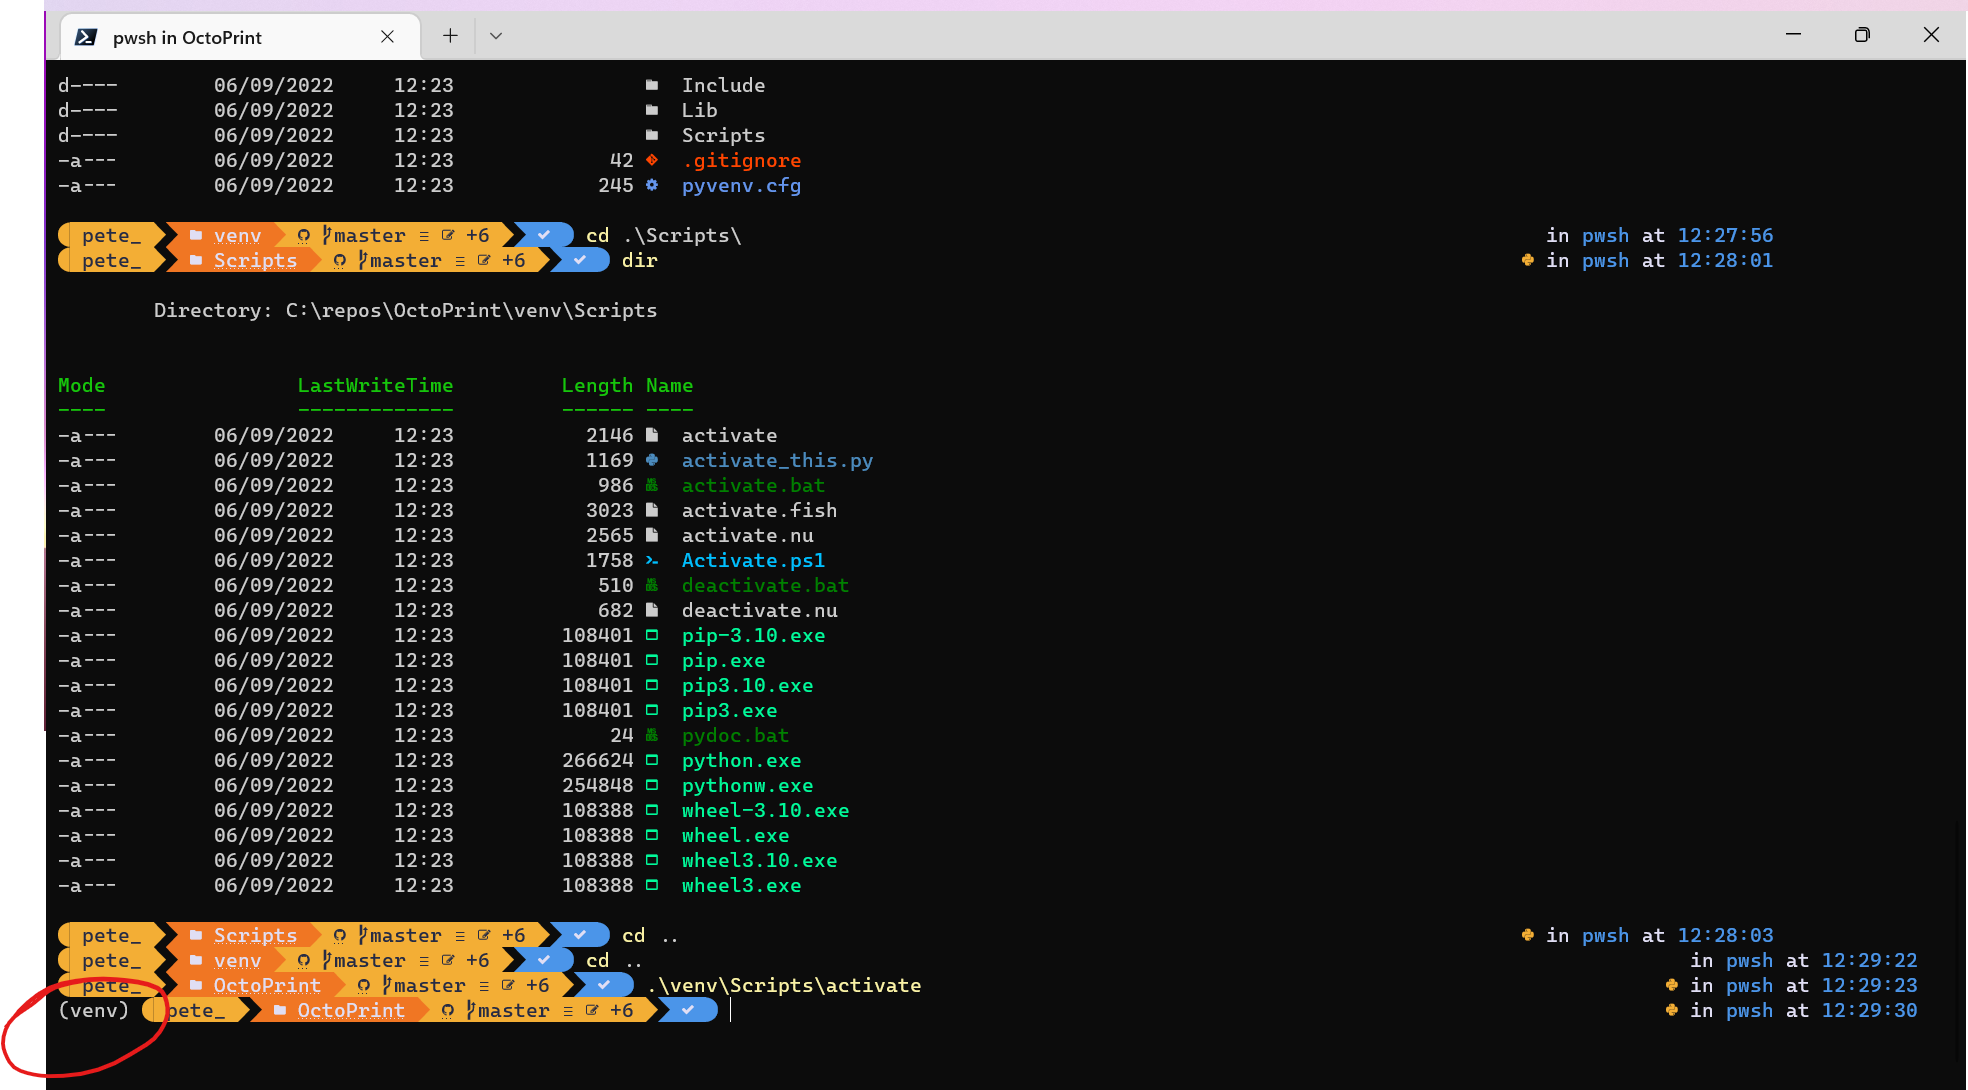
That looks to have worked, where we now have (venv) shown at the start of our path.
Setting up the Virtual Environment
Going back to the original docs, the next step is to upgrade pip in the virtual environment it seems;
pip install --upgrade pip
That looks like it’s already the latest…
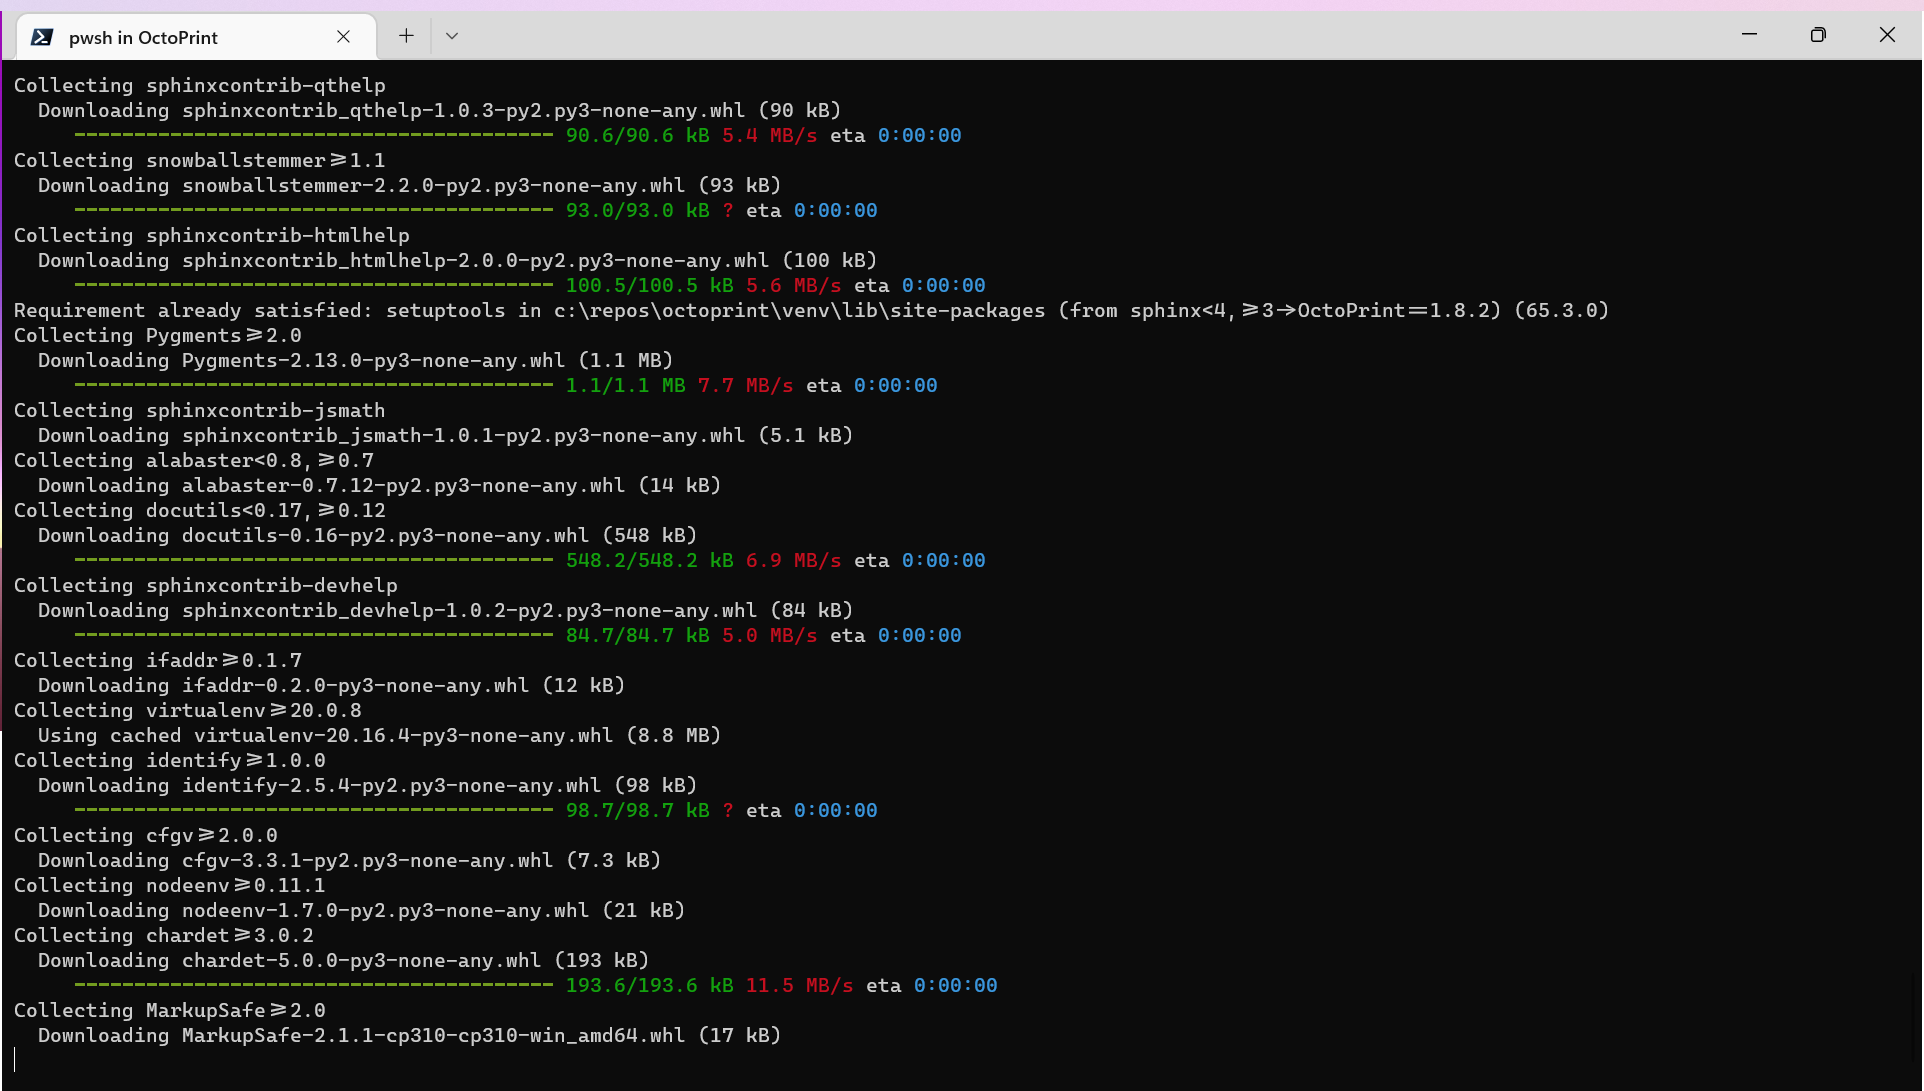
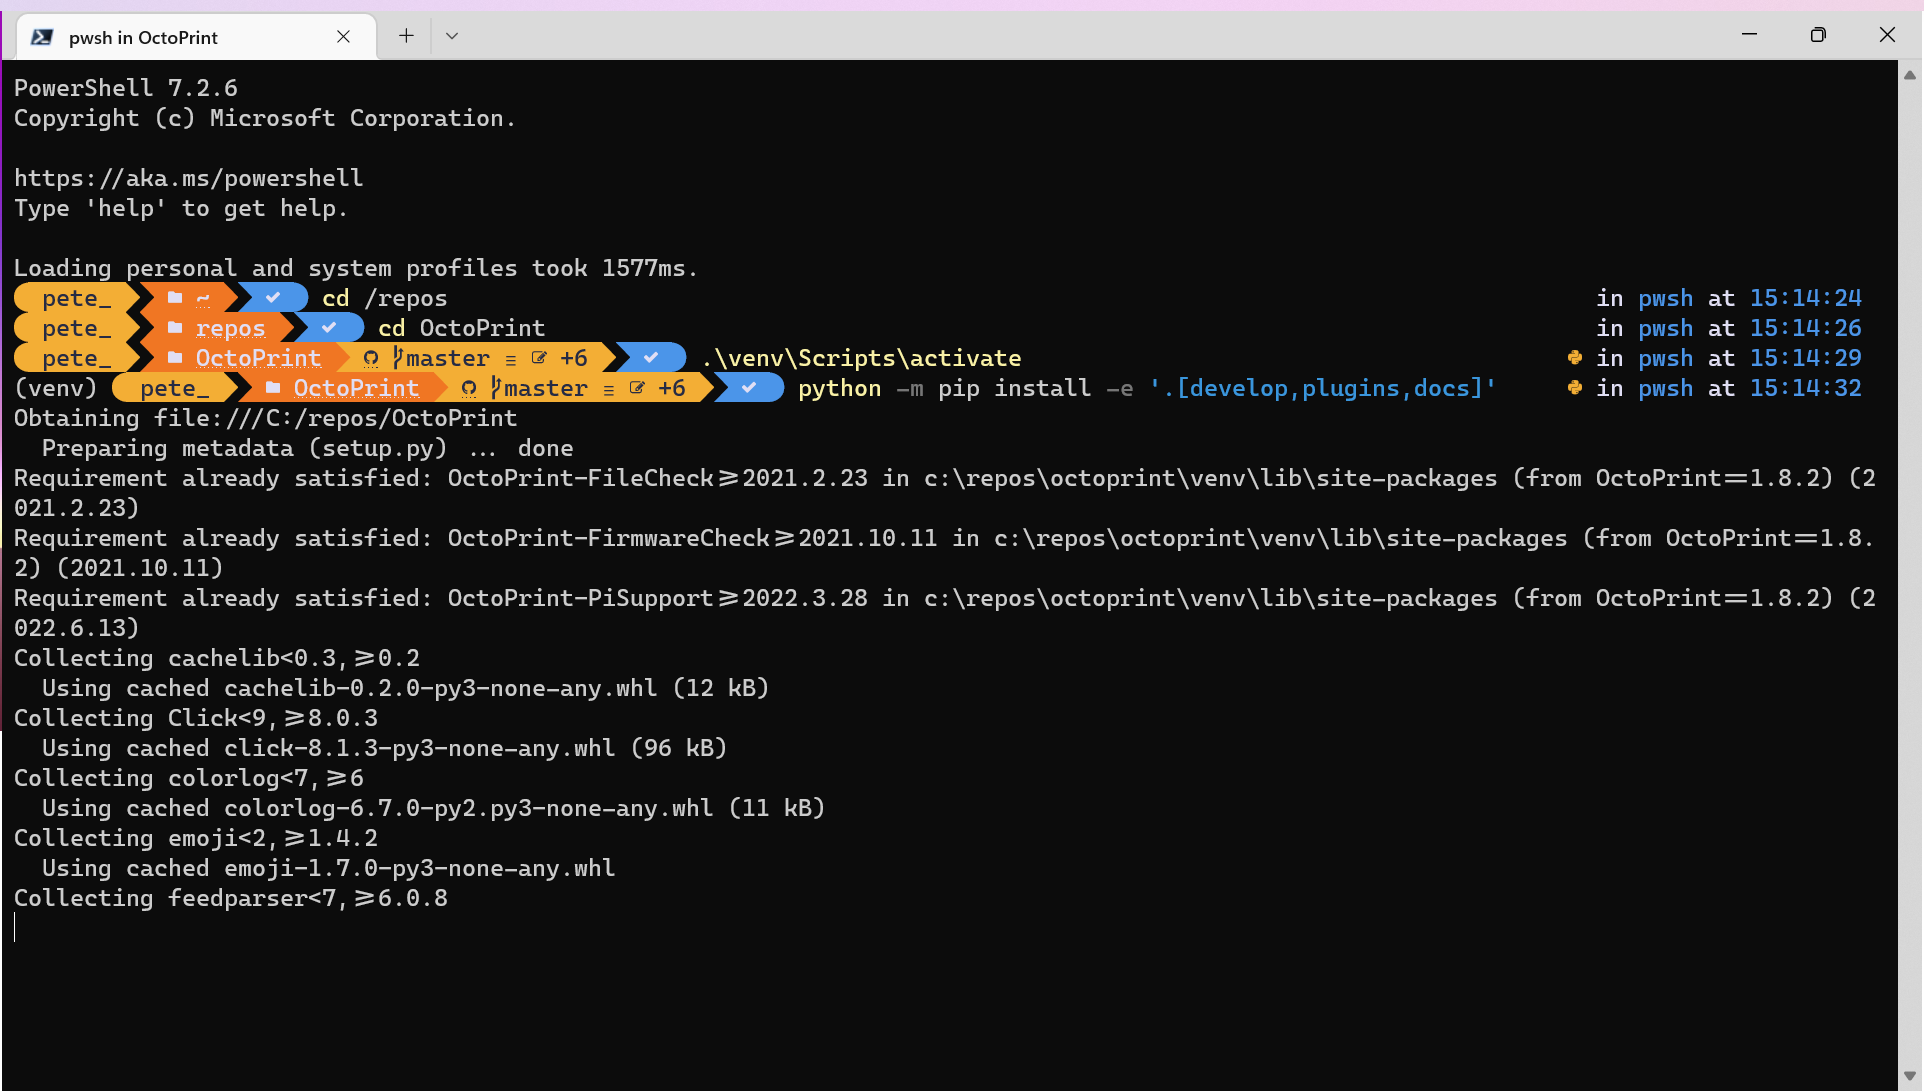
Next up we need to install some packages – develop, plugins and docs;
python -m pip install -e '.[develop,plugins,docs]'It’s now busy downloading and installing a heap of stuff;
Oh dear… We now have some red errors;
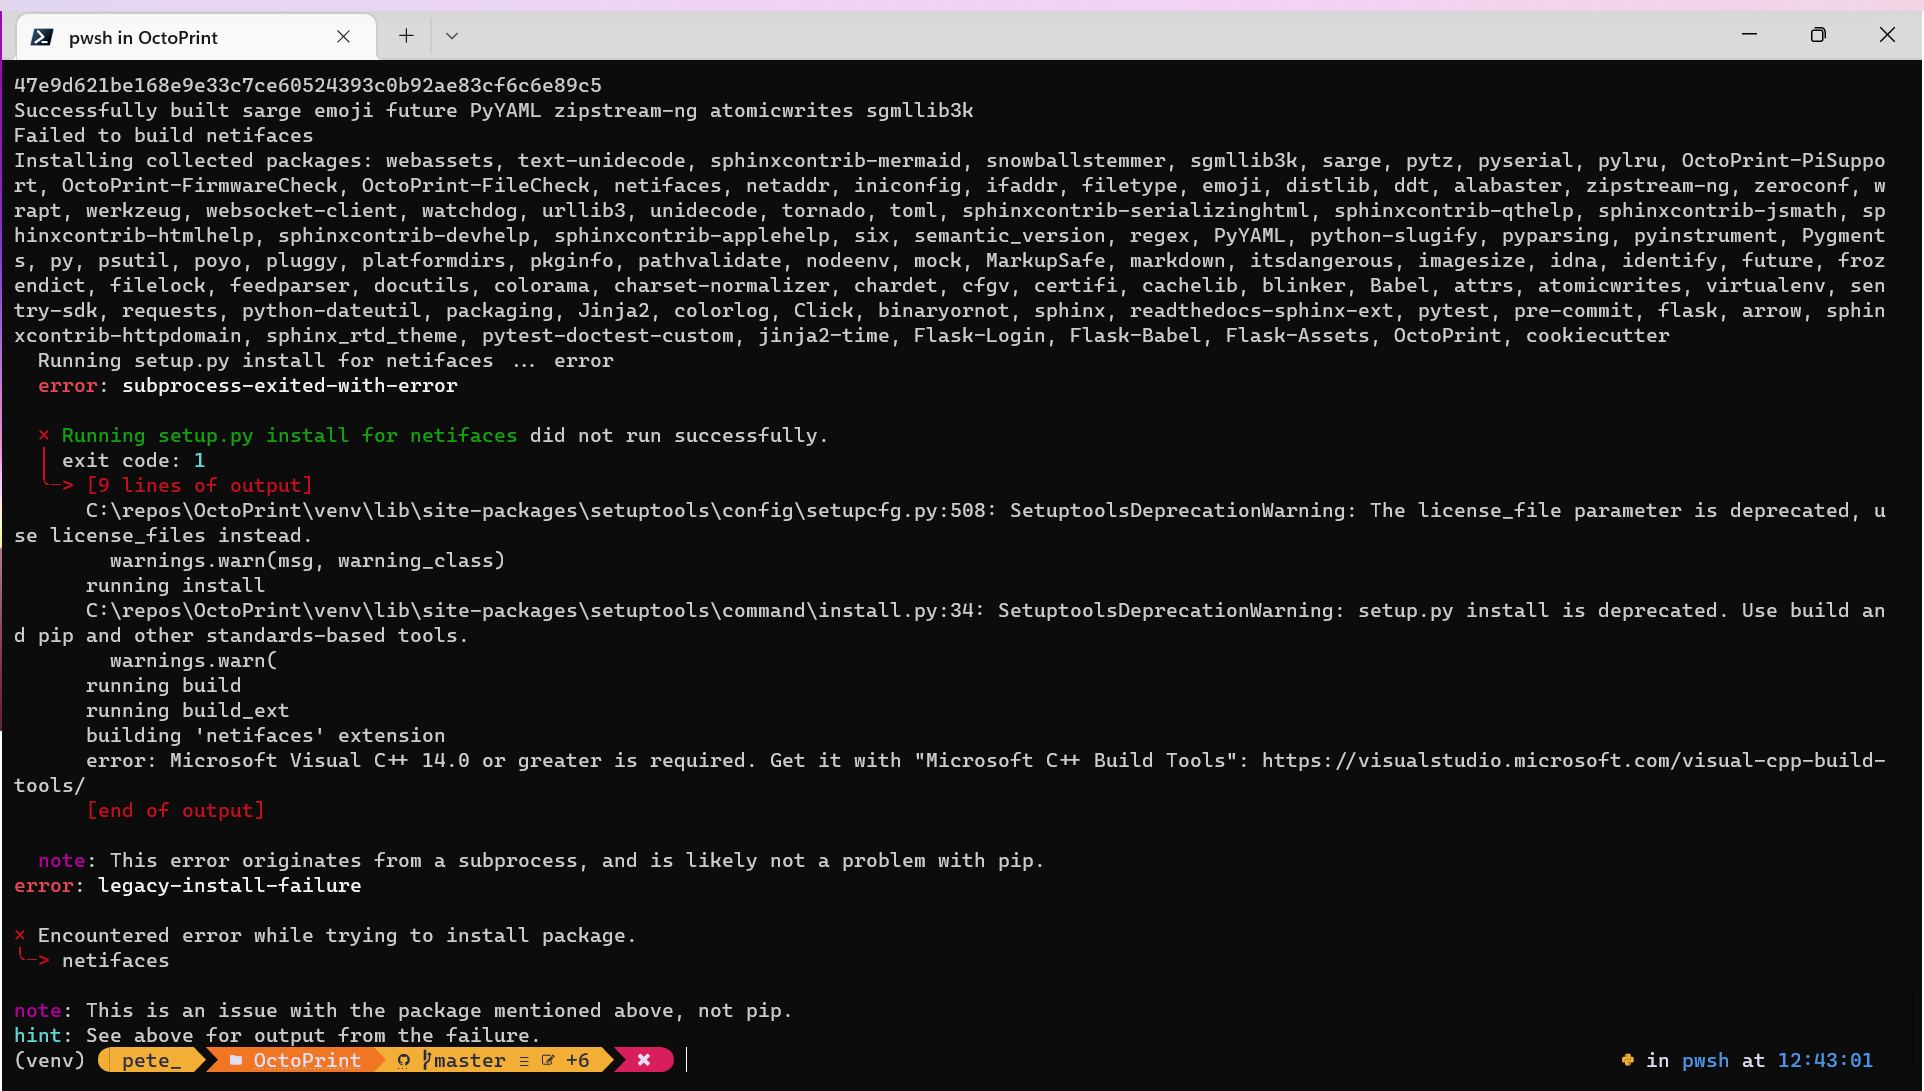
Scrolling up, I spot the issue;
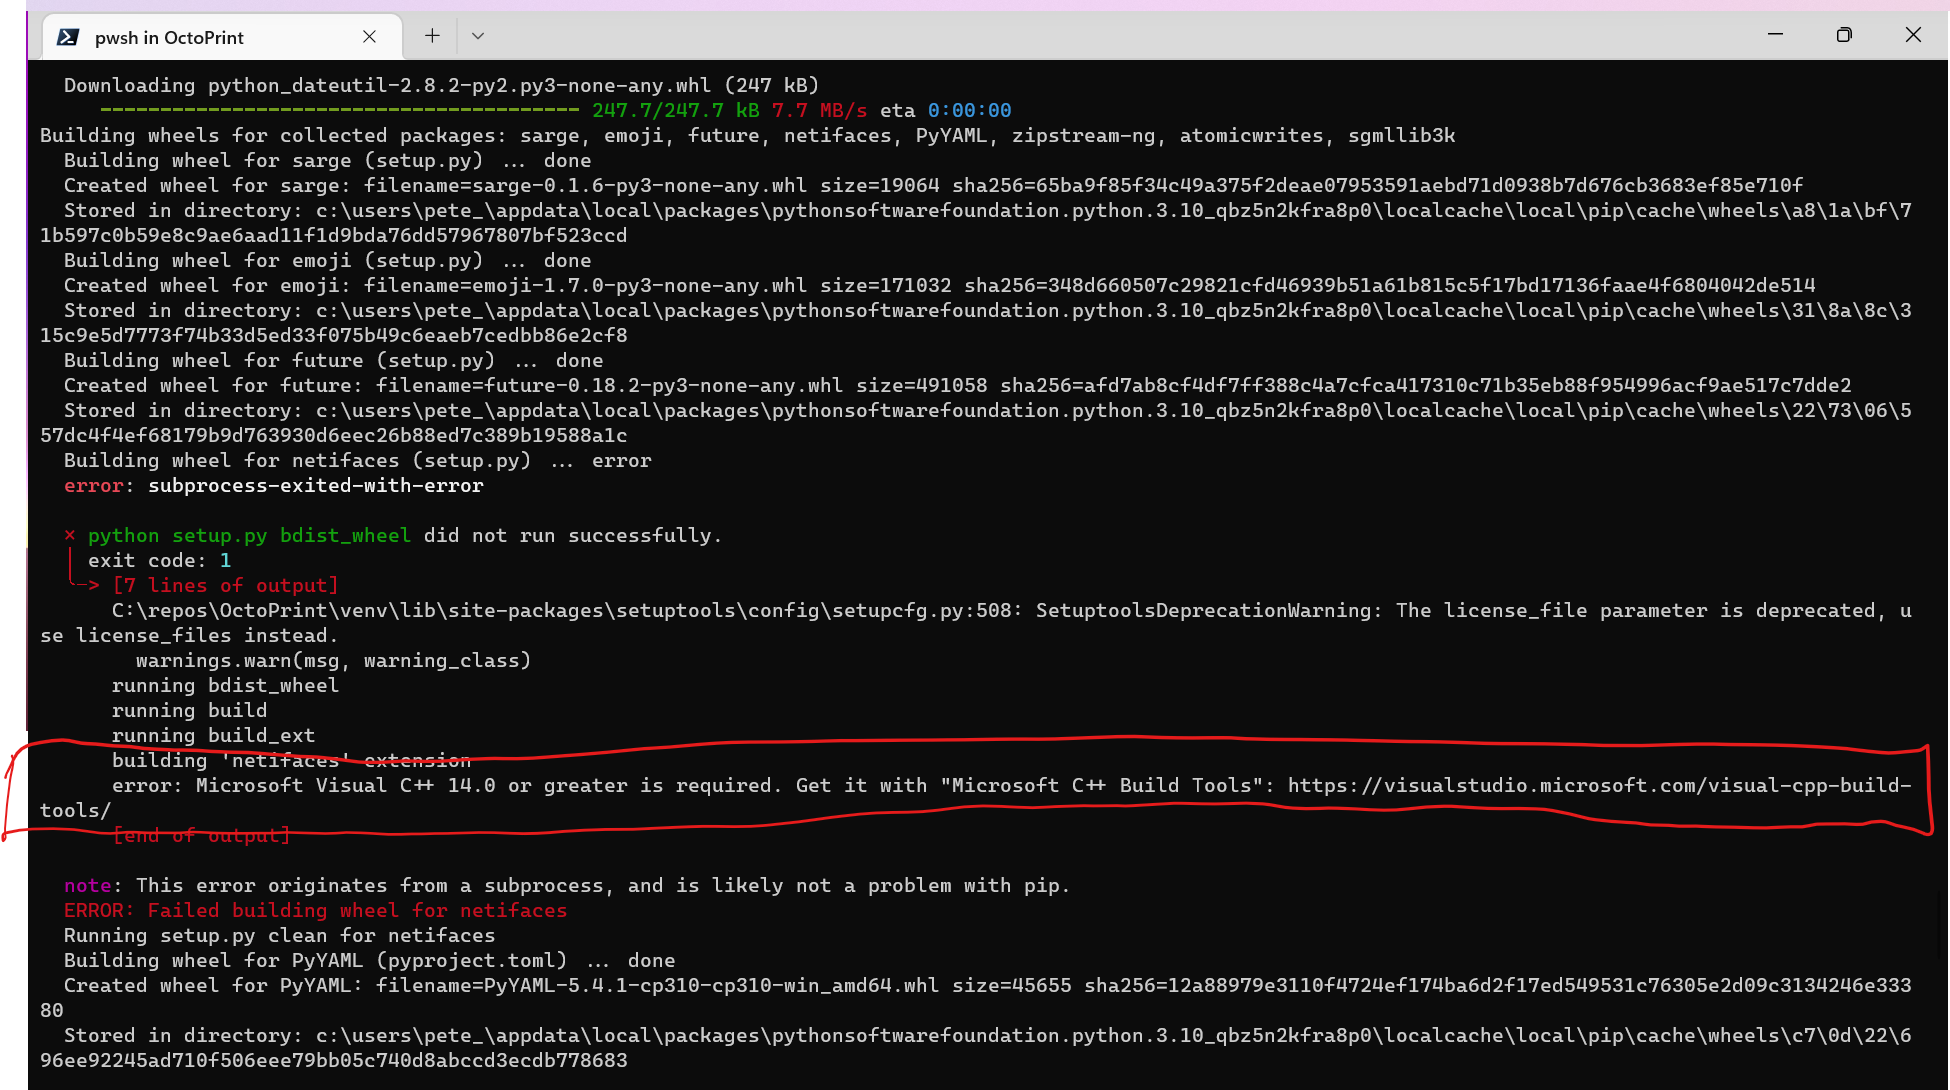
error: Microsoft Visual C++ 14.0 or greater is required. Get it with “Microsoft C++ Build Tools”: https://visualstudio.microsoft.com/visual-cpp-build-tools/
Installing Microsoft Visual C++ 14.0
So I’m missing Microsoft Visual C++ 14.0… Which I would’ve though would’ve been installed as part of those Build Tools we installed yesterday?
So, let’s go ahead and go to https://visualstudio.microsoft.com/visual-cpp-build-tools and get C++ installed;
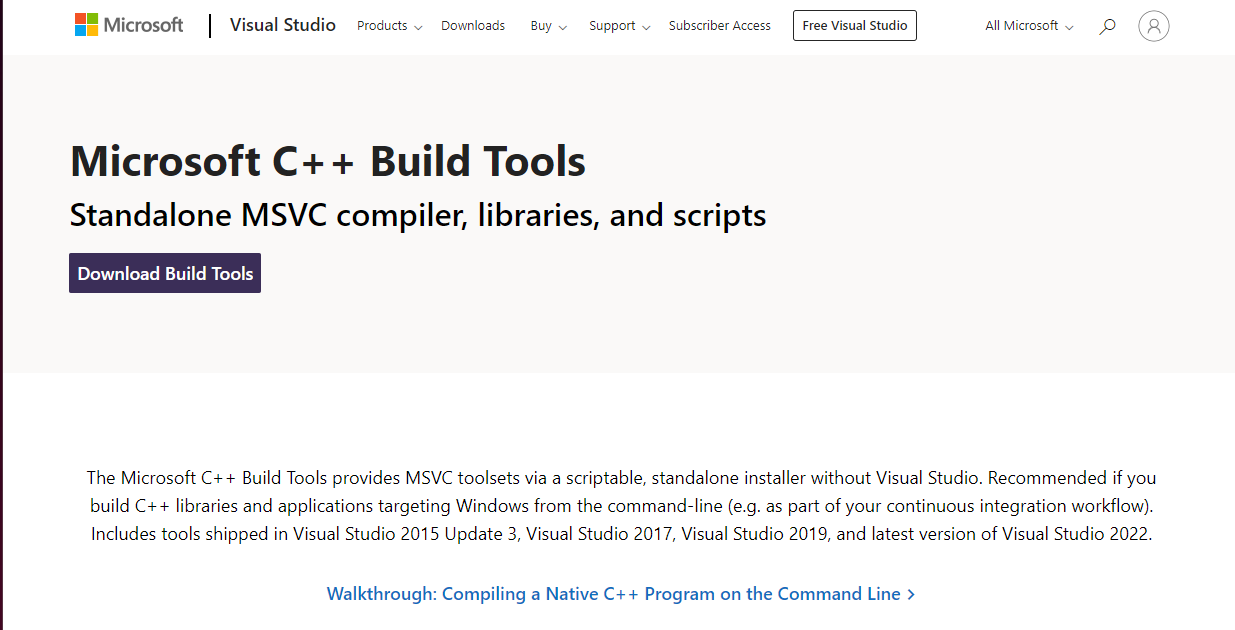
Clicking on the “Download Build Tools” button, seems to download the same installer as we used yesterday;
Which confirms my thought that we should’ve have this installed already.
Remembering the process before, we had some options to download additional packages as part of the install, so perhaps we just needed to make sure that we selected the C++ stuff.
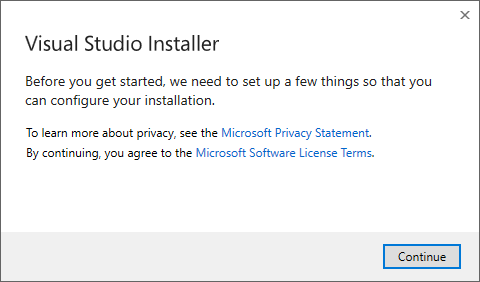
Running the latest installer application again, we get the same prompt about configuration;
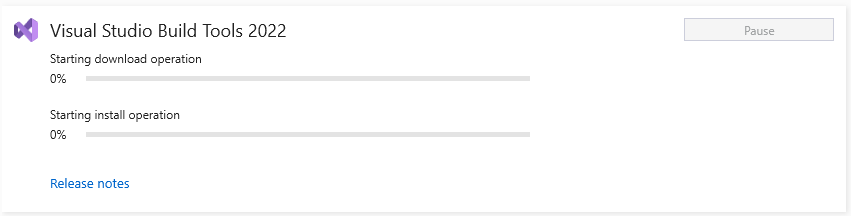
We get some downloads and installations;
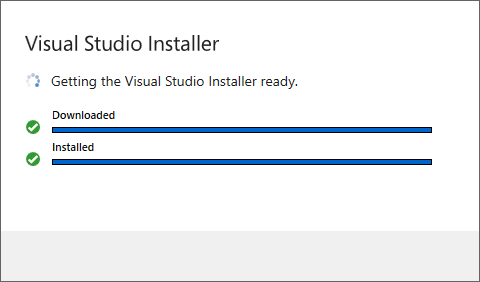
This appears to be the Visual Studio 2022 Build Tools;
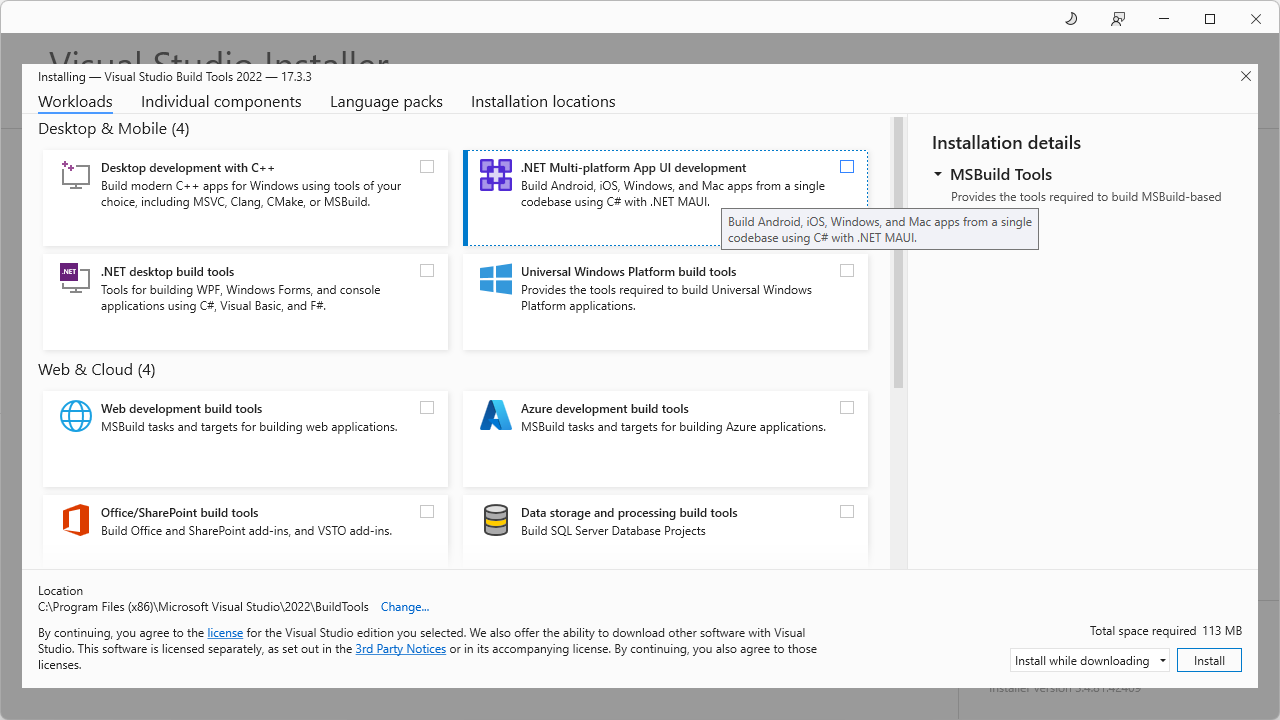
Looking at the Individual Components tab… There’s a heap of options here;
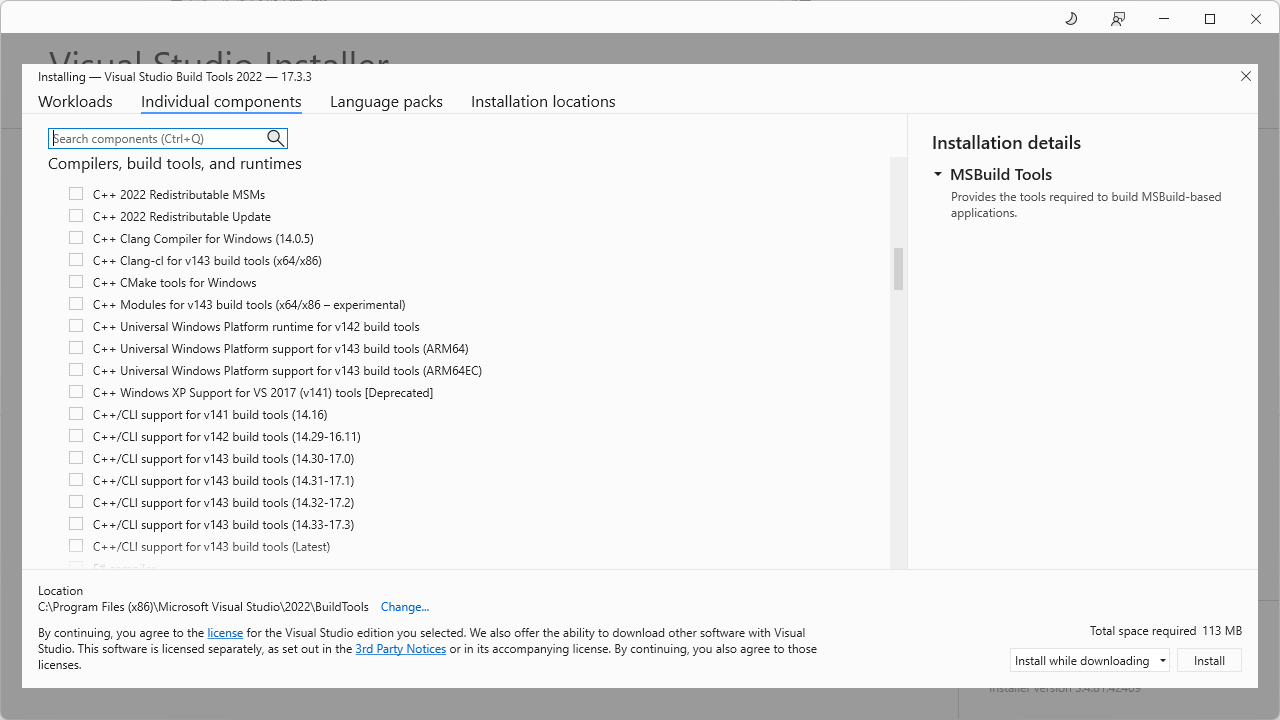
So, I think I’ll just try installing the main “Desktop development with C++” Workload;
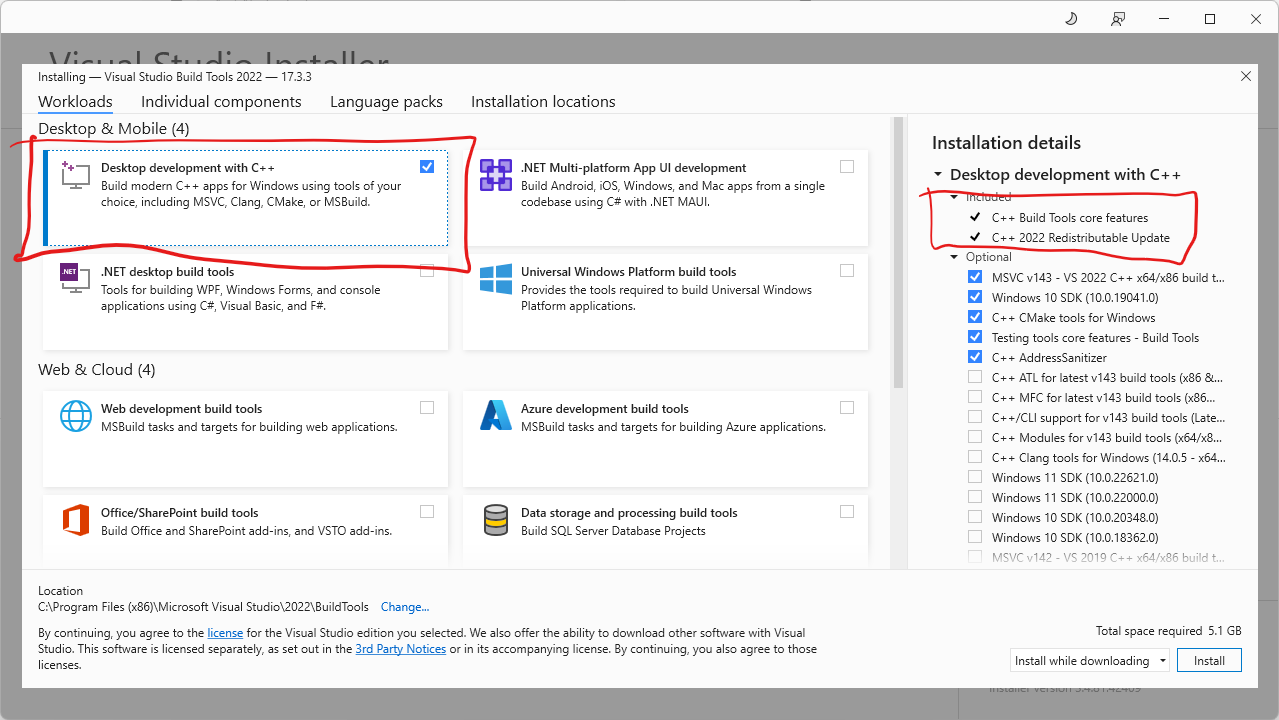
I can see the Build Tools are included as part of this workload… Scrolling down though, the VS2019 variant isn’t selected;
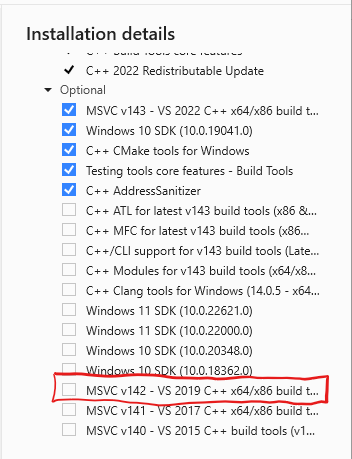
So, let’s select that too and cover our bases;

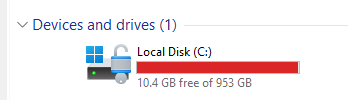
Darn it… Looks like I need more space on my hard drive… Time to delete some stuff!
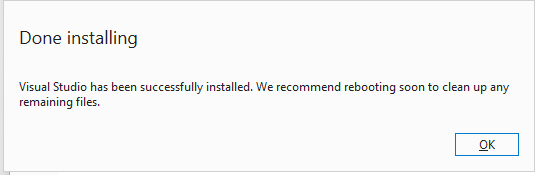
Ok, with that, let’s get the C++ Build Tools installed;
After a good while, the Build Tools are now installed;
Using pip to install packages in the Virtual Environment
Now, I’m not sure if I’m going to need to close the terminal window before the Virtual Environment will find the new tools… So let’s do that, re-activate the Virtual Environment and try the install command again;
cd /repos/Octoprint
.\venv\Scripts\activate
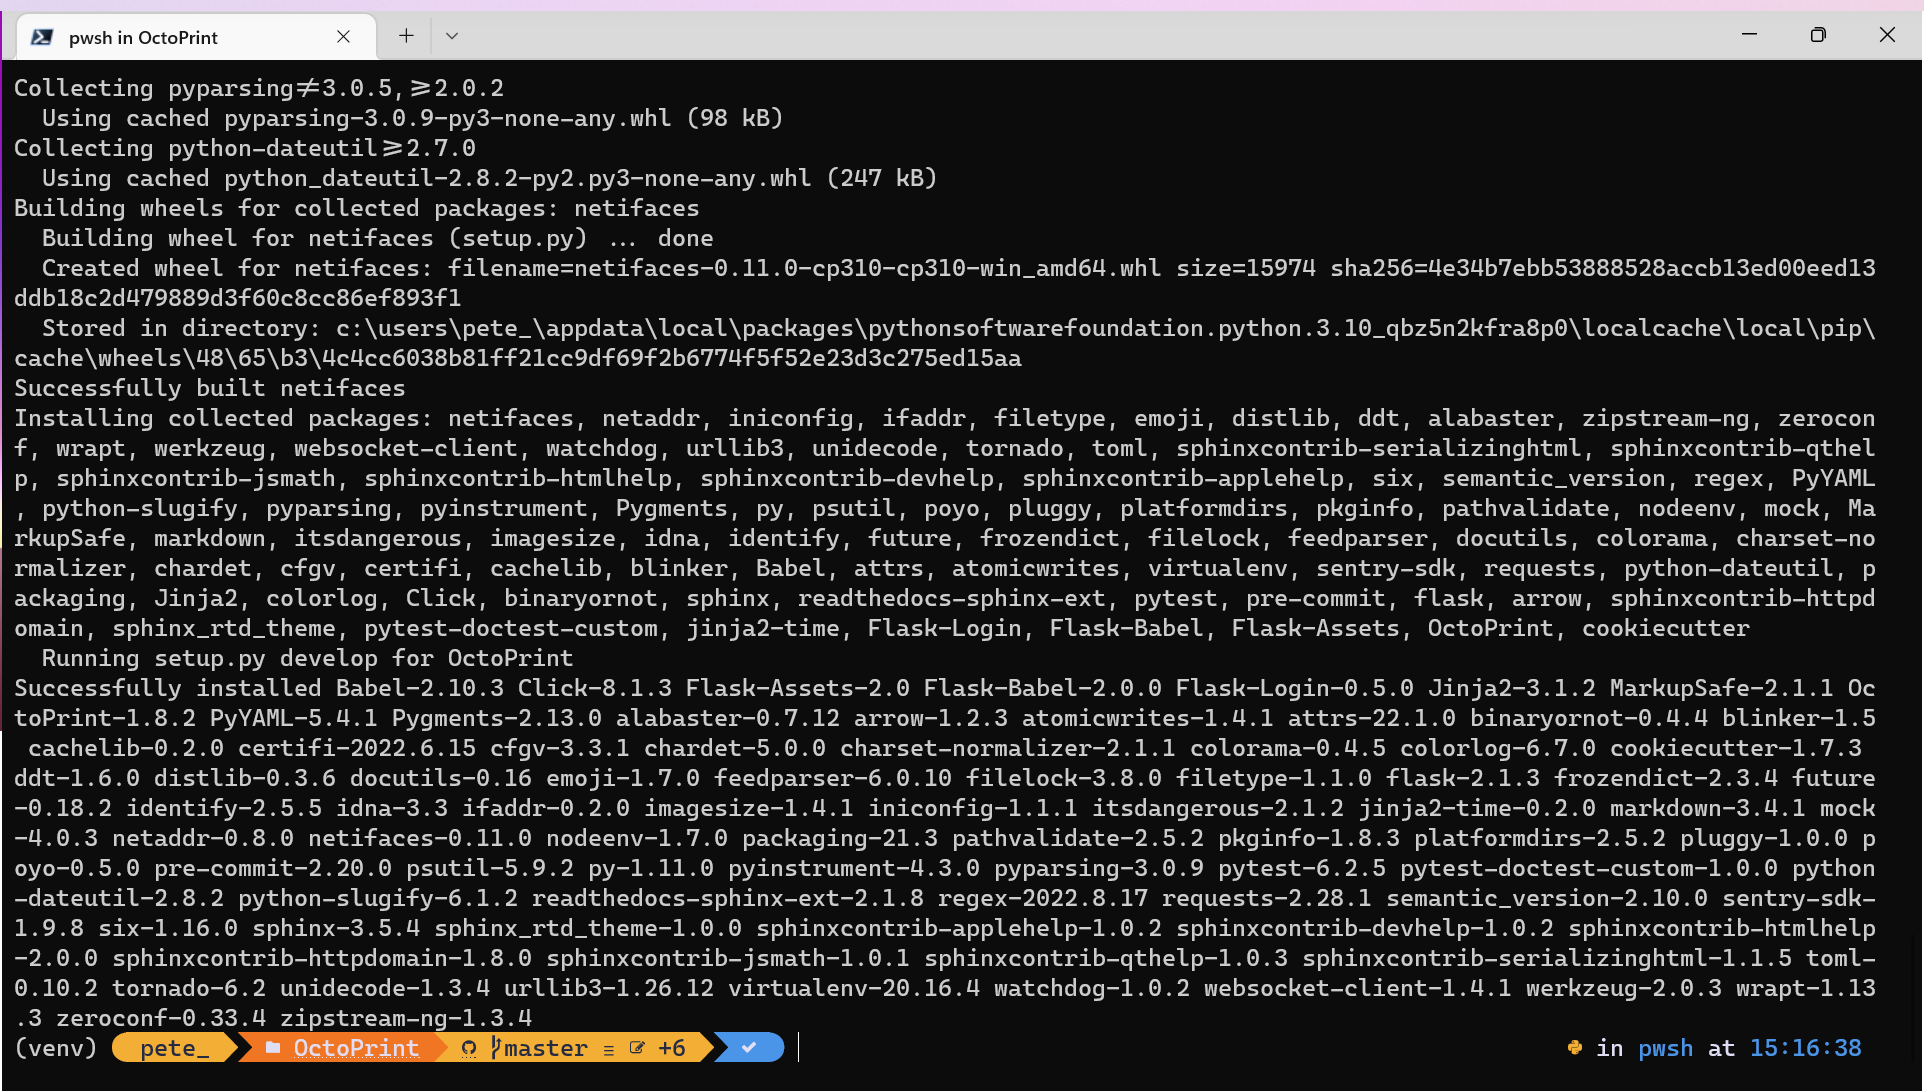
python -m pip install -e '.[develop,plugins,docs]'The terminal is now busy running through it’s operations;
While this is installing, I’m realising I should either create a blog around how to do this, which is more succinct than this one, or indeed submit a PR to the official docs… or both?
In the meantime, this looks like the install procedure has completed successfully this time;
Git Pre-Commit
With those pip bits done, going back to the docs, the next thing we need to do is run the pre-commit command.
I’m not sure what this is to be fair… A google search for just pre-commit brings up a bunch of stuff;
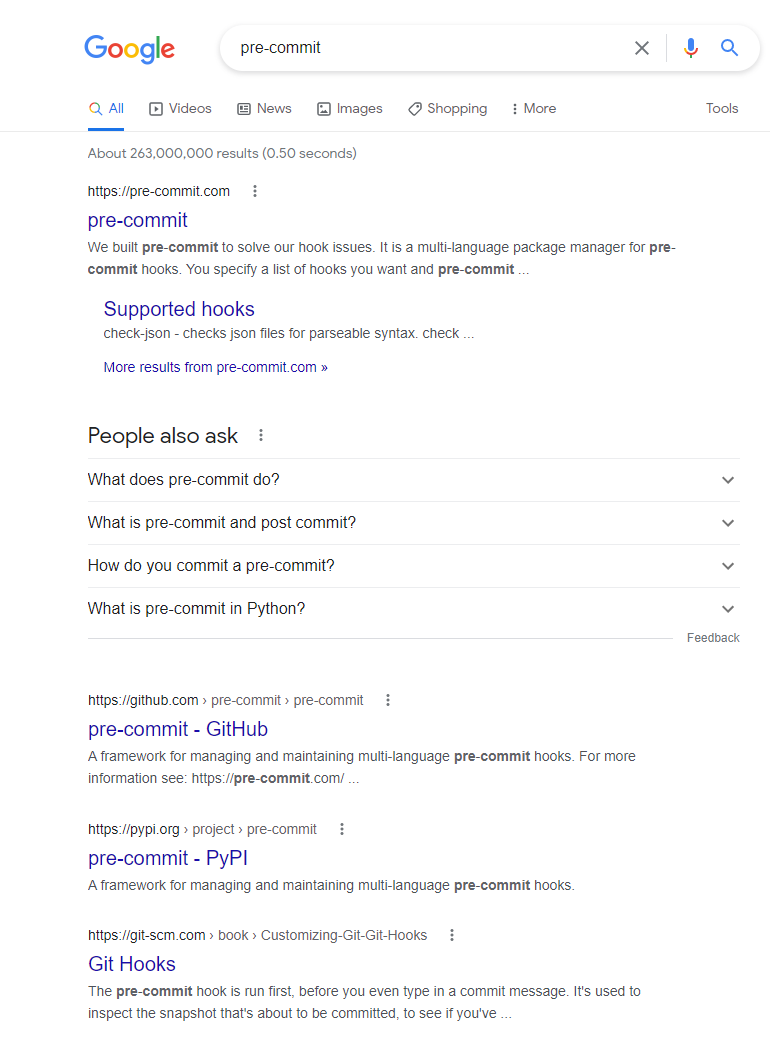
The majority seem to be around Git Hooks, and another search around what Git Hooks are reveals;
The pre-commit hook is run first, before you even type in a commit message. It’s used to inspect the snapshot that’s about to be committed, to see if you’ve forgotten something, to make sure tests run, or to examine whatever you need to inspect in the code.
So let’s see what it does… Especially as I’m not in a Git Bash session as we know;

That looks like that worked ok… In fact, it looks like perhaps it’s added something to our git repo… Let’s have a look;
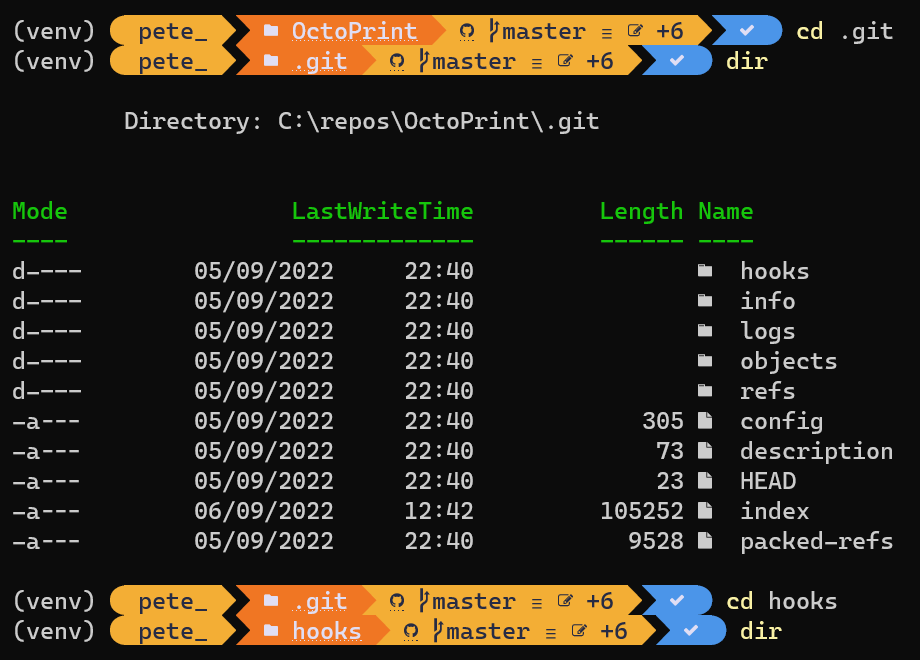
We have a hooks directory… Looking inside of there;
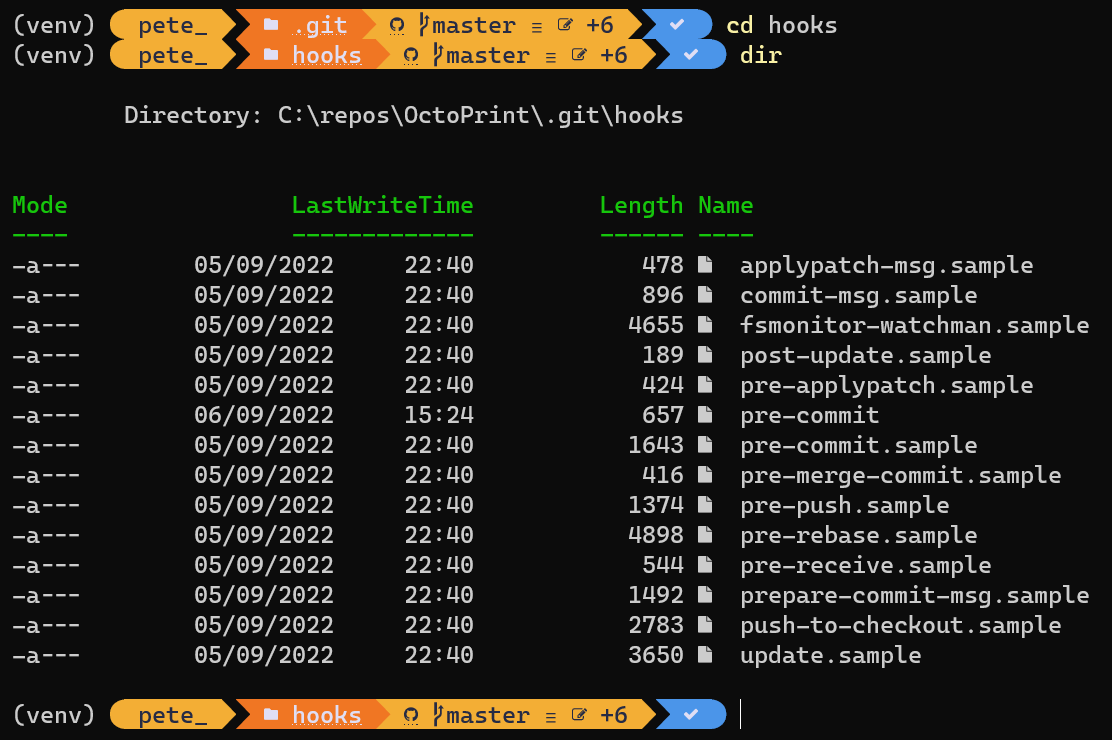
Looks like we’ve got a bunch of sample files… I wonder what could be in there?
There is also a file called pre-commit however, so this must’ve been the main file we just created.
Git Changes, Blame and Ignore
The final command we need to run is a git config command;
git config blame.ignoreRevsFile .git-blame-ignore-revsFrom what I can work out, this allows us to ignore a whole set of changes in our code base from a Git Perspective… We can check that out first by looking at our solution in something like VS Code first, and looking at the Source Control information.
If we navigate back to our project root directory, we can open the project in Visual Studio Code by typing;
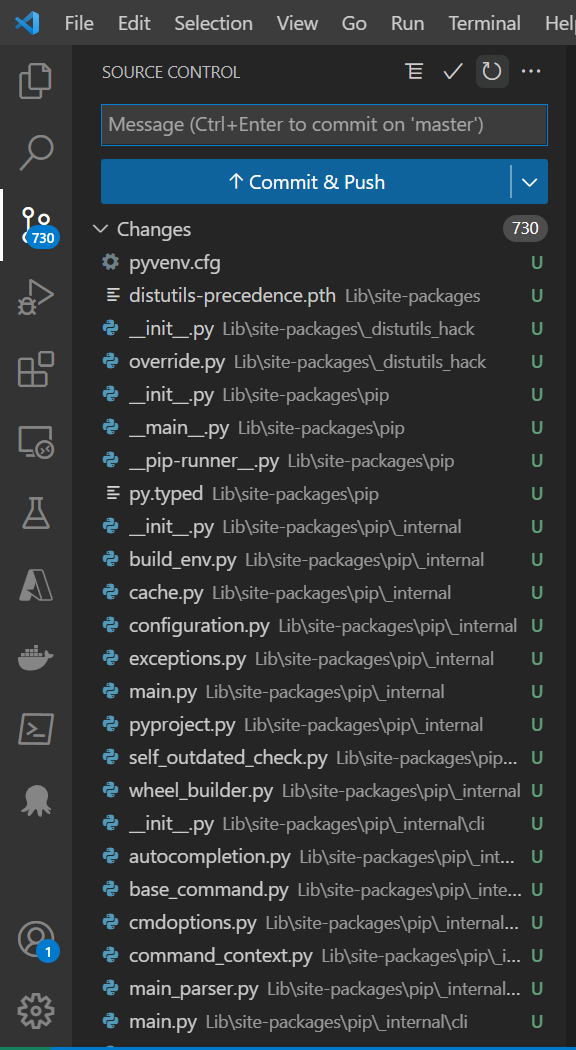
code .When VS Code opens, we can switch the the Source Control tab and view the number of changes we can also see that on the Source Control icon directly in the toolbar;
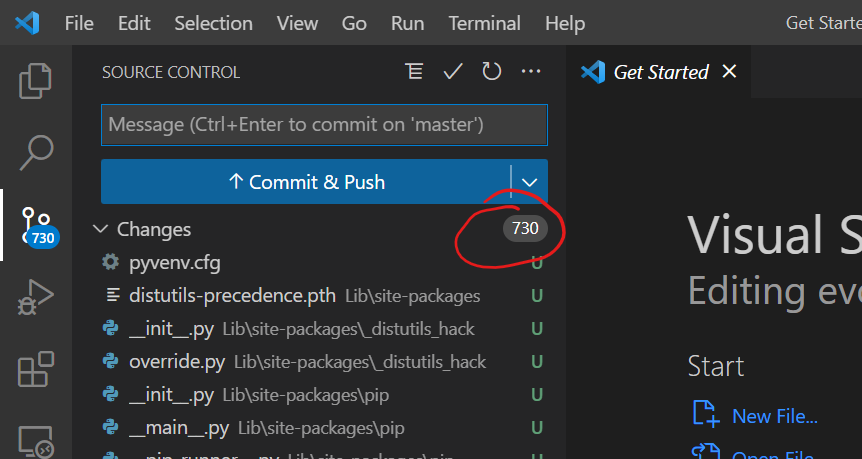
Interestingly, I see 730 changes here… That seems a lot… Looking at the files that have changed, they appear to be in the Lib directory… I’d have thought that this would’ve been excluded in the .gitignore file as they should be brought in rather than being part of the Source Control?
A quick Google search brings up an example gitignore file for Python Projects.
I can see that indeed the lib folder is ignored;

Let’s just double check that I’ve not somehow changed something… Let’s have a look at the original gitignore in github;
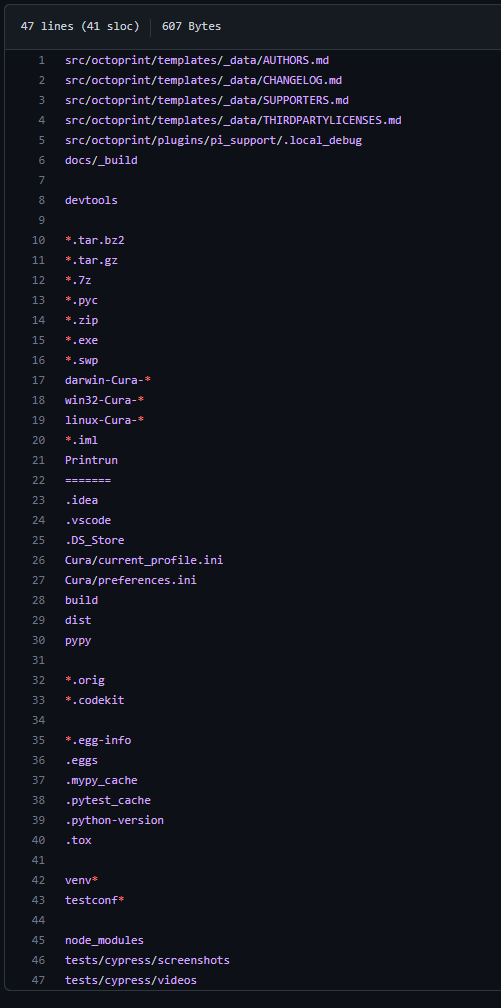
Ok, so it’s never been there… Well, interesting… So, I’m guessing that the git blame command will ignore these files then?
Looking again at the command we’re going to run;
git config blame.ignoreRevsFile .git-blame-ignore-revsThere’s a reference to a file here by the looks of it blame.ignoreRevsFile. Let’s go have a look see if that file exists and what’s in it. Switching back to Visual Studio Code;
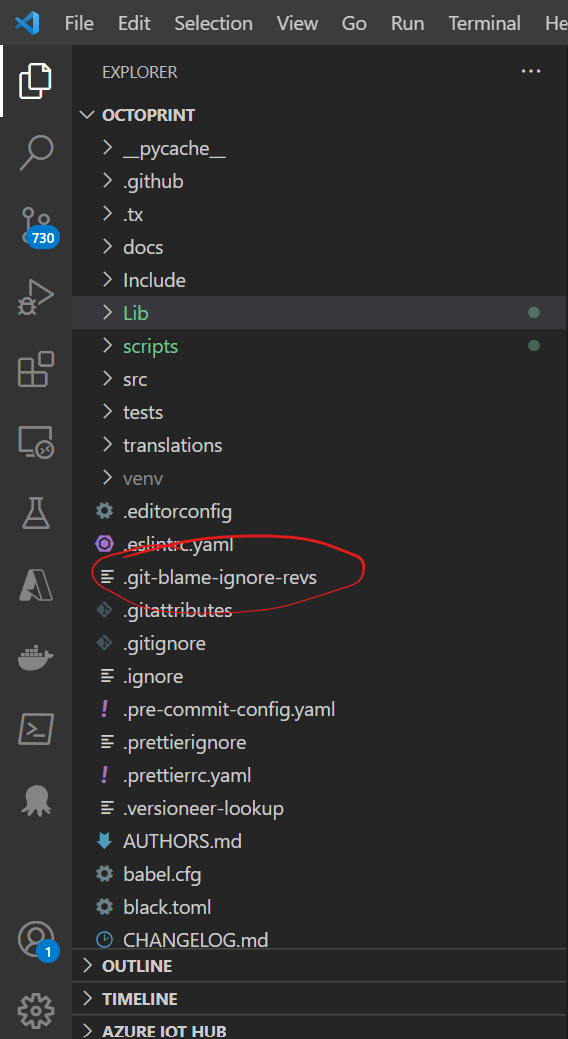
We can see the file that’s being referenced. Let’s open it up and see what’s in it;
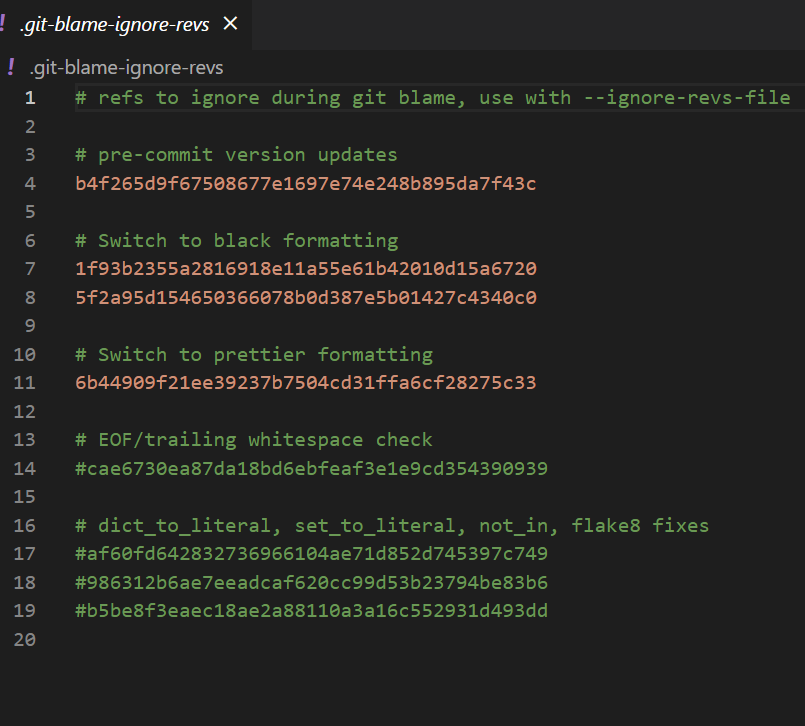
This appears to be a list of git commit references to me… But they appear to be related to formatting changes rather than anything in the lib folder…
So, let’s see what it does when we run the command;

Outwardly… Nothing… Let’s see what changed in VS Code;
Errr… Nothing… Ok… Interesting.
Let’s just try running some git commands in the terminal to see what it thinks there..
A quick Google again tells me that, to list the untracked files, we can run the following command;
git statusAccording to Atlassian;
The
git statuscommand displays the state of the working directory and the staging area. It lets you see which changes have been staged, which haven’t, and which files aren’t being tracked by Git.
So running that command we see;
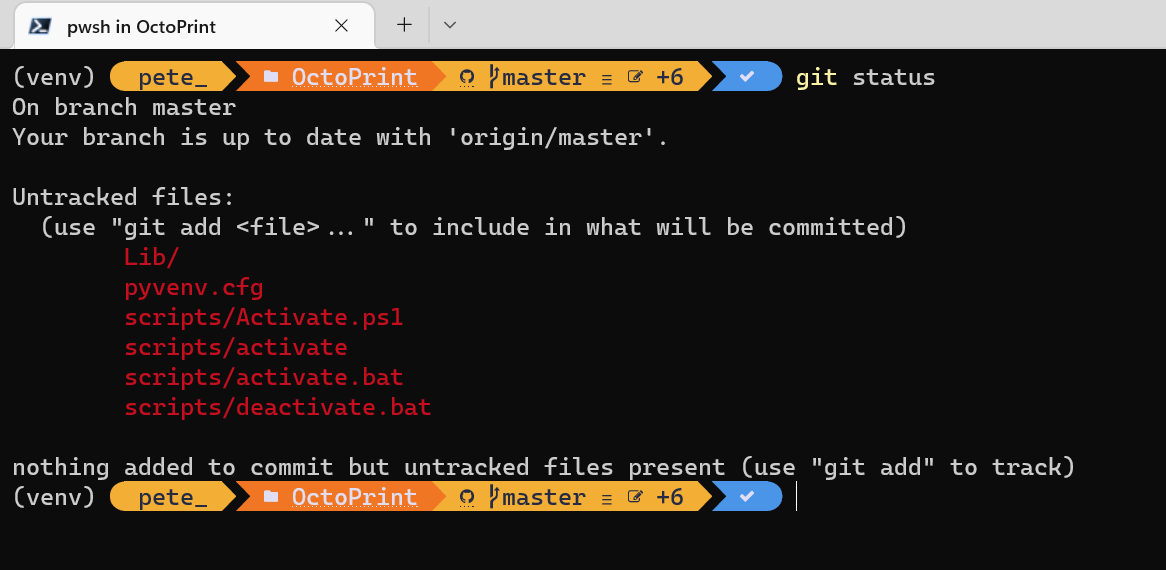
Where we can see that the Lib folder is indeed untracked, along with a few other files, matching what we saw in VS Code.
I’m loath to modify the gitignore file to add the Lib folder, as I don’t know how the build process works elsewhere.
Thinking further down the line, I’m not sure how I will source control my new Plugin as I’m guessing the plugin could live within this folder structure? Hopefully not!
Configuring VS Code
Next up we need to configure our editor of choice VS Code to build and launch OctoPrint.
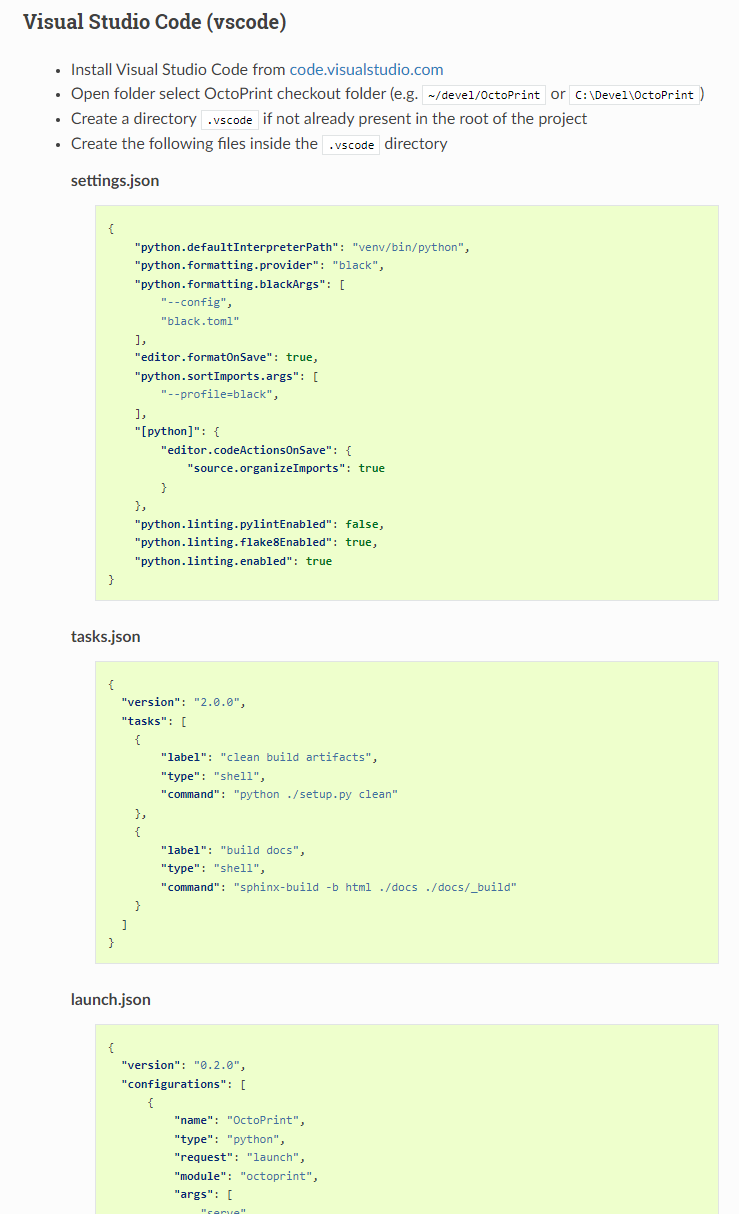
Returning to the docs, we can scroll down and the find the Visual Studio Code (vscode) section, which tells us to create a .vscode folder and add a settings.json, tasks.json and a launch.json file and paste in some content into each;
After creating the .vscode folder, then creating a settings.json file, pasting in the contents and saving, I’m prompted that an Invalid Python Interpreter is selected;
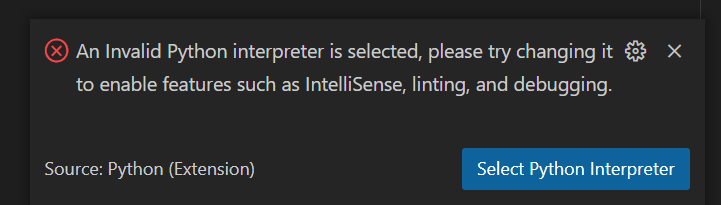
Let’s sort that out by hitting the Select Python Interpreter button in the dialog;
We then get a list of Python Interpreters to select. We can see we have a recommended one highlighted… Let’s choose that for now shall we… I guess we can always change our minds later (famous last words?)
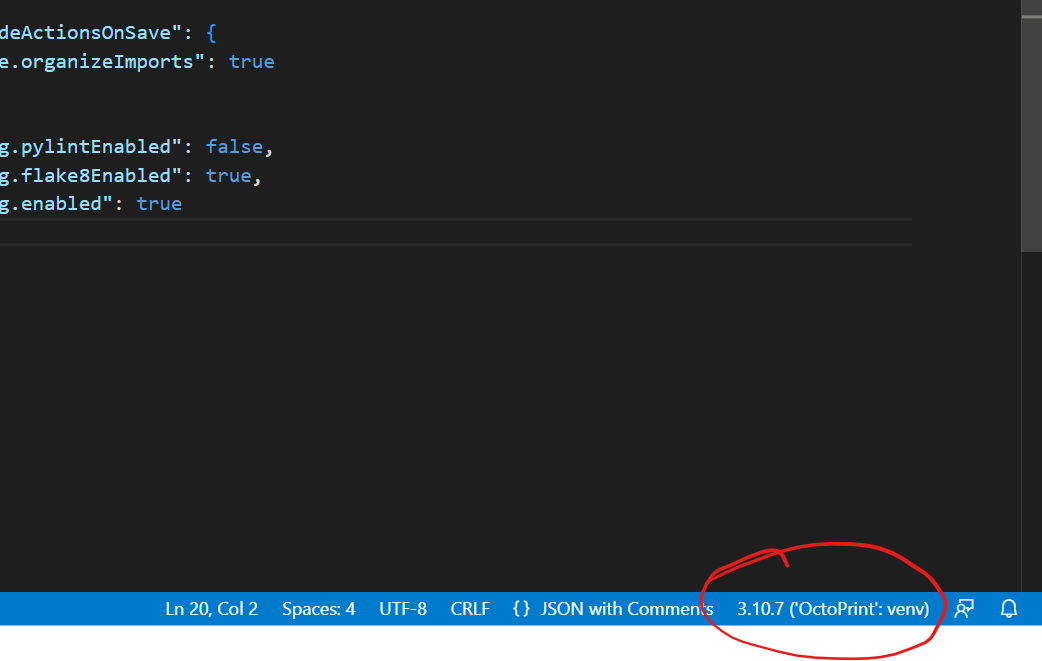
At the bottom right of VS Code, we can now see our selected Interpreter;
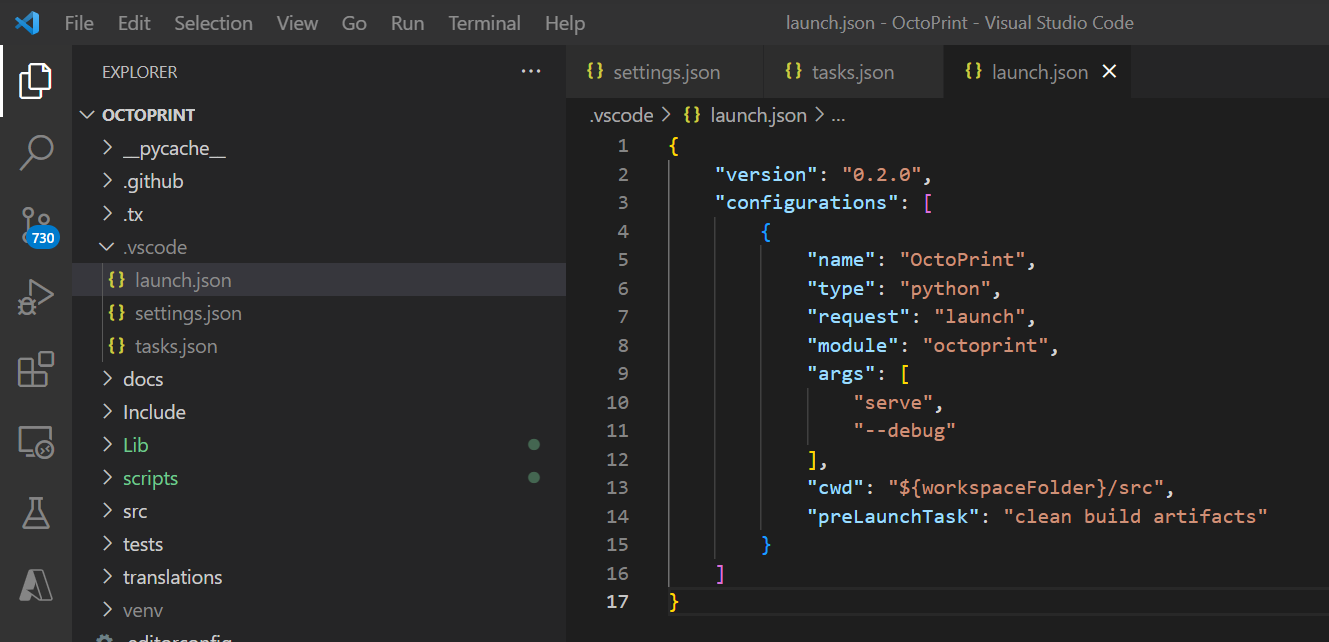
I’ll carry on and add the remaining two files.
I don’t see any items in any of the three that need changing to match any path differences, so that’s all good;
The next thing we’re told to do is install the Python Extension for VS Code with;
code --install-extension ms-python.pythonI’ve got a feeling that I’ve got that installed already.. Let’s check my Extensions;
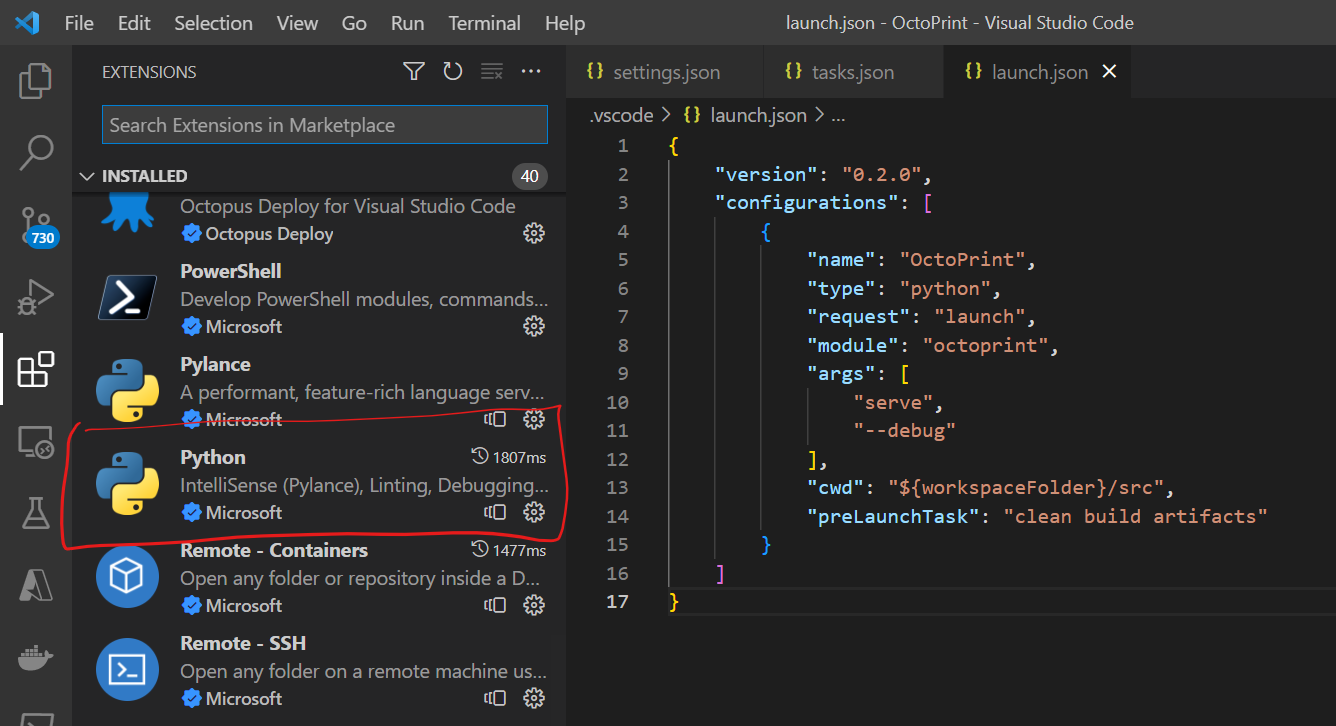
Yup… Looks like I’ve already got that installed… Assuming that it’s the same extension that is… We can check that by clicking on the extension in the list and scrolling to the bottom of the right hand panel;
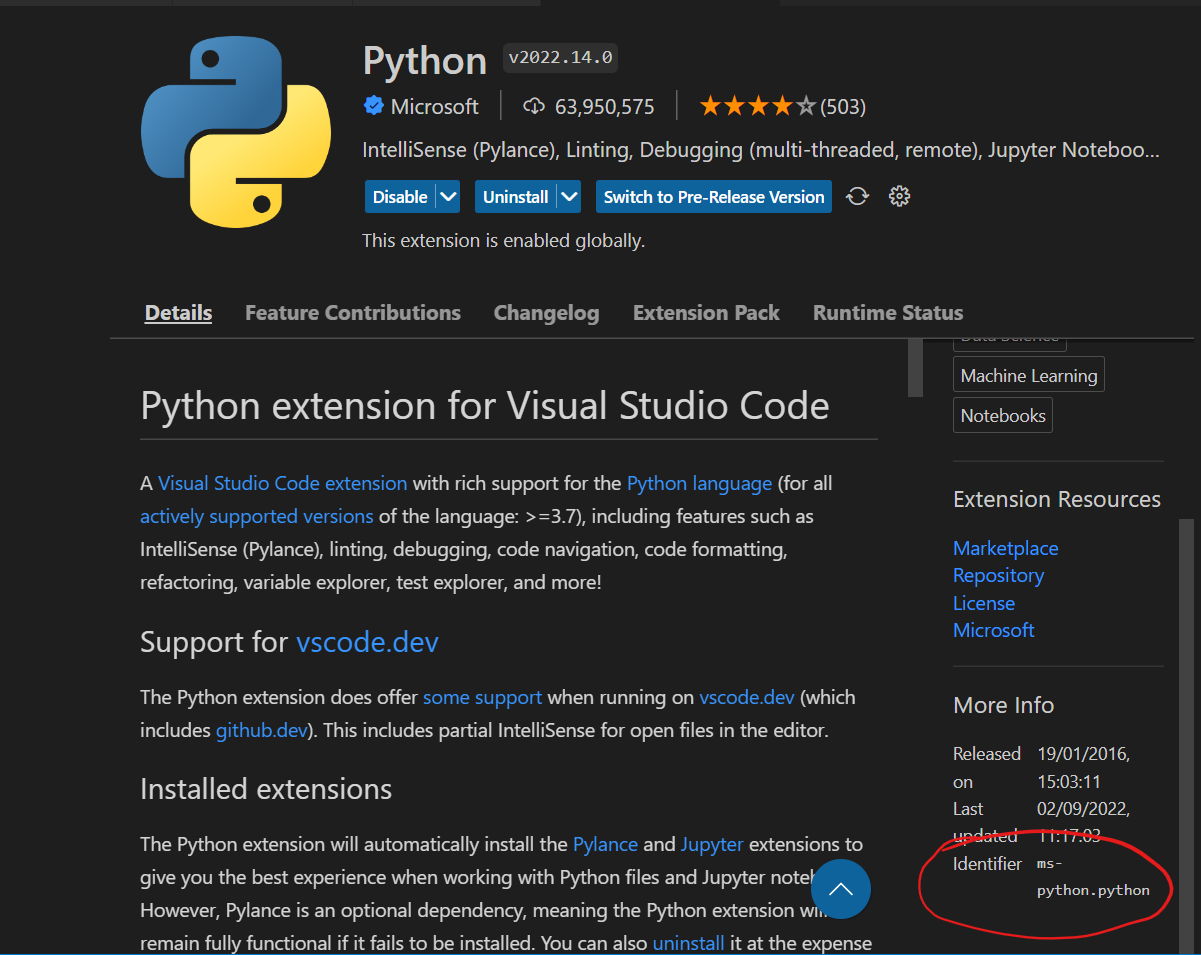
We can see that the Identifier matches, so we’re all good.
The final step we’re told to do is to install code formatter black and linter flake8 from our terminal window or from VS Code;
python -m pip install -U black flake8 flake8-bugbearWe’ve still got our terminal window open at the right location, so let’s run it there;
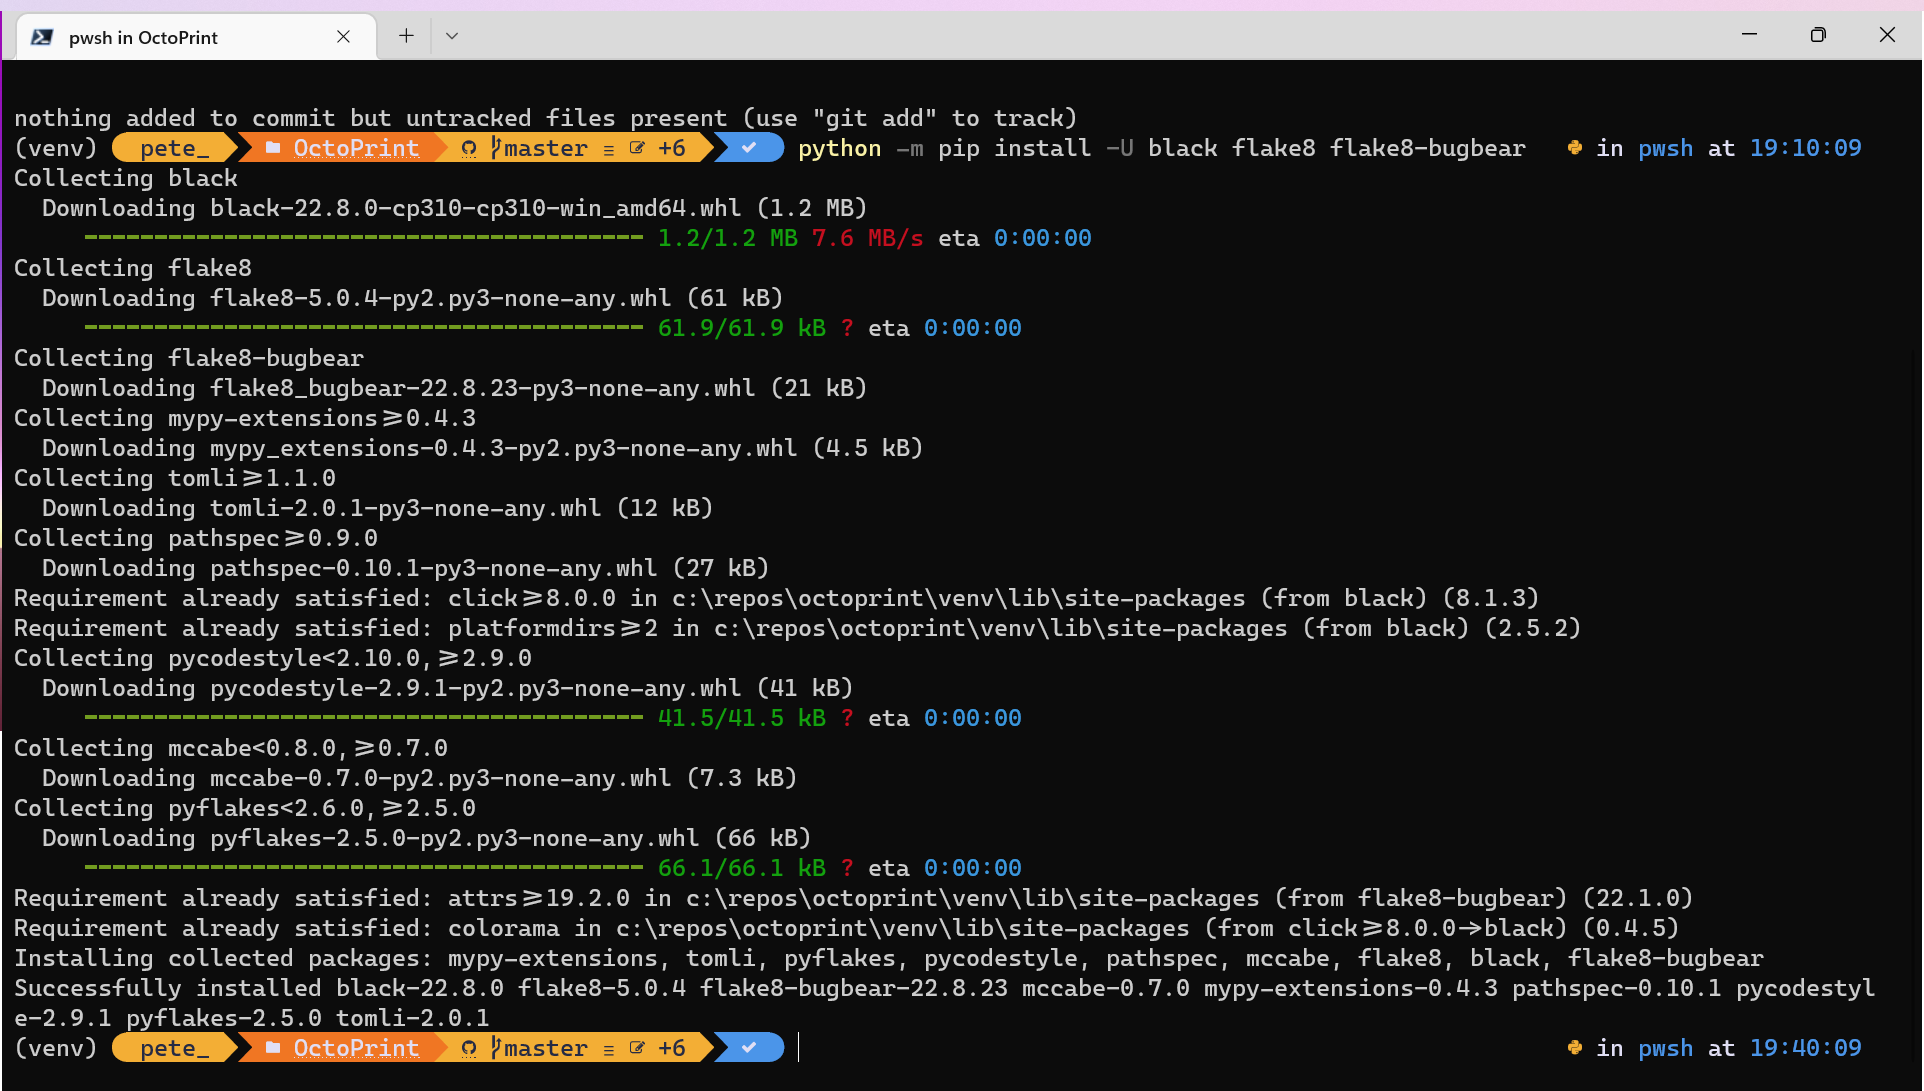
That appears to have worked just fine.
Running OctoPrint for the first time
The docs now give us a summary of what we’ve configured;
- Pressing
F5will now start OctoPrint in debug mode - Your terminal inside vscode uses the virtual python environment
- Saving a file will run an auto formatter and import sort
Ctrl+Shift+Bcan be used to run thebuild docstask to rebuild the documentation
So, let’s go ahead and see if it runs shall we…
Early signs look good, with the standard VS Code debug toolbar showing and a build happenning…
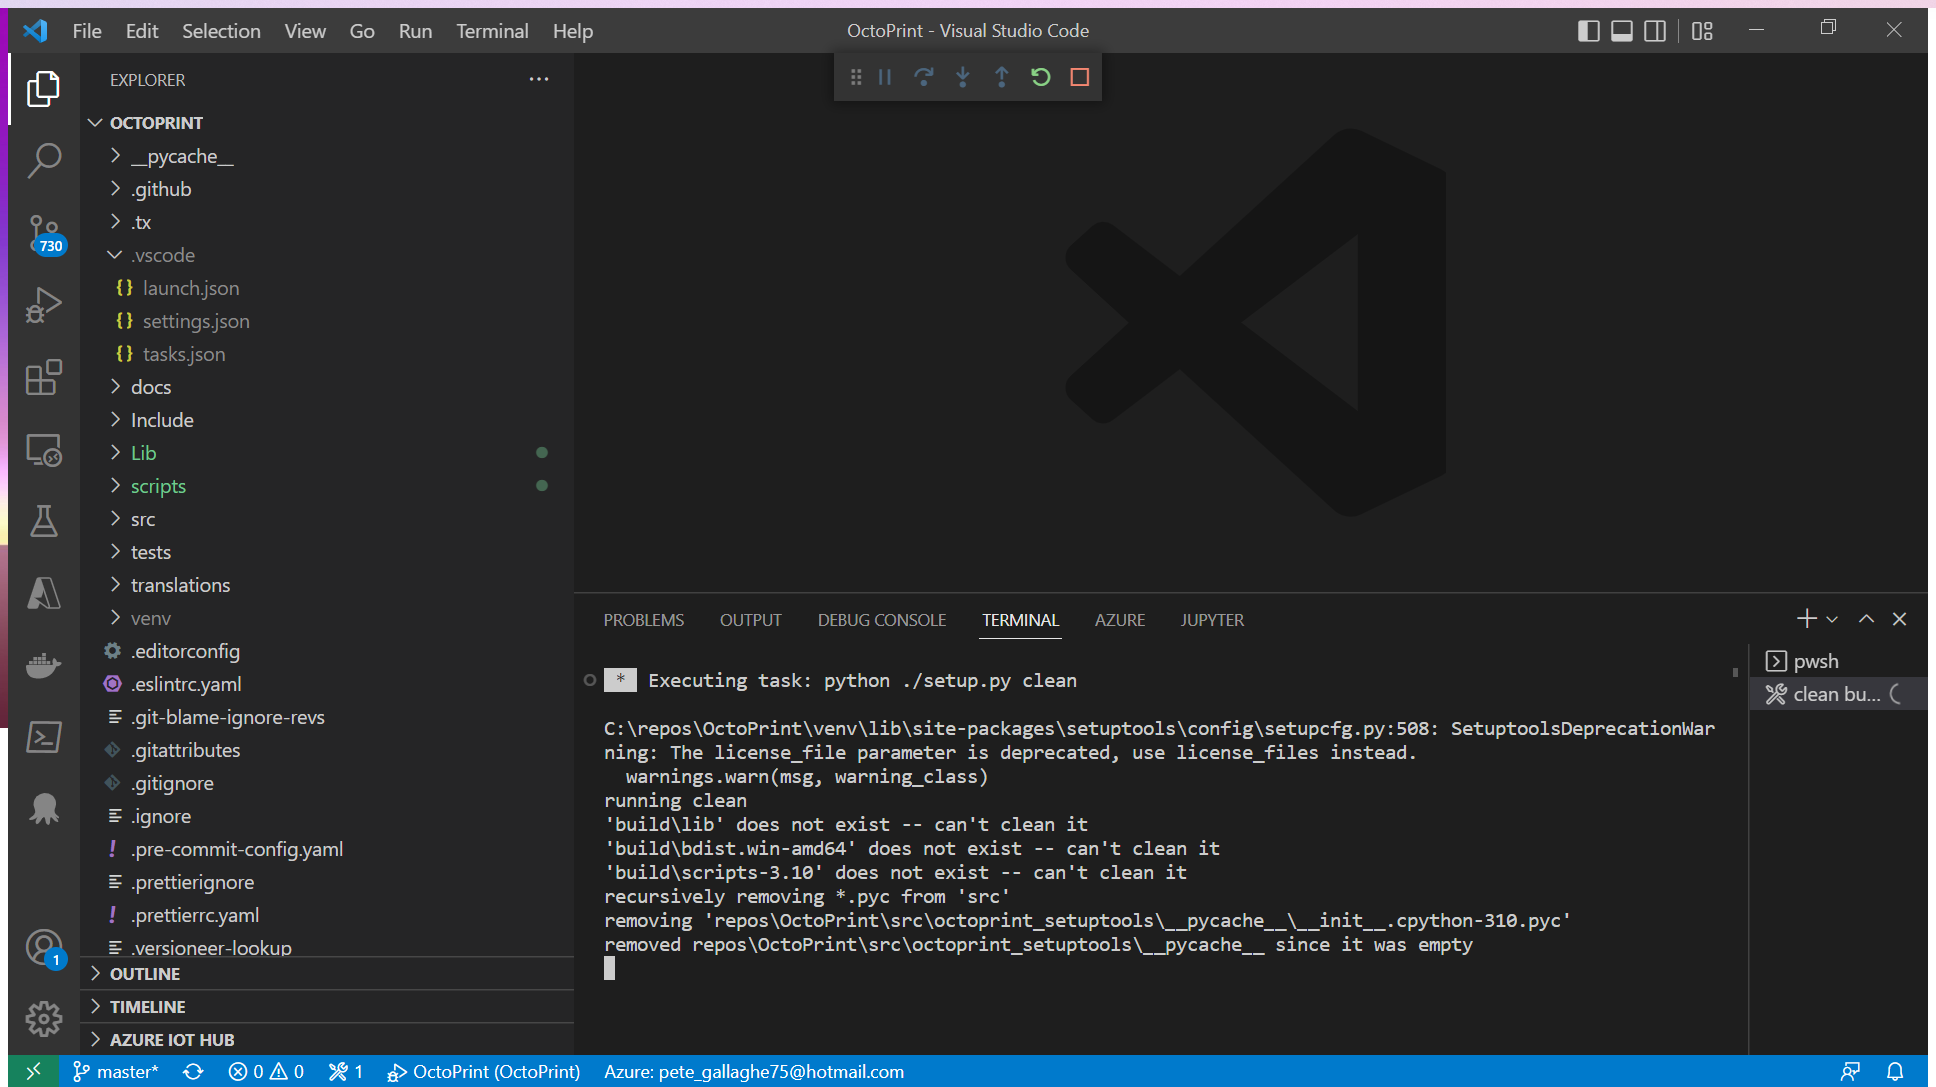
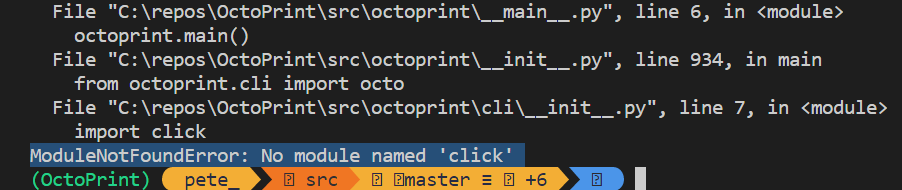
Oh dear… I see an error;

It appears that it can’t find a module named click.
A Google search leads me to a page from Borislav Hadzhiev which suggests we just need to install the module with;
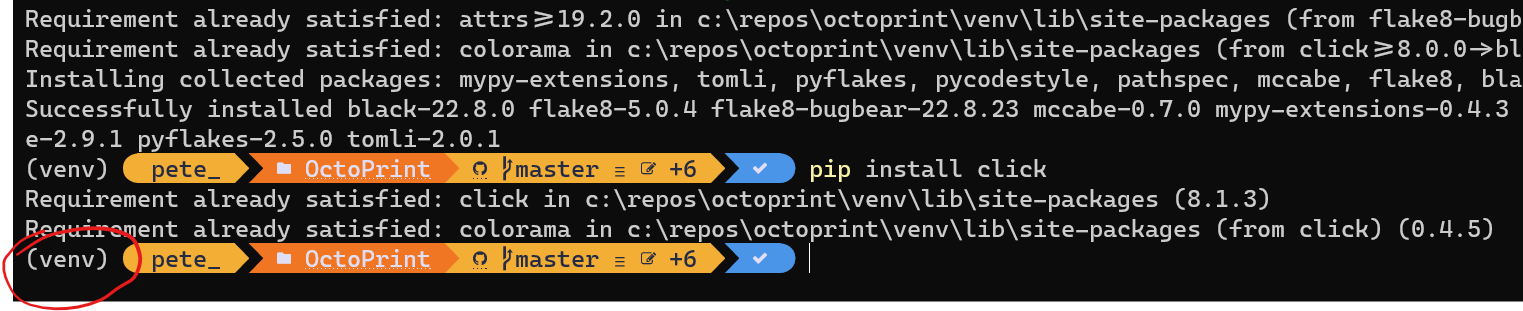
pip install clickThat sounds sensible… Let’s try that from our familiar terminal window;

Oh… It reckons it’s already installed… Darn it… That complicates matters a bit.
Reading through the rest of this post from Borislav Hadzhiev, they mention that we have to be careful about where the pip package is installed…
In our terminal we’re in an Virtual Environment as denoted by the venv;
However, in the VS Code Terminal, I don’t think we are in that environment;
Looking at the post, if we’re not in a virtual environment and want to install click, we need to run a slightly different command;
pip3 install clickSo, let’s try running that in the VS Code Terminal;
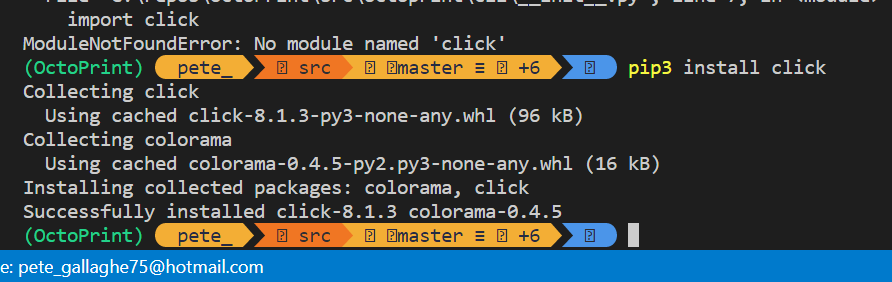
That looks to have installed at least… Ok, now let’s try pressing F5 again and see what happens;
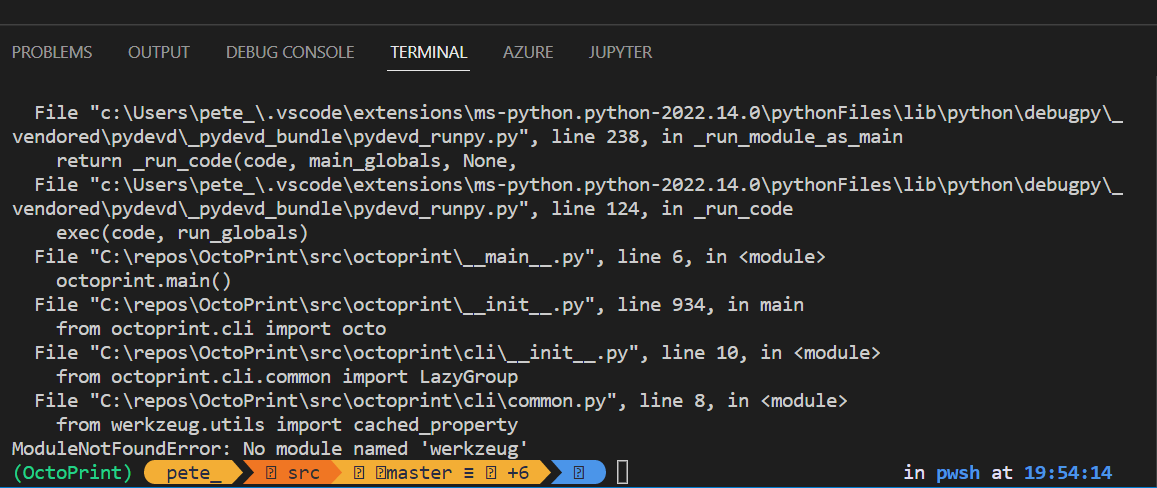
Ok, we’re missing another package – werkzeug… Let’s install that one too with;
pip3 install werkzeug
That looks to have installed correctly… F5 again…
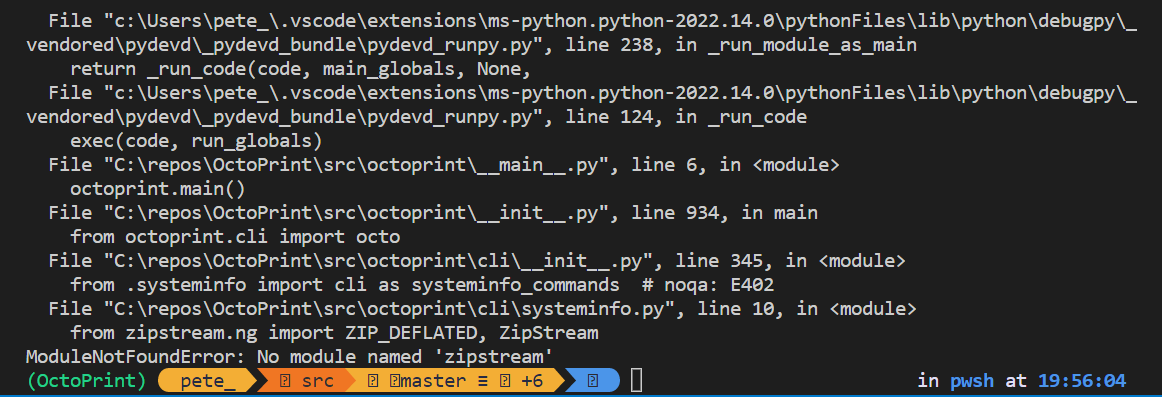
Oh for heaven’s sake… Another missing package, this time zipstream… I could be at this a while… I’m going to try this last one, and if another one pops up, it’s time to do some more digging;
pip3 install zipstream
One more try of F5;
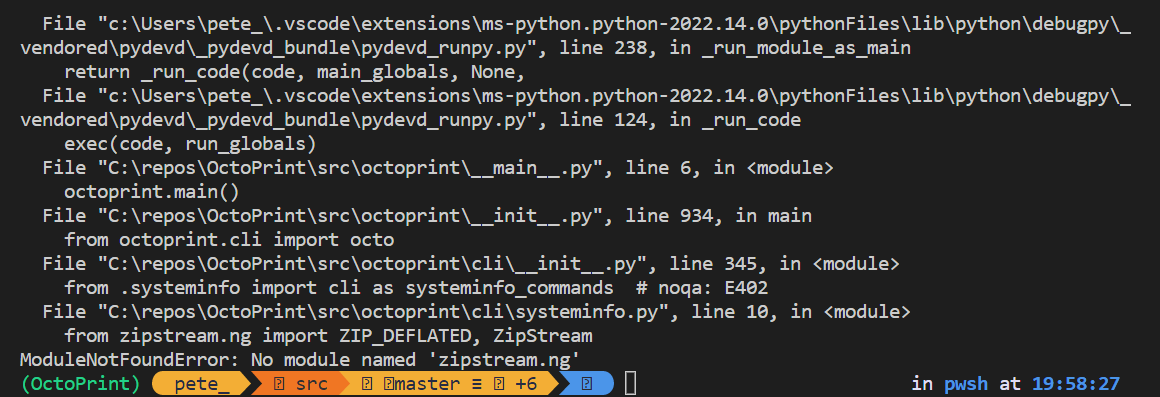
Yup… Another failure… Time for a break and see what I turn up when I get back.
I wonder if, somehow, the VS Code Terminal should have the Virtual Environment Activated? I don’t know if just activating here in the active terminal window would then stick when F5 is pressed.
It really feels like activating the Virtual Environment should be part of the launch.json steps?
I think that’s about it for today… It’s almost time to go live with AzureishLive! If you’re following along, you can catch the show at 9PM BST on the AzureishLive Twitch Channel, where myself, Maria-Anastasia Moustaka and Cliff Agius will be looking at what I’ve done so far, as well as talking through some of this week’s IoT News.
More tomorrow!
Changing the Python Interpreter
Well… I know I said more tomorrow… But, during tonight’s IoTeaLive, we managed to get the debug environment up and running!
You can watch the moment we got it working here;
I proposed during the stream, after talking through the issues I’d seen, that it was possible that changing the Python Interpreter in VS Code may solve the issue of my missing packages.
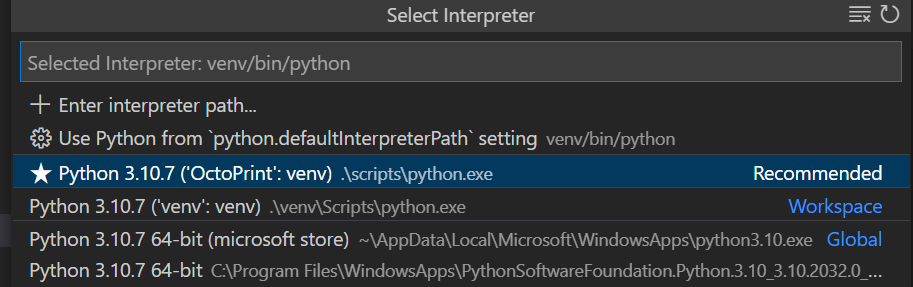
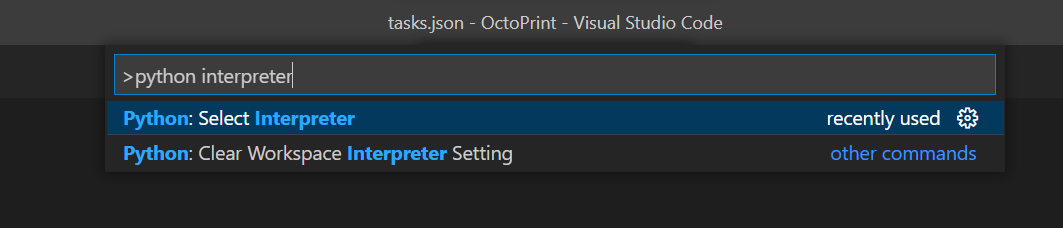
So, returning to VS Code and hitting ctrl+shift+P to bring the Palette up, we can type python interpreter and select the Python: Select Interpreter option;
We’re now shown the same list of Python Interpreters to choose from;
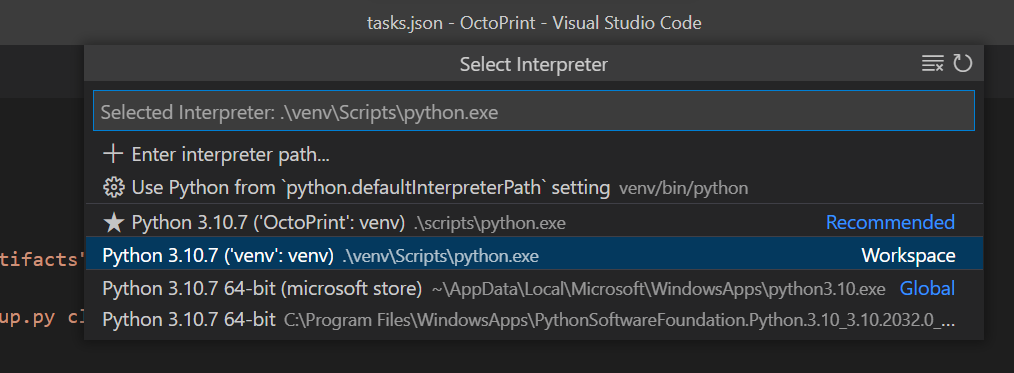
Where as before, we’d selected the Recommended option of the ('OctoPrint': venv) .\scripts\python.exe Interpreter, we now select the ('venv': venv) .\venv\Scripts\python.exe option.
Running the OctoPrint from VS Code
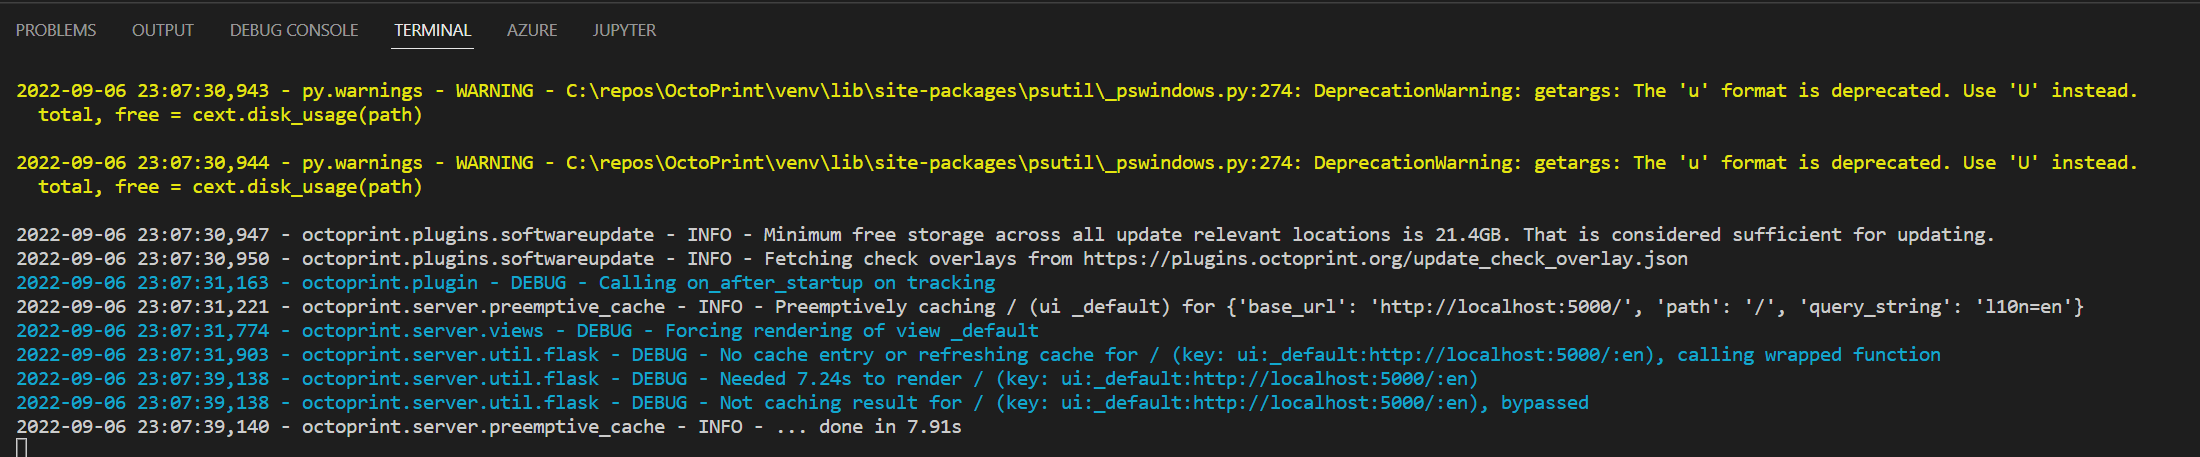
Pressing F5 now results in a whole heap of terminal logging and a running application.
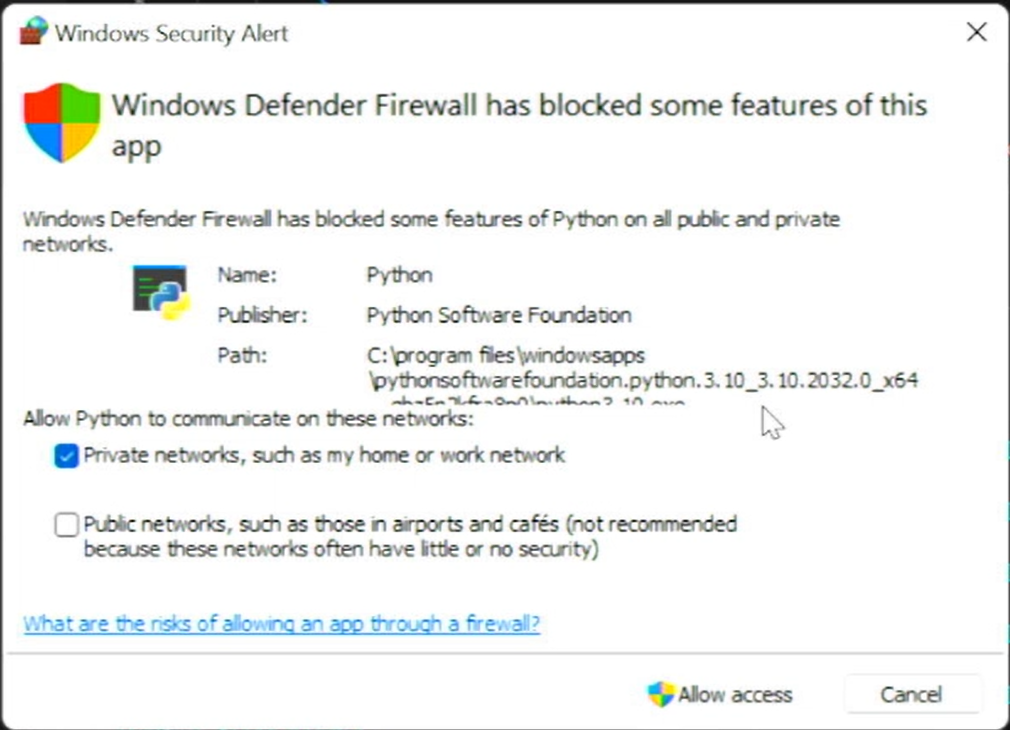
We also get a Windows Security Alert which we can accept to allow us to access the application;
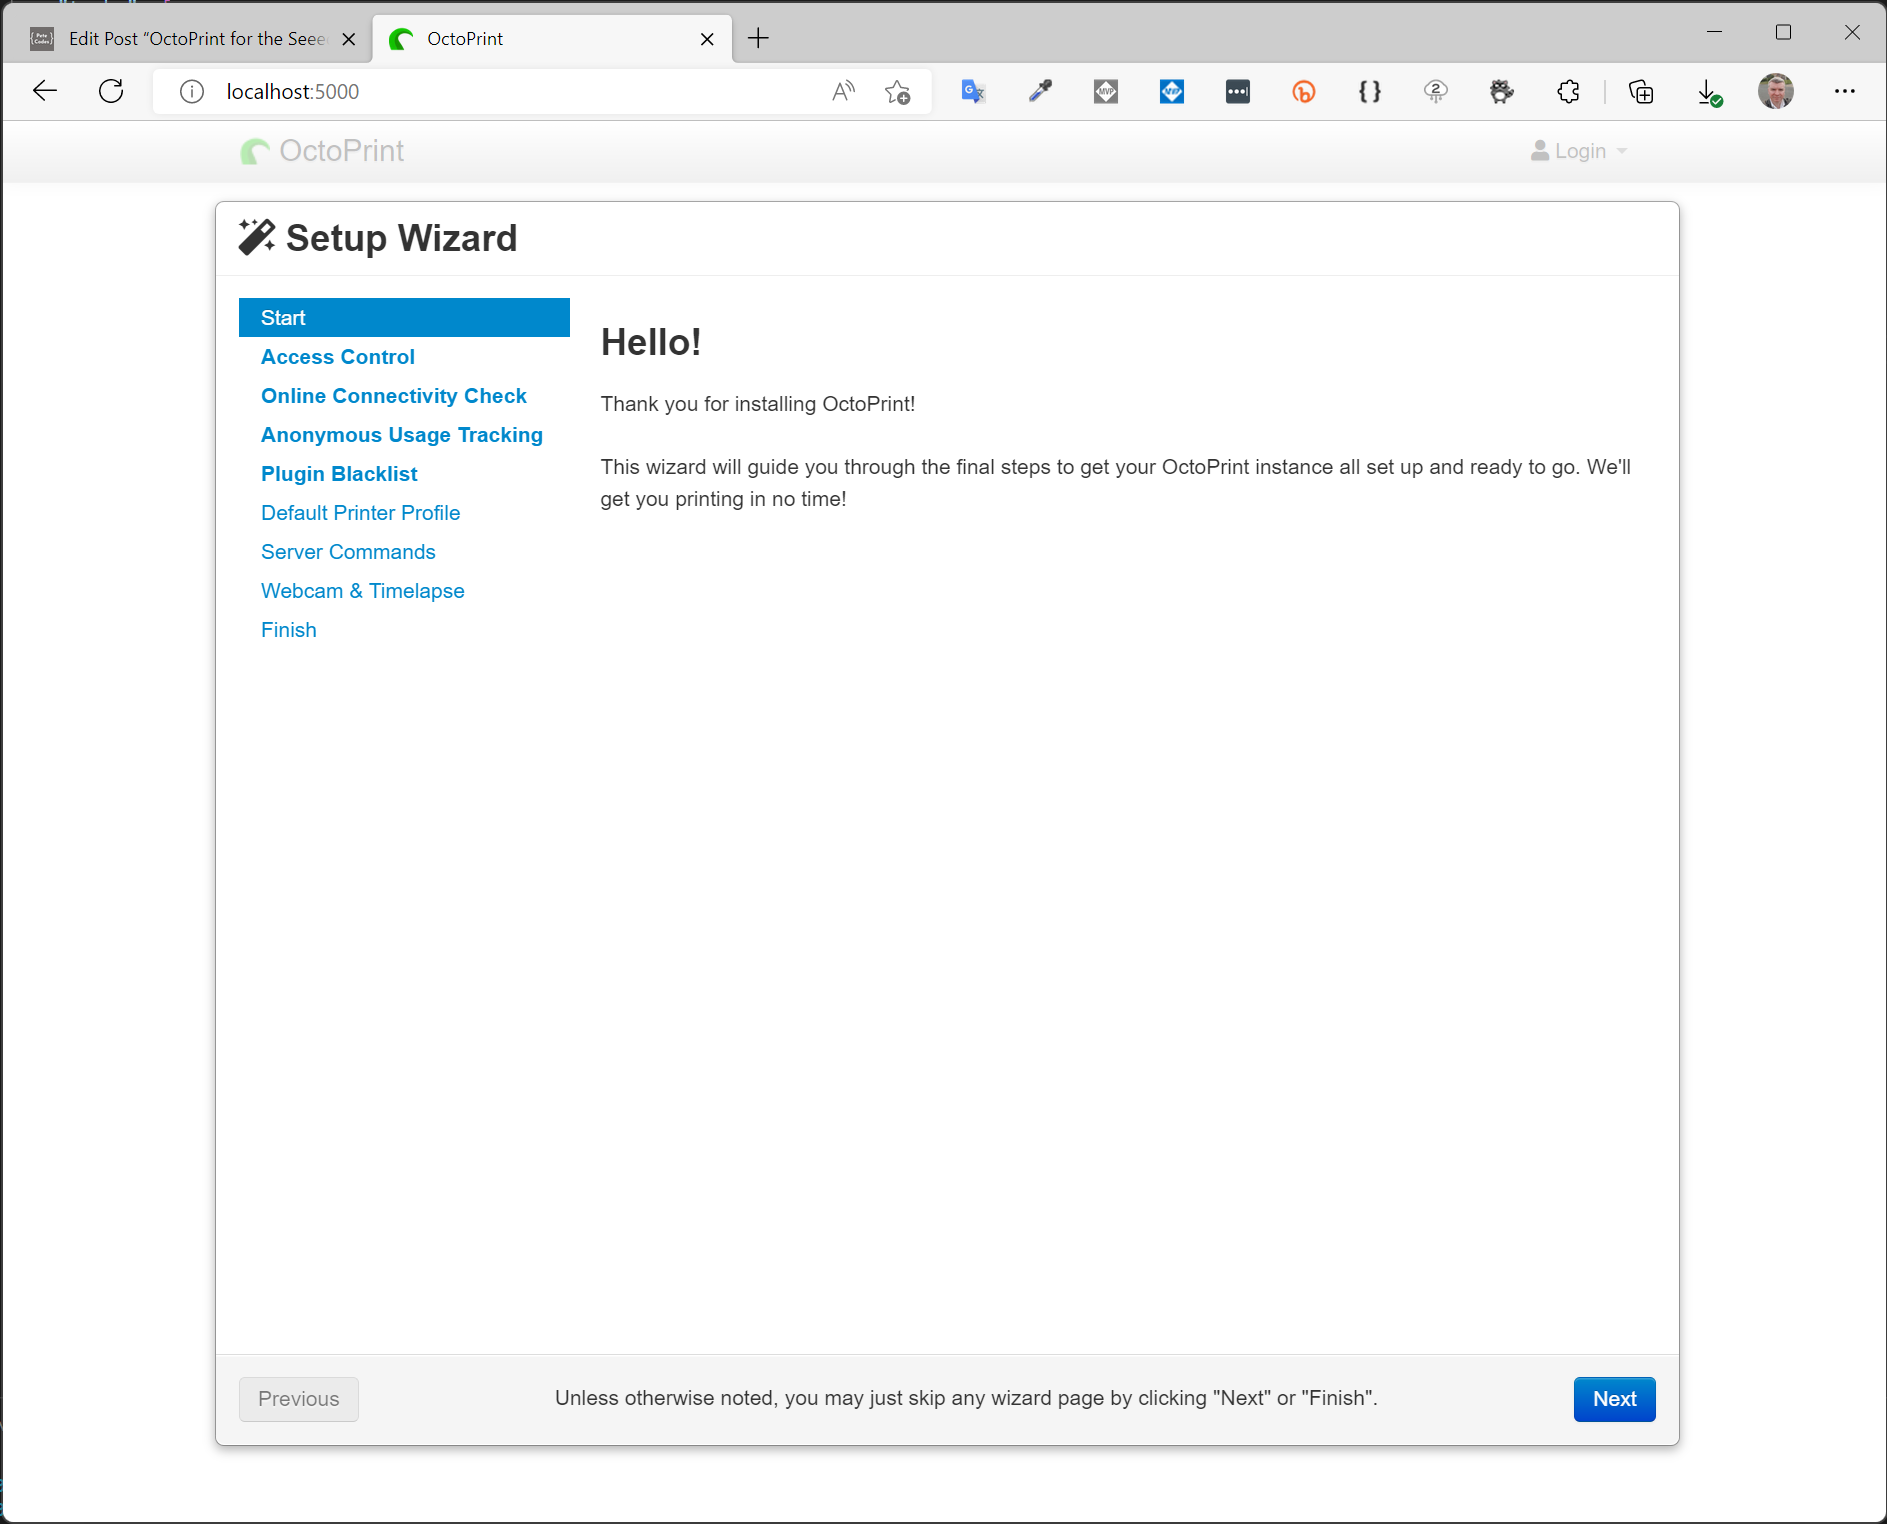
Once the log messages had stopped scrolling past, I needed to find the address OctoPrint was running on… After some scrolling I found this line;

So OctoPrint is available on;
http://localhost:5000Navigating to that address in our browser… Hey presto… We get the setup experience page! Wahoo!
And that really is it for me tonight… Tomorrow I plan on looking at how to develop plugins… See you then!