Hey Folks….
This will be my first live blog, where I’ll be looking at modifying the awesome OctoPrint to integrate with the Seeed Studio reTerminal.
I’ll be trying to keep this post updated live as I work my way through the work, so there’ll more than likely be some dead ends and mistakes as I go… But that’s half the fun right!
Note – 15-09-22:
This post is getting a bit too big for its britches! So, I’ve split this post up into Days. You can click through to each day’s development by clicking the day link in the table of contents below;
Contents
Day 1 – 05–09–22 – Getting Started:
- Getting Started – 05/09/2022
- My Initial Plans
- Cloning the Repos
- A pointer in the right direction from the folks at OctoPrint3D – Plugins
- OctoPrint Plugin Mixin Development Docs
- Getting the Development Environment setup
- Installing Python
- Checking out the OctoPrint Sources
- Creating and Activating a Virtual Environment
- Build Tools for Visual Studio 2019
- Setting up VirtualEnv
- Adding VirtualEnv to the Windows Path
- Upgrading Pip
- Setting up the Virtual Environment
Day 2 – 06–09–22 – Setting up the Environment:
- OctoEverywhere – 06-09-22
- Continuing with VirtualEnv
- Activating the Virtual Environment
- Setting up the Virtual Environment
- Installing Microsoft Visual C++ 14.0
- Using pip to install packages in the Virtual Environment
- Git Pre-Commit
- Git Changes, Blame and Ignore
- Configuring VS Code
- Running OctoPrint for the first time
- Changing the Python Interpreter
- Running the OctoPrint from VS Code
Day 3 – 07–09–22 – Setup Wizard:
- Setting up OctoPrint in the Debug Environment – 07-09-22
- Setup Wizard – Access Control
- Setup Wizard – Online Connectivity
- Setup Wizard – Usage Tracking
- Setup Wizard – Plugin Blacklist
- Setup Wizard – Printer Profile
- Setup Wizard – Please Reload
- Setup Wizard – Setup Printer (Again)
- Setup Wizard – Server Commands
- Setup Wizard – Webcam and Timelapse Recordings
- Setup Wizard – Finish
- Virtual 3d Printer Plugin
- Beginning Plugin Development
How it started
A couple of weeks back I got a message from a friend over at Microsoft UK, Chris Jeffrey, who had been contacted by the folks at Seeed Studio about getting OctoPrint up and running on their reTerminal device;

As you can see, Chris didn’t have time to get involved, but very kindly recommended me to the folks at Seeed… Thanks Chris!
Not long after this, Serena Liang over at Seeed contacted me;
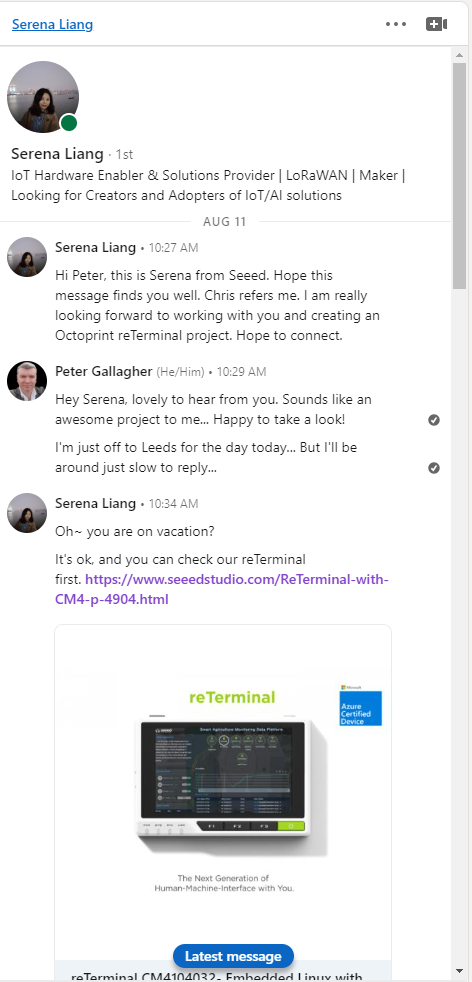
True to Chris’s word, Serena very kindly offerred to send me a to device to get going with.
So thanks very much indeed to Serena and the folks over at Seeed for the device and for involving me in this project!
The Seeed Studio reTerminal
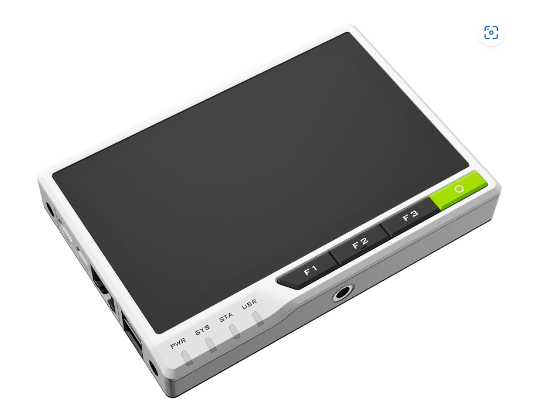
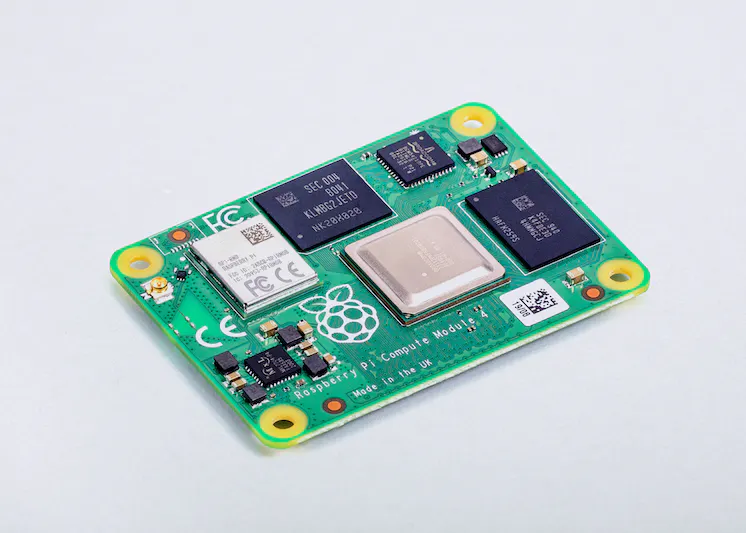
Before all of this, I hadn’t actually looked at the reTerminal (as evidenced by my comments in the tweet to Chris above), so it was a nice surprise to learn that it’s based on the Raspberry Pi CM4, which is a Compute Module with what boils down to the bare bones of a Raspberry Pi 4.
The official page for the Seeed Studio reTerminal is here.
The specifications for the reTerminal are;
reTerminal Features
- Integrated modular design with high stability and expandability
- Powered by Raspberry Pi Compute Module 4 (CM4) with 4GB RAM & 32GB eMMC
- 5-Inch IPS capacitive multi-touch screen at 1280 x 720 and 293 PPI
- Wireless connectivity with dual-band 2.4GHz/5GHz Wi-Fi and Bluetooth 5.0 BLE
- High-speed expansion interface and rich I/O for more expandability
- Cryptographic co-processor with secure hardware-based key storage
- Built-in modules such as accelerometer, light sensor, and RTC
- Gigabit Ethernet Port and Dual USB 2.0 Type-A ports
- Pre-installed heatsink for higher performance
- 40-Pin Raspberry Pi compatible header for IoT applications
- reTerminal is Microsoft Azure Certified
- Remote management support from partner Mender.io (OTA software updates, configure, troubleshoot, remote terminal access)
- The best Raspberry Pi device with a 5-Inch multi-touch screen
- High-performance Raspberry Pi CM4 tablet
Unboxing and first look
My reTerminal arrived a week or so after speaking with Serena, so I of course got it out of the box and had a brief look;
At this point I set up a special IoTeaLive show with the awesome Cliff Agius and Maria-Anastasia Moustaka to have a look at it live!
You can watch the show back on YouTube right here;
OctoPrint and OctoPi
For this work, I’ll be looking at open source projects. I’ll of course be looking at OctoPrint, which is where the bulk of the work will be happenning I guess.
OctoPrint is an open source project which allows for the remote control and monitoring of 3d Printers such as the Ender or the Prusa line of printers.
I’ll also be looking at the excellent OctoPi project, which is an image / set of scripts, which target OctoPrint specifically.
Among other things, OctoPi makes use of the Raspberry Pi Camera Module to enable a remote view of the 3d Printing Process